

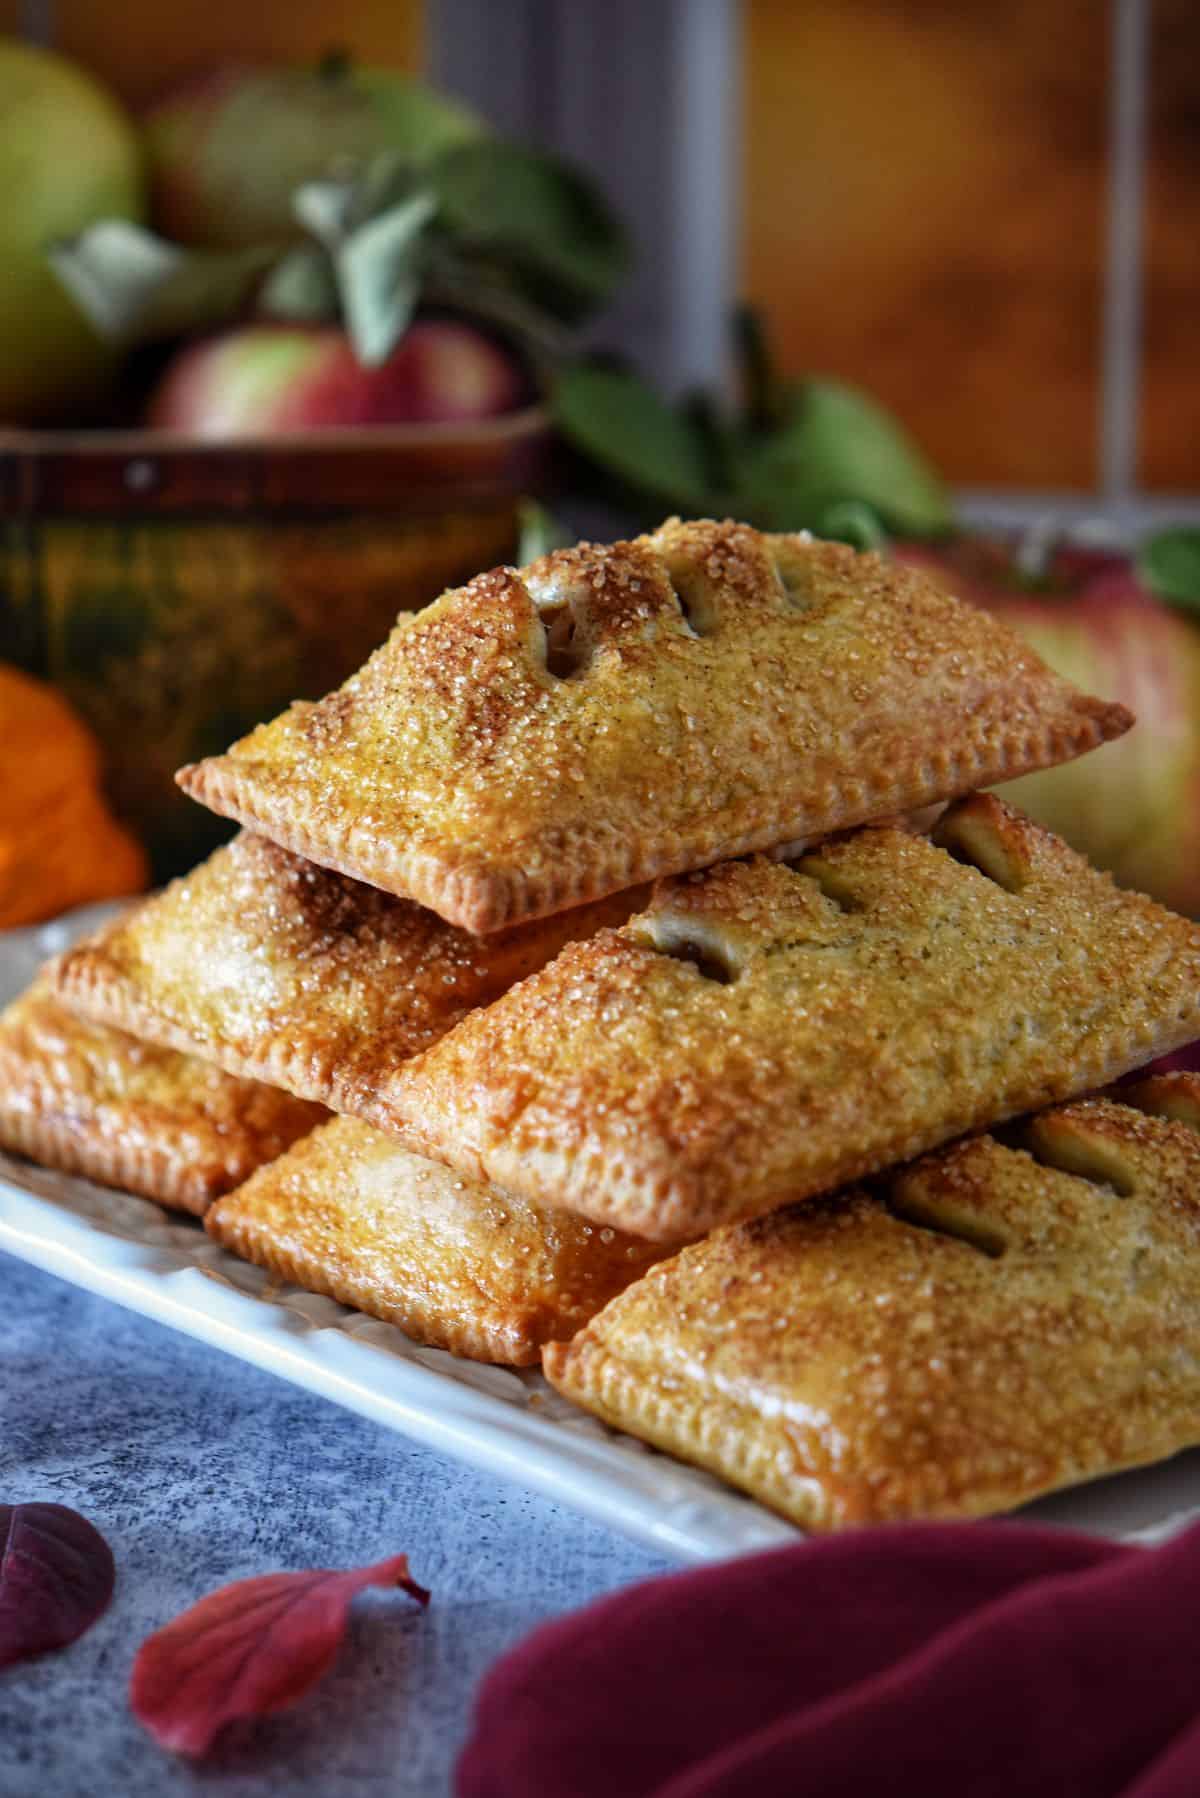
Make the best Apple Hand Pies from scratch with buttery pasta frolla dough and a warm cinnamon-apple filling - crisp, golden, and simply irresistible.
There's something so comforting about baking with apples - the smell alone makes the whole kitchen feel warm and inviting.
These apple hand pies with pasta frolla are my idea of a perfect fall treat: tender pastry wrapped around a mildly spiced apple filling.
They're everything you love about a classic apple pie, just in a smaller size. They are easy to pack for lunch or to enjoy with an afternoon coffee.
I like to use my go-to pasta frolla, an Italian shortcrust pastry I've been making for years. It's the same dough I use to make my fruit crostata. Yes, it's a bit more involved than your average hand pie recipe, but the results truly speak for themselves.
They might even remind you of those famous commercial apple hand pies from childhood, but made entirely from scratch, with real apples, warm spices, and a buttery homemade crust. One bite, and you'll never go back to store-bought again.
If you love cozy, homemade apple desserts that look as good as they taste, I think you'll really enjoy baking these with me.
Jump to:
Quick Overview
- Prep Time: 55 minutes (includes making the pasta frolla, filling, and assembling the pies)
- Chill Time: 45-60 minutes (for the dough and assembled pies)
- Cook Time: 22-25 minutes
- Total Time: About 2 hours 15 minutes
- Yield: 6 rectangular hand pies
- Serving Suggestions: Enjoy these apple hand pies slightly warm, just as they are - the golden crust and spiced apple filling speak for themselves. For an extra treat, serve with a spoonful of whipped ricotta or a scoop of vanilla ice cream. They're also wonderful the next morning with a cup of coffee or tea.
Ingredients
- Apples: I like using a variety of apples for a balance of sweetness and tartness. Today, I used Cortland, Gala, and Golden Delicious.
- Sugar: A combination of brown and granulated sugar gives the filling depth and just the right amount of sweetness.
- Unsweetened Applesauce: Keeps the filling soft and naturally sweet without adding too much sugar.
- Cinnamon: A warm, familiar spice that brings the apple filling to life.
- Vanilla Extract: Enhances the flavors and adds a lovely aroma.
- Lemon Juice and Zest: Adds brightness and prevents the apples from turning brown.
- Salt: Just a pinch to balance all the sweetness.
- Water: Helps the apples cook evenly - you can adjust the amount depending on how juicy your apples are.
- Pasta Frolla Dough: Buttery and tender with a delicate crumb - perfect for hand pies. Homemade or store-bought both work well.
- Almond Flour: A light sprinkle keeps the bottoms crisp by soaking up any excess moisture from the filling.
- Egg Wash: Brushed on before baking for that golden, glossy finish.
- Cinnamon Sugar Topping: A combination of coarse sugar and cinnamon sprinkled on top before baking adds a bakery-style look.
Instructions
Making the Apple Filling

- Peel and core 3 apples - I used one Cortland, one Gala, and one Golden Delicious for a nice balance of sweetness and tartness. Chop them into small cubes, about ½ inch (1.25 cm) in size. (Total weight before peeling and coring should be around 1¼ pounds / 600 g.)
- In a medium saucepan over medium heat, combine the diced apples with 2 tablespoons (25 g) brown sugar and 2 tablespoons (25 g) granulated sugar. Add 2 tablespoons (30 g) unsweetened applesauce, 1 teaspoon (4 g) ground cinnamon, 1 teaspoon (5 ml) vanilla extract, 2 tablespoons (30 ml) lemon juice, and the zest of half a lemon. Give everything a good stir, then add just a pinch of salt.
- Pour in ¼ cup (60 ml) of water and let this mixture simmer for about 8-10 minutes, stirring occasionally. You're looking for tender apples that still hold their shape - not mushy. If the mixture seems too dry, add a splash more water as it cooks.
- Once the filling is ready, remove it from the heat and let it cool completely before assembling your hand pies.
Note: The filling can be made up to 24 hours in advance. Store it in an airtight container in the refrigerator and bring to room temperature before using. You'll have a little extra - perfect for spooning over oatmeal, yogurt, or ice cream.
Prepare the Dough
While the filling cools, let's move on to the dough.
I'm using my Pasta Frolla recipe - the same buttery pastry I use when I make apple crostata and my ricotta pie. It's tender, easy to handle, and bakes up beautifully golden every time. Of course, if you're short on time, a good-quality store-bought pie dough works too.
Once the dough comes together, wrap it and chill it for about 30 minutes before rolling. This short rest makes it easier to work with and helps it bake up nice and flaky.
You can also make the dough ahead of time - it keeps beautifully in the fridge for up to 2 days. Just take it out about 15-20 minutes before rolling so it softens slightly. Trust me, it makes the whole process feel a lot more relaxed when you're not doing everything at once.
Roll and Assemble the Hand Pies
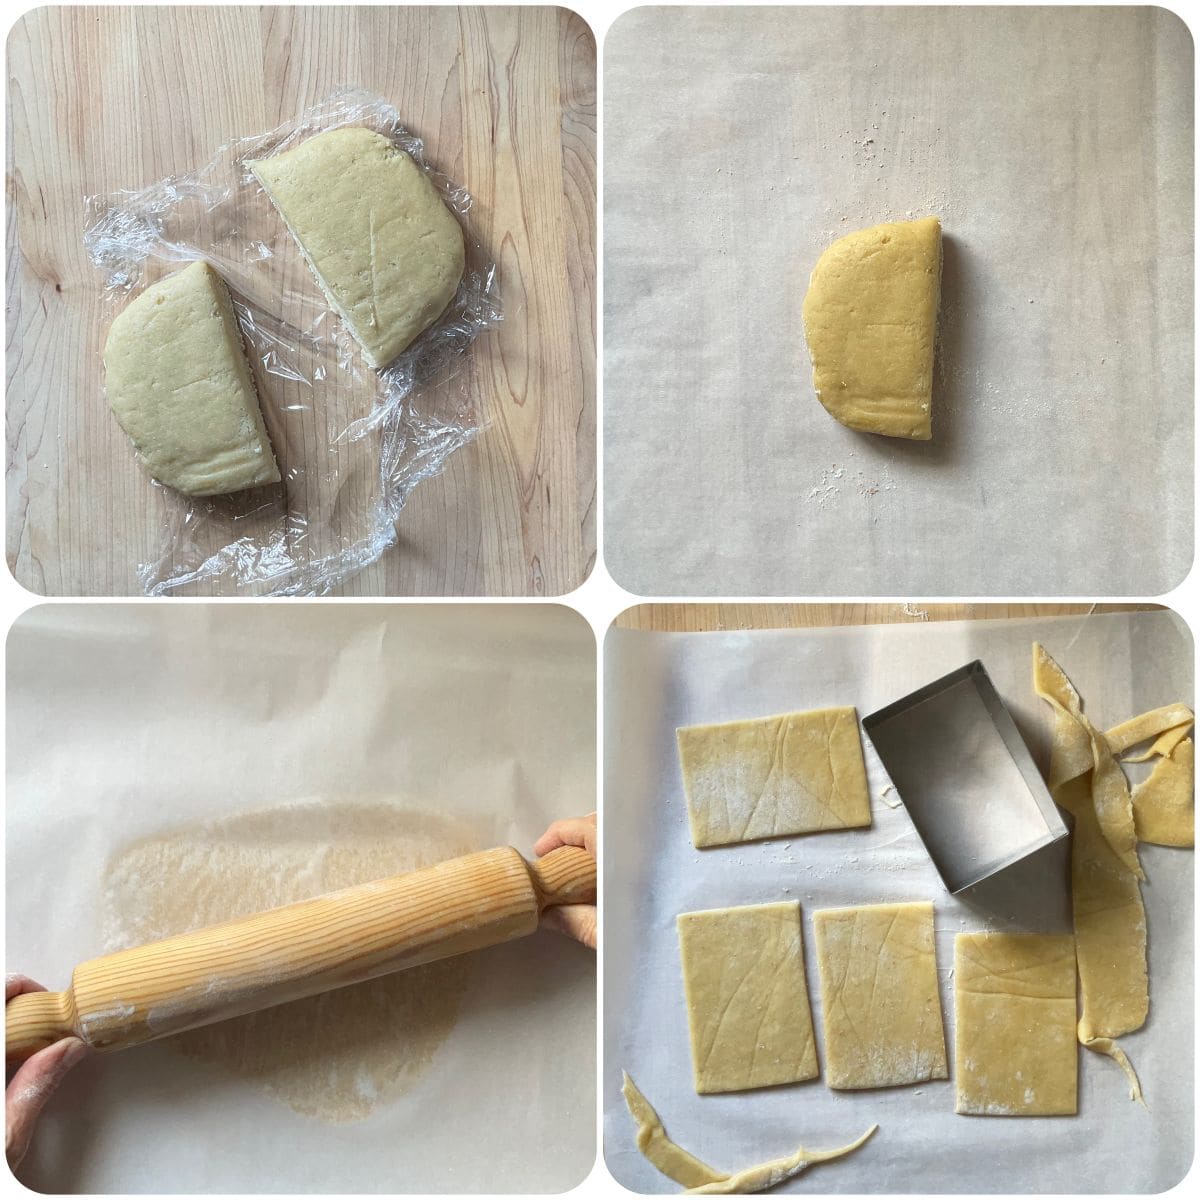
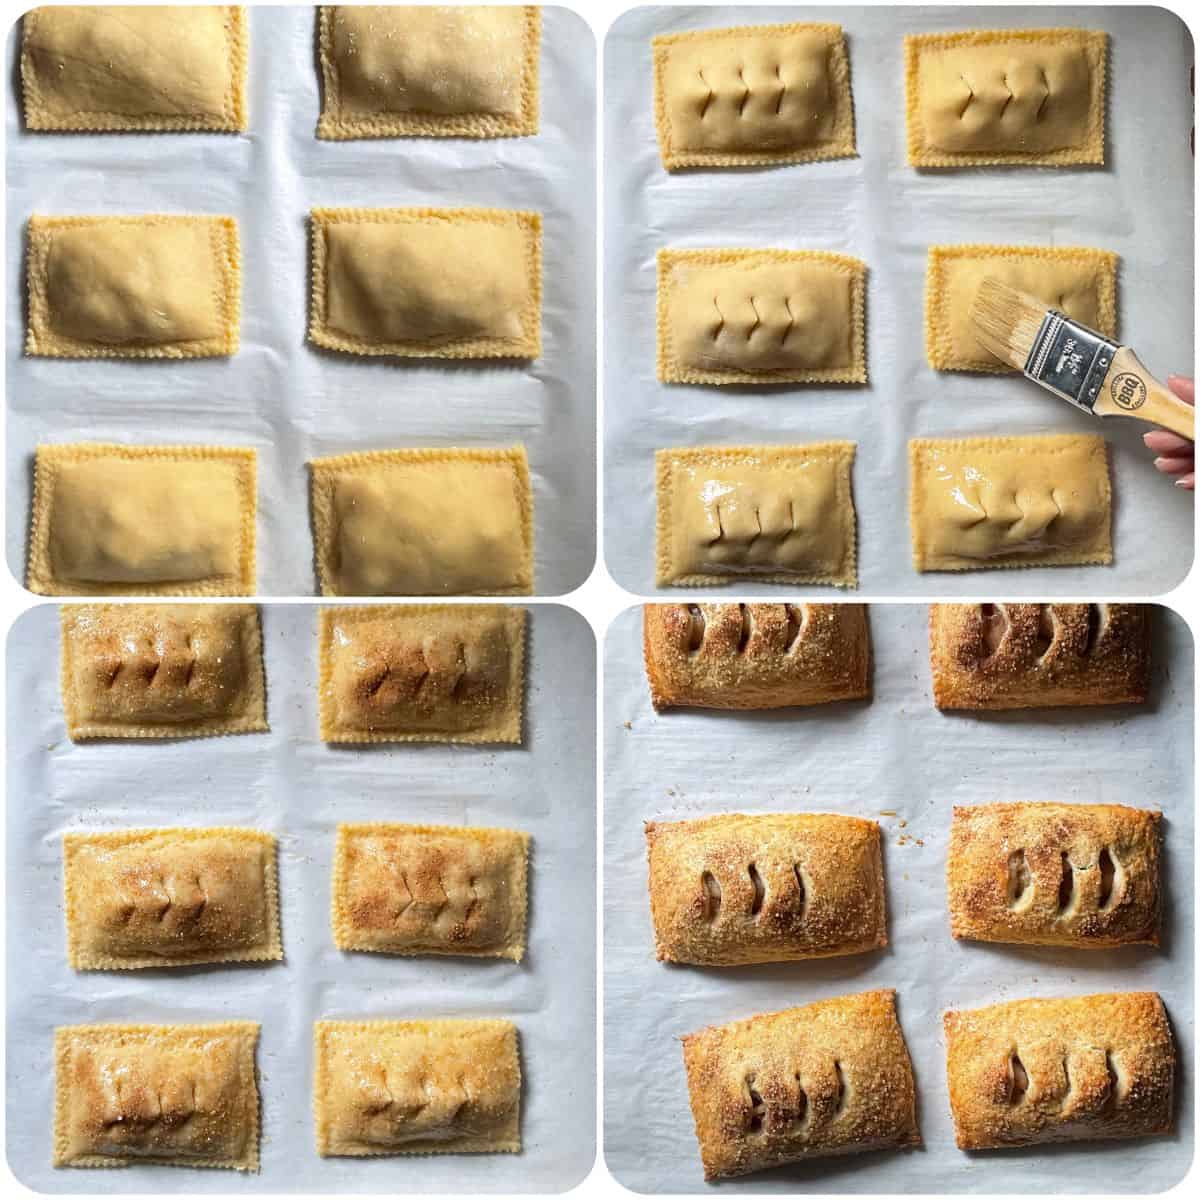
- Work with half of the dough at a time, keeping the rest in the fridge so it stays chilled and easy to handle. On a lightly floured surface (or between two sheets of parchment paper), roll the dough to about ⅛ inch (3 mm) thick.
- I find it easier to cut the dough into rectangles about 4½ x 3 inches (11.5 x 7.5 cm). You'll get 12 rectangles to make 6 hand pies. Gather and reroll any scraps - this dough handles that beautifully.
- As you work, keep the cut pieces refrigerated so they stay firm. Once everything's ready, take out a few at a time to fill.

- Lightly brush the bottom pieces with beaten egg, then sprinkle a bit of almond flour over each (just enough to create a thin layer - about ½ teaspoon / 2 g). This helps absorb any excess moisture from the filling.
- Spoon about 1½ tablespoons (20-25 g) of the cooled apple filling into the center of each bottom rectangle. Top with another rectangle of dough and gently press to seal.
- Use your pastry cutter to crimp the edges, then trim for a clean, even border. You can also use the tines of a fork, but I love the slightly scalloped look from the cutter.
- Arrange the hand pies a couple of inches apart on a parchment-lined baking sheet - they need a little breathing room to bake evenly.
- Before baking, I like to pop the tray into the fridge for about 15-20 minutes. This quick chill helps the dough firm up again, giving you those crisp, defined edges and a tender, flaky texture.
Bake the Hand Pies
- Preheat your oven to 375°F (190°C).
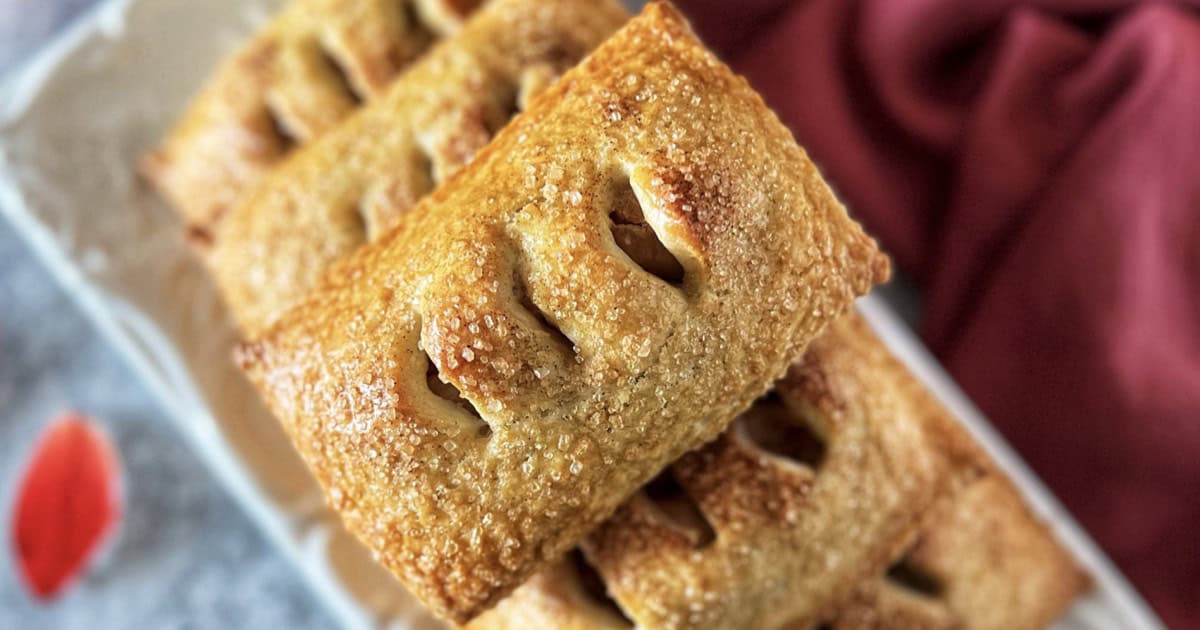
- Cut two or three small slits on top for steam to escape. Brush with egg wash and sprinkle generously with a cinnamon-sugar mixture - about 2 tablespoons (25 g) coarse sugar mixed with ½ teaspoon (2 g) cinnamon.
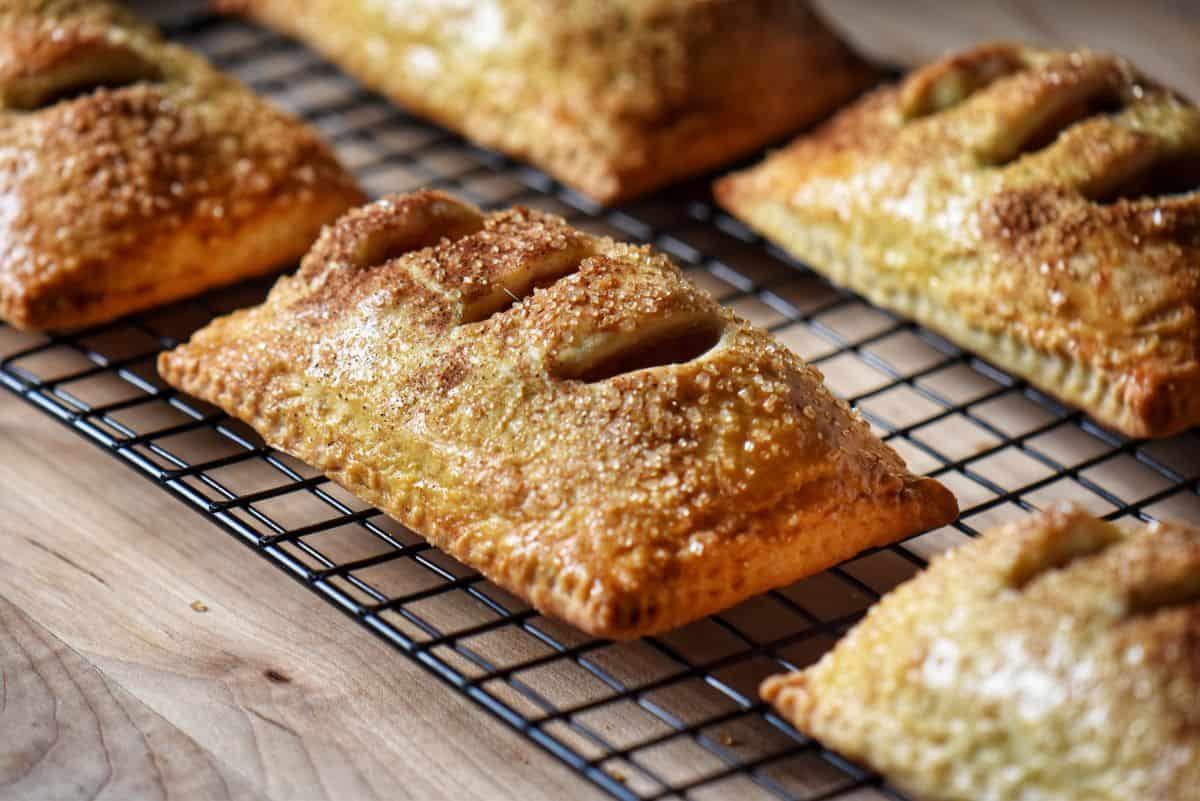
- Bake for 22-25 minutes, or until the pies are beautifully golden and the tops look glossy and caramelized from that cinnamon-sugar topping.
- Let them cool on the pan for 5 minutes, then transfer to a wire rack to cool completely. The aroma alone is irresistible, but try to give them a little time - the filling sets as they cool, making them easier (and less messy!) to enjoy.
Tips
- Mix sweet and tart apples for the best flavor complexity. I love using a combination like Cortland, Gala, and Golden Delicious – each brings something different to the filling and creates that perfect balanced taste.
- Keep that dough chilly! Cold pasta frolla is much easier to work with and gives you those beautiful flaky layers. If it gets too soft while you’re working, just pop it back in the fridge for 10-15 minutes.
- Don’t skip the almond flour sprinkle on the bottom crust. This little trick acts as a moisture barrier and prevents soggy bottoms.
- Don’t go overboard with apple filling. I know it’s tempting, but stick to about 2 tablespoons per pie. Too much and you’ll have delicious apple explosions in your oven!
- Let your apple mixture cool completely before assembling. Hot filling will melt your dough, creating soggy bottoms, and nobody wants that! I like to prepare the filling 24 hours in advance and refrigerate it.
- Press those edges together firmly when sealing. Give them some love with your pastry cutter – you want those apples to stay put during baking, not make a break for it.
- Those little steam vents on top aren’t just pretty. They prevent your pies from bursting open. Just a few small slits will do the trick.
- Use egg wash for bakery-level golden shine. Brush once before adding your cinnamon sugar.
- Cool on a wire rack after baking so air can circulate underneath and keep those bottoms nice and crispy.

FAQ
Absolutely! Puff pastry, regular pie crust, or even phyllo dough work great. You only need to adjust the baking times.
The combination of sweet and tart apples gives a lovely balance of flavor. Granny Smith, Honeycrisp, Golden Delicious and/or Gala are all great options. Avoid overly soft varieties, such as Red Delicious.
Yes! Both can be made a day in advance. Just keep them refrigerated and assemble the pies when you're ready to bake.
This is usually caused by overfilling, improper sealing of edges, or skipping steam vents.
They'll keep at room temperature for up to 2 days or in the fridge for about 5. Reheat in a 350°F (175°C) oven for a few minutes to crisp them up again. You can also freeze the baked pies for up to 2 months - just reheat straight from frozen until warm and flaky.
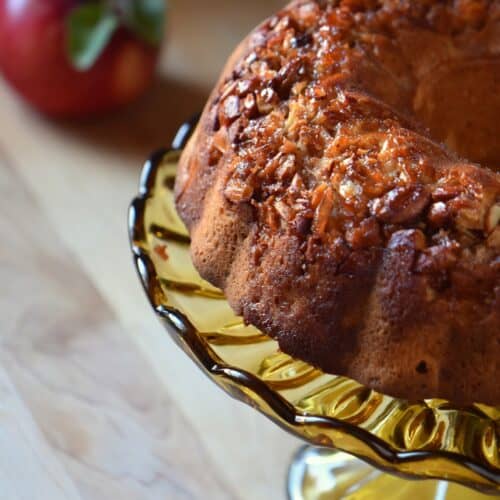
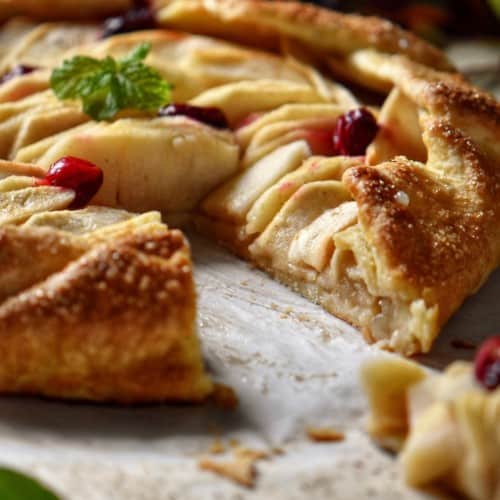
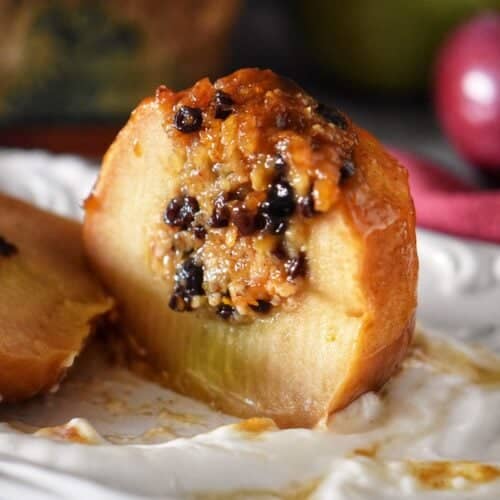
More Cozy Apple Desserts You’ll Love

Recipe Origins
Growing up, apple desserts were always a sign that fall had truly arrived.
My mom would make simple baked apples or her almond apple cake that filled the house with the most comforting aroma. These hand pies are my way of capturing that same cozy feeling.
The idea to use pasta frolla dough came naturally. It's the same tender, buttery pastry I use in many Italian desserts, and it creates a beautiful contrast with the cinnamon-spiced apple filling.
Over the years, I’ve perfected every detail through trial and error - from the three-apple blend to getting the sweetness and spice balance just right. The result? A rustic, bakery-style treat that rivals those famous commercial apple pies, made completely from scratch in your own kitchen.
I can’t wait for you to try these - let me know how they turn out!
Just for you! A printable baking checklist to help you keep track of all your baking needs.
If you love to bake, this is for you! Simply subscribe to my weekly newsletter and receive this FREE BAKING CHECKLIST PRINTABLE!
This way, you won't miss any of my new recipes, and it's FREE!
THANKS SO MUCH for following and being part of the She Loves Biscotti community, where you will find Simple & Tasty Family-Friendly Recipes with an Italian Twist.
Ciao for now,
Maria
★★★★★ If you have made these apple-filled pastries, I would love to hear about it in the comments below, and be sure to rate the recipe!
Recipe
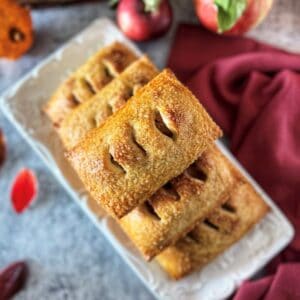
Apple Hand Pies with Pasta Frolla
WANT TO SAVE THIS RECIPE?
Ingredients
For the apple filling:
- 3 apples about 1¼ lbs / 600 g
- 2 tablespoons brown sugar 25 grams
- 2 tablespoons granulated sugar 25 grams
- 2 tablespoons unsweetened applesauce 30 grams
- 2 tablespoons lemon juice 30mL, from ½ fresh lemon
- 1 teaspoon pure vanilla extract 5mL
- 1 teaspoon cinnamon ground, 4 grams
- pinch salt
- zest of ½ lemon
- ¼ cup water 60mL
For the pastry dough:
- pasta frolla recipe or store-bought shortcrust
Finishing:
- 3 teaspoons almond flour 12 grams, separated, ½ teaspoon (2 grams) per pie
- 1 egg beaten with 1 tbsp (15 ml) milk, for egg wash
- 2 tablespoons Turbinado or coarse sugar for sprinkling on egg wash
- ½ teaspoon ground cinnamon 2 grams
Instructions
For the Apple Filling:
- Peel and dice the apples into ½ inch (1.25 cm) cubes.
- In a medium saucepan over medium heat, combine apples with brown sugar, granulated sugar, applesauce, cinnamon, vanilla, lemon juice, and lemon zest. Add a pinch of salt.
- Pour in ¼ cup (60 ml) water and simmer for 8-10 minutes, stirring occasionally, until apples are tender but still hold their shape. Add a splash more water if needed.
- Remove from heat and let cool completely. Can be made up to 24 hours ahead; store in an airtight container in the fridge.
Prepare the Dough:
- Use your Pasta Frolla or store-bought dough. Chill for about 30 minutes. Dough can be made ahead and refrigerated up to 2 days; let sit at room temperature 15-20 minutes before rolling.
Roll and Assemble:
- Work with half the dough at a time. Roll to ⅛ inch (3 mm) thick between parchment sheets.
- Cut into rectangles 4½ x 3 inches (11.5 x 7.5 cm). Re-roll scraps as needed.
- Keep cut pieces refrigerated while working.
- Brush bottom rectangles with egg wash, sprinkle almond flour, then spoon ~1½ tbsp (20-25 g) filling in center.
- Top with another rectangle, press edges, and trim with pastry cutter or fork.
- Place the tray into the fridge for about 15-20 minutes.
- Cut two or three small slits on top, brush with egg wash, and sprinkle cinnamon-sugar mixture.
Bake
- Preheat oven to 375°F (190°C) and line a baking sheet with parchment.
- Bake pies 22-25 minutes until golden. Let them cool 5 minutes in the pan, then transfer to a wire rack.
Video
Notes
- Mix sweet and tart apples for the best flavor complexity. I love using a combination like Cortland, Gala, and Golden Delicious – each brings something different to the filling and creates that perfect balanced taste.
- Keep that dough chilly! Cold pasta frolla is so much easier to work with and gives you those beautiful flaky layers. If it gets too soft while you’re working, just pop it back in the fridge for 10-15 minutes.
- Don’t skip the almond flour sprinkle on the bottom crust. This little trick acts as a moisture barrier and prevents soggy bottoms.
- Don’t go overboard with apple filling. I know it’s tempting, but stick to about 2 tablespoons per pie. Too much and you’ll have delicious apple explosions in your oven!
- Let your apple mixture cool completely before assembling. Hot filling will melt your dough, creating soggy bottoms, and nobody wants that! I like to prepare the filling 24 hours in advance and refrigerate it.
- Press those edges together firmly when sealing. Give them some love with your pastry cutter – you want those apples to stay put during baking, not make a break for it.
- Those little steam vents on top aren’t just pretty. – they prevent your pies from bursting open. Just a few small slits will do the trick.
- Use egg wash for bakery-level golden shine. Brush once before adding your cinnamon sugar.
- Cool on a wire rack after baking so air can circulate underneath and keep those bottoms nice and crispy.
- Room temperature: up to 2 days
- Refrigerator: up to 5 days (reheat in 350°F / 175°C oven for a few minutes)
- Freezer: up to 2 months (baked or unbaked; for baked, reheat straight from frozen; for unbaked, bake from frozen, adding a few extra minutes)
Nicole
Omg perfect recipe for Fall can’t wait to make it for my Luv, he is going to be so Happy
Maria
Thanks so much Nicole ❤️ Enjoy!