

Sweet shortcrust pastry dough is known as pasta frolla in Italian. It is one of the most simple and versatile Italian pastry doughs used for a variety of delicious Italian desserts.
This easy recipe ensures the best results, whether using the food processor or a more traditional method of mixing by hand. The results will be amazing, even if you’re not a professional baker!
In the world of desserts, across all cultures, there are only a few recipes as iconic as Italian sweet shortcrust pastry dough.
This simple yet versatile Italian recipe can be used in various delicious desserts and is a favorite of amateur and professional bakers.
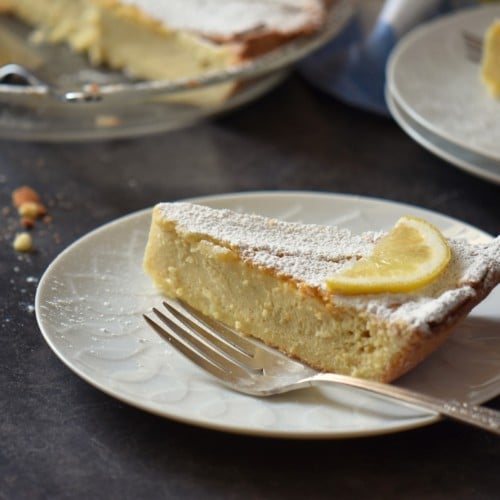
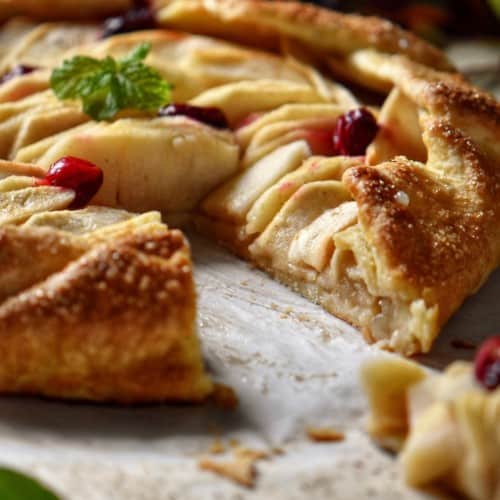
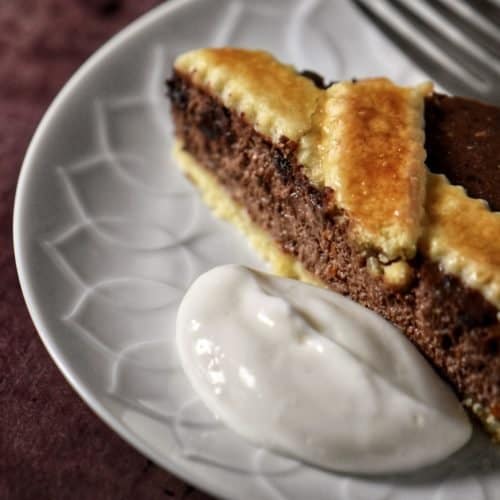
Create the most delicious apple crostata or fill it with pastry cream to create a mouthwatering Italian dessert called torta della nonna. A lattice top provides a magnificent appearance for an Italian crostata, a pastiera Napoletana, or the ever-popular ricotta pie.
As you can see, I love using Italian pasta frolla. It is the perfect foundation for many amazing Italian desserts.
Let’s take a closer look at some of the ingredients and how to make this basic recipe using either a food processor or mixing by hand.
Jump to:
Prep and Cook Time
Making this pastry dough is quick and simple, with just a little chilling time to ensure the best texture. Here's a breakdown:
- Prep Time: 10-15 minutes (measuring, cutting butter, mixing dough)
- Chilling Time: 40 minutes
- Total Time: 50-55 minutes
Once chilled, the dough is ready to roll out and use for your favorite recipe!
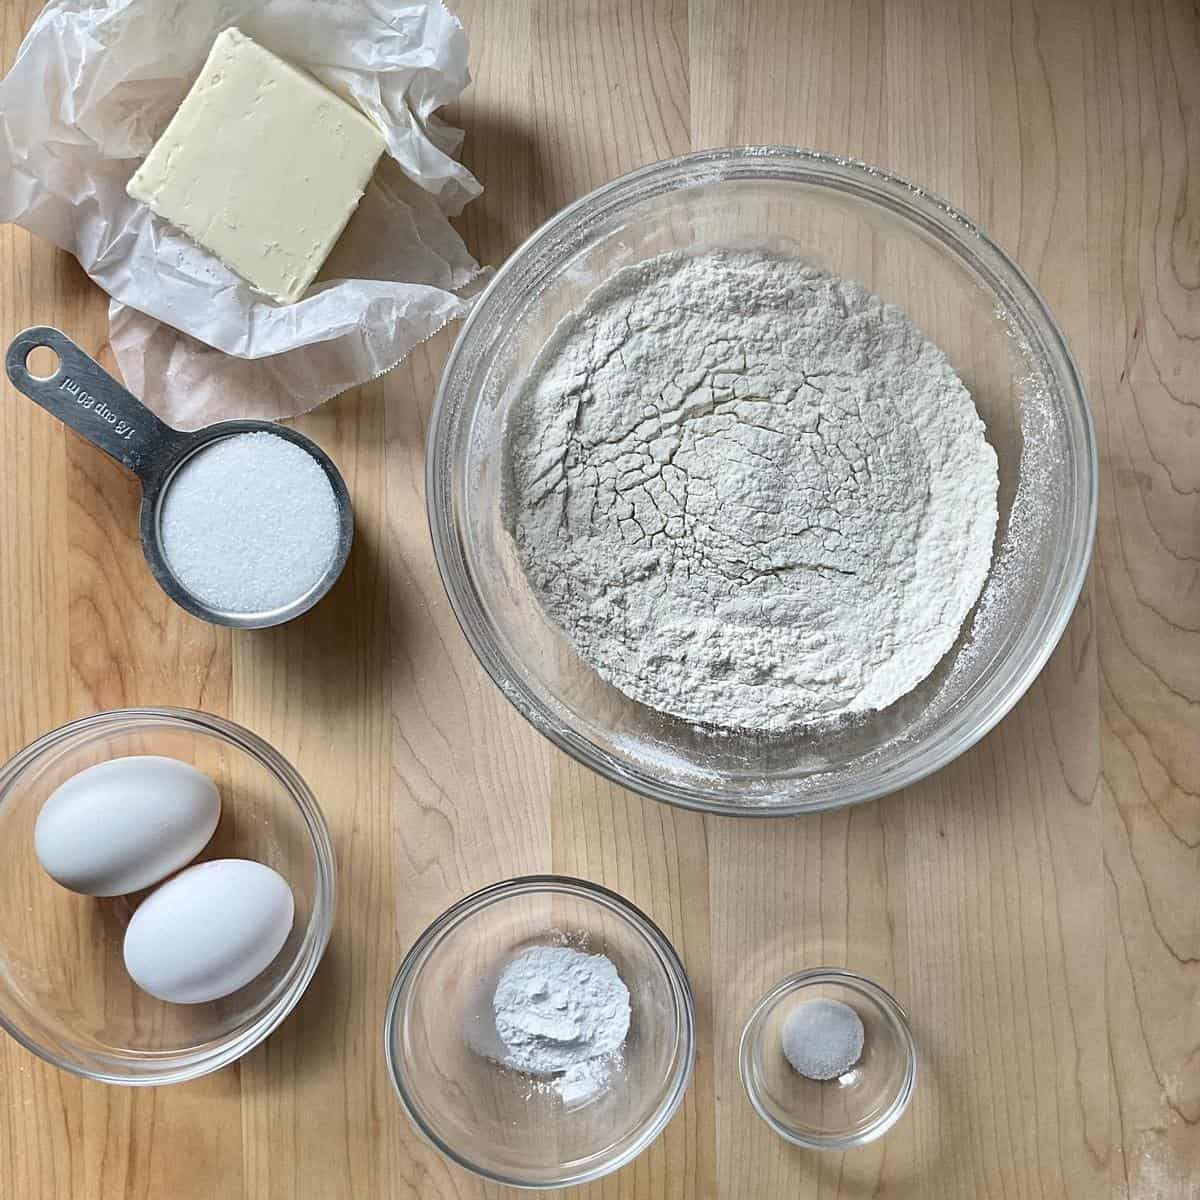
Ingredients for Pasta Frolla
One of the things I love about pasta frolla is its simplicity. With just a few basic ingredients, you can create Italian sweet pastry dough perfect for tarts, cookies, or crostatas.
Basic Ingredients:
- Flour: I like to use all purpose flour, but when I want an extra delicate crust, I use “00” flour.
- Sugar: Just enough to add a touch of sweetness without overpowering the filling.
- Salt: A small pinch of Kosher salt makes all the difference in balancing flavors.
- Butter: It has to be very cold and cut into small pieces for a flaky, melt-in-your-mouth texture. I use unsalted butter but some recipes suggest using salted butter and adjusting the added salt accordingly.
- Eggs: Help bring the dough together and add richness.
Additional Ingredients:
- Baking Powder: If I want a crisper, lighter crust, I add a few pinches of this leavening agent.
- Vanilla Extract: When making a dessert with a creamy filling, I love adding vanilla for warmth.
- Citrus Zest (Orange or Lemon): Depending on the filling, I'll mix in some zest to brighten the flavor. Lemon is my go-to for fruit tarts!
- Extra Egg Yolk: Some recipes call for an extra egg yolk to enhance the dough's richness. It makes a noticeable difference, especially in tarts!
Every time I make pasta frolla, I tweak it slightly depending on what I'm baking. It's one of those recipes that is endlessly adaptable! You can also easily vary the proportions depending on the type of texture desired.
Making the Dough
This tutorial will cover two methods for producing this sweet pastry dough: one using a food processor and the other mixing it by hand.
Food Processor Method
A food processor is a great option for making shortcrust pastry. With a prep time of 5 minutes, it does most of the work for you.
Prepare the butter: Cut ½ cup (113 grams) of cold unsalted butter into 18 small pieces and place it in the freezer for about 10 minutes.
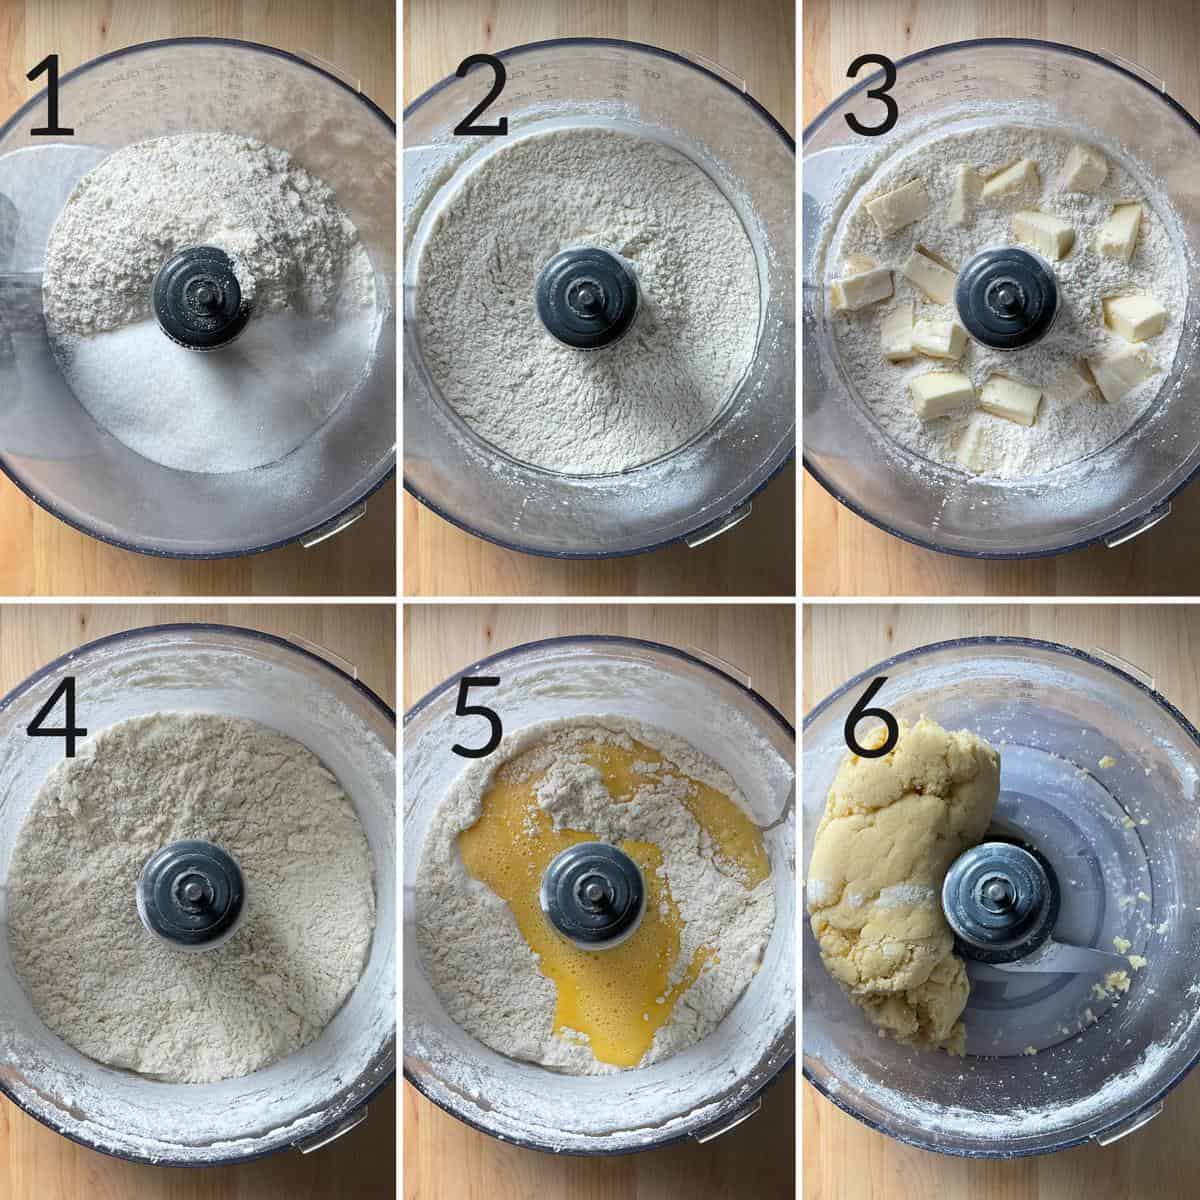
- Combine 1¾ cups all purpose flour (250 grams), ⅓ cup granulated sugar (67 grams), ½ teaspoon baking powder, and ⅛ teaspoon of salt in the bowl of a food processor.
- Pulse several times to combine.
- Distribute the cold butter evenly over the dry ingredients.
- Pulse about 12 times at 1-second intervals until the mixture is fine and powdery.
- Add 2 lightly beaten eggs. Note: if using, add vanilla extract, orange or lemon zest at this point.
- Process until the dough clumps together and forms a smooth ball, about 30 seconds. Be careful not to overprocess the dough.
Hand Mixing Method
If you don’t have a food processor, don’t worry! You can mix this basic dough by hand using a fork and your fingers.
The key is to work quickly so that the heat from your fingers doesn’t soften the butter.
Prepare the butter: Place a box grater and ½ cup of butter (113 grams) in the freezer for about 10 minutes.
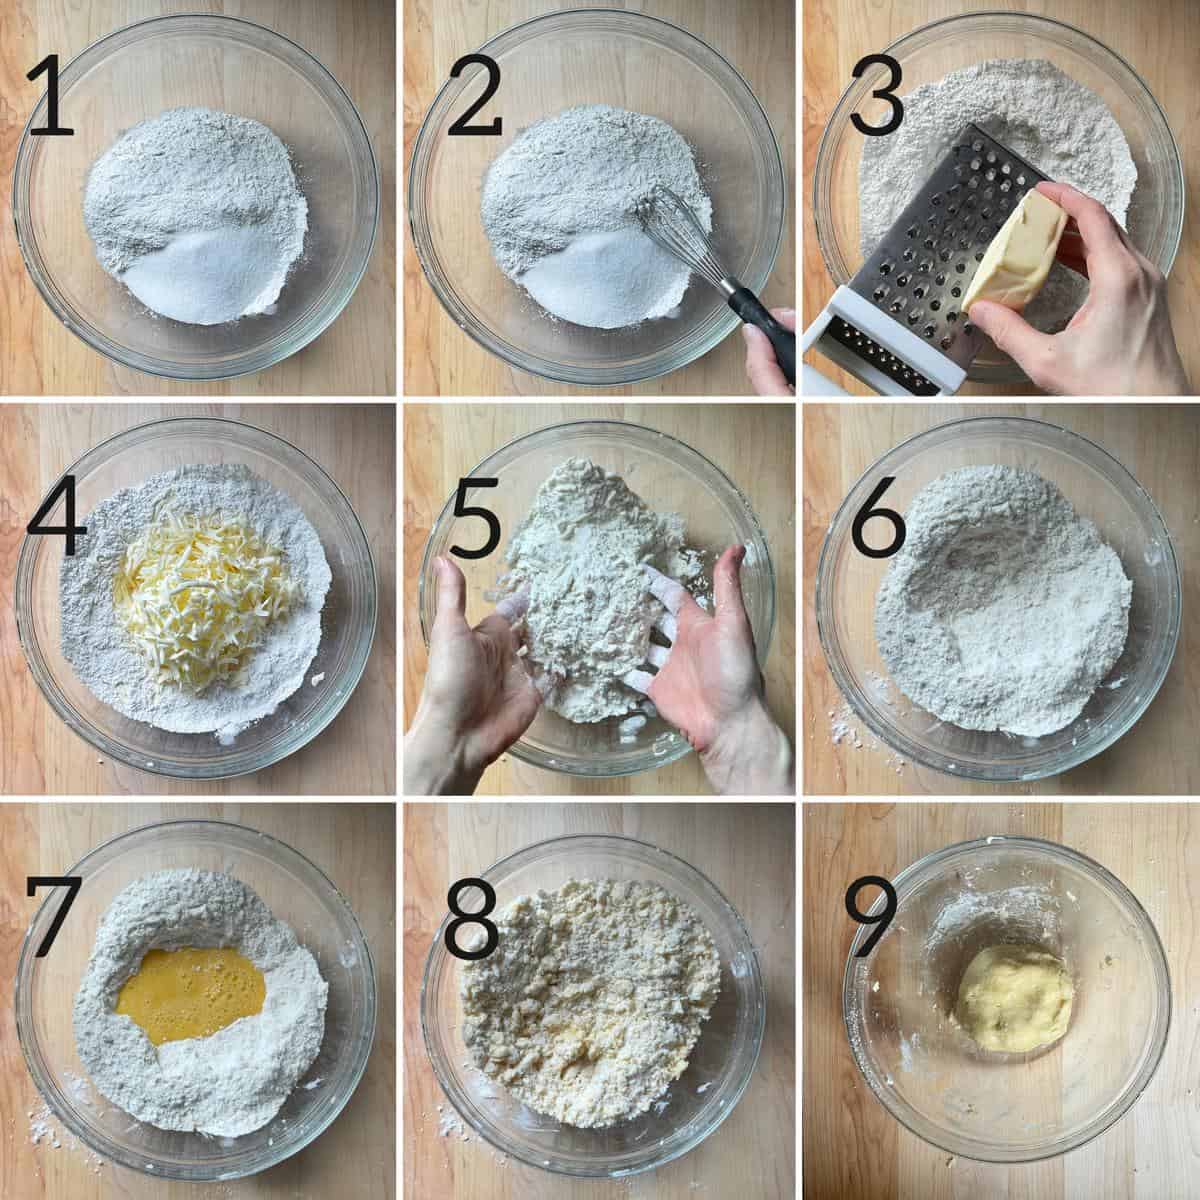
- Combine 1¾ cups all purpose flour (250 grams), ⅓ cup granulated sugar (67 grams), ½ teaspoon baking powder, and ⅛ teaspoon of salt in a large bowl.
- Whisk these ingredients together thoroughly.
- Create a well in the center. Remove the icebox grater and butter from the freezer.
- Using the large holes of a box grater, quickly grate the cold butter.
- Quickly but gently toss the grated butter with the dry ingredients with your fingertips.
- Then rub the mixture together for the butter to coat the flour particles. The mixture will become coarse.
- Create a well, and add 2 lightly beaten eggs. Note: if using, add vanilla extract, orange or lemon zest at this point.
- Use a fork to incorporate the eggs. Work quickly and continue stirring until coarse crumbs form about 30 seconds.
- Gather into a ball. Be careful not to overwork the dough.
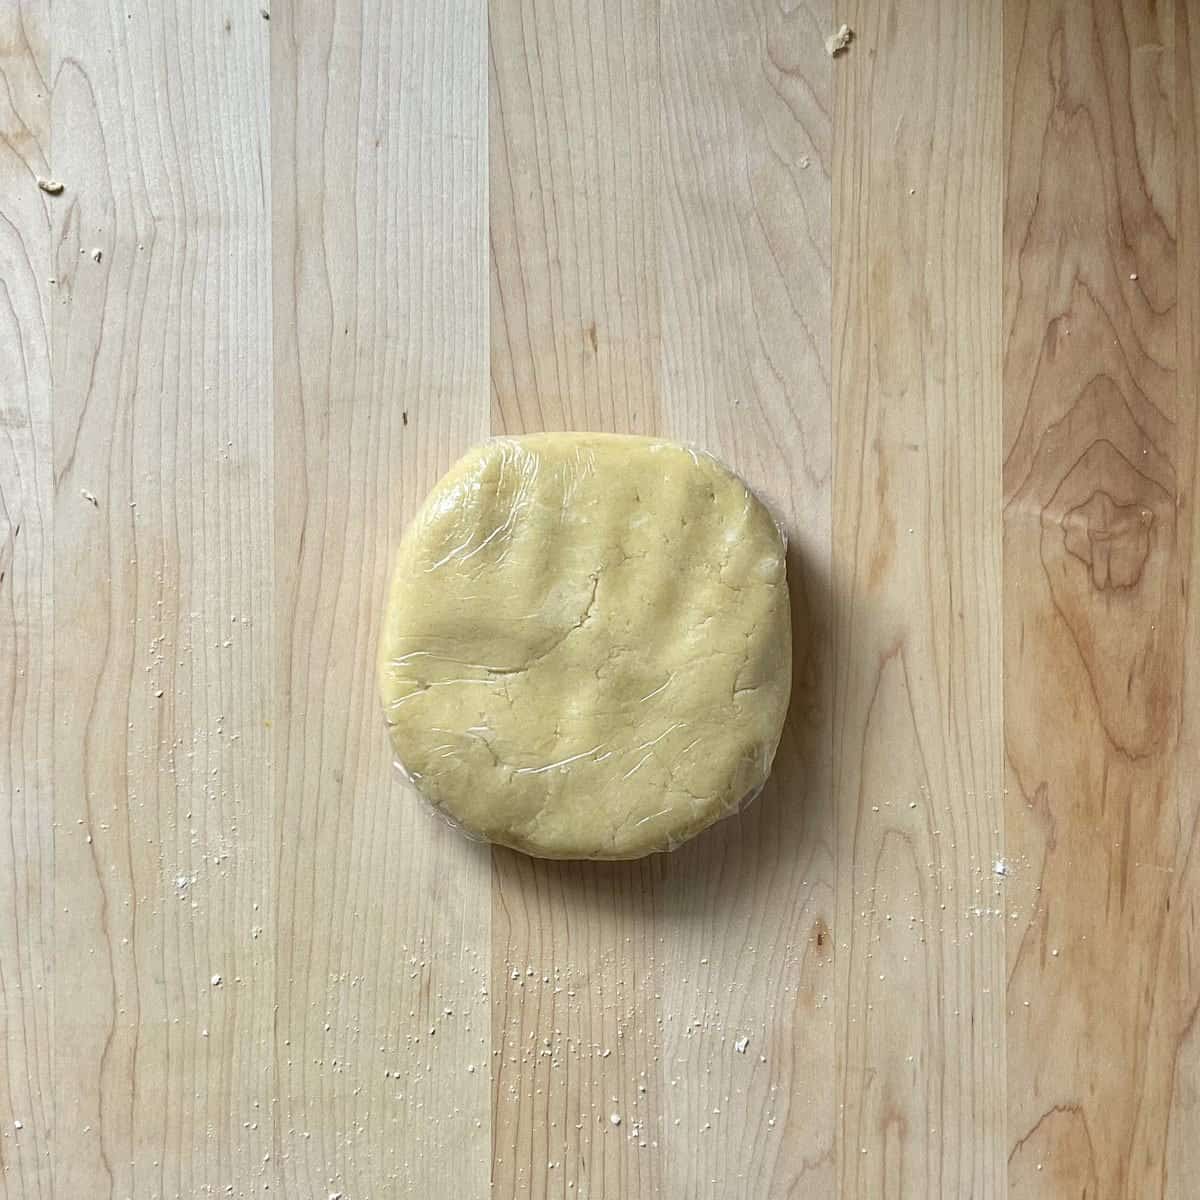
Refrigerating the Dough
Once you have your ball of dough, press it together into the shape of a disc. Wrap it properly with plastic wrap and refrigerate it for a minimal time of 30 minutes before using it. Pasta frolla will last up to three days when stored in an airtight container in the fridge.
Rolling and Forming the Dough
Once your dough has chilled, you can roll it out and form it into the desired shape before baking it.
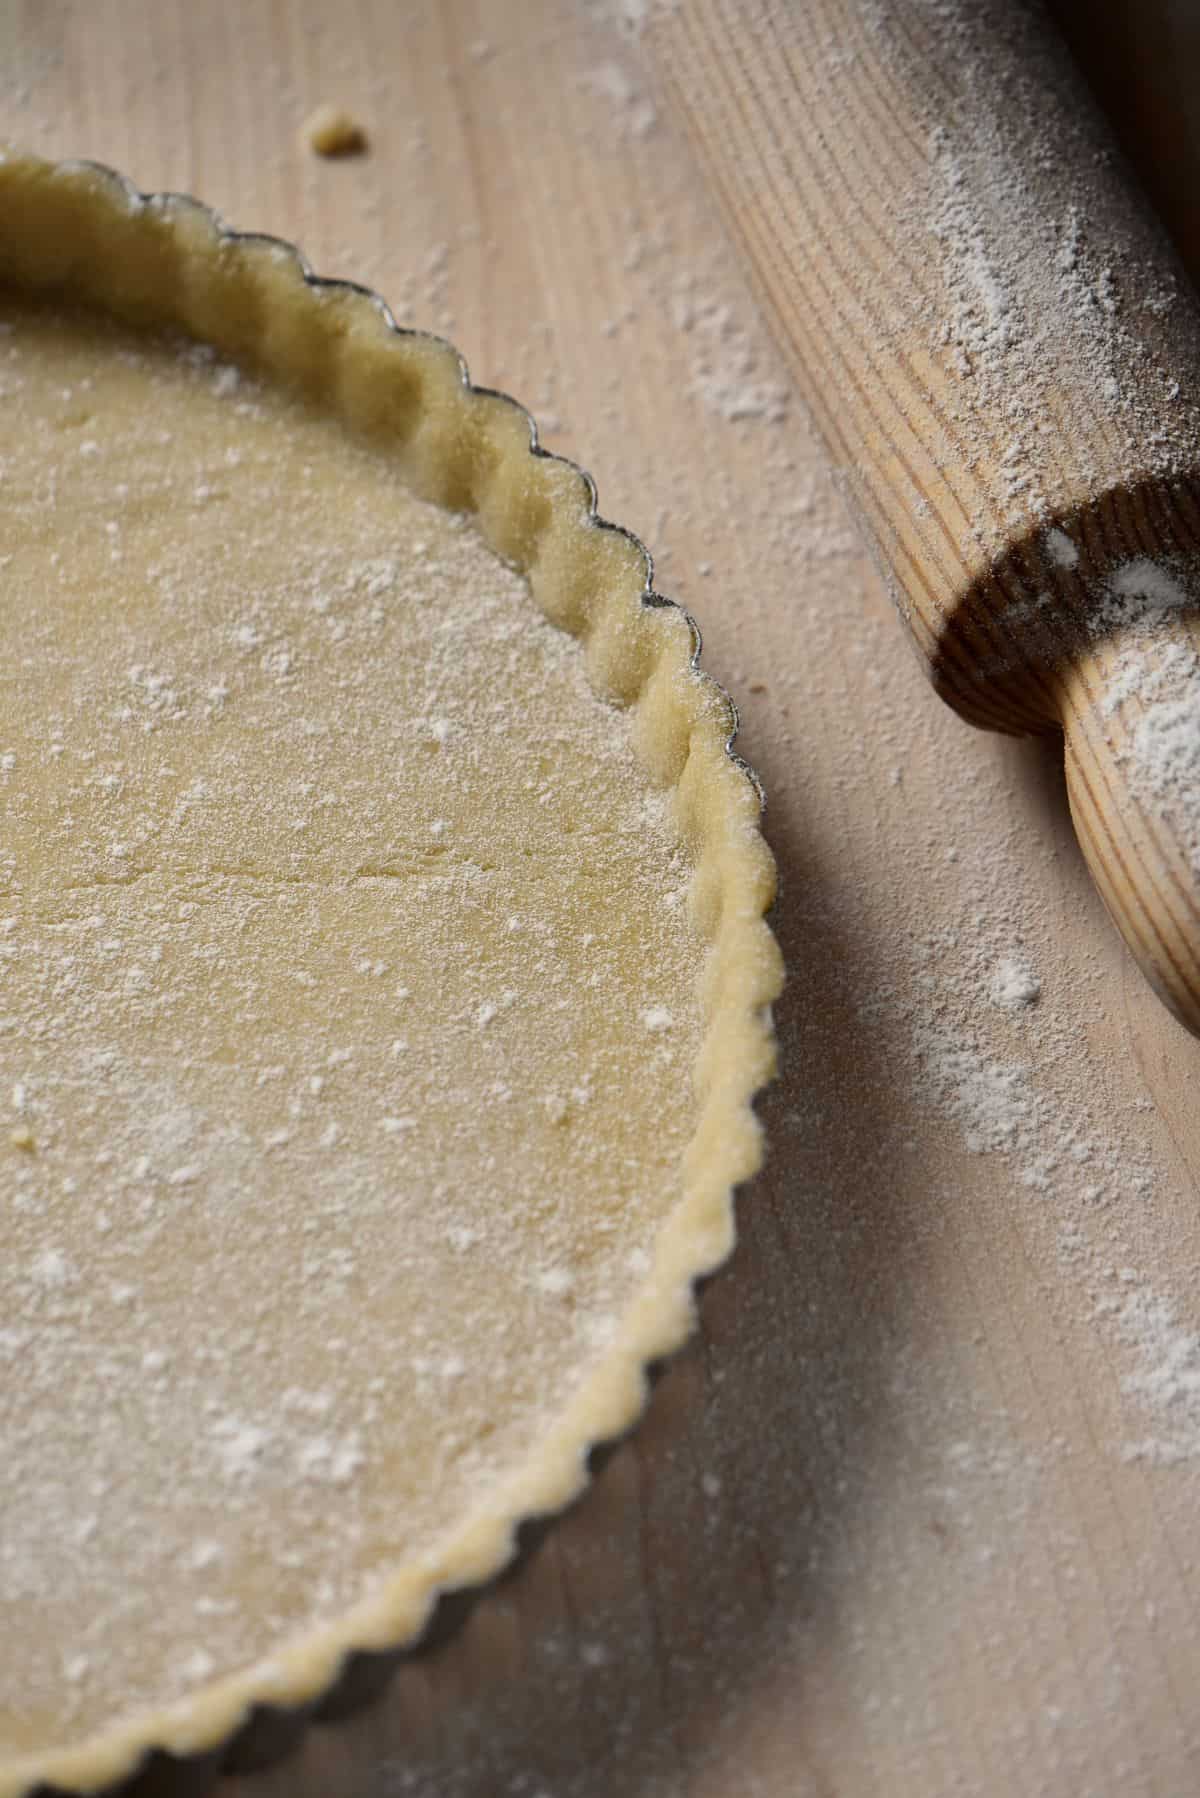
Rolling the dough
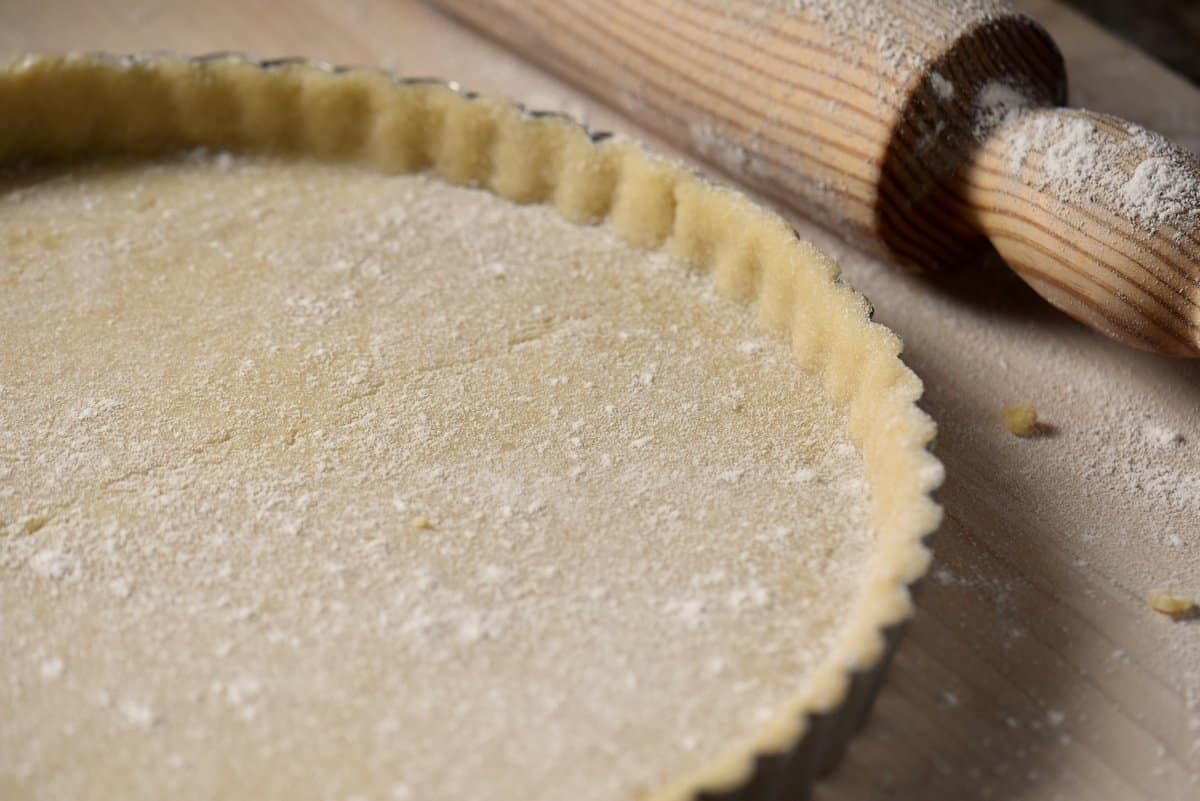
The most common method of preparing pasta frolla is to roll it out using a rolling pin.
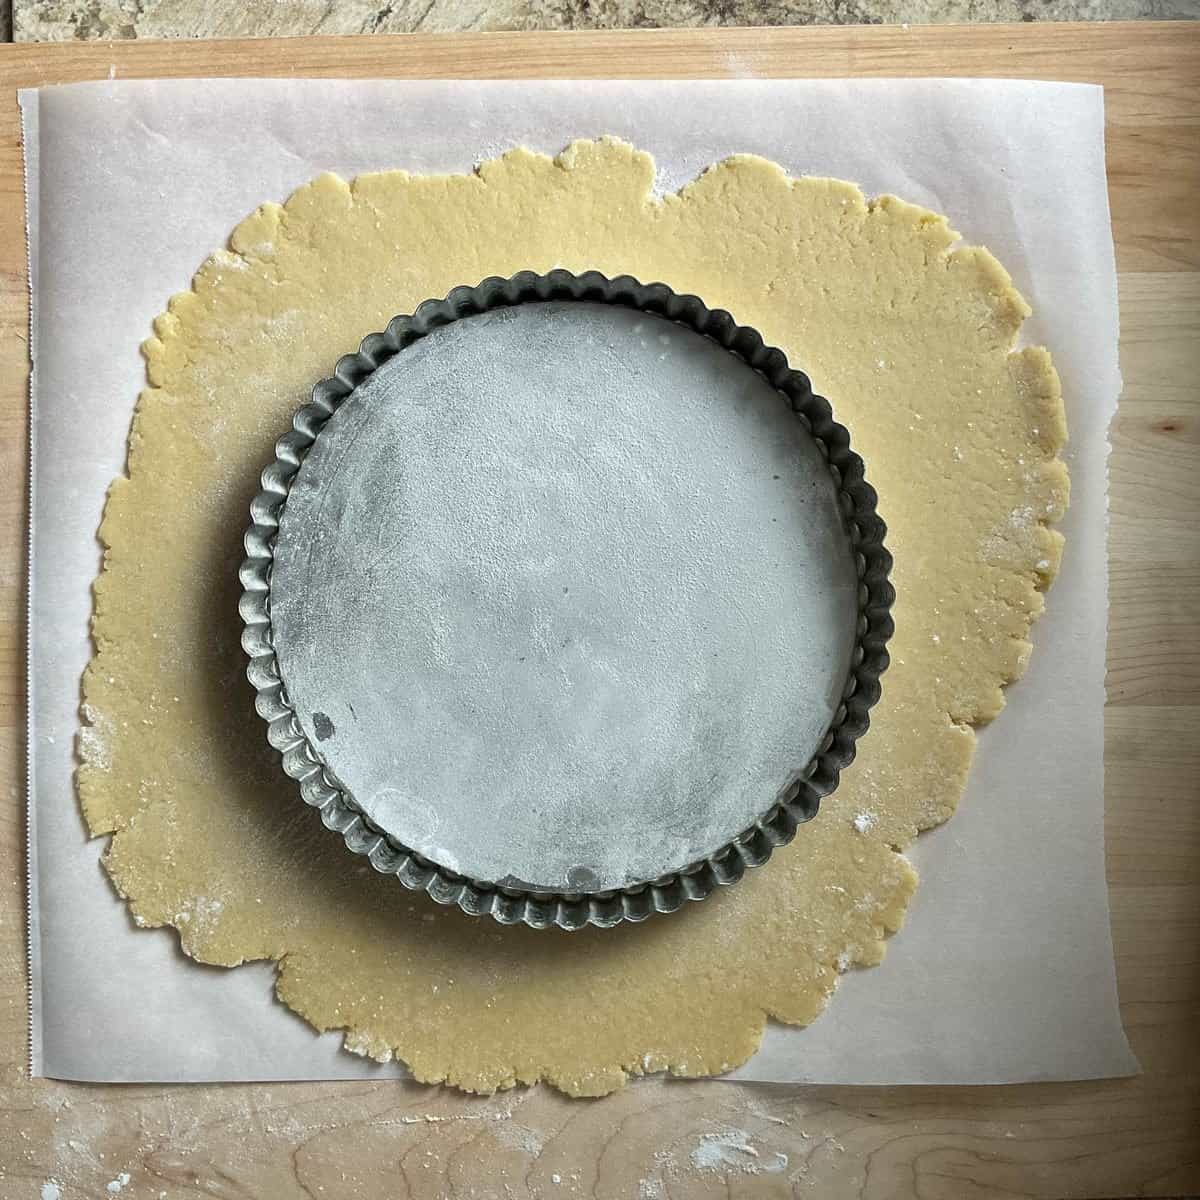
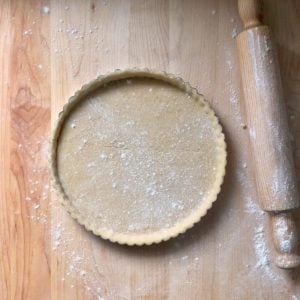
When you’re ready to roll the dough, butter and flour the bottom and sides of a 9-inch round tart pan with a removable bottom.
Sprinkle flour lightly over a sheet of parchment paper, then place the disc of dough in the center. To avoid sticking, lightly flour the dough and the rolling pin before beginning to roll.
To roll, hold the rolling pin horizontally and press down evenly as you roll forward in short, even strokes, from the center outward. Then turn the dough a quarter of a turn, and repeat the process.
Be sure to lightly flour your work surface and your rolling pin to prevent sticking.
Lift up the parchment paper occasionally to ensure it isn’t sticking, and sprinkle lightly with flour if necessary.
Roll it out into a circle that is roughly 2 inches larger in diameter than the pan, about ¼ inch (½ cm) thick.
Transferring the dough
It’s time to transfer the dough to your prepared pan once you’ve rolled it out.
The quickest approach to accomplish this is to fold the dough in half. To support it, carefully slide both hands underneath it. Place it in the pan, then gently unfold it.
Alternatively, fold the pastry dough carefully over your rolling pin, lift gently and place it over your pan.
If the dough tears, don’t worry! Just patch it up and continue.
Also, if your dough has become too warm and is difficult to work with, place it in the fridge for 15-20 minutes to firm up before continuing.
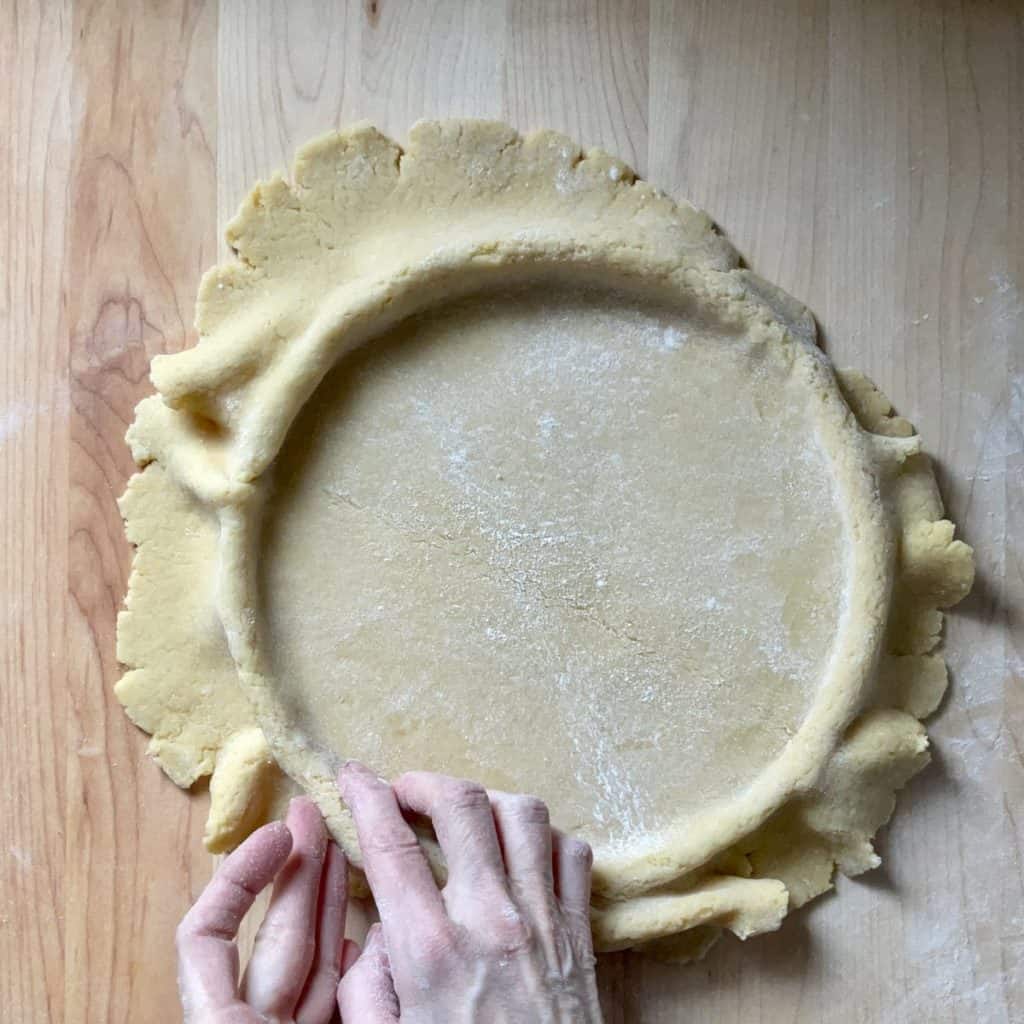
Once your dough is transferred to the pan, gently press it into the sides and bottom. Take care not to stretch it too much, or you will risk having a thinner crust.
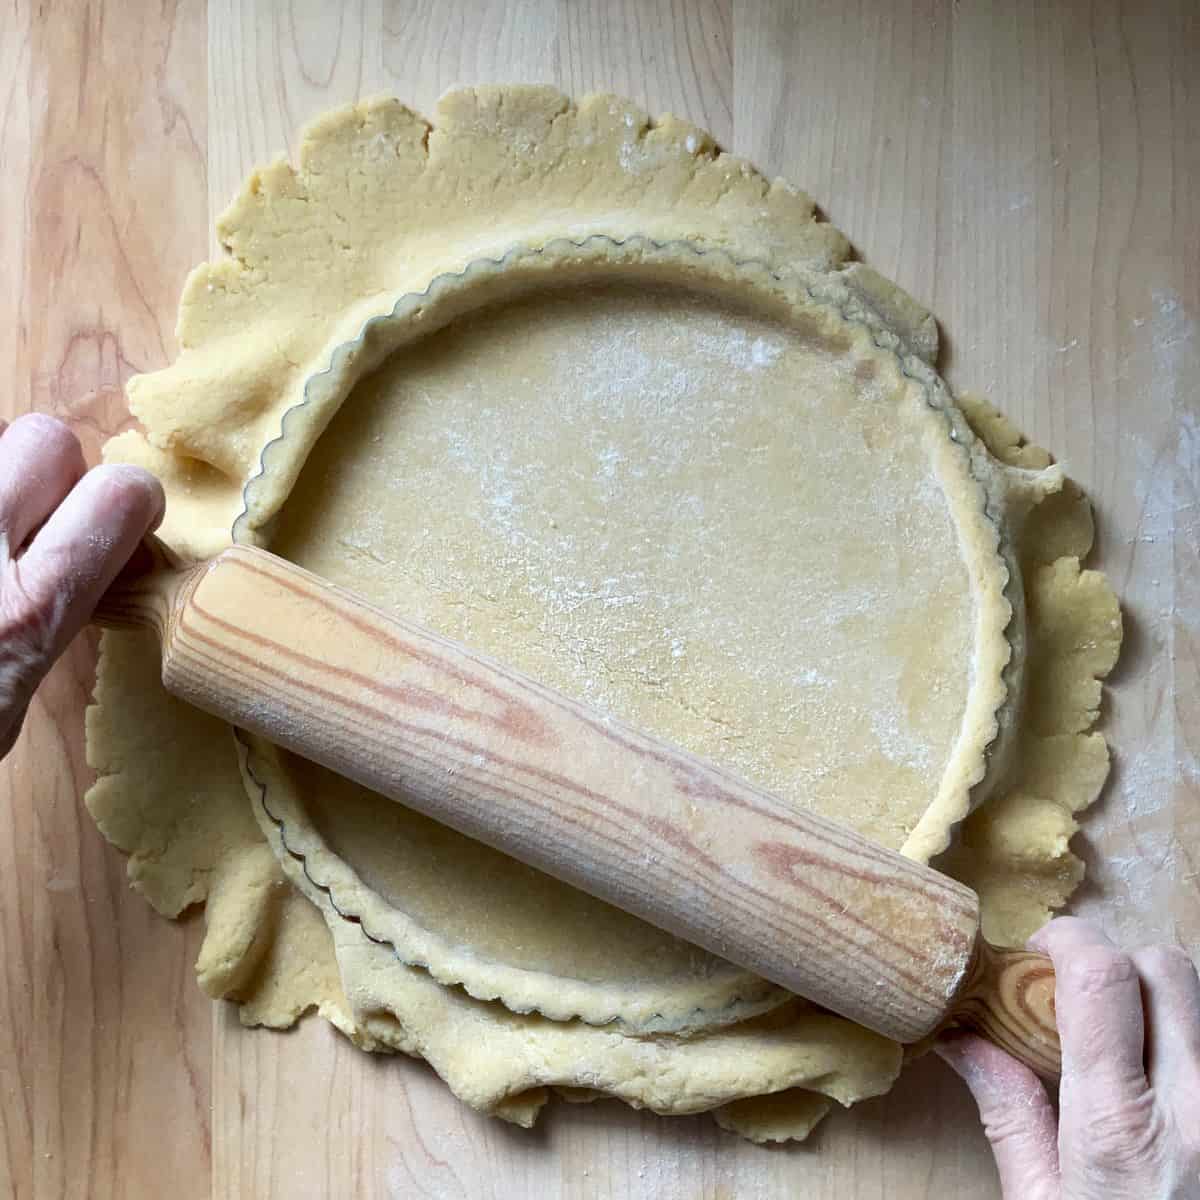
Trimming the dough
After you’ve pressed the dough into place, use your rolling pin to gently roll over the top of the tart case to trim the excess dough. Alternatively, use a knife.
Baking the Tart Shell
After the dough has been placed in the tart shell, chill it for 10-15 minutes to minimize shrinkage before baking.
Baking the shell unfilled
Sweet shortcrust pastry should be baked without any filling when it is to be used with custard and/or fresh fruit filling.
To blind bake the pasta frolla (without the filling):
- Preheat the oven to 375°F (190°C).
- Using a fork, pierce the dough (poke holes) at 1-inch intervals.
- Line with parchment paper and fill it with pie weights or dried beans.
- Bake for 10 -12 minutes or until the crust feels dry.
- Remove the weights and parchment paper, then continue to bake until the crust is golden brown. This will take an additional 8-10 minutes.
- Remove the crust from the oven, then leave it to cool completely before adding your filling.
Baking the shell filled
There is no need to pre-bake the crust if you’re baking your pasta frolla with a filling. Simply remove it from the refrigerator, fill it and proceed with your recipe instructions.
Tips
- This Italian sweet pastry dough recipe is for a 9-inch round-tart pan (with a removable bottom) with a lattice top.
- Chilling the butter and the box grater makes it easier to incorporate it quickly into the dry ingredients.
- Chilling the dough for at least 30 minutes makes rolling it out much easier.
- To prevent the dough from drying in the refrigerator, wrap it tightly in plastic wrap.
- When rolling out the dough, make sure your surface is lightly floured so that the dough doesn’t stick. Remember to use a minimal amount of flour.
- Rolling out the dough on a sheet of floured parchment paper helps to prevent the dough from sticking to the counter.
- Avoid overworking the dough, which leads to an overly developed gluten structure, making your dough tough.
- To make a dough with a finer texture, replace the granulated sugar with icing sugar as it is more evenly distributed throughout the dough.
FAQ
The term pasta frolla translates as “tender dough.” It’s a flavorful and sweet shortcrust pastry dough that is simple to prepare, versatile in application, and delicious to eat.
It is used in many Italian pies to showcase fillings. It can also be used to create delicious cookies.
Pasta frolla can be stored in the fridge for up to 3 days when wrapped tightly in plastic wrap or kept in an airtight container.
Yes, you can freeze raw pasta frolla dough. Simply form it into a disc, wrap it tightly in cling film and freeze it for up to two months. When ready to use, let the frozen dough thaw overnight in the fridge before rolling out as normal.
Yes, you can use a stand mixer to make pasta frolla dough. Use the paddle attachment at low speed and mix until the ingredients are just combined.
How to Use Pasta Frolla in Italian Desserts
Pasta frolla has been a staple in my kitchen for as long as I can remember. Whether I'm making a simple crostata for Sunday lunch or delicate cookies for the holidays, this dough never fails me. Here are some of my favorite Italian desserts with pasta frolla:

Recipe Origins
Nick Malgieri is, without a doubt, one of my favorite bakers. His pasta frolla is my go-to recipe for this classic Italian pastry dough.
I have tried so many of his recipes and have documented both his ricotta strudel and ricotta pie recipes.
The baking blind method I used was inspired by this source.
I hope you found this tutorial helpful!
If you have any questions, please feel free to leave them in the comments below.
Just for you! A printable baking checklist to help you keep track of all your baking needs.
If you love to bake, this is for you! Simply subscribe to my weekly newsletter and receive this FREE BAKING CHECKLIST PRINTABLE!
This way, you won't miss any of my new recipes, and it's FREE!
THANKS SO MUCH for following and being part of the She Loves Biscotti community, where you will find Simple & Tasty Family-Friendly Recipes with an Italian Twist.
Ciao for now,
Maria
★★★★★ If you have made this sweet pastry dough, I would love to hear about it in the comments below and be sure to rate the recipe!
Recipe
Easy Pasta Frolla Recipe
WANT TO SAVE THIS RECIPE?
Ingredients
- ½ cup unsalted butter 113 grams, cold
- 1¾ cups flour 250 grams, all purpose or "00" flour
- ⅓ cup granulated sugar 67 grams
- ½ teaspoon baking powder
- ⅛ teaspoon salt
- 2 eggs slightly beaten
- extra flour for rolling
Instructions
Food Processor Method
- Cut ½ cup of cold unsalted butter into 18 small pieces and place it in the freezer for about 10 minutes.
- In a food processor combine the dry ingredients and pulse a few times.
- Add the cut-up butter and pulse until the mixture resembles coarse ground meal.
- Add the slightly beaten eggs and pulse until the dough comes together.
- Turn out the dough on a lightly floured wooden board and form it into a smooth disc by pressing the dough together.
- Shape the dough into a flat disc, wrap it in plastic wrap and refrigerate for a minimal time of 30 minutes before using it.
Hand Mixing Method
- Place a box grater and ½ cup of butter (113 grams) in the freezer for about 10 minutes.
- In a large bowl, whisk the dry ingredients together thoroughly.
- Create a well in the center of the dry ingredients. Remove the icebox grater and butter from the freezer.
- Using the large holes of a box grater, quickly grate the cold butter.
- Quickly but gently toss the grated butter with the dry ingredients with your fingertips.
- Then rub the mixture together in order for the butter to coat the flour particles. The mixture will become coarse.
- Create another well, and add the lightly beaten eggs.
- Use a fork to incorporate the eggs. Work quickly and continue stirring until coarse crumbs form about 30 seconds.
- Gather into a ball. Be careful not to overwork the dough.
- Shape the dough into a flat disc, wrap it in plastic wrap and refrigerate for a minimal time of 30 minutes before using it.
Video
Notes
- Chilling the butter, and the box grater makes it easier to incorporate it quickly into the dry ingredients.
- Chilling the dough for at least 30 minutes makes rolling it out a lot easier.
- To prevent the dough from drying out while it is in the refrigerator, wrap it tightly in plastic wrap.
- When it comes to rolling out the dough, make sure your surface is lightly floured so that the dough doesn’t stick. Remember to use a minimal amount of flour.
- Rolling out the dough on a sheet of floured parchment paper helps to prevent the dough from sticking to the counter.
- Avoid overworking the dough, which leads to an overly developed gluten structure, making your dough tough.
- To make a dough with a finer texture, replace the granulated sugar with icing sugar as it is more evenly distributed throughout the dough.
Nutrition
I originally published this post on March 14, 2022 and republished it on March 14, 2025 with updated content. Thanks for sharing!
Maria Pimento
Thank you for the Pasta Frolla recipe, Maria! Instructions are clear and easy to follow.
Can I use this dough recipe to make a jam crostata? My mom would spread the dough on a rectangle pizza pan, add jam and lattice strips at the top.
Maria
Thank you for the kind words. I’m so glad you found the instructions helpful Maria!
Yes, this Pasta Frolla is exactly what you need for a jam crostata. It works beautifully in any shape of pan, including a rectangular one. It sounds like a delicious tribute to your mom’s baking. Happy baking!
Anita Orsino
My tart pan doesn’t have a removable bottom. What is the reason for the removable bottom?
Maria
Great question Anita! A tart pan with a removable bottom makes it much easier to remove the tart from the pan without damaging the crust. This feature allows you to push the bottom up and out, keeping the delicate sides of the tart intact and giving you a perfect presentation. You can still use your regular tart pan. Just be extra careful when removing the tart, perhaps using a thin spatula to help lift it out gently. Thanks for stopping by.
Maria
Can you refrigerate the dough for use the next day?
Maria
Thanks for your interest Maria. Yes, you can refrigerate overnight. Enjoy!
Karen
I LOVE all your recipes. Thank you so much for sharing🤗
Maria
Thank you so much for your support Karen!
Karen Hantsche
Your recipes are all wonderful! I use your site more than my Lydia’s cookbook!!
Maria
Wow! Thanks so much Karen ♥♥♥
Patz
For my ricotta pie, the pasta frolla crust uses anise extract instead of vanilla…
Maria
Thanks for sharing Patz, that is a great variation!
Nicole Grignon
So Happy Maria you posted the recipe to Pasta Frolla Teresa used to make it she would use whatever fruit she had that was old make the crust and just put the jam between the layers of pasta Frolla and then cook it and serve it as lady fingers or little squares OMG this recipe brings back such good memories can’t wait to make it this week!!! with abricot jam ..its easy and versitile to make Grazie Bella !!!
Maria
How wonderful Nicole! Thank you so much for taking the time to comment. I love hearing about all of your wonderful memories ♥
Mary Brown
I have your recipe bookmarked. I’ve made it lots of times and love it. So much better than American pie dough!
Maria
That is wonderful to hear Mary! I’m thrilled you prefer the Italian style. It really is a game-changer for homemade desserts. Thank you for the wonderful feedback and for keeping the recipe bookmarked!