

Make a homemade rustic Italian bread with a golden crust and airy crumb using gentle no-knead stretch-and-fold and coil folds. This easy pagnotta recipe is perfect for dunking in soups and stews.
Growing up, my mom would occasionally make rustic Italian bread, and when she did, it was a special event!
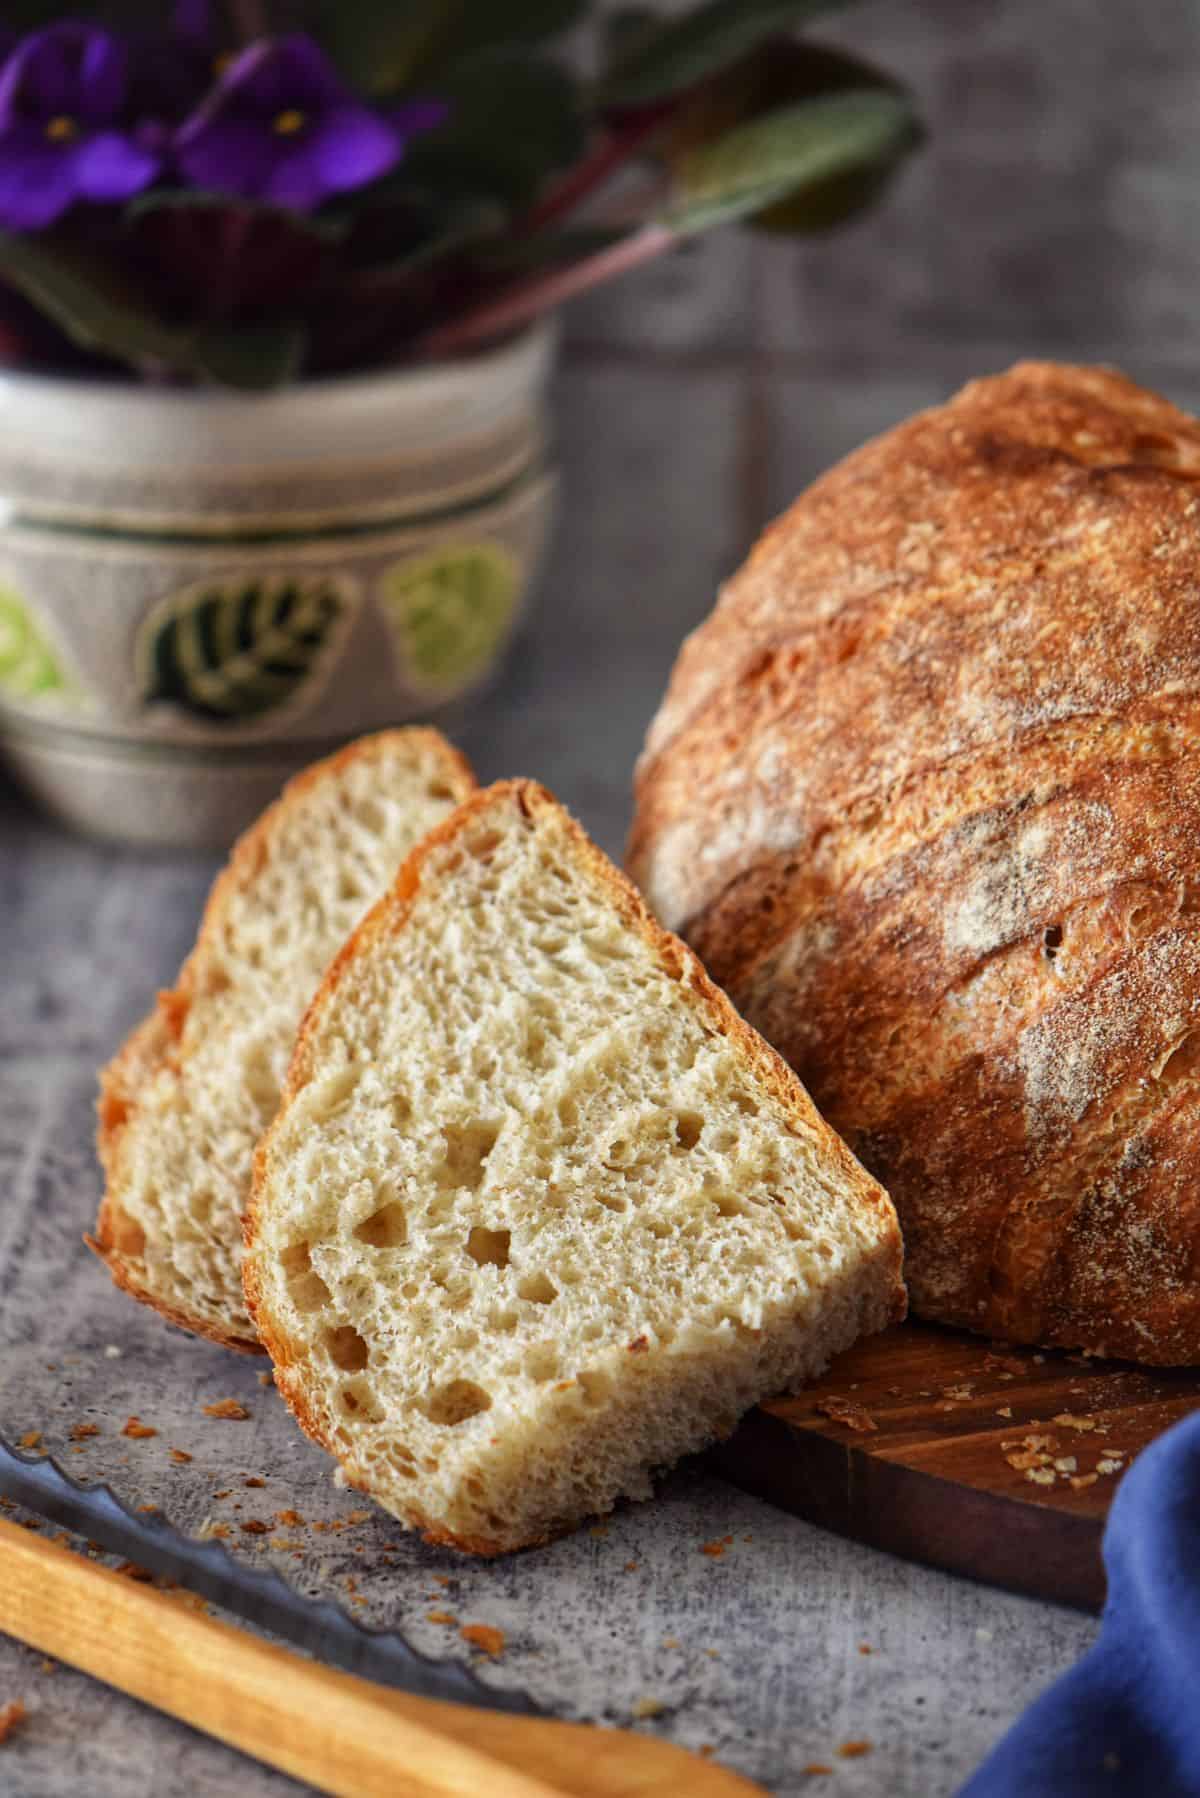
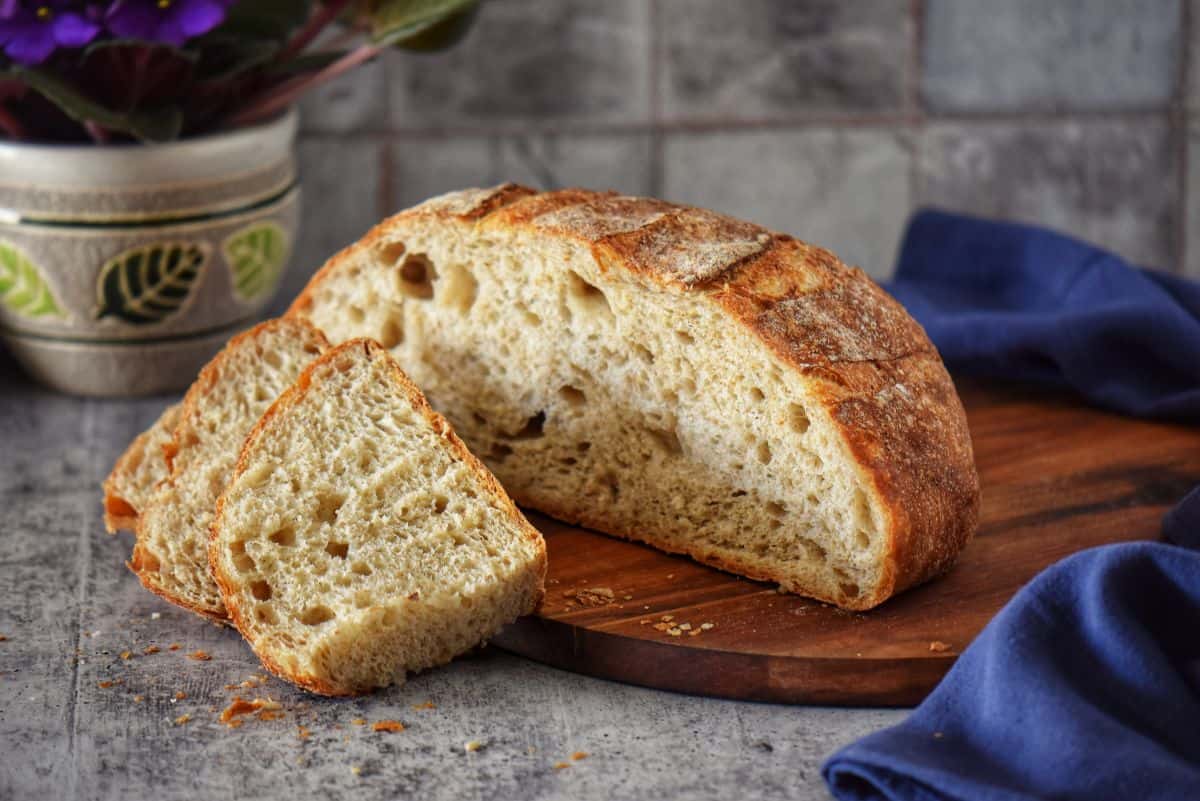
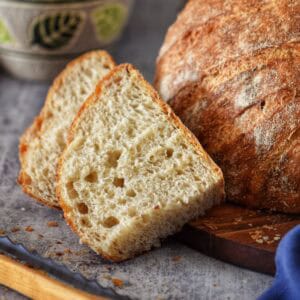
More often than not, we'd pick up a fresh loaf of pagnotta from our neighborhood Italian bakery. The thick golden crust, the airy crumb, and that unmistakable aroma of freshly baked bread-it made every meal feel special.
If you’re new to Italian bread, a pagnotta is a round, rustic loaf perfect for dipping into classic Italian dishes like lentil soup, ciambotta, and my favorite, the tasty mix of oil and juices from this Italian tomato salad.
Just like the recipe for my Italian panini bread, this recipe uses a beginner-friendly no-knead method, combining gentle stretch-and-fold and coil folds to build structure without heavy kneading. The result is a loaf that’s light, airy, and packed with flavor-no stand mixer required.
With a little patience, some careful folding, and a bit of steam in the oven, you can bring a touch of that neighborhood Italian bakery right into your kitchen.
Are you ready to make some homemade Italian bread? Let's get started.
Jump to:
Prep and Bake Time
Active prep time: ~30 minutes
Resting & proofing: ~1 hour 45 minutes
Baking: ~45 minutes
Cooling: ~1 hour
Total time: ~4 hours
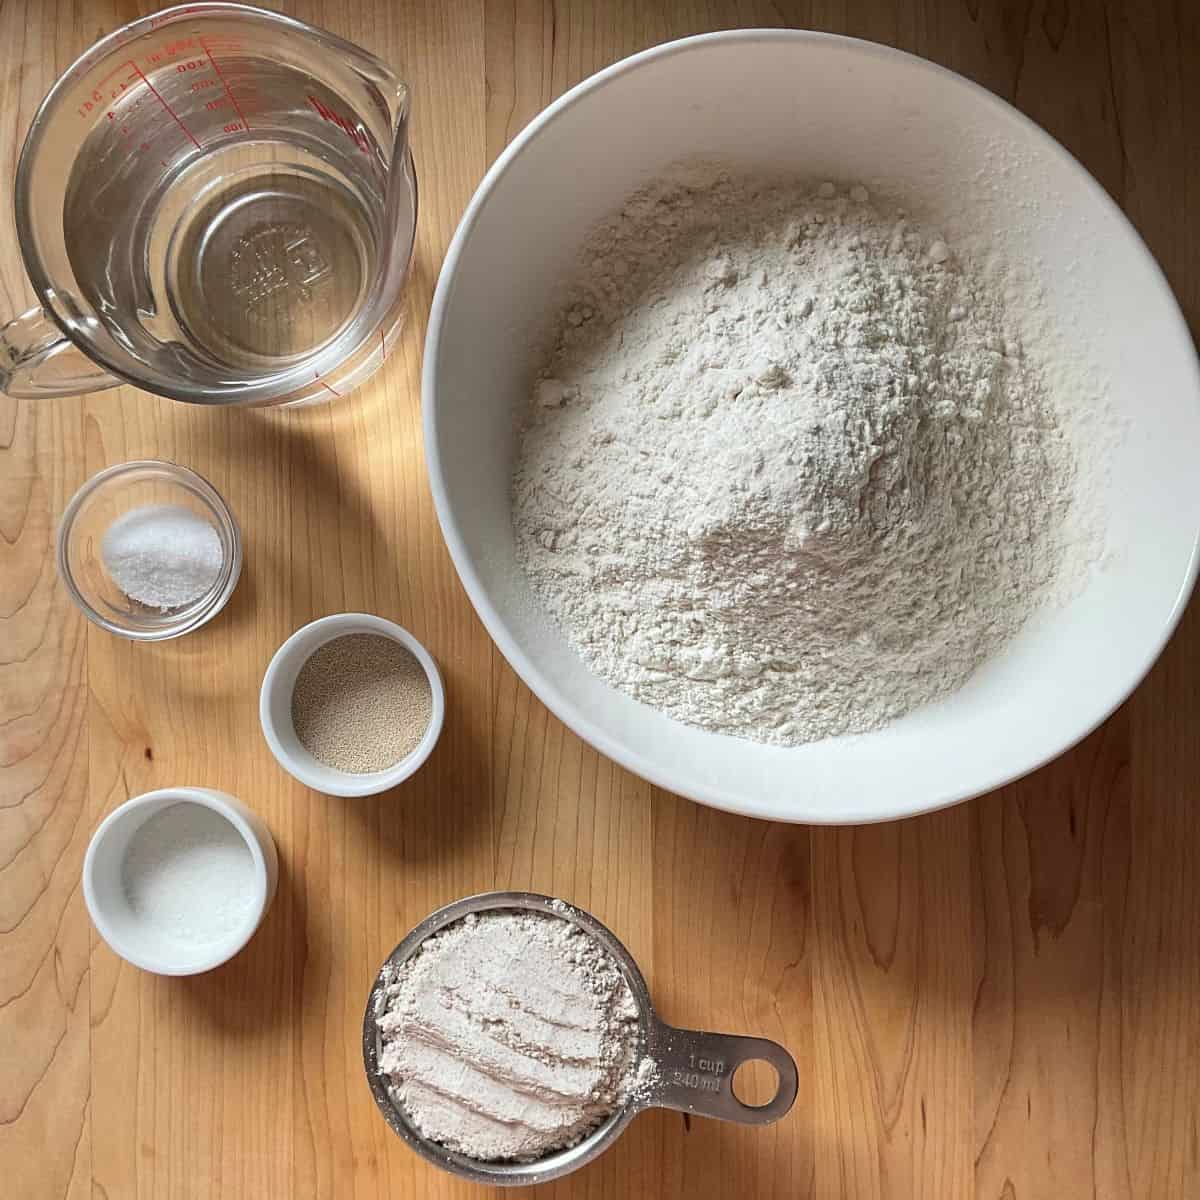
Ingredients
- Bread or pizza flour: This high-protein flour helps create a light, airy structure for our bread.
- Active dry yeast: The leavening agent that makes the dough rise. Be sure it's active for the best results-if unsure, proof it in warm water with a pinch of sugar before adding to the recipe.
- Sugar: Just a touch helps feed the yeast.
- Lukewarm water: Should feel just warm to the touch, around 110°F (43°C). I sometimes swap in ricotta whey for added depth of flavor.
- Salt: Essential for flavor. I like to add it after the initial mix for better gluten development.
- Ice cubes: Optional, but the easiest way to create steam for a bakery-style texture.
How to Make Pagnotta Bread
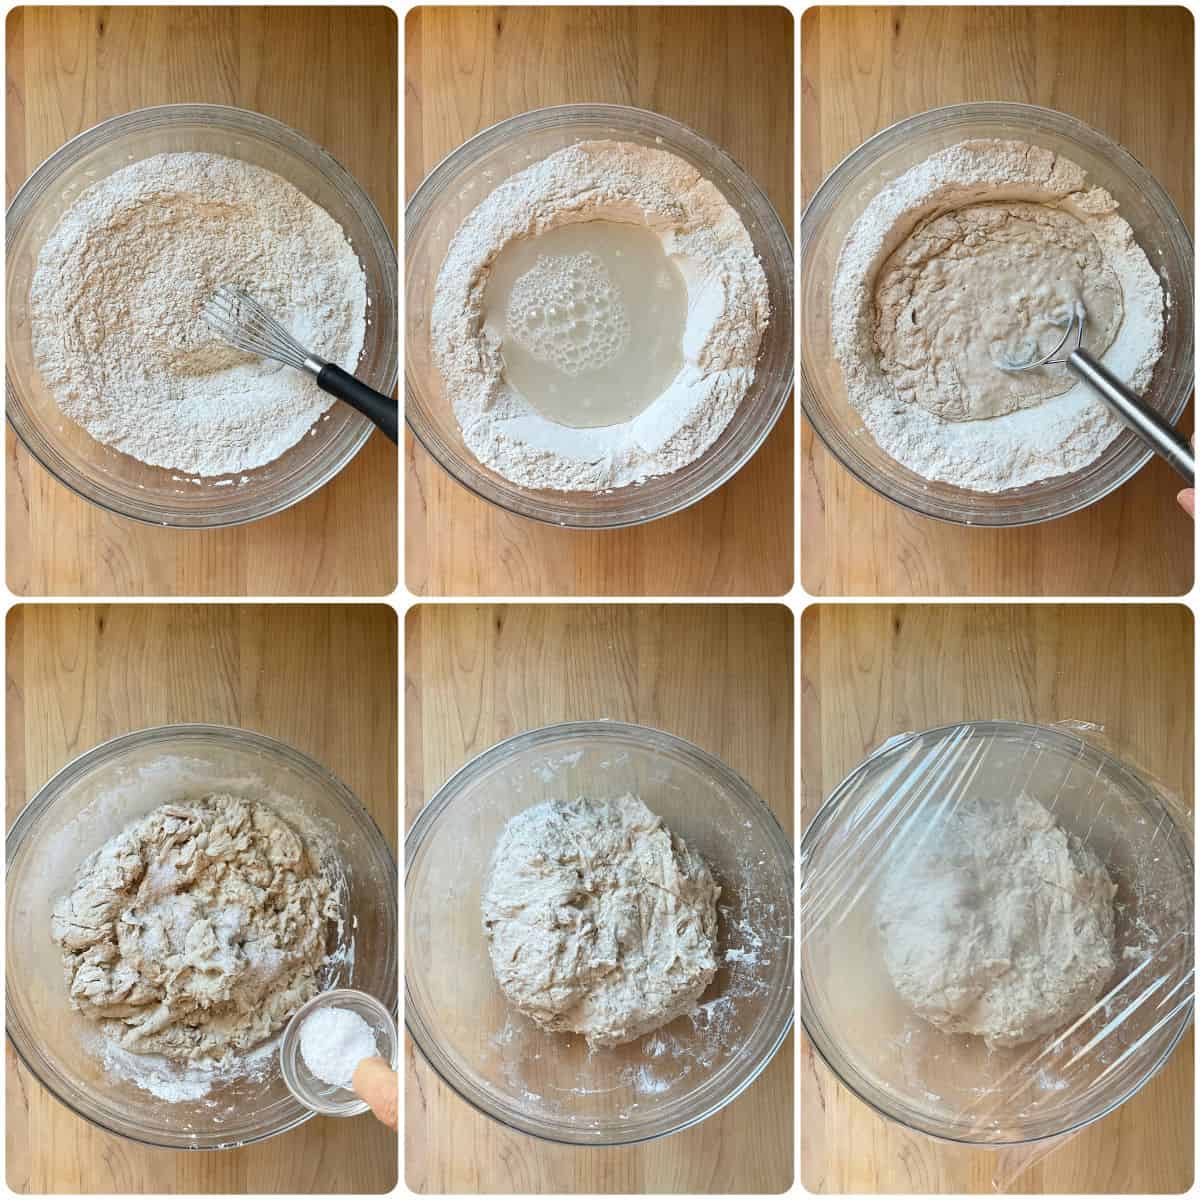
Mix the dough and rest
- In a large bowl, whisk together 500 grams (~3½ cups) of bread or pizza flour, 125 grams (~ 1 cup) of whole wheat flour, 3.5 grams (~1 teaspoon) of active dry yeast, and 4 grams (1 teaspoon) of granulated sugar.
- Add 465 grams (2 cups) of lukewarm water (110°F / 43°C) and stir until a shaggy dough forms. Cover and let rest for 2-3 minutes.
- Add 9-10 grams (1½ teaspoons) salt.
- Mix with a dough whisk, wooden spoon, small dough scraper or hands until the flour is incorporated.
- Cover and let the dough rest in a warm spot for 15 minutes (an oven with the light on or proof mode works well).
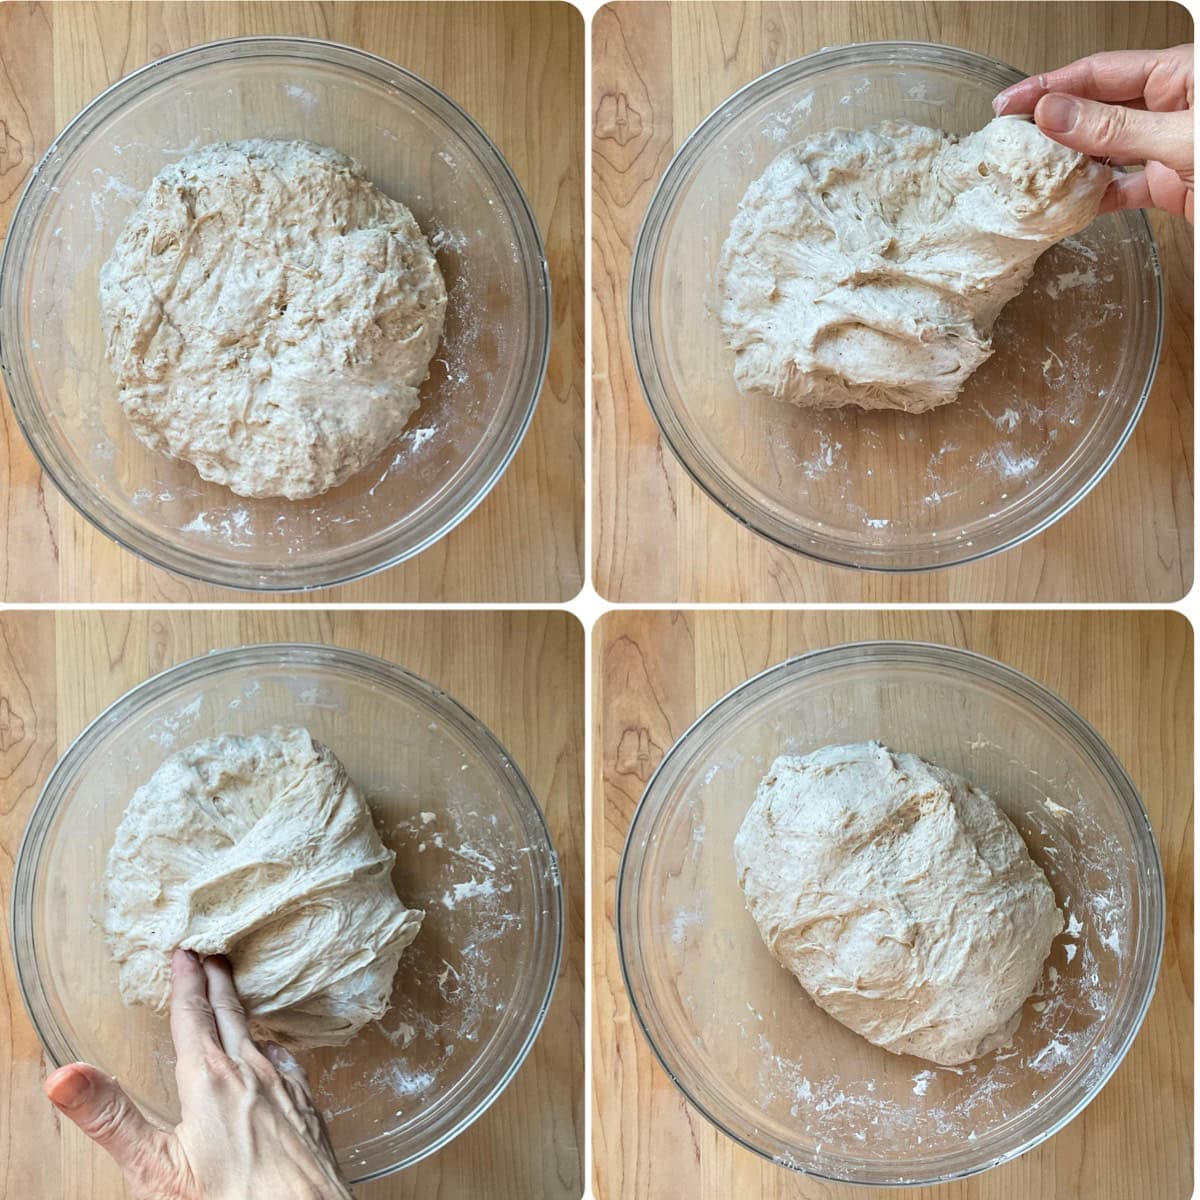
Stretch & fold - 1st and 2nd set
- With wet or lightly dampened hands, lift one side of the dough, stretch it up, and fold it over the center. Rotate the bowl ¼ turn and repeat until you've gone around (about 4 folds).
- Flip the dough over and gently shape it into a ball.
- Cover and rest 15 minutes in a warm place (an oven with the light on or proof mode works well).
- Repeat the same stretch-and-fold sequence and rest for another 15 minutes.
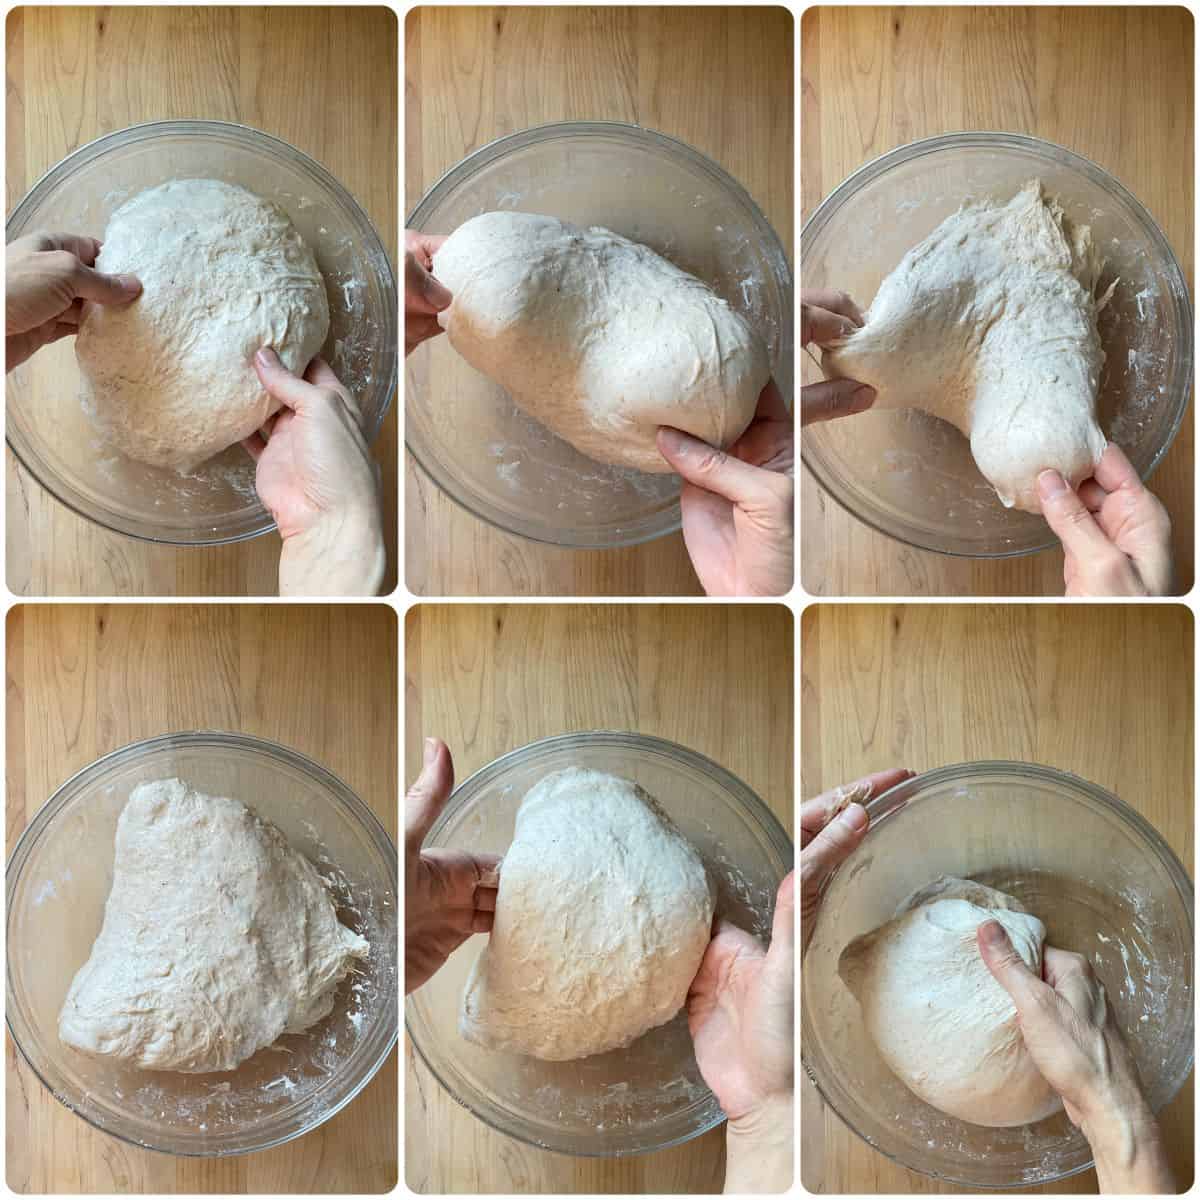
Coil folds - 3rd and 4th set
- With wet or lightly dampened hands, gently lift the dough from the middle so it sags down on both sides.
- Fold it under itself (like tucking it in) and let it drop back into the bowl.
- Rotate the bowl and repeat once more.
- Roll into a ball. Cover and rest for 15 minutes in a warm place (an oven with the light on or proof mode works well).
- Repeat the same coil-fold process one more time, then rest for another 15 minutes.
Preheat the Oven and Prepare the Setup
- Start preheating your oven to 475°F (245°C).
- Place one rack in the middle of the oven and another directly below it. Place a metal pan (never glass, which can shatter) on this lower rack.
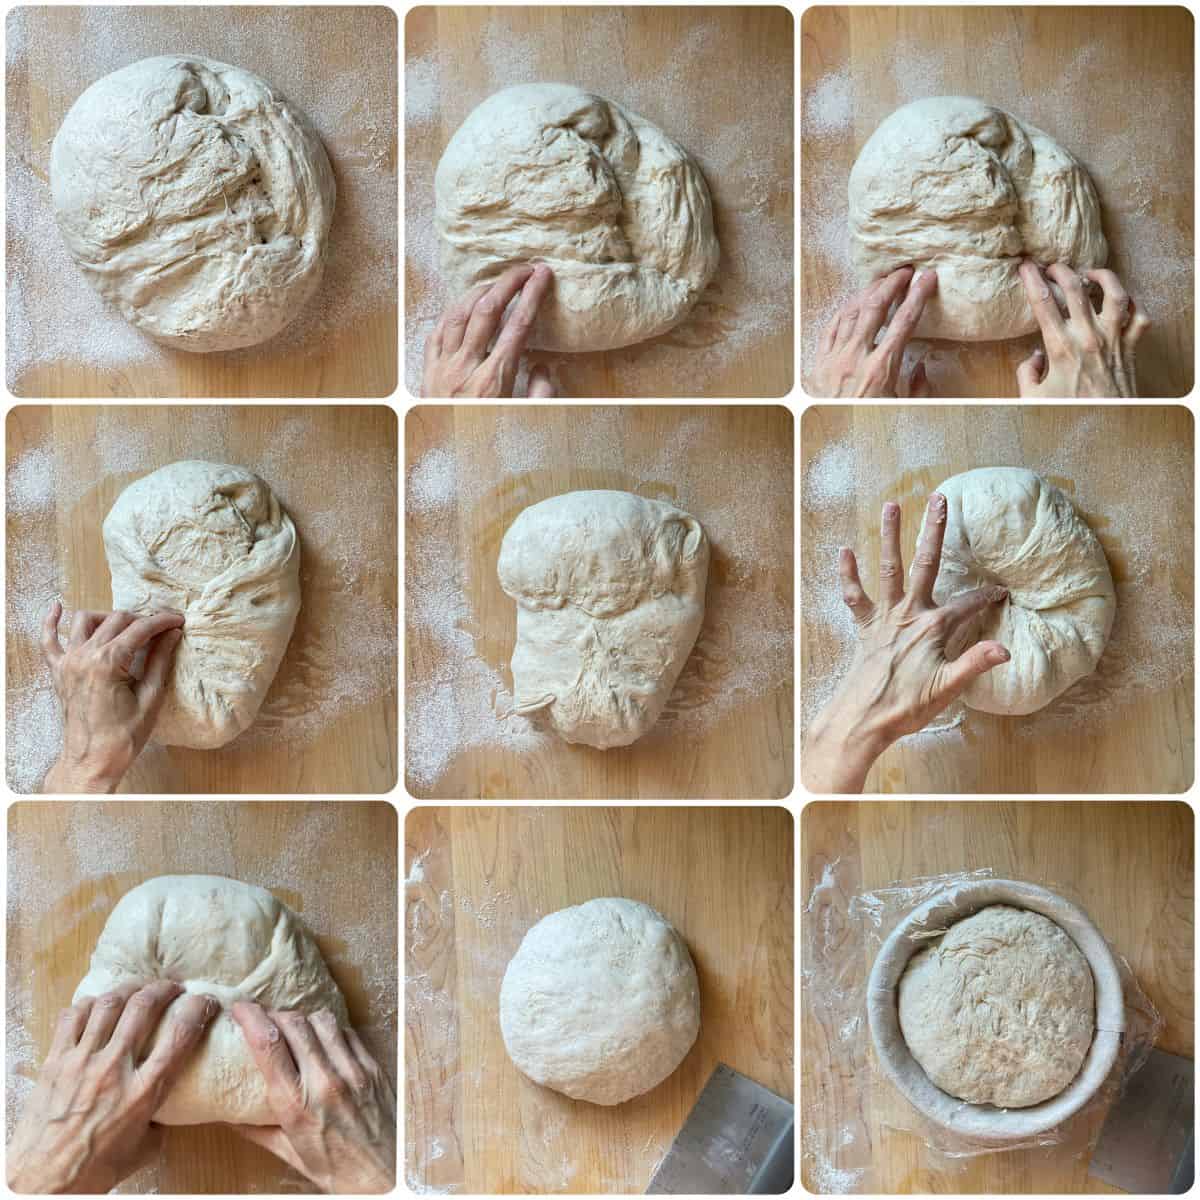
Shape and Final Proof
- Turn the dough out onto a lightly floured wooden board.
- Lift the bottom third of the dough and fold it toward the middle. Pinch to seal.
- Fold in the left side, then the right side, toward the center, and pinch as you go.
- Next, fold down the top third and pinch in place.
- One at a time, bring in the four corners toward the middle and pinch them in place.
- Roll the dough away from you, pinching the seam and sides to create surface tension. Gently press down with each turn to keep the shape tight.
- With the seam-side down, gently shape into a round ball. You can also use a bench scraper to help tighten the shape.
- Place the ball of dough seam-side up in a bread proofing basket.
- Cover and rest for 30 minutes in a warm place (an oven with the light on or proof mode works well).
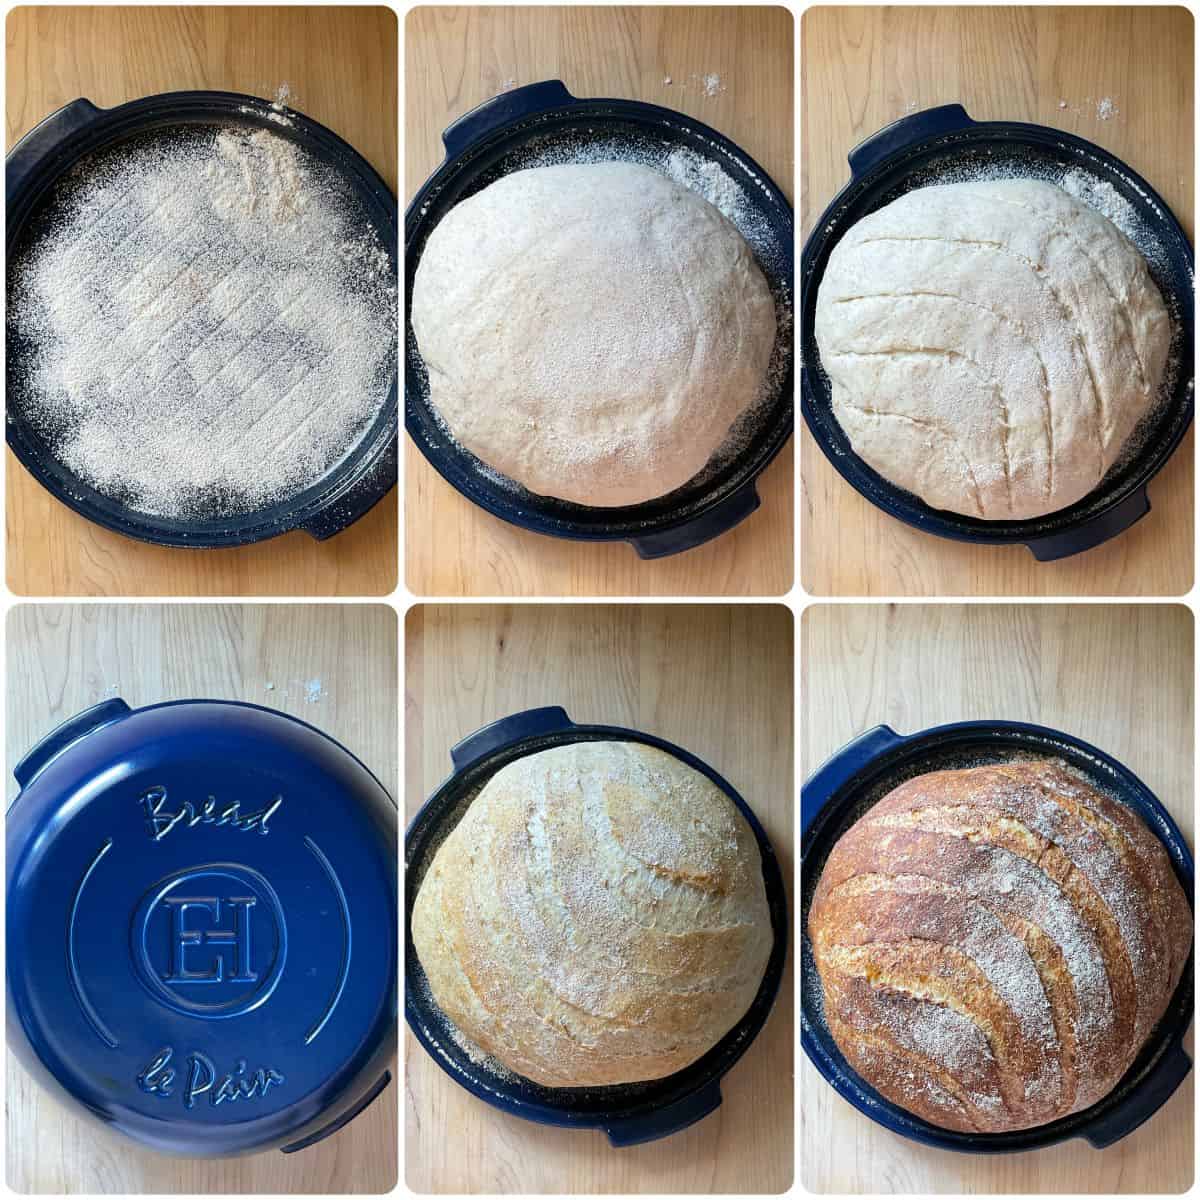
Score and Bake
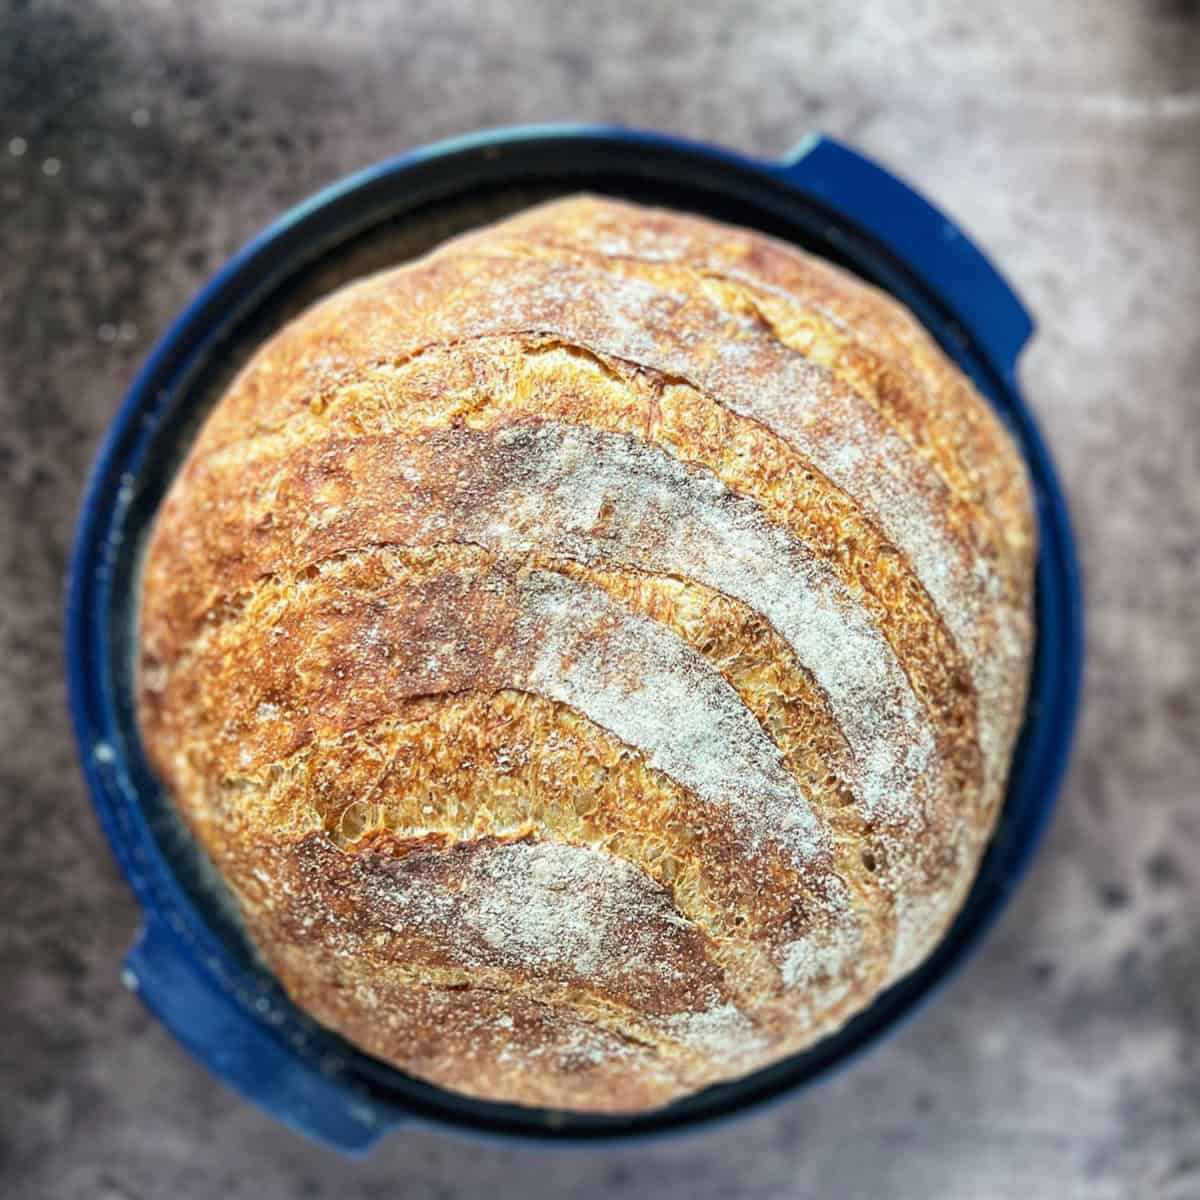
- Sift flour over the base of the bread baker (I have an Emile Henry bread baker).
- Gently transfer the dough from the proofing basket, placing it seam-side down on the base.
- Use a sharp knife or lame to score a few shallow cuts (¼ inch / 6 mm) lengthwise.
- Cover with the lid and place on the middle rack of the oven.
- Carefully add 1-2 cups of ice cubes to the hot metal pan on the lower rack.
- Bake for 30 minutes at 475°F (245°C).
- Remove the lid, reduce the heat to 425°F (220°C), and continue baking for an additional 15 minutes, until golden brown and hollow-sounding when tapped on the bottom.
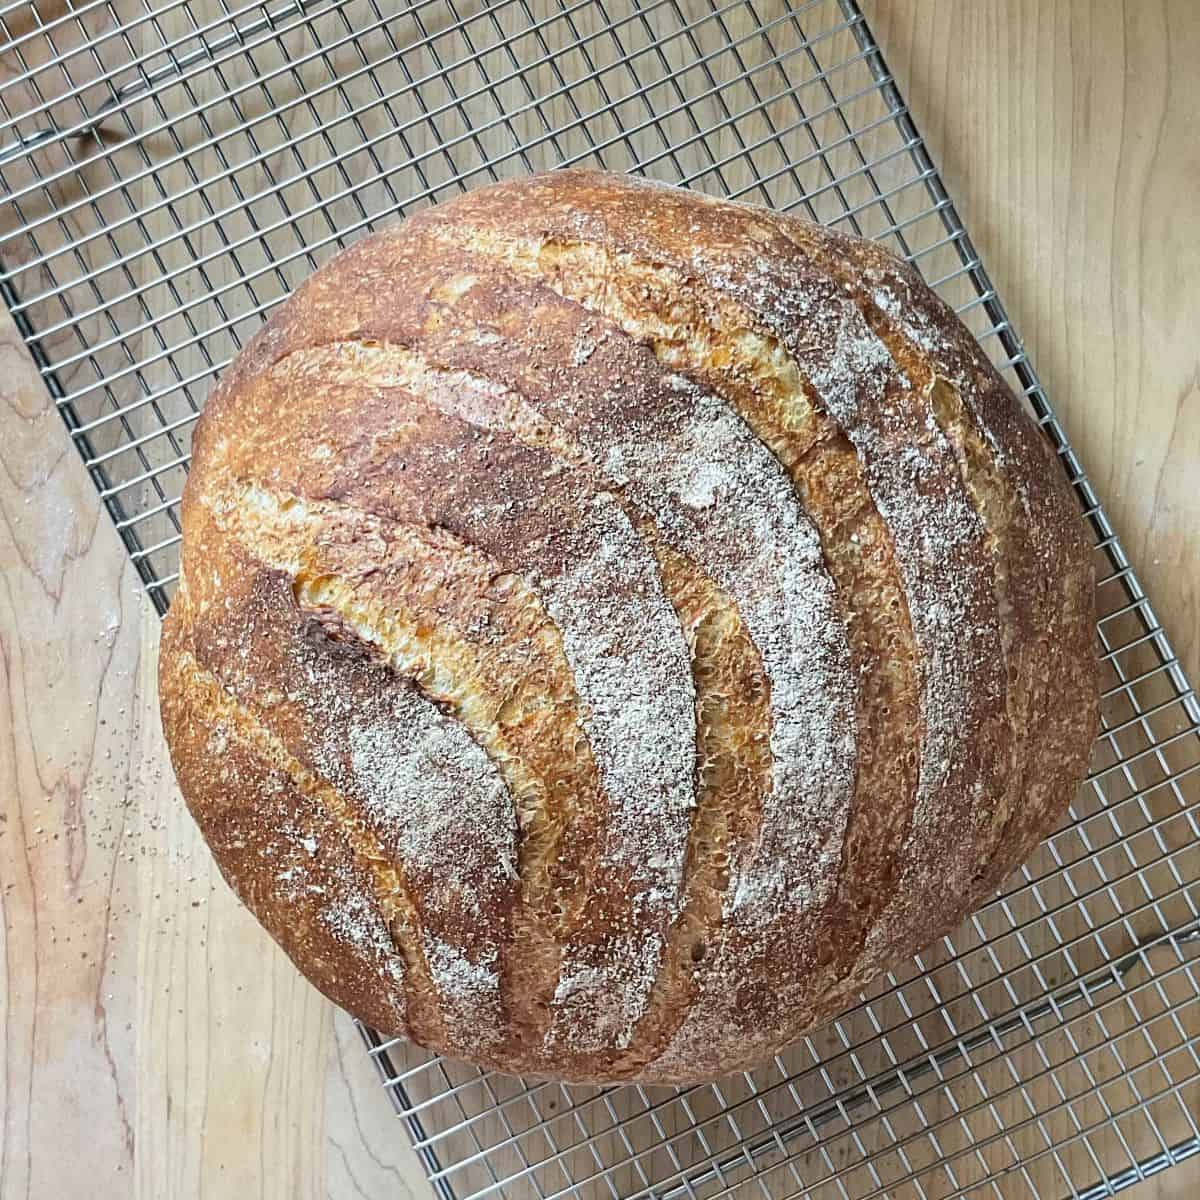
Cool and Serve
- Transfer the bread to a wire rack and let it cool for at least 1 hour before slicing.
Tips
- Measure ingredients accurately- use a kitchen scale if possible. Weighing the ingredients ensures consistent results every time.
- Use lukewarm water - too hot will kill yeast, too cold will slow the rise. Aim for 105-110°F (40-43°C).
- Handle sticky dough easily with wet fingertips - keep a small bowl of water nearby to dip your fingers in when working with the dough..
- Don't skip the rest periods - they let the gluten relax, making folds easier.
- Let the dough proof in a warm spot for best results - use an oven with the light on, set the oven proofing option to 80°F (27°C), or choose a draft-free kitchen counter.
- Score the top (optional) - helps direct the rise.
- Create steam - it keeps the crust soft and lets the rolls rise fully in the oven.
- Cool completely before slicing - cooling allows the crumb to set. Cutting too soon can make the bread gummy.
Serving Suggestions
- Appetizer: Cut into chunks and serve with a platter of marinated olives, cheeses, or cured meats.
- With soups and stews: Perfect for dipping into your favorite soups like this escarole and bean soup or this veal stew.
- Sandwiches: Slice and fill with Italian meats, cheeses, or Mediterranean roasted vegetables.
- With salads: Serve alongside this Italian green salad with olive oil and vinegar.
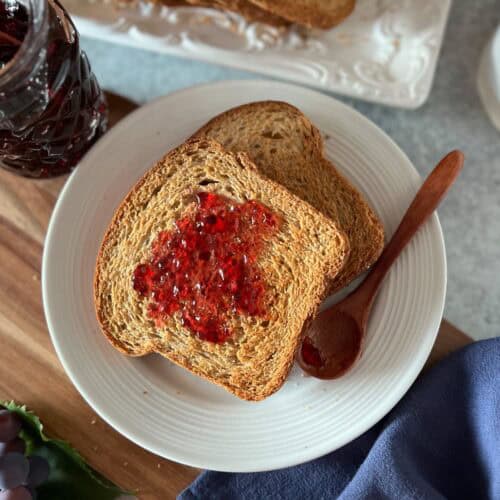
- Breakfast or snack: Toast slices and make this ricotta cheese toast or enjoy with blueberry jam.
FAQ
Yes, you can, but bread or pizza flour has higher protein, which helps create a chewier, airy crumb. Using all-purpose flour may result in a slightly denser loaf.
Absolutely! Instant yeast can be added directly to the flour, and it usually works slightly faster than active dry yeast.
Rustic Italian bread dough is naturally sticky. Resist the urge to add too much flour-stickiness helps create a light, airy crumb. You can lightly flour your hands and work surface when shaping.
Yes! Refrigerating the dough slows fermentation and can enhance flavor. Bring it to room temperature before baking.
The loaf should sound hollow when tapped on the bottom, and the crust should be deeply golden. Internal temperature should be about 95°C / 203°F.
Yes! A heavy cast-iron Dutch oven, like Le Creuset, works just as well. Preheat the pot in the oven, then carefully transfer the dough inside.
Yes, but you may need to create steam by adding a pan of water in the oven or covering the loaf loosely with foil to mimic the steam effect.
Store at room temperature for 2-3 days in a paper bag or bread box. For longer storage, slice and freeze-toast straight from the freezer for best results.
Yeast Bread Recipes


Recipe Origins
This recipe has a very personal beginning. Last Christmas, my son and daughter-in-law surprised me with an Emile Henry bread baker. That thoughtful gift sparked an unexpected baking adventure. Since then, I've been experimenting with techniques and styles to create the perfect rustic Italian bread.
Along the way, I discovered a shaping method from Keep It Sweet Kitchen that worked beautifully with this dough. I adapted it to create a tighter, more structured loaf.
The result is this pagnotta: a traditional Italian round bread with a hearty crust and tender crumb.
THANKS SO MUCH for following and being part of the She Loves Biscotti community, where you will find Simple & Tasty Family-Friendly Recipes with an Italian Twist.
Ciao for now,
Maria
We are a participant in the Amazon Services LLC Associates Program, an affiliate advertising program designed to provide a means for us to earn fees by linking to Amazon.com and affiliated sites.
If you are interested, the Emile Henry bread baker I am using is available on Amazon. Follow the affiliate link for all the details.
★★★★★ If you have made this recipe for rustic bread, I would love to hear about it in the comments below and be sure to rate the recipe!
Recipe
Rustic Italian Bread: Pagnotta Recipe
WANT TO SAVE THIS RECIPE?
Ingredients
- 500 grams bread or pizza flour approx. 3½ cups
- 125 grams whole wheat flour approx. 1 cup
- 3.5 grams active dry yeast 1 teaspoon
- 4 grams granulated sugar 1 teaspoon
- 465 grams water 2 cups, lukewarm
- 10 grams salt 1½ teaspoons
- additional flour for dusting the wooden board
Instructions
- Mix dry ingredients: Whisk both flours, yeast, and sugar in a large bowl.
- Combine: Make a well in the flour mixture, pour in the water, and mix into a shaggy dough. Cover and rest for 2-3 minutes.
- Add salt: Sprinkle salt over the dough and mix until well incorporated. Cover and let the dough rest in a warm spot for 15 minutes. (Oven with light on or proof mode works well.)
- Stretch and fold: Perform 2 sets of stretch-and-folds and 2 sets of coil folds, resting for 15 minutes between each (REFER TO RECIPE NOTES FOR DETAILS).
- Preheat the oven to 475°F (245°C) with a pizza stone on the middle rack and a metal pan on the lower rack.
- Turn out dough: Invert onto a floured surface.
- Shape and form bread: Fold, roll, cup, and shape into a round ball of dough. Place seam-side up in a bread proofing basket. (REFER TO RECIPE NOTES FOR DETAILS).
- Final proof: Cover loosely with plastic wrap and a tea towel and proof for 30 minutes in a warm spot.
- Transfer, score & bake: Gently transfer (seam side down) onto your baker. Shallow cut lengthwise, cover with lid, and place on the middle oven rack. Add ice cubes to the pan on the lower rack. Bake for 30 minutes at 475°F (245°C). Then remove lid, reduce the heat to 425°F (220°C) and bake for 15 minutes or until golden brown and the bottom sounds hollow when tapped.
- Cool: Transfer to a wire rack to cool before slicing.
- The total weight of the baked bread is approximately 1 kilogram, yielding about 25 slices, each weighing roughly 40 g.
- Detailed step-by-step photos are included in the article. You can also watch the video on the recipe card to see how to shape the bread.
Video
Notes
- With wet or lightly dampened hands, lift one side of the dough, stretch it up, and fold it over the center. Rotate the bowl ¼ turn and repeat until you've gone around (about 4 folds).
- Flip the dough over and gently shape it into a ball.
- Cover and rest 15 minutes in a warm place (an oven with the light on or proof mode works well).
- Repeat the same stretch-and-fold sequence and rest for another 15 minutes.
- With wet or lightly dampened hands, gently lift the dough from the middle so it sags down on both sides.
- Fold it under itself (like tucking it in) and let it drop back into the bowl.
- Rotate the bowl and repeat once more.
- Roll into a ball. Cover and rest for 15 minutes in a warm place (an oven with the light on or proof mode works well).
- Repeat the same coil-fold process one more time, then rest for another 15 minutes.
- Turn the dough out onto a lightly floured wooden board.
- Lift the bottom third of the dough and fold it toward the middle. Pinch to seal.
- Fold in the left side, then the right side, toward the center, and pinch as you go.
- Next, fold down the top third and pinch in place.
- One at a time, bring in the four corners toward the middle and pinch them in place.
- Roll the dough away from you, pinching the seam and sides to create surface tension. Gently press down with each turn to keep the shape tight.
- With the seam-side down, gently shape into a round ball. You can also use a bench scraper to help tighten the shape.
- Place the ball of dough seam-side up in a bread proofing basket.
- Cover and rest for 30 minutes in a warm place (an oven with the light on or proof mode works well).
- Lukewarm water (105-110°F / 40-43°C)
- Wet fingertips to handle sticky dough
- Rest periods make folds easier
- Warm proof (80°F / 27°C) - oven light on works great
- Score to guide the rise (optional)
- Steam for a soft crust & full rise
- Cool completely before slicing
Teri
I made this bread today. It came out wonderful!! My husband and son loved it with the lasagna I made. Thank you for a great recipe. It is a keeper!!
Maria
Thanks so much for sharing Teri ♥ So happy to read this!
Stella oddo
Dear Maria when are you going to do a cook book with all your wonderful recipes l live in Australia and always read your recipes but it would be nice to have a book with all of them . Yours thankful Stella
Maria
Thank you so much for your support Stella ♥
val
This is an amazing bread Maria! Such a wonderful texture! Thank you for another wonderful recipe.
Maria
How wonderful! Thanks for sharing Val!
Adriana
I’m confused as to why we need a pizza stone if we’re baking the bread on a pan or Dutch oven. Hubby loves pagnottas so I’ll definitely be trying this…….soon as weather cools down a bit 😉
Maria
Great question Adriana! Honestly, the mention of the pizza stone was a bit of a happy accident on my part — I had left it in the oven from another recipe, and since the oven was already heating, I decided to just leave it there. I noticed the bread baked up with a slightly crisper crust and nicer texture, so I’ve kept using it ever since. That said, it’s definitely optional, especially if you’re baking in a Dutch oven or bread baker, which already does a wonderful job. I hope you and your husband enjoy the pagnotta once the weather cools down — it’s such a cozy bread to bake and share!
Adriana
Thanks Maria 🤗. I do have a pizza steel which, since it’s too heavy to keep moving around, stays on the bottom rack. I do find that food cooks a few minutes faster so have to keep watch especially cookies and cakes.
Maria
My pleasure ❤️ You are all set, enjoy!
Linda
I made this last night using all-purpose flour plus red winter wheat flour I’d ground in my Mockmill. I used a cast iron Dutch oven as the baking vessel. The loaf turned out beautifully. This recipe is a keeper! 😊
Maria
So thrilled to read this Linda! Thanks so much for sharing.
Jacquelinr
Can’t see video just ads on loop
Maria
Hi Jacquelinr, thank you so much for letting me know! The video seems to be working on my end (I tested it on a few different devices), so it might be a browser or ad-blocker issue. Could you try refreshing the page, or opening it in a different browser/window to see if that helps? Also, sometimes clearing your cache can fix looping issues. I really appreciate you taking the time to let me know — and please feel free to update me if you’re still having trouble!