

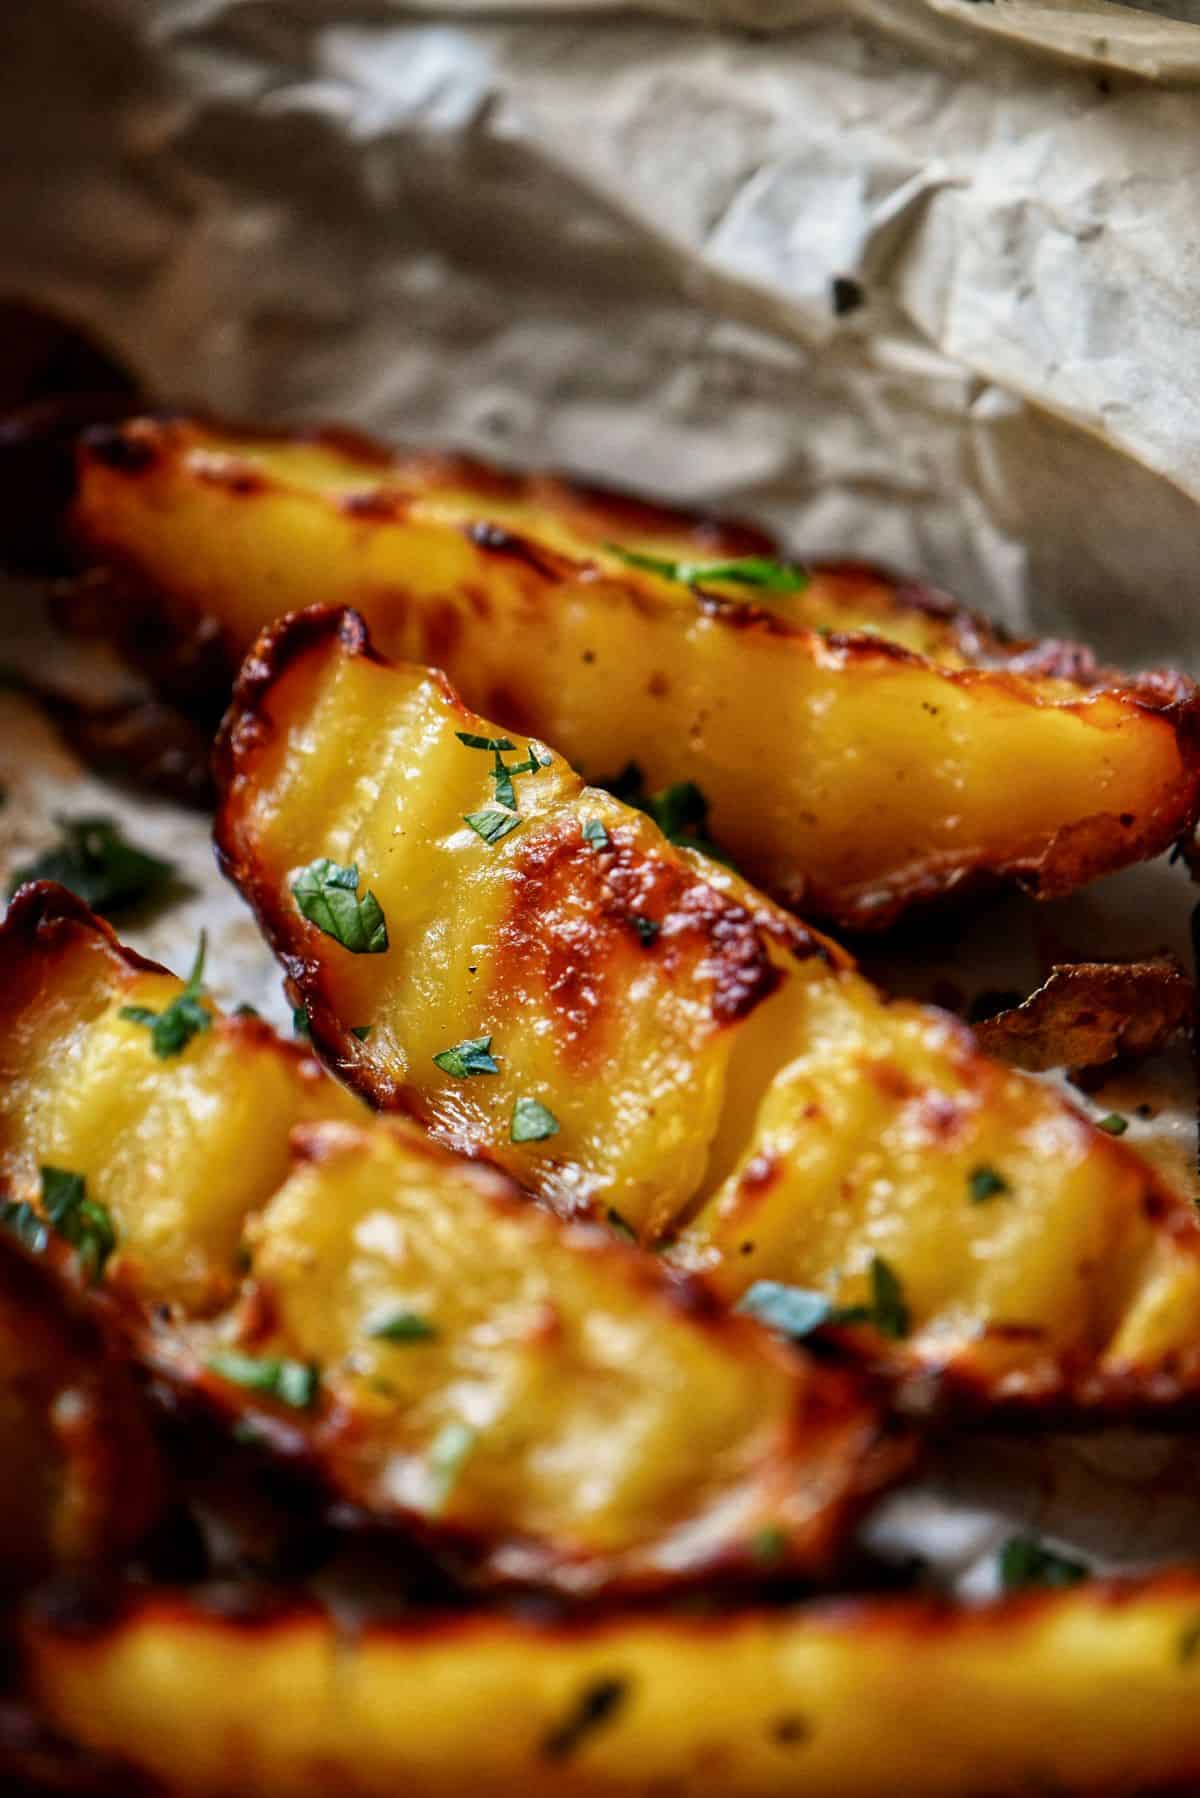
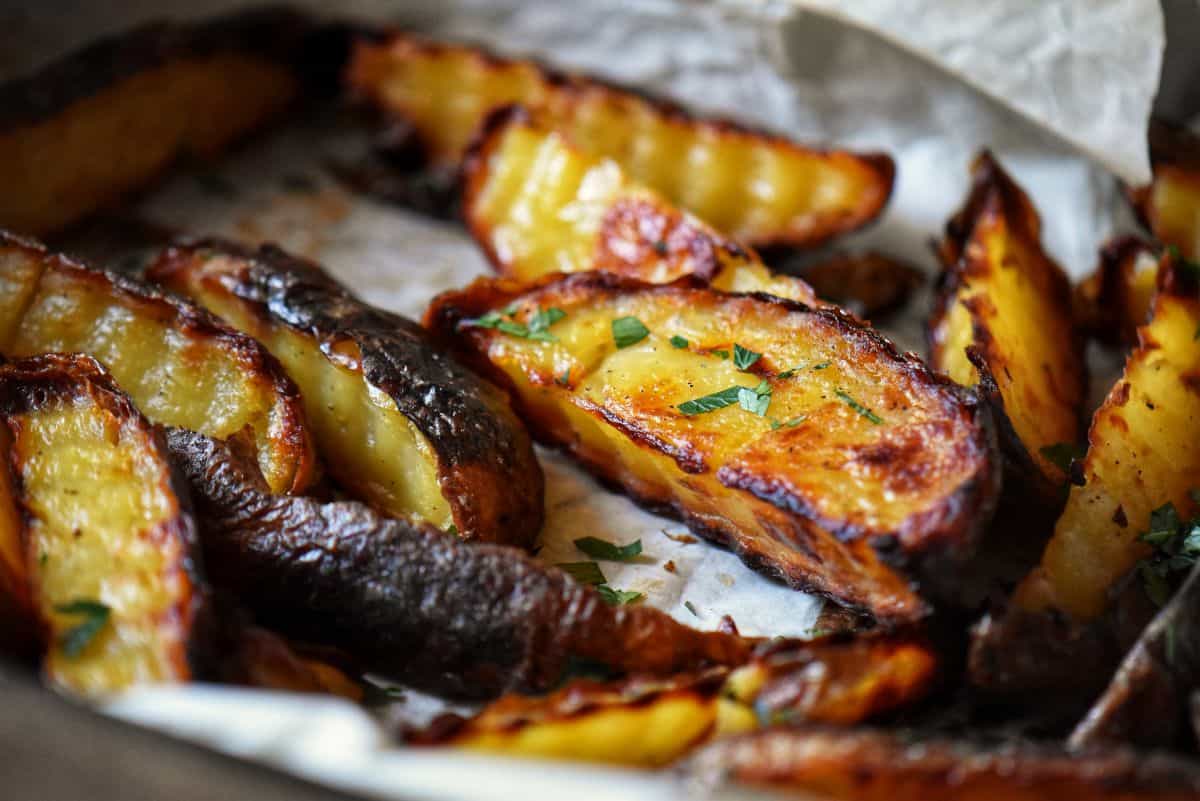
Finally, baked potato wedges that are actually crispy! This easy double-bake method creates golden, restaurant-style wedges with minimal hands-on time.
Tired of baked potato wedges that promise crispiness but end up soft and soggy?
You're not alone. Most oven-baked versions just don't deliver that golden, crunchy exterior that makes restaurant-style wedges so irresistible.
My family loves potatoes in every form, but I've never been a fan of deep frying at home - too much mess, oil, and cleanup. Not to mention, it's not exactly the healthiest option. That's what inspired me to perfect this simple method for getting restaurant-quality results straight from the oven.
The secret isn't a special ingredient or fancy equipment - it's all about the method. This double-bake technique transforms ordinary potatoes into perfectly crisp wedges with tender, fluffy centers - all without the need for frying.
And the best part? It's mostly hands-off. With just 10 minutes of active prep, you'll bake the potatoes whole, let them cool, slice them into wedges, then bake again with perfectly timed seasoning. The result: beautifully golden, crunchy wedges that everyone will love.
Ready to finally master crispy baked potato wedges - no frying required? Before we dive in, let me show you why this technique makes all the difference.
Jump to:
Why This Double-Bake Method Works
As a retired dietitian, I've always loved understanding the why behind good food - and this method is a perfect example of how science and simplicity come together to create something amazing.
The magic happens during cooling. When you bake potatoes whole, their starches gelatinize and then firm up as they cool - a process known as retrogradation. This gives the potatoes structure, allowing them to crisp up beautifully during the second bake.
It's all about moisture control. Baking the potatoes whole first lets excess moisture escape slowly. By the time you slice and bake them again, those surfaces are nice and dry - which means they'll brown instead of steam.
You get double the browning. Think of it as two chances for that golden, crispy magic to happen - once in the first bake, and again when those freshly cut sides hit the heat.
Why cutting raw potatoes doesn't work as well: When the surface is too wet and the starches haven't set, you end up with soft, soggy wedges, no matter how long they stay in the oven.
This double-bake method isn't about taking longer - it's about working smarter. And the reward? Perfectly crisp, golden wedges every single time.
Quick Overview
- Prep Time: 10 minutes
- Bake Time: 90-120 minutes (includes second bake)
- Cooling Time: 30 minutes
- Total Time: 2-2½ hours
- Yield: Serves 4
- Serving Suggestions: Enjoy these crispy potato wedges as a side to roasted meats, baked cod fish, or a simple salad. They're also great on their own with a sprinkle of smoked paprika, Italian parsley, and Parmesan. You can also serve them with your favorite dipping sauce - think garlicky aioli, marinara, or a simple garlic yogurt sauce.
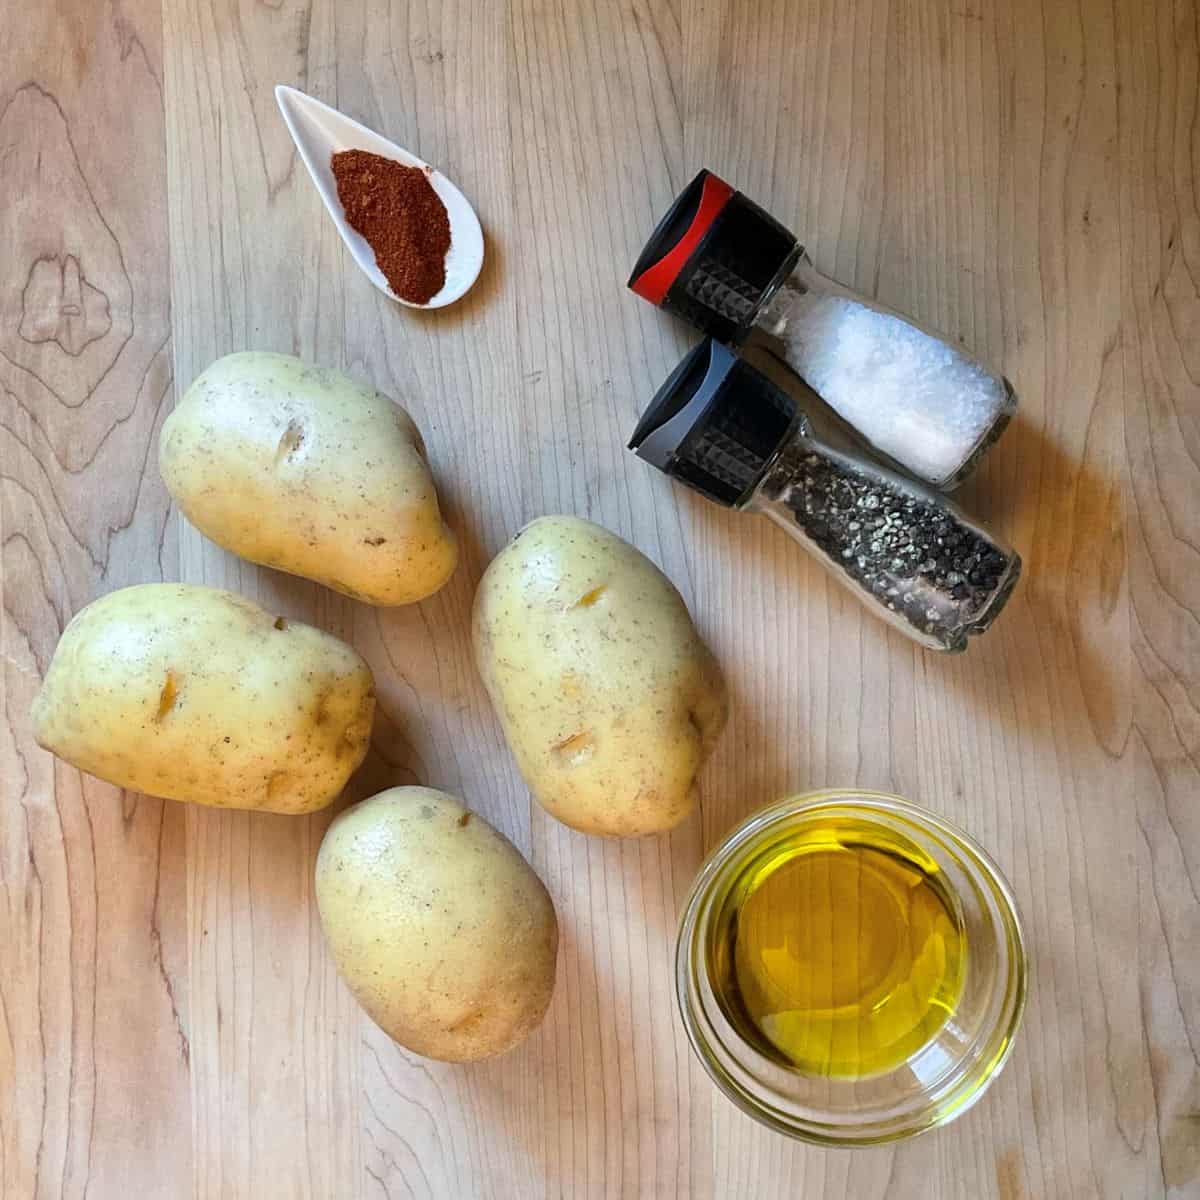
Ingredients
- Potatoes: Yukon Gold are my go-to for this recipe - they have just the right balance of creaminess and structure - but Russets work just as well.
- Olive oil: Just enough to coat the potatoes lightly for both the first and second bake.
- Salt and pepper: To season before the first bake and again after slicing into wedges.
- Paprika (optional): Adds a touch of color and mild flavor during the second bake.
- Optional garnishes: A sprinkle of freshly chopped Italian parsley and a light dusting of Parmesan cheese just before serving for a finishing touch.
Step-by-Step Instructions
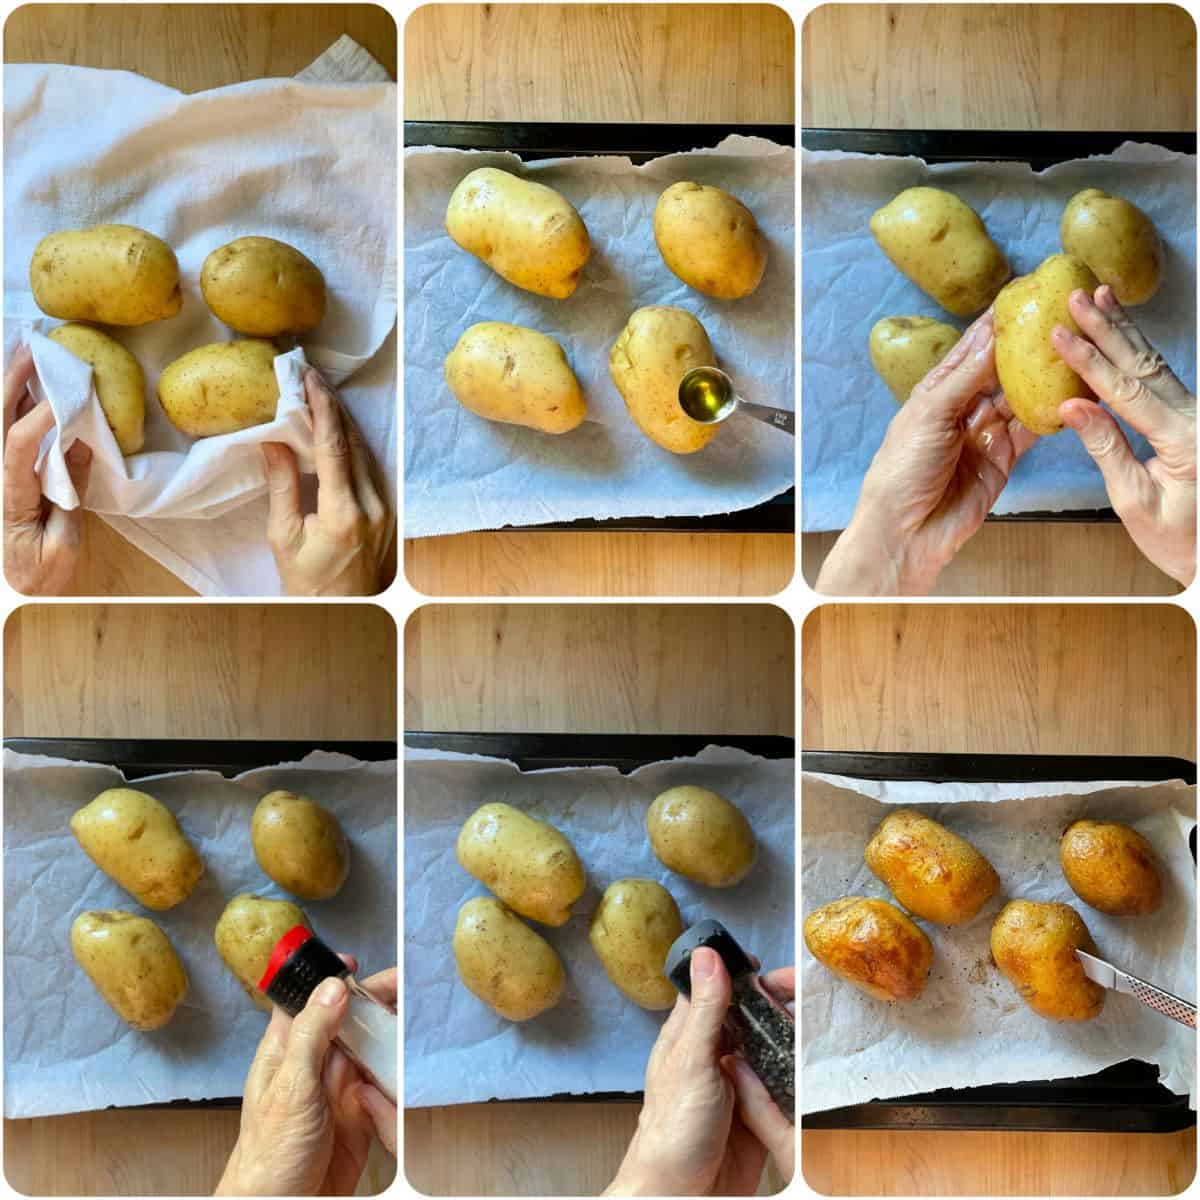
Step 1: Bake the potatoes whole
Preheat your oven to 400°F (200°C). Scrub 4 potatoes well and pat them dry. Rub each one lightly with olive oil and season with salt and pepper. Place them on a parchment-lined baking sheet. Bake until just tender when pierced with a knife, about 40-50 minutes, depending on their size. Flip the potatoes halfway through baking for slightly more even browning.
Step 2: Let them cool
Once baked, transfer the potatoes to a wire rack or plate and let them cool for 30 minutes, until just warm to the touch.
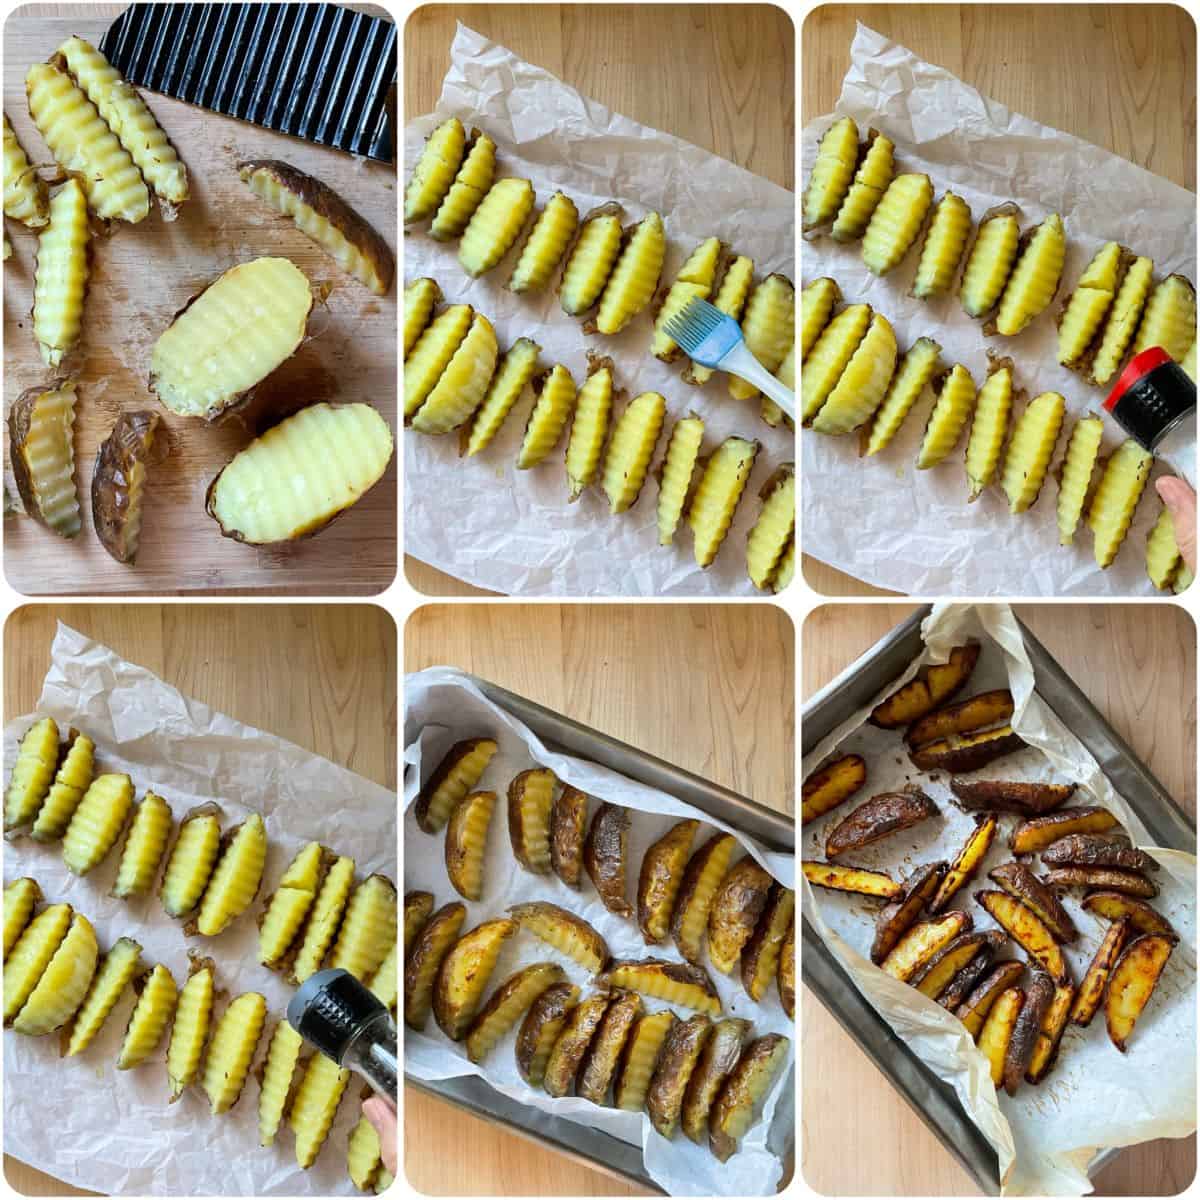
Step 3: Slice and season
Once cool, cut each potato into 6 wedges. Place them on parchment paper. Brush with just enough olive oil to coat. Sprinkle with salt and pepper.
Step 4: Preheat your baking sheet
Place an empty baking sheet in the oven and preheat to 425°F (220°C). Once hot, carefully remove it and transfer the seasoned potatoes for the second bake.
Step 5: Bake again for crispiness
Carefully arrange the wedges in a single layer on the hot baking sheet, cut sides down. Bake until the bottoms are golden brown, about 30-40 minutes. If desired, sprinkle with ground paprika, then flip each wedge and continue baking for another 20-30 minutes, or until both sides are crisp and beautifully golden.
Step 6: Add finishing touches
Remove from the oven and sprinkle with a little extra salt if needed. For a simple finish, top with freshly chopped Italian parsley and/or a light dusting of Parmesan cheese.
Step 7: Serve and enjoy
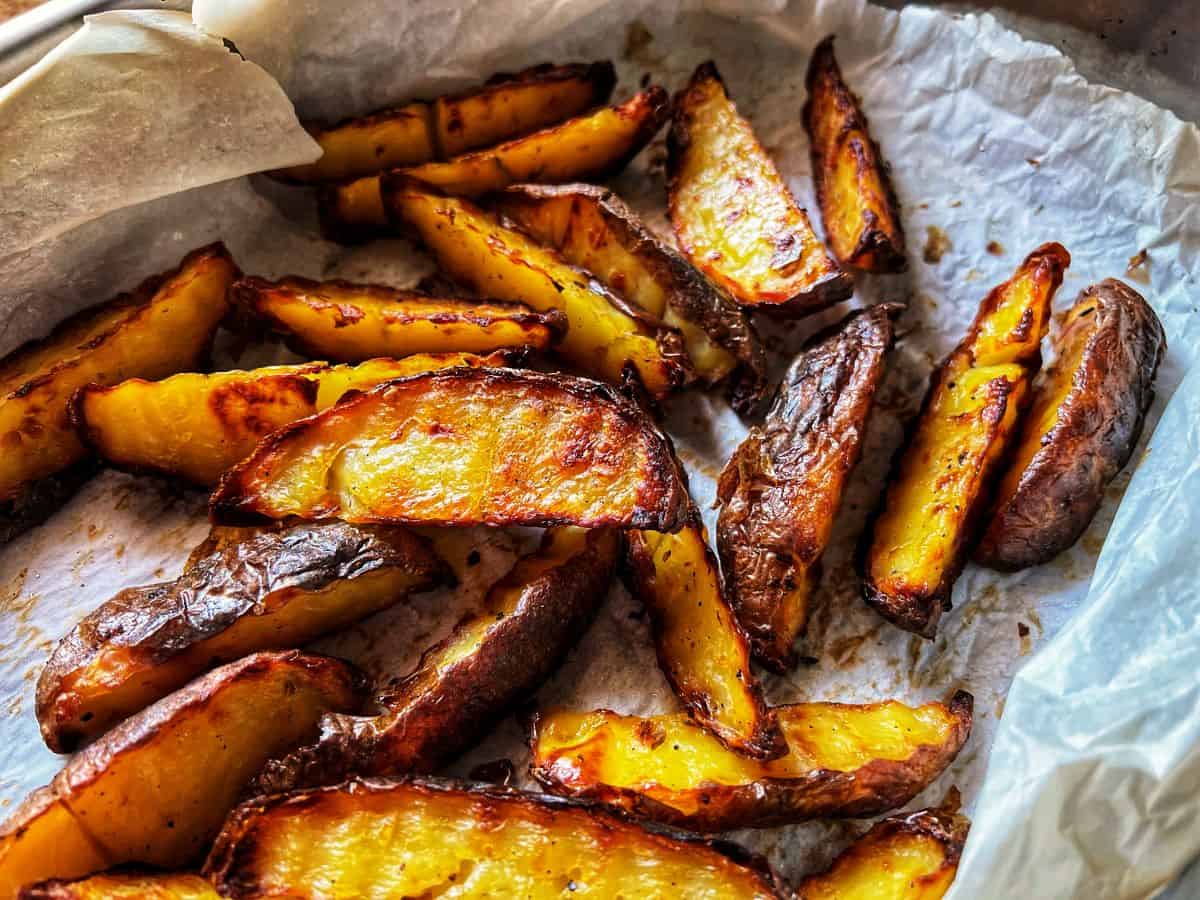
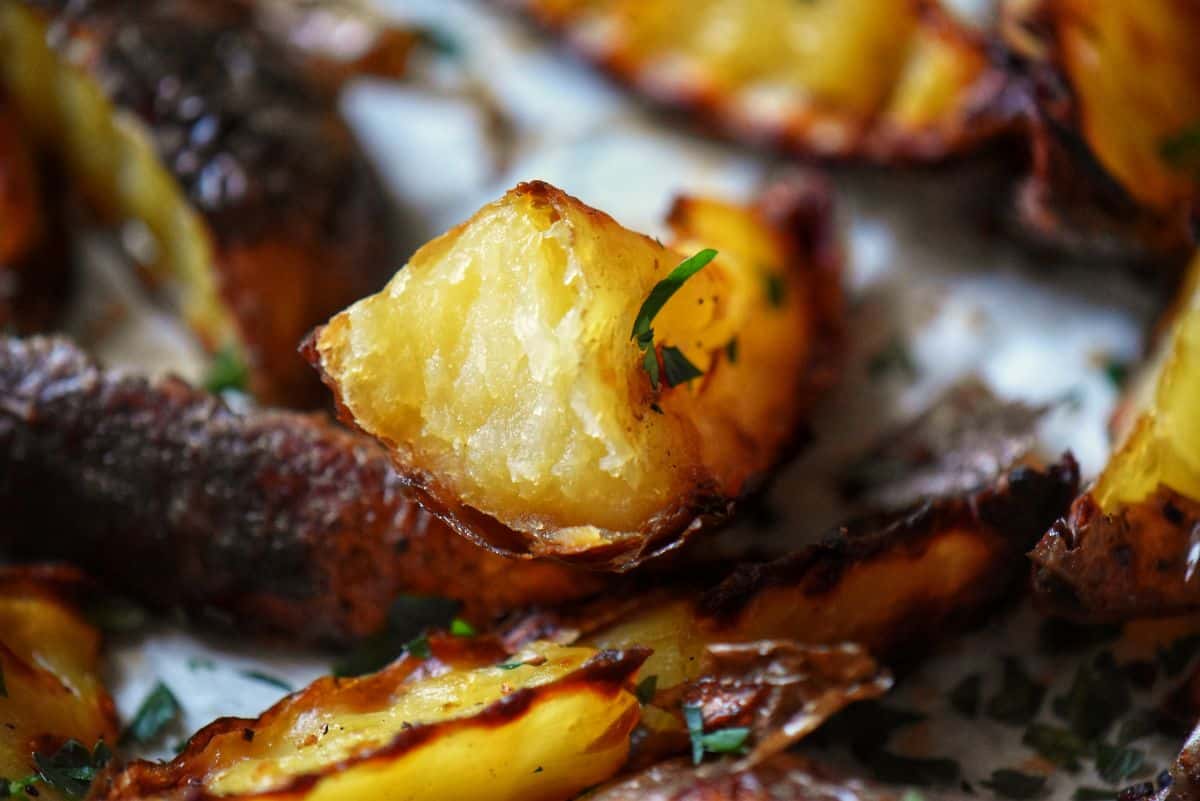
Serve hot, straight from the oven. These wedges are crispy on the outside, soft and fluffy inside - and the best part? No frying required.
Tips
- Choose evenly sized potatoes. Similar sizes ensure uniform cooking during that crucial first bake - no overcooked or undercooked spots.
- Always start with a fully preheated oven. Baking the potatoes in a hot oven helps the skins firm up and moisture escape evenly, setting the stage for crisp, golden wedges during the second bake.
- Cool before slicing. Let the potatoes rest for 20-30 minutes, until they are just warm to the touch. They’ll slice cleaner and maintain their wedge shape better than piping hot potatoes.
- Start with a hot baking sheet. Preheat your pan in the oven so wedges begin crisping the moment they make contact with the surface.
- Give them breathing room. Crowded wedges steam each other instead of crisping. Leave space between each piece for proper air circulation.
- Time your paprika right. If you notice your oven runs hot, add it halfway through the second bake (after flipping) to get that beautiful color without any bitter, burnt flavor.
- Finish with flair. A sprinkle of fresh parsley or grated Parmesan after baking adds restaurant-quality color and flavor.
Serving Suggestions
These crispy baked potato wedges make a great side for just about anything - from roast chicken and salmon croquettes to tuna patties or your favorite sandwich. They're also delicious on their own with a side of ketchup, aioli, or even a healthy tartar sauce.
FAQ
Yes - but the baking times will vary. Very thick wedges may need extra baking time on the second bake to get crisp all the way through. Very thin ones might crisp faster and risk burning, so keep a close eye.
You can add simple seasonings (salt, pepper, light herbs) before the first bake, but for more delicate or volatile spices (garlic powder, fresh herbs) it's often better to reserve or partially add them on the second bake. That way they don't burn or brown too quickly, and their flavor stays fresh and bright.
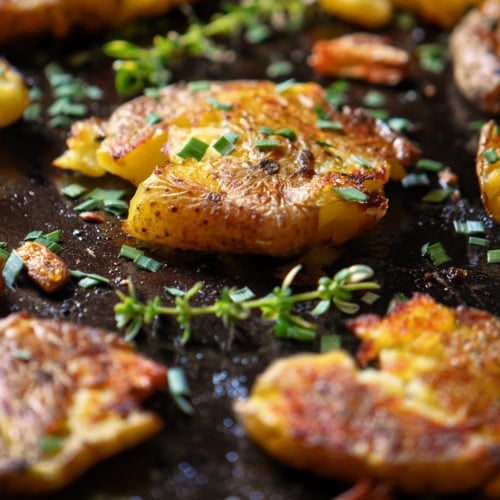
More Potato Recipes You'll Love

Recipe Origins
I’ve been baking potatoes for as long as I can remember, but it always frustrated me that oven-baked wedges never turned out quite as crispy as I wanted - until I discovered this double-bake method completely by accident.
One evening, I had baked a few potatoes ahead of dinner, but plans changed and they sat on the counter for a while. I finally decided to slice and bake them for later; the results were shockingly crisp - far better than any “quick” wedge recipe I’d tried before.
As a retired dietitian, I enjoy discovering ways to make classic comfort foods healthier without compromising flavor or texture. This technique was perfect: crispy, restaurant-style wedges that required no frying.
This double-bake method has become my go-to for perfectly crispy wedges every time - no frying, no fuss, just reliable results that combine food science with family-friendly flavor.
Give them a try, I promise they'll quickly become a family favorite!
THANKS SO MUCH for following and being part of the She Loves Biscotti community, where you will find Simple & Tasty Family-Friendly Recipes with an Italian Twist.
Ciao for now,
Maria
Recipe

Restaurant-Style Crispy Oven Baked Potato Wedges Recipe
WANT TO SAVE THIS RECIPE?
Ingredients
- 4 Yukon Gold potatoes
- 2-4 tablespoons olive oil
- kosher salt to taste
- black pepper to taste
- 2 tablespoons Italian flat-leaf parsley fresh and chopped, optional
Instructions
- Preheat oven to 400°F (200°C). Scrub potatoes, pat dry, rub with olive oil, and season with salt and pepper.
- Bake whole: Place on a parchment-lined baking sheet and bake 40-50 minutes, until tender. Flip the potatoes halfway through baking for slightly more even browning.
- Cool: Once baked, transfer the potatoes to a wire rack or plate and let them cool for 30 minutes, until just warm to the touch.
- Slice and season: Cut into wedges, then place them on parchment paper. Brush the cut sides with olive oil, and season with salt and pepper.
- Preheat baking sheet: Place an empty sheet pan in the oven at 425°F (220°C).
- Bake wedges: Transfer potatoes (with the parchment paper) to the hot sheet pan. Place cut sides down and bake about 30-40 minutes. If desired, sprinkle with ground paprika, then flip each wedge and continue baking for another 20-30 minutes, or until both sides are crisp and beautifully golden.
- Serve: Optionally garnish with chopped parsley and/or grated Parmesan, and enjoy hot.
Video
Notes
- Choose evenly sized potatoes. Similar sizes ensure uniform cooking during that crucial first bake - no overcooked or undercooked spots.
- Always start with a fully preheated oven. Baking the potatoes in a hot oven helps the skins firm up and moisture escape evenly, setting the stage for crisp, golden wedges during the second bake.
- Cool before slicing. Let the potatoes rest for 20-30 minutes, until they are just warm to the touch. They’ll slice cleaner and maintain their wedge shape better than piping hot potatoes.
- Start with a hot baking sheet. Preheat your pan in the oven so wedges begin crisping the moment they make contact with the surface.
- Give them breathing room. Crowded wedges steam each other instead of crisping. Leave space between each piece for proper air circulation.
- Time your paprika right. If you notice your oven runs hot, add it halfway through the second bake (after flipping) to get that beautiful color without any bitter, burnt flavor.
- Finish with flair. A sprinkle of fresh parsley or grated Parmesan after baking adds restaurant-quality color and flavor.
Mary
Now, why didn’t I think of that! I shall be trying this way for wedges the very next time I want them. Thanks for sharing! 😂
Maria
My pleasure Mary! I can never make enough of these! Enjoy!