

Would you like to know How to Remove Pomegranate Seeds? Is it the whacking method with a wooden spoon? Or perhaps the underwater experience? Do you trust Martha Stewart or Jamie Oliver’s method? Only one way to find out!
Have you avoided eating this wonderful ruby red fruit because it was too messy to deal with? Or perhaps you are not sure how to open a pomegranate, so you figure why bother?
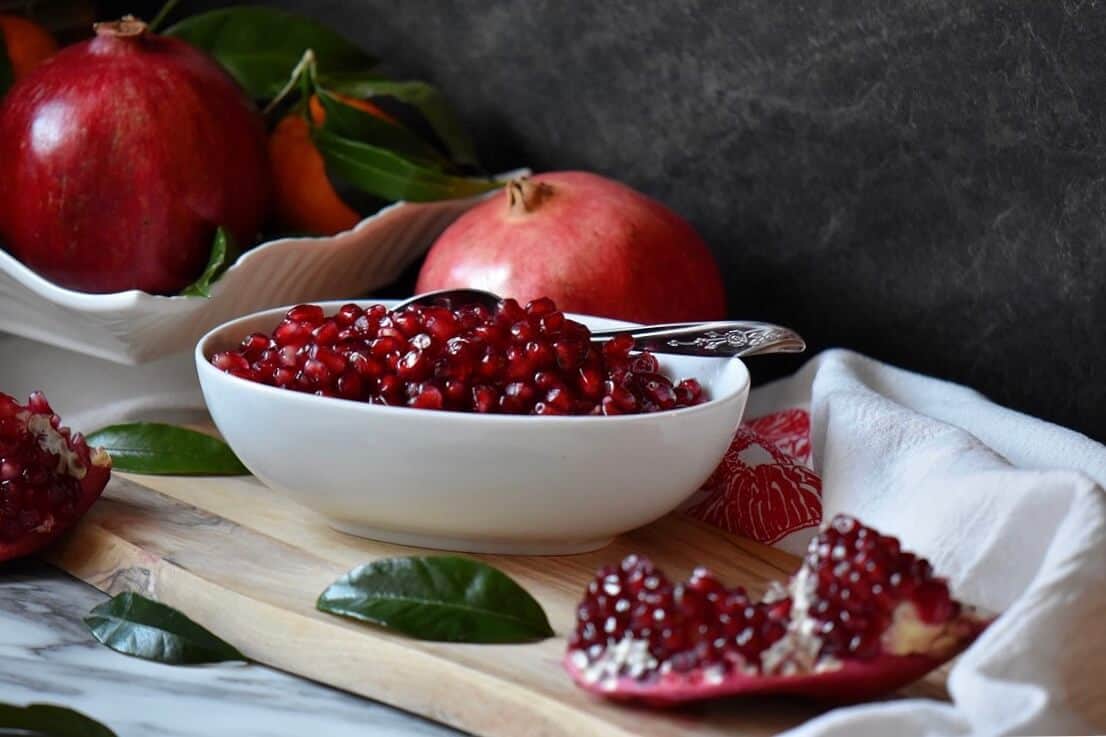
I hope that once you see for yourself how to remove pomegranate seeds easily, you will be as excited as I am when pomegranates are on the market!
Pomegranates are usually in season (in the Northern Hemisphere) from late September right through to February.
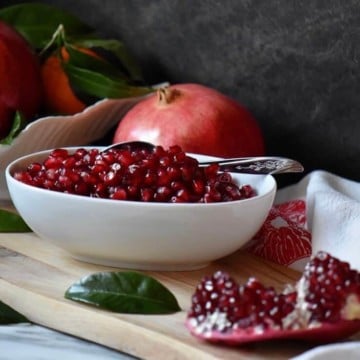
These seeds are a great addition to salads. For example, in this fennel orange salad, the fresh arils and pine nuts create a fantastic texture contrast that makes this simple salad even more delicious!
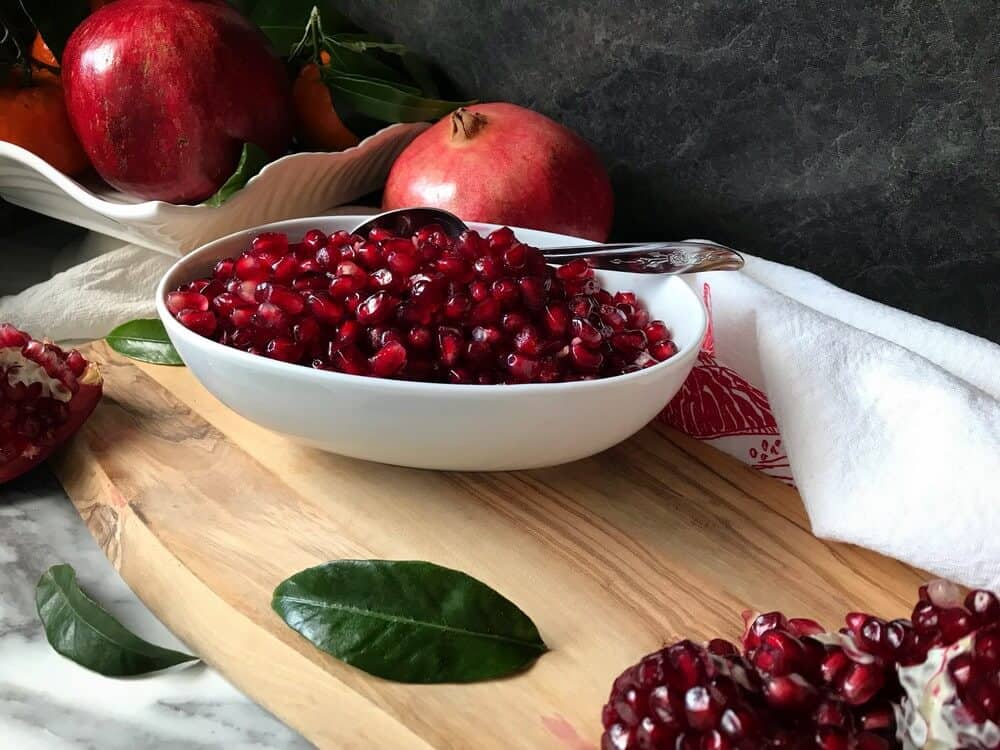
The seeds have a sweet, tangy taste that you just can’t put your finger on, but it’s so hard not to eat them! Not to mention that wonderful pop of color!
Before discussing the best way to remove pomegranate seeds, also referred to as arils, it is essential to choose the best pomegranates.
How to tell if a pomegranate is ripe
There is nothing more frustrating than spending a few dollars on a pomegranate, prying it open, only to find it is unripened or past its due date.
Let's look at some of the characteristics to look for to help you choose the best pomegranate.
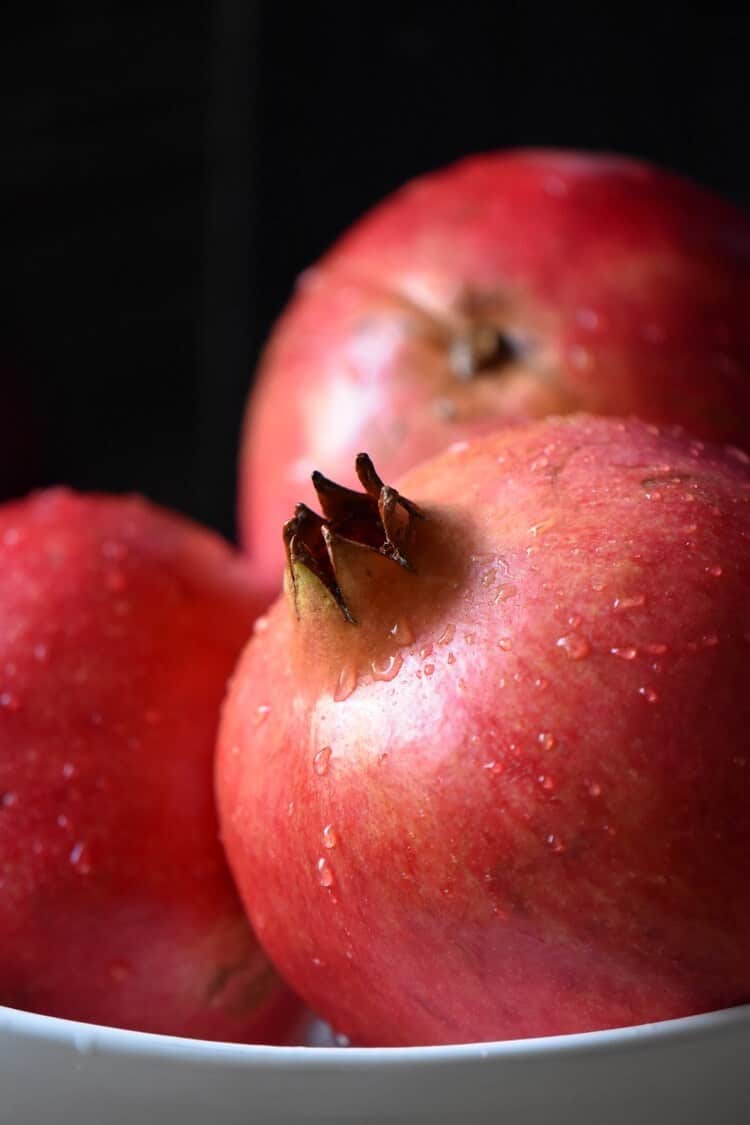
Color
This can vary from a glossy bright to a dark, deep red color; always look for those pomegranates with that deep red color, as this will indicate that the fruit has ripened. Once it is picked, the pomegranate does not ripen;

Shape
Look for that hexagonal shape, that is to say, sides that are angular (as shown by the arrows); this is a clear indicator that the seeds have ripened and are full of juice, just waiting to explode. A round-shaped pomegranate is an indicator of an under-ripe pomegranate, best not to purchase;
Skin
Look for smooth leathery skin, free from wrinkling and with no signs of shrinking. It should feel smooth, firm and tight;
Weight
Look for a pomegranate that feels heavy for its size. You should be pleasantly surprised as to how heavy it feels once you have picked one up. This is a sure signal that the pomegranate seeds are juicy.
How many seeds in a pomegranate?
Do you know how many seeds there are in a pomegranate?
If you said an average of 613 you would be correct! [source]
If not consumed right away, refrigerate your pomegranate to ensure freshness. The entire pomegranate can be refrigerated for a few weeks or if you prefer, the seeds can be frozen.
How to freeze the individual pomegranate seeds
Simply place the seeds on a baking sheet that has been lined with parchment or wax paper. After a couple of hours, place the individual frozen seeds in a resealable plastic bag or container. This is so convenient, especially when you want to sprinkle a few seeds on yogurt, a breakfast bowl, an Italian trifle or in salads like this spinach salad.
Parts of a pomegranate
Now that we have purchased the best pomegranate let’s quickly examine the exterior and interior of a pomegranate. This will help us understand why and where certain incisions are made
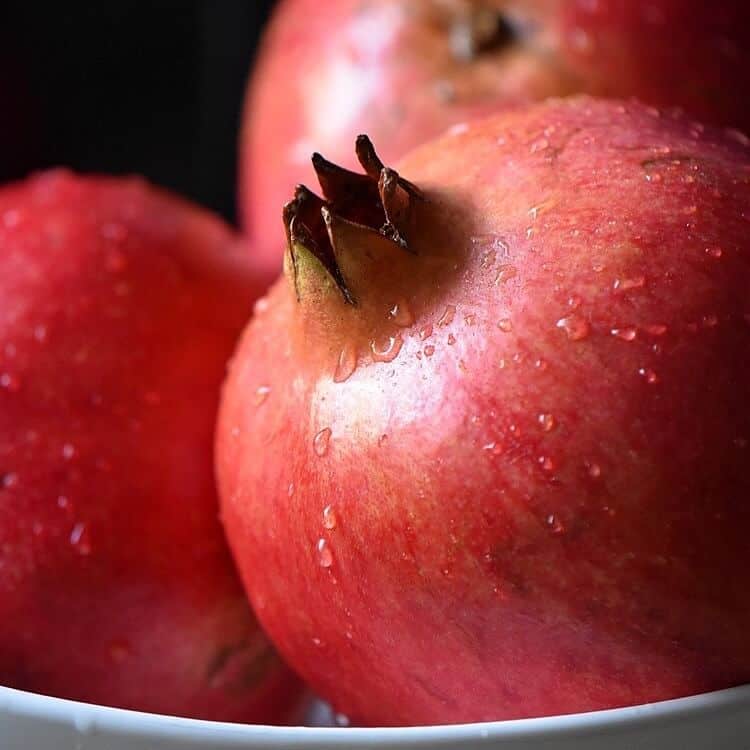
The exterior
Notice how both ends of the fruit are very different. The pomegranate crown is considered the top of the fruit. This is where the blossoms sprout. This is also the part that we will need to cut off to get access to the seeds. The other end is referred to as the bottom of the fruit. This is where the fruit was attached to the tree.
The presence of a hexagonal shape is not only an indicator that the pomegranate is ripe, but it will serve as a guide as to where to score the fruit.
Inside of a pomegranate
Every pomegranate has several sections that are separated by a non-edible, bitter-tasting, white membrane. This membrane will act as a natural separator.
At the base, you will notice another cluster of seeds. When scoring the fruit, the goal is to cut through the leathery skin, without cutting the delicate seeds. Remember, these seeds are just bursting with juice.
Now that we have demystified the pomegranate, it is time for the moment of truth. You will see that nature has a way of rewarding your patience when opening up this fruit with hundreds of sweet arils.
You will need:
- a sharp paring knife and
- a large bowl
That’s it! No wooden spoon and no water bowl.
Are you ready?
How to Remove Pomegranate Seeds
Let's begin by rinsing the pomegranate with water.
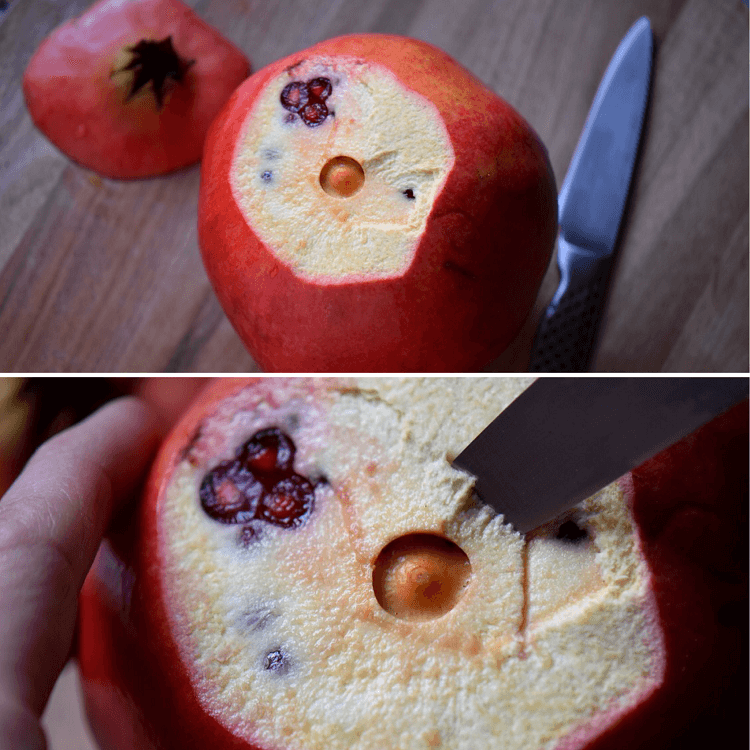
Using a sharp paring knife, make an incision all around the crown of the fruit. The incision should be about ½ inch from the crown. Gently pull it off.
Notice the white membrane. Make a few angular half-inch cuts in the white membrane (in the center of the fruit) with your knife. Remove this part.
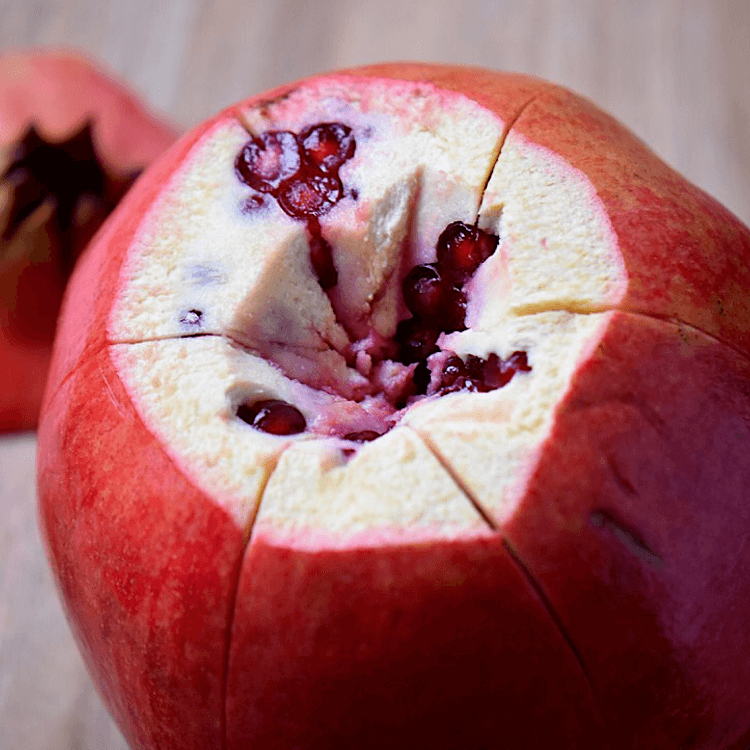
Now that we have a better understanding of the composition of this fruit, it makes sense to make six incisions on the outside. The scoring of the pomegranate at these particular points will correspond to the protruding part of the hexagonal shape and the positioning of the interior white membrane.
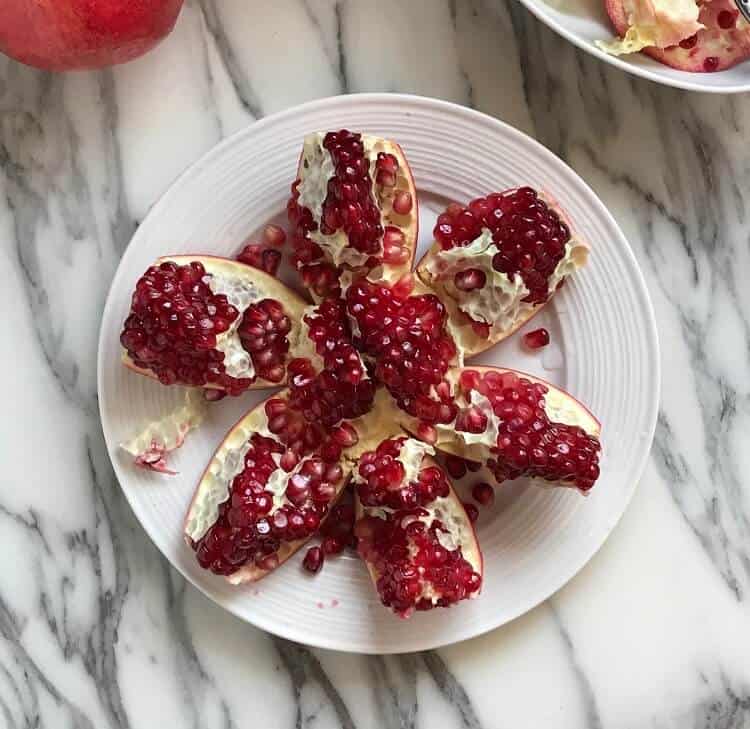
Isn’t nature wonderful? It naturally separates the pomegranate into sections for us.
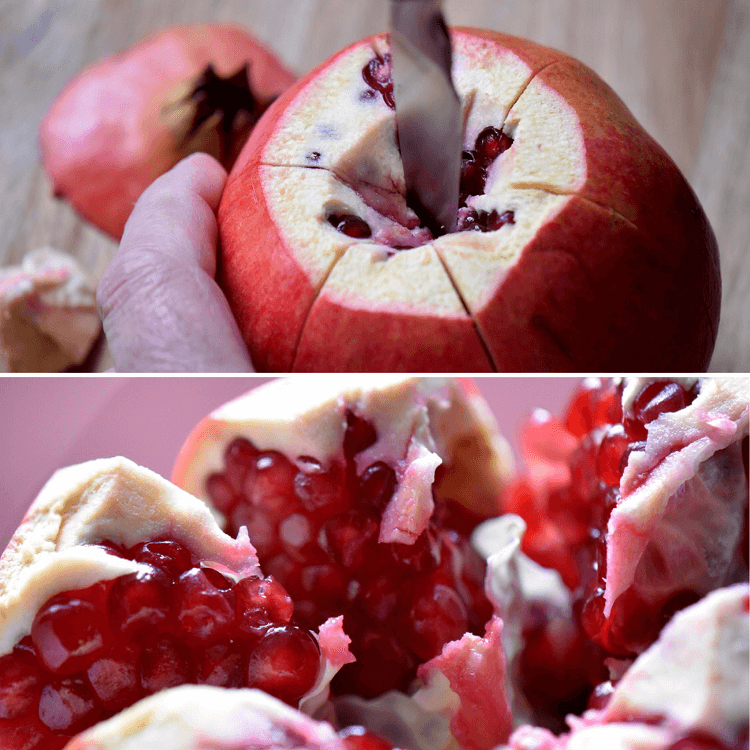
Gently insert the paring knife, about one inch, in the middle white pith and give it a gentle twist. Firmly grasp the pomegranate with your fingers and gently pry the pomegranate open.
Congratulations! You have now learned how to get pomegranate seeds out!
You now have access to all the jewel-like seeds. Separate each section from the base and begin to “pop” the sweet seeds of each section in your bowl. It is easier to remove the seeds if the pomegranate is cold, not at room temperature.
The Easy Way to Remove Pomegranate Seeds
It seems that everyone has a method for the best way to remove pomegranate seeds. Both Martha and Jamie (Home Cooking Skills) have also expressed their opinion on this.
Some will cut the pomegranate in half and proceed to whack each pomegranate half with a wooden spoon until all the arils fall out. I am sure you have also seen the method where the pomegranate half is submerged in a bowl of water where the arils are then removed.
In my humble opinion, if you find a method for deseeding a pomegranate that works for you, fantastic! I have just shared my method for the best way to cut a pomegranate, based on my personal experience and my lifelong obsession with this beautiful fruit.
No matter how to get pomegranate seeds out, what is essential is that you eat this fabulous super-food! Pomegranates seeds are full of antioxidants and are a great source of Vitamin C, among other vitamins and minerals. They are also a great source of fiber.
So, please stop avoiding this ancient fruit which has been around since the beginning of time… and that’s a long time!
Do you eat pomegranate seeds? Now that you know how to seed a pomegranate, I hope you will!
THANKS SO MUCH for following and being part of the She Loves Biscotti community where you will find Simple & Tasty Family-Friendly Recipes with an Italian Twist.
If you haven't already joined, here is the link where you can sign up for my weekly e-mail newsletter. This way, you won't miss any of my new recipes and it's free!
Ciao for now,
Maria
★★★★★ If you have tried this method to remove pomegranate seeds, I would love to hear about it in the comments below and be sure to rate the recipe!
Recipe
How to Easily Remove Pomegranate Seeds
WANT TO SAVE THIS RECIPE?
Ingredients
- 1 pomegranate whole
- water
Instructions
- Rinse the pomegranate under running water.
- With a sharp paring knife, make an incision all around the crown area, about ½ inch from the top.
- Gently remove this top piece.
- Make a few angular ½ inch cuts in the white membrane located in the center of the fruit. Gently remove this white section.
- Score the exterior of the pomegranate along the "ridges" from the crown to the base.
- Gently insert the knife, (about one inch) in the middle section of the pomegranate and give it a gentle twist.
- Firmly grasp the pomegranate with your fingers, and gently pry the pomegranate open. This will reveal the sections.
- Detach each section from the base and begin to gently pop the seeds in a bowl. Discard the white membrane.
judith Wadson
This way is less messy than cutting in half horizontally, plus the vibrant juice of the arils doesn’t leak as much.
Thanks!
Maria
Thanks Judith. I feel the same way… a lot less waste. Thanks so much for stopping by.
Patti
I love this method. Always struggled to open and get out seeds. This not much interest in buying them before. I’m a believer!!
Maria
How wonderful, Patti! Thanks so much for sharing!
Samantha
It took me about 15 minutes the first time i tried with your method to remove all of the seeds intact. Thanks for your info. I can’t wait to dive into the seeds now.
Maria
Enjoy the fruit of your labors Samantha! Thanks so much for stopping by, appreciate it!
Lin
Thanks so much Maria-this method was easiest yet as I usually use bowl of water method! I have a pomegranate bush in backyard and just picked the first one- this year’s Yield was only five but they are big and beautiful fruits
Maria
My pleasure Lin! Such a wonderful fruit to have growing in your backyard. Thanks for sharing.
Susan
Holy moly, this actually worked. Tidier than Martha Stewart’s method and yielded more than hers did the previous time I attempted it. Love that I can usually buy just the seeds but not so here in Melbourne, Australia.
JUST USE THIS METHOD. Or buy the damned seeds if you can find them.
Maria
You made my day Susan ♥
This is one of my favorite fruits… I tried so many methods, including “whacking” it and it was one big fat mess.
I’m thrilled to hear this method worked for you. Thanks so much for taking the time to comment, appreciate it 🙂
Paula Babarito Levitt
So, I have my own method for doing this but yesterday when faced with the task I followed your instructions to a T, starting with selection of the pomegranate. Readers – this works exceptionally well, I suggest you bookmark the post.
Maria
Fantastic Paula, glad to hear it worked for you! Thanks so much for drooping by ♥♥♥
John
Very useful ! thanks you very much!!!
Maria
My pleasure John! Appreciate you stopping by 🙂
Nella
Wow, I had never heard about this method!
Wish I did before opening (and fighting, yet again) with the one I have at home tonight.
Will try it next time. Thanks!!
Maria
My pleasure Nella ♥ You will be a pro in no time… guaranteed! Have a wonderful evening 🙂