
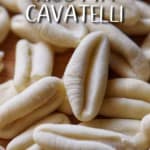
Make homemade ricotta cavatelli with this easy pasta dough recipe. This ricotta pasta dough only requires flour, ricotta, water (or milk), an egg and salt. The result is a soft, pillowy pasta that pairs perfectly with many sauces. Deliciousness guaranteed!
Compared to the traditional cavatelli recipe that uses just water and semolina flour, this ricotta-based cavatelli adds an extra layer of flavor and tenderness, making it a delightful twist on the classic pasta dish.
There is no denying that making this homemade pasta-from-scratch recipe requires an initial investment of time.
But you will be rewarded with great-tasting pasta and some bragging rights.
Pasta shapes like cavatelli and orecchiette are some of the most familiar varieties found throughout Southern Italy. Without a doubt, broccoli rabe pasta recipes are some of the most popular.
After all, who can resist the combination of garlicky broccoli rabe with cavatelli pasta?
I have already shared my family recipe for cavatelli made only with flour, water and salt.
Today’s cavatelli recipe is made with one egg and ricotta cheese. Please note that you can also get great results with any commercial variety of ricotta.

Let’s prep our recipe
Here are the specific amounts of the basic ingredients you need to make this homemade pasta recipe:
- 500 grams of all-purpose flour (3½ cups); alternatively, you can use “00” flour for pasta or bread flour.
- 500 grams of whole milk ricotta (approximately 2 cups); well-drained in a cheesecloth-lined colander to avoid adding extra moisture. I prefer to use homemade ricotta cheese.
- 1 egg; organic if possible.
- 4 tablespoons of water (or milk); either liquid work well in this recipe
- 1 teaspoon of salt; enhances the natural flavors of the other ingredients in the pasta.
Instructions
There are two methods to combine the ingredients for this recipe: a stand mixer or the traditional method.
Regardless of your chosen method, the goal is to achieve a soft pasta dough that is no longer sticky. Whether you prefer the convenience of a stand mixer or the traditional approach, the result should be a smooth and pliable pasta dough perfect for shaping into cavatelli.
Stand Mixer Method
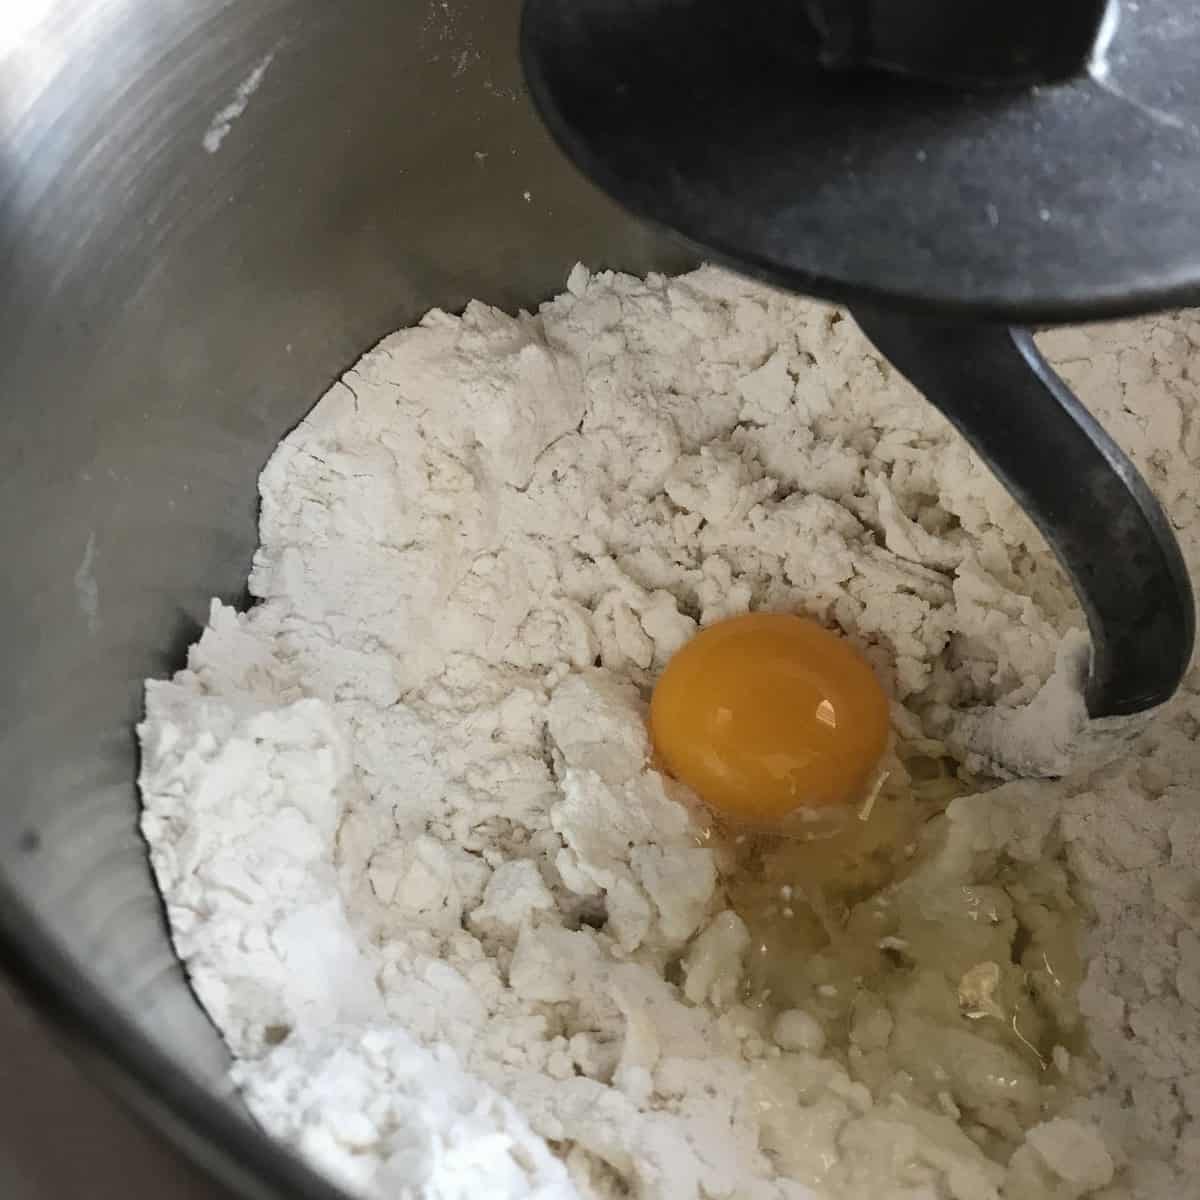
Place all of the ingredients in the bowl of a stand mixer. With the dough hook, knead for 8-10 minutes on medium speed.
The dough should pull away from the bowl’s sides and bottom. The texture should be soft.
If it appears wet and tacky at the end of the kneading process, add ½-1 tablespoon of flour until the right consistency is achieved.
On the other hand, if it appears dry and crumbly, sprinkle a little water (or milk) until the right consistency is achieved.
Traditional Method
Place the flour on a wooden board and shape it into a well.
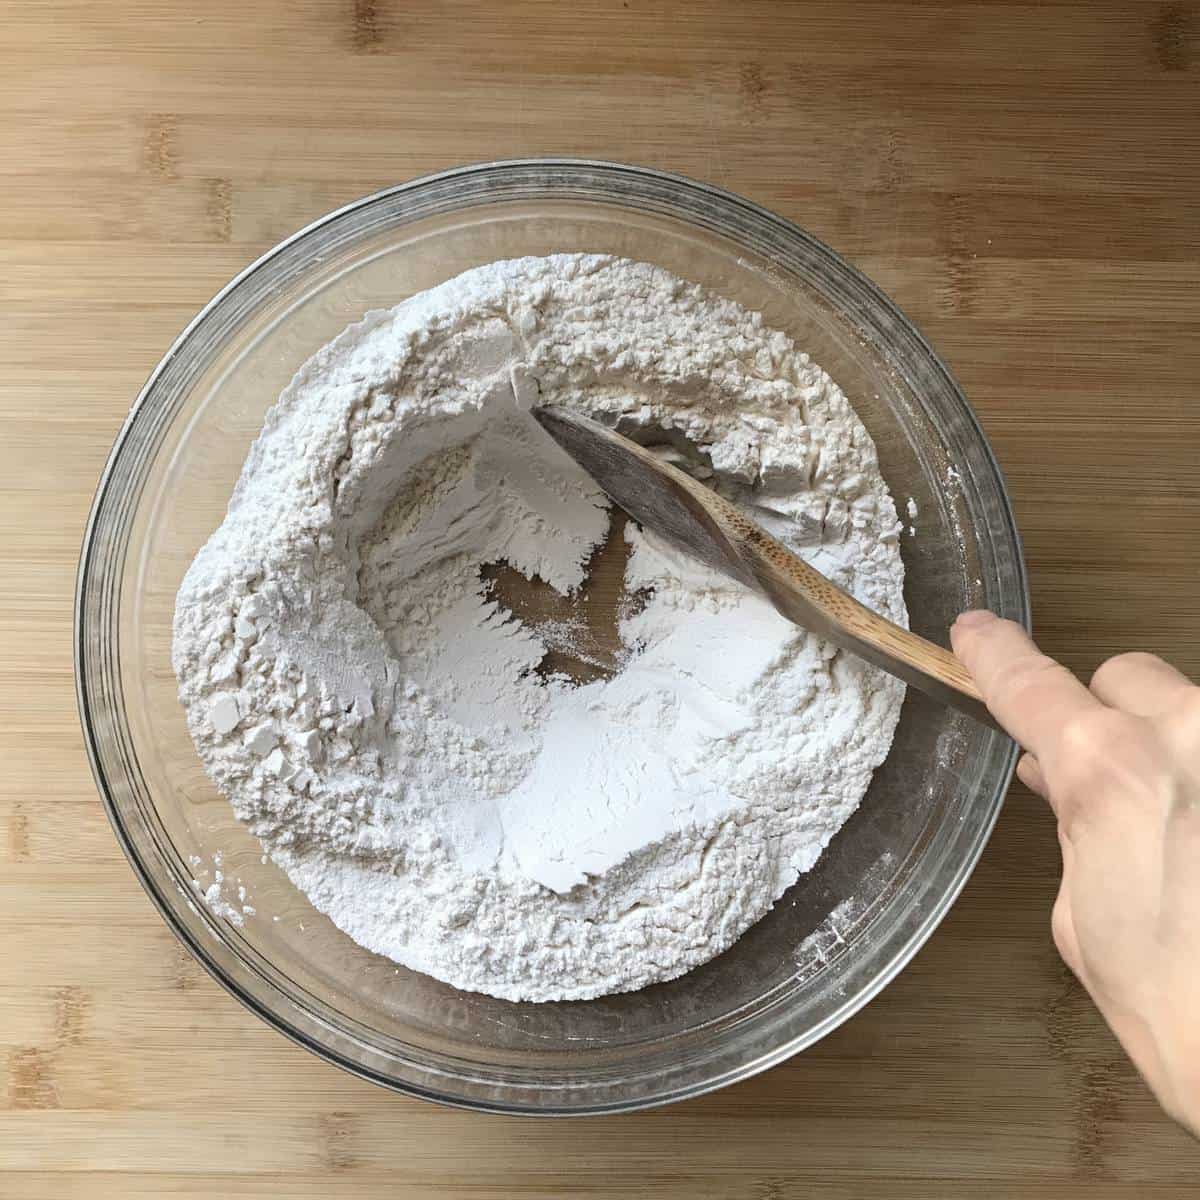
This same principle can be used by placing the flour in a bowl and creating a well.
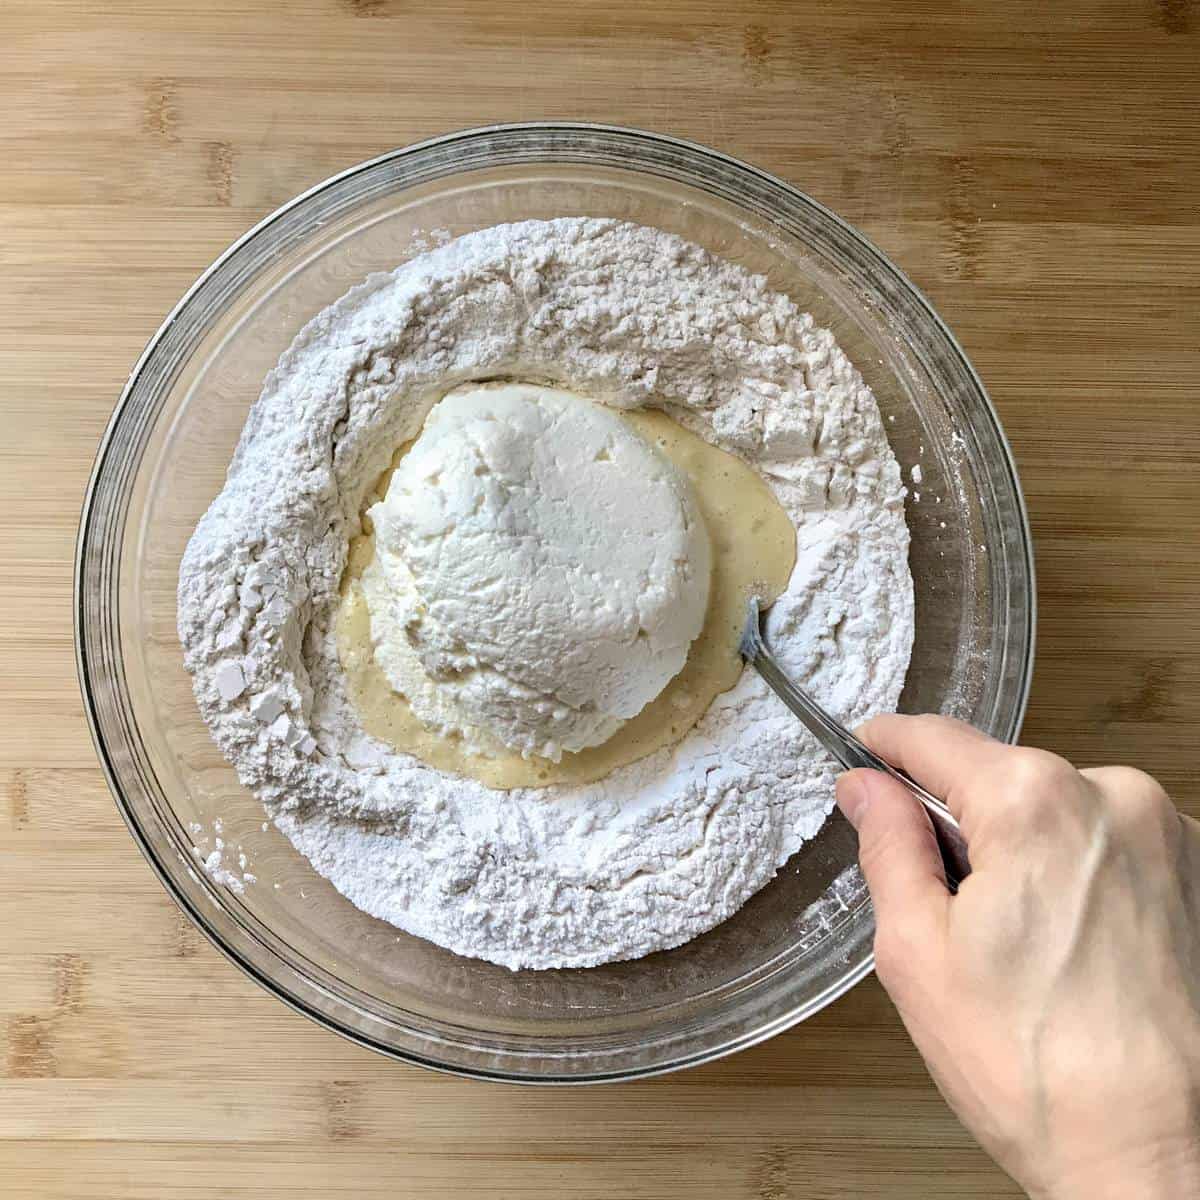
Add the rest of the ingredients in the middle of the well. Beat together with a fork and slowly incorporate the flour. You will obtain a raggy dough.
Transfer to a lightly floured wooden board or flat surface.
Use your hands to knead it for about 8-10 minutes or until it is smooth and elastic.
If it feels sticky, add a little bit of flour. If, on the other hand, it feels dry, sprinkle a few drops of water (or milk) and continue kneading.
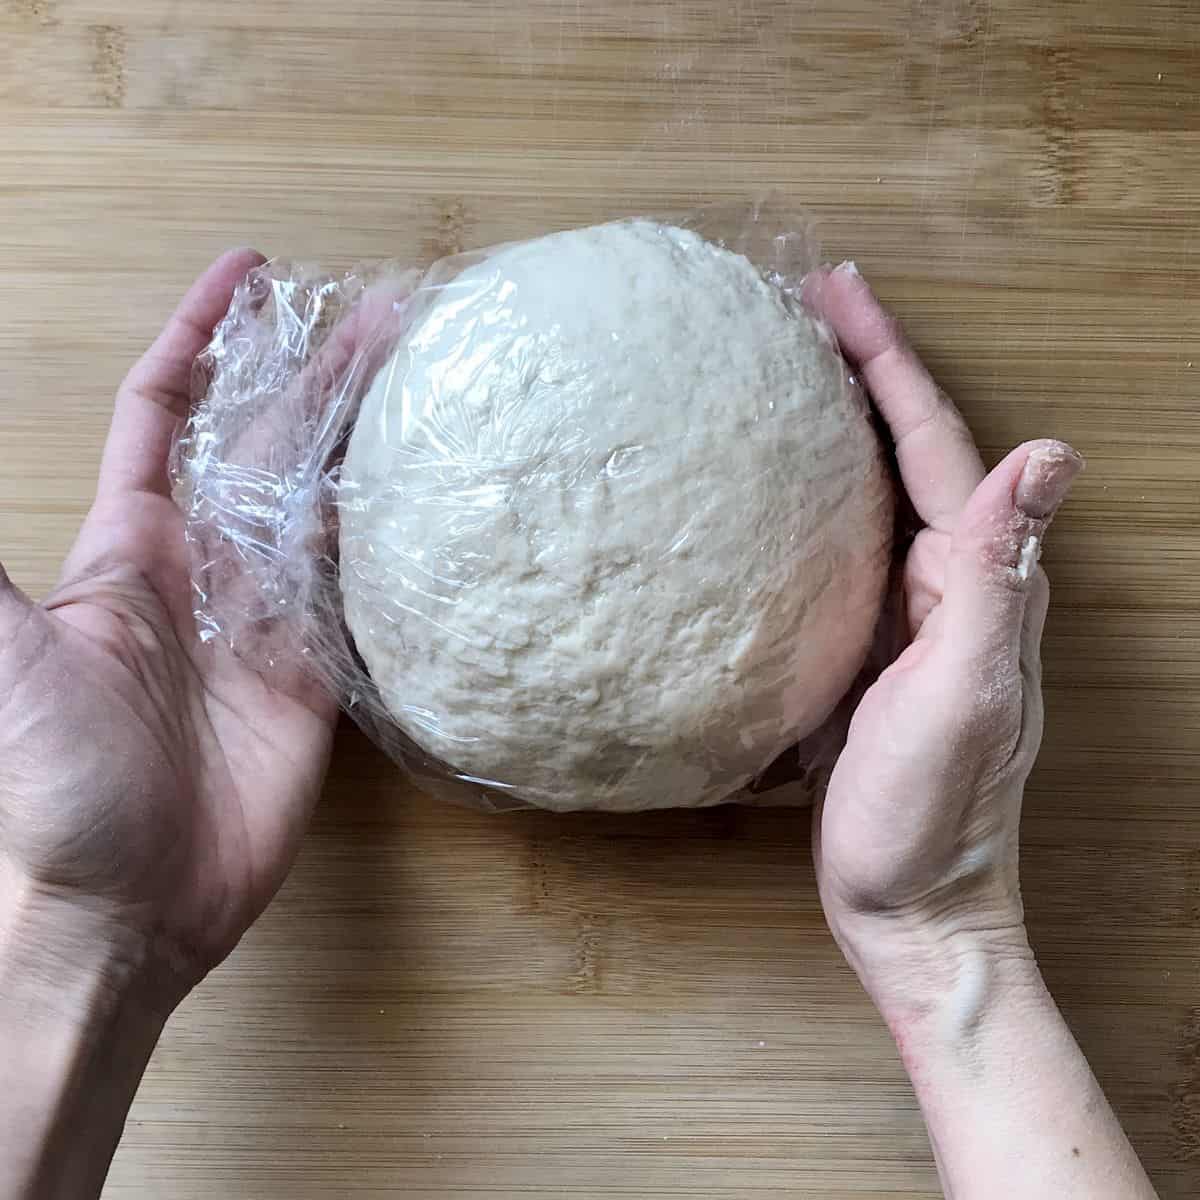
Wrap the ball of dough in cling wrap.
Cover with a tea towel. Leave it on the counter to rest, at room temperature, for about 30 minutes.
This resting period allows the gluten to relax. As a result, it will be easier to roll out and shape.
During this waiting period, line 2 large rimmed baking sheets with tea towels. Sprinkle a little flour over them. This will prevent the cavatelli from sticking to the tea towels.
Cutting the dough
The first thing we need to do is to cut off a section of our freshly made ball of dough.
Keep the remaining dough covered with the cling wrap to prevent it from drying out.
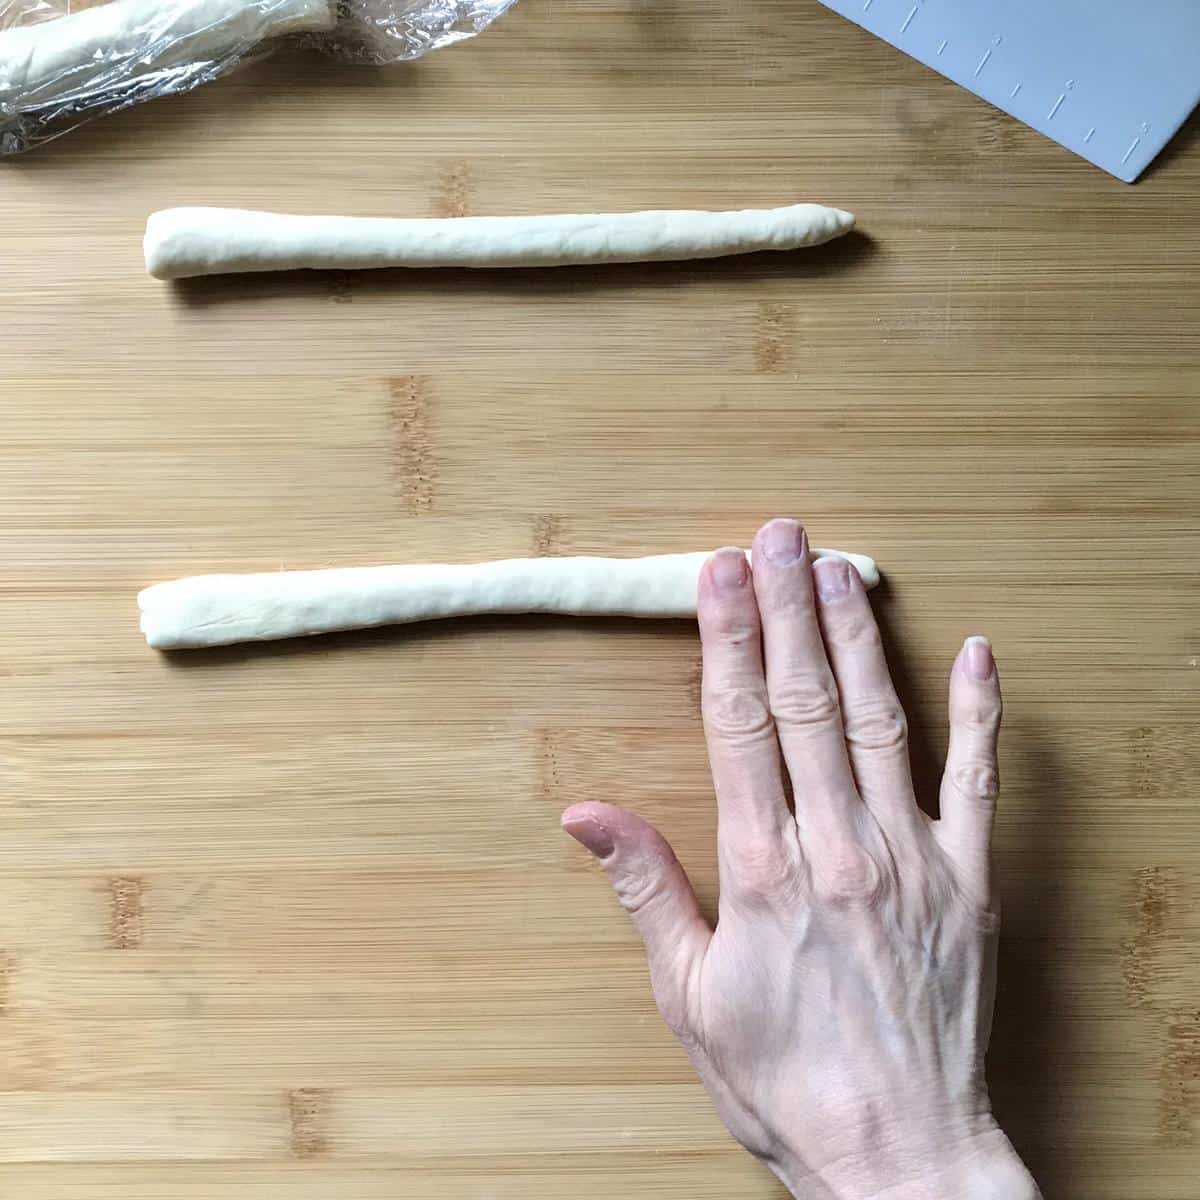
Start at the center and roll towards the ends using your fingertips and palms. All the while, apply gentle pressure to stretch it into a rope shape. Keep rolling until your rope is about ½ inch thick.
Flatten the rope by applying gentle pressure over the top.
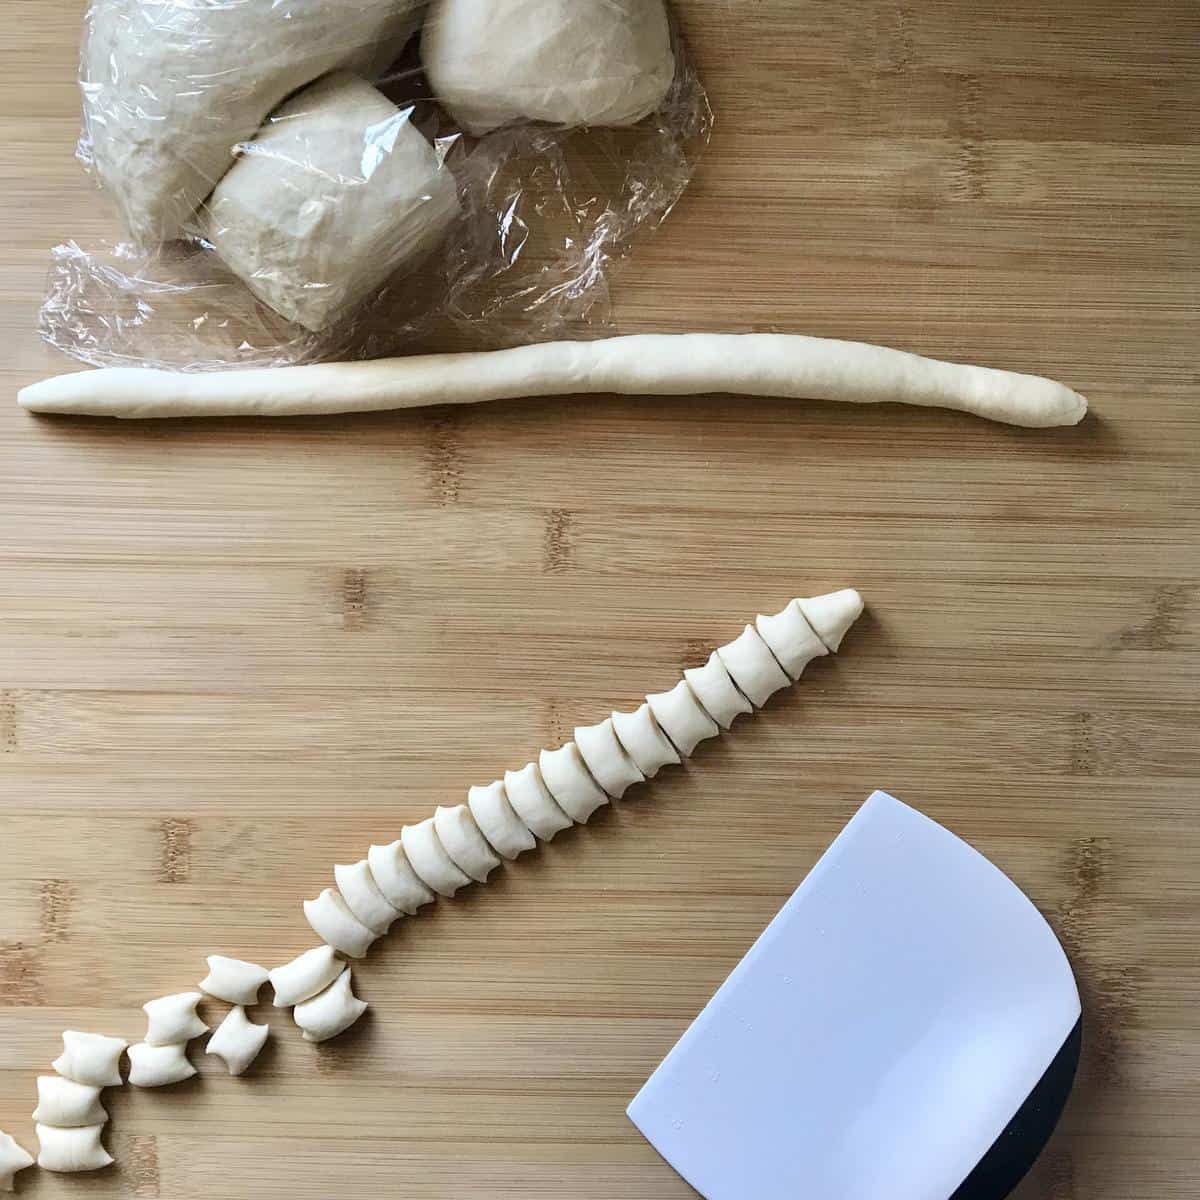
Use a pastry cutter or a knife to cut the rope evenly into ½ inch pieces.
We are now ready to make our pasta shapes.
Pasta shaping
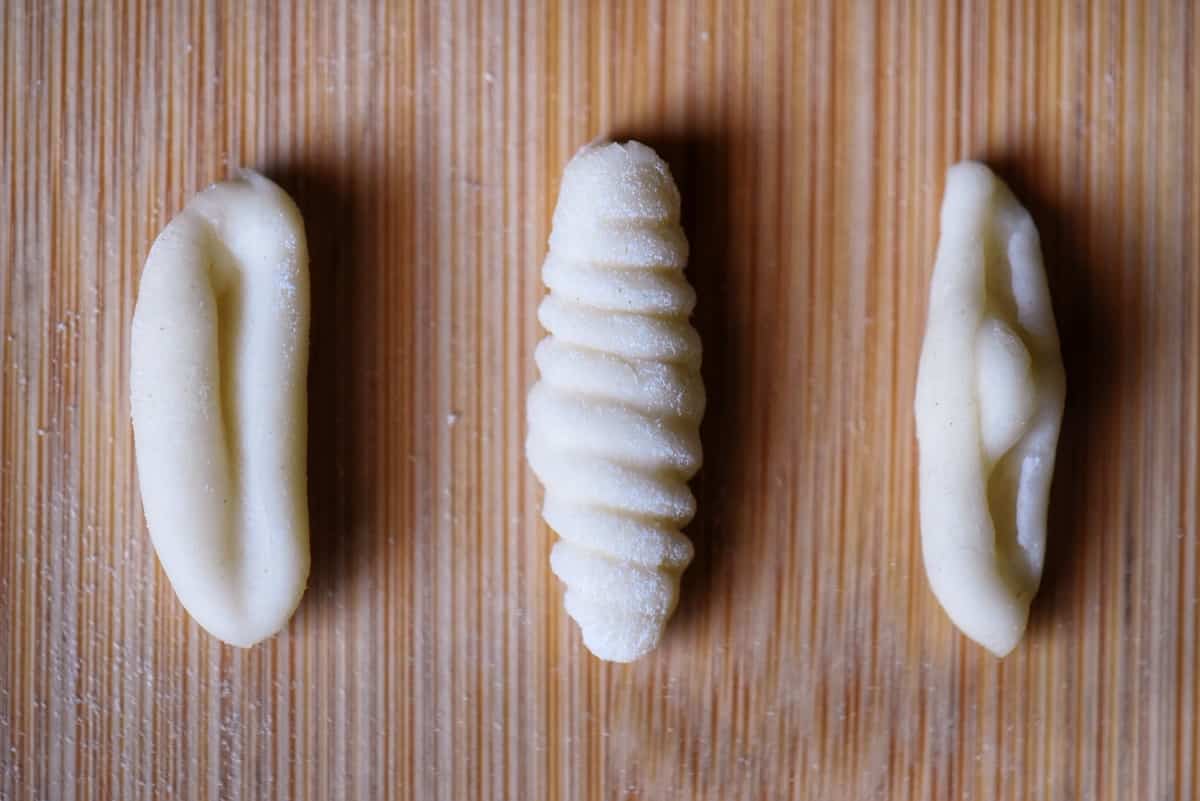
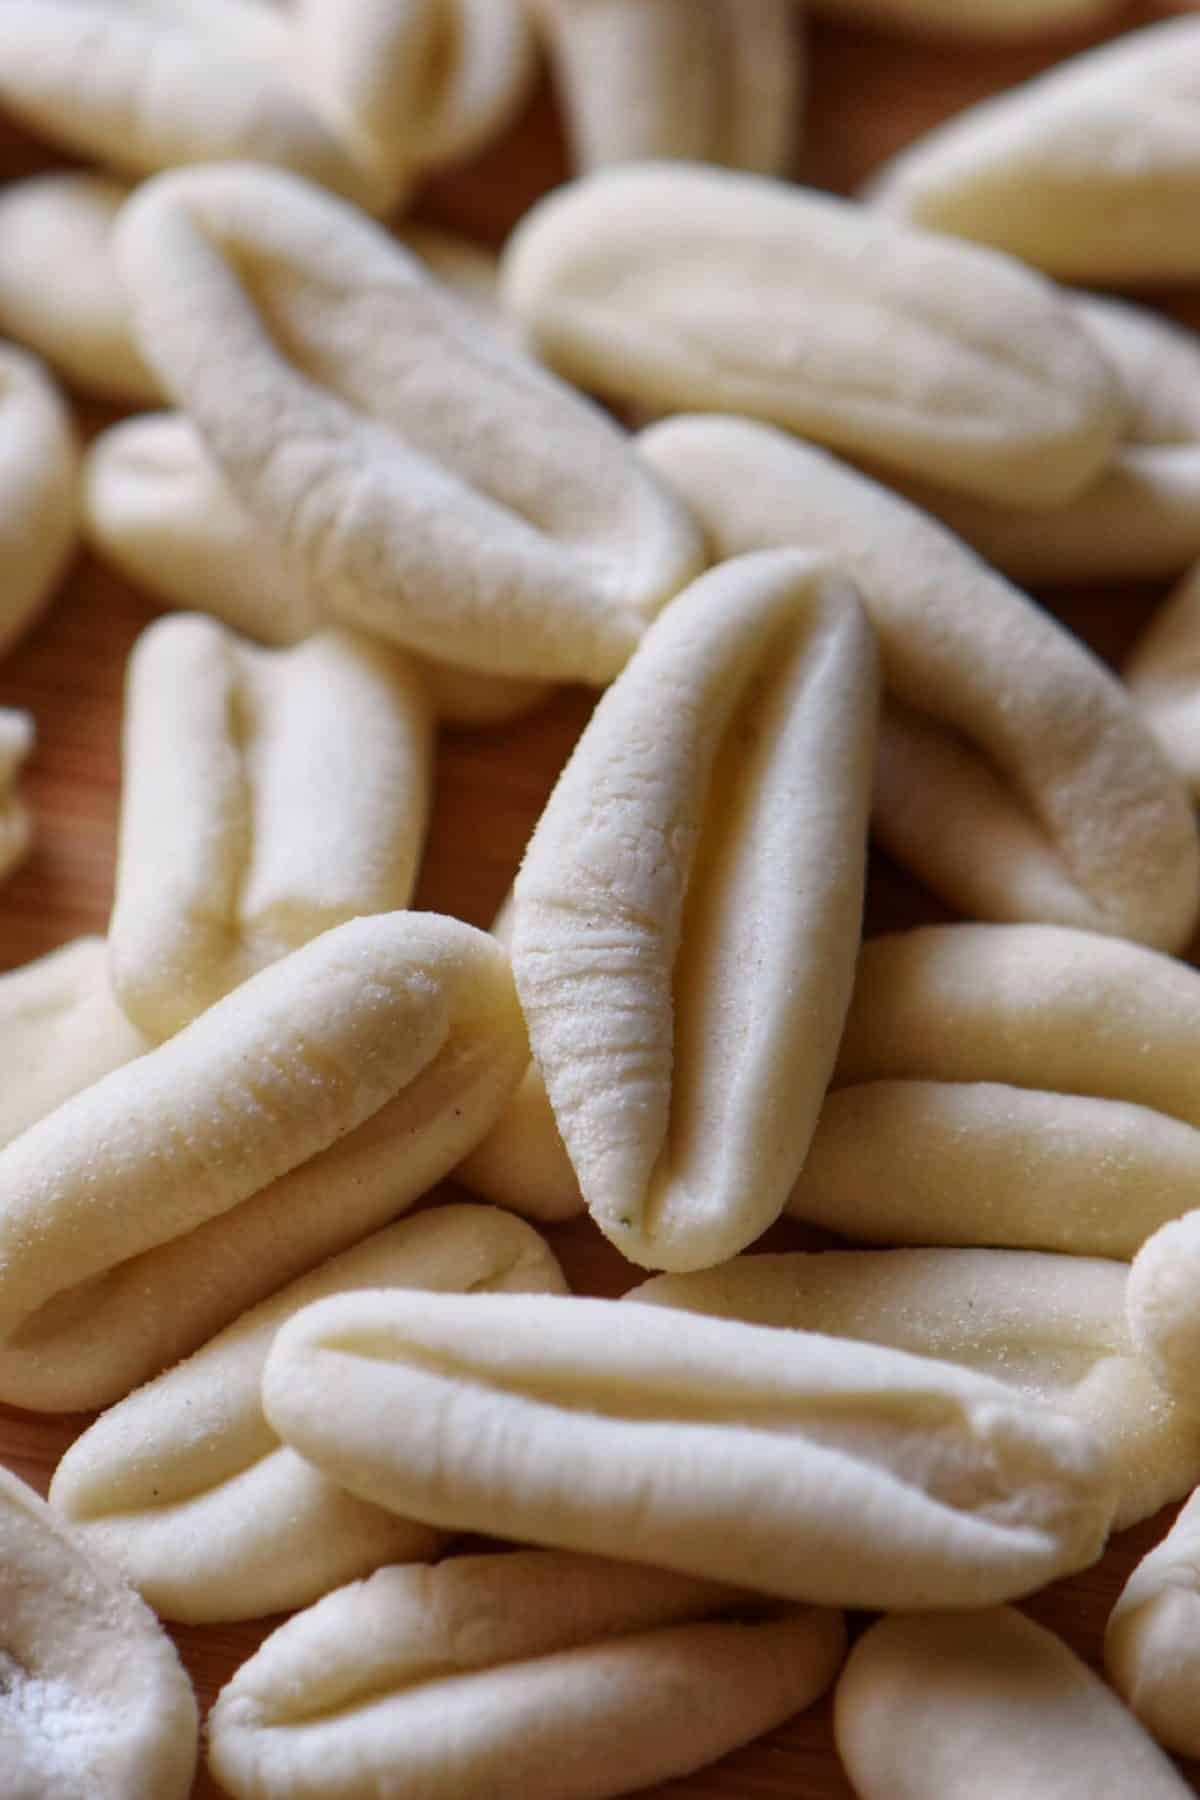
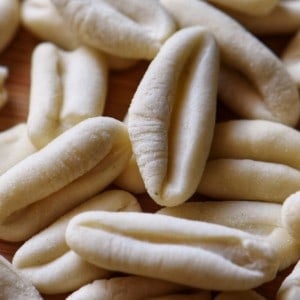
As you can see, you can shape your pasta in different ways.
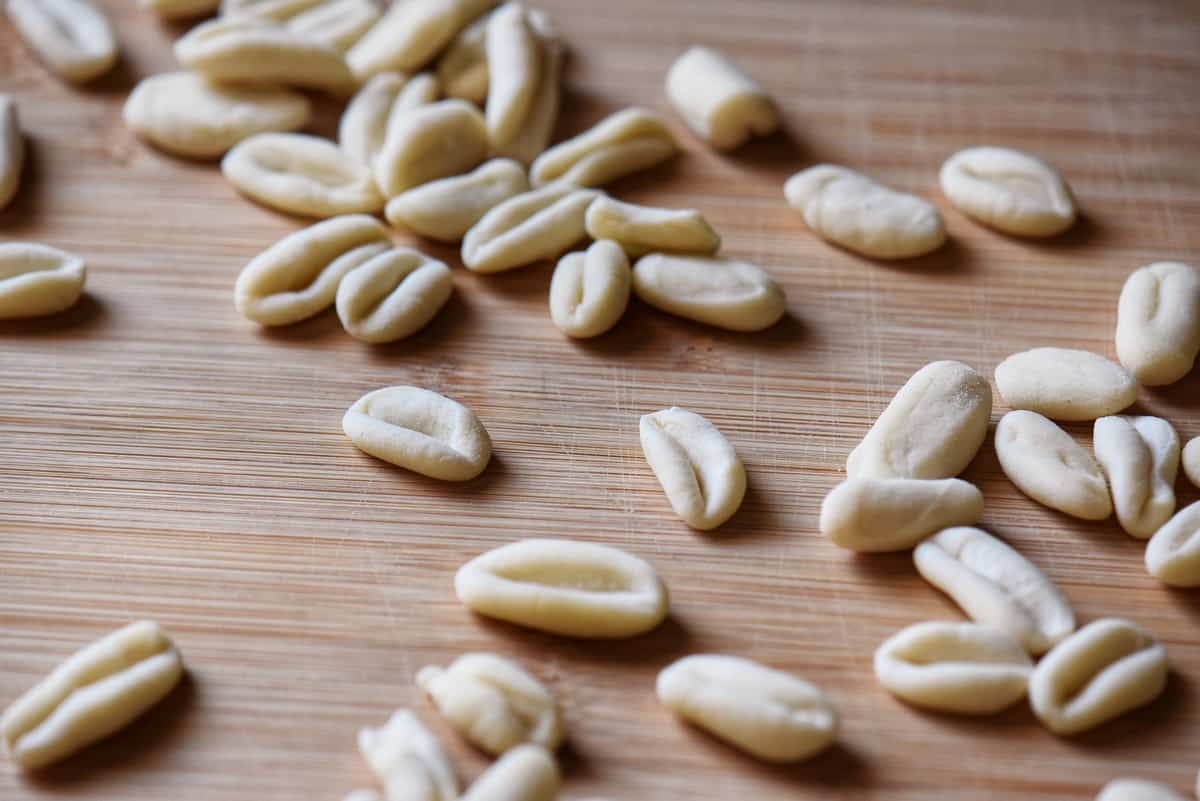
Let’s begin with the shape that looks like mini hot dog buns.
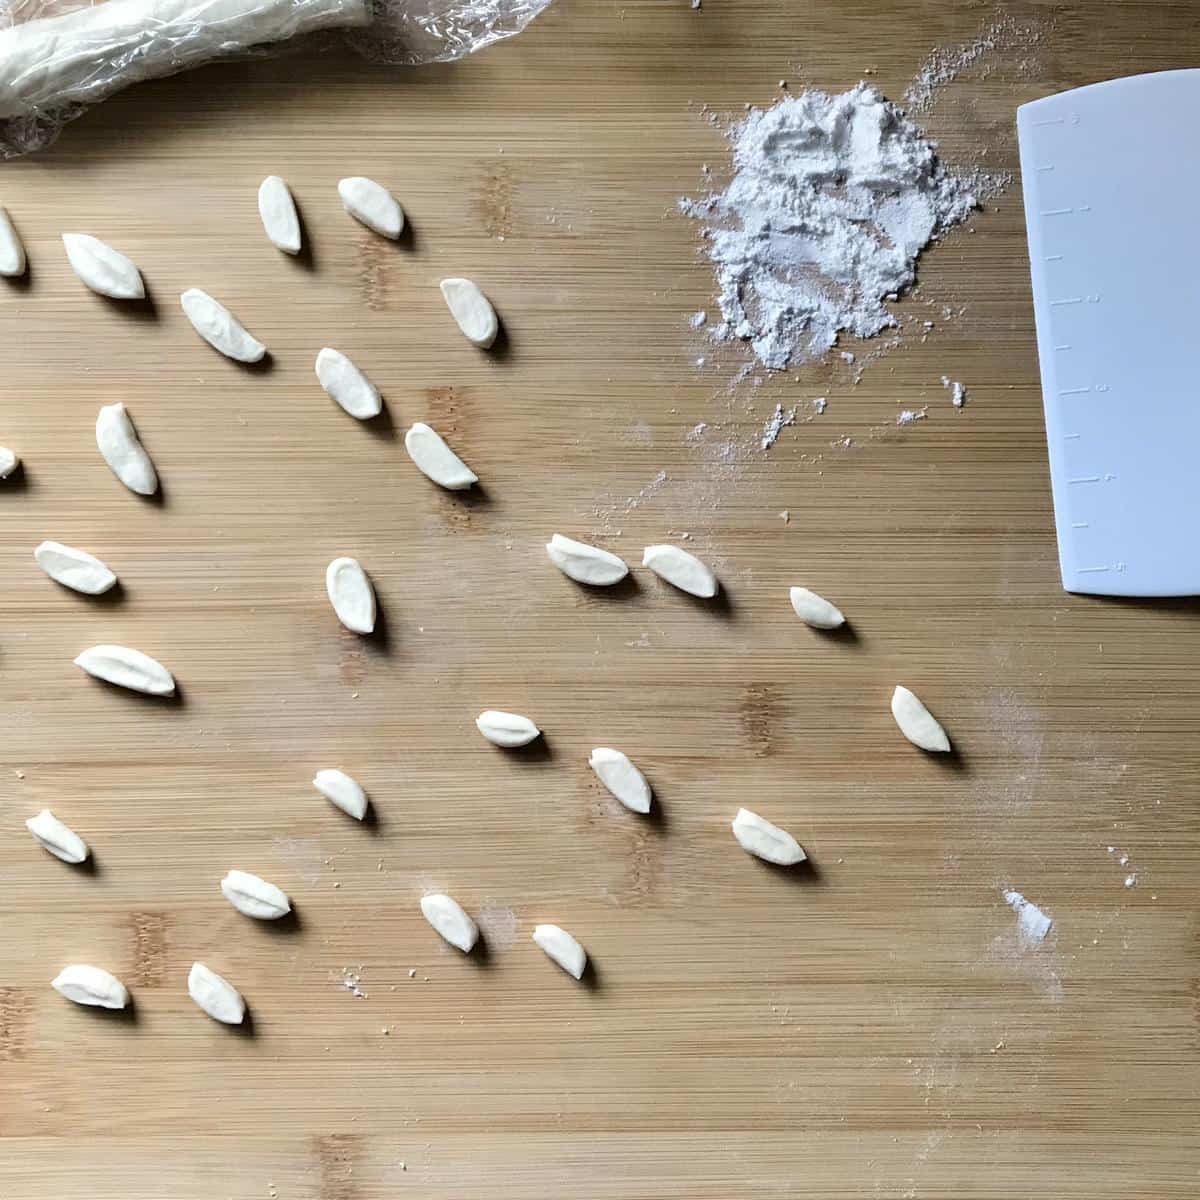
Separate the individual pieces of dough on your wooden board.
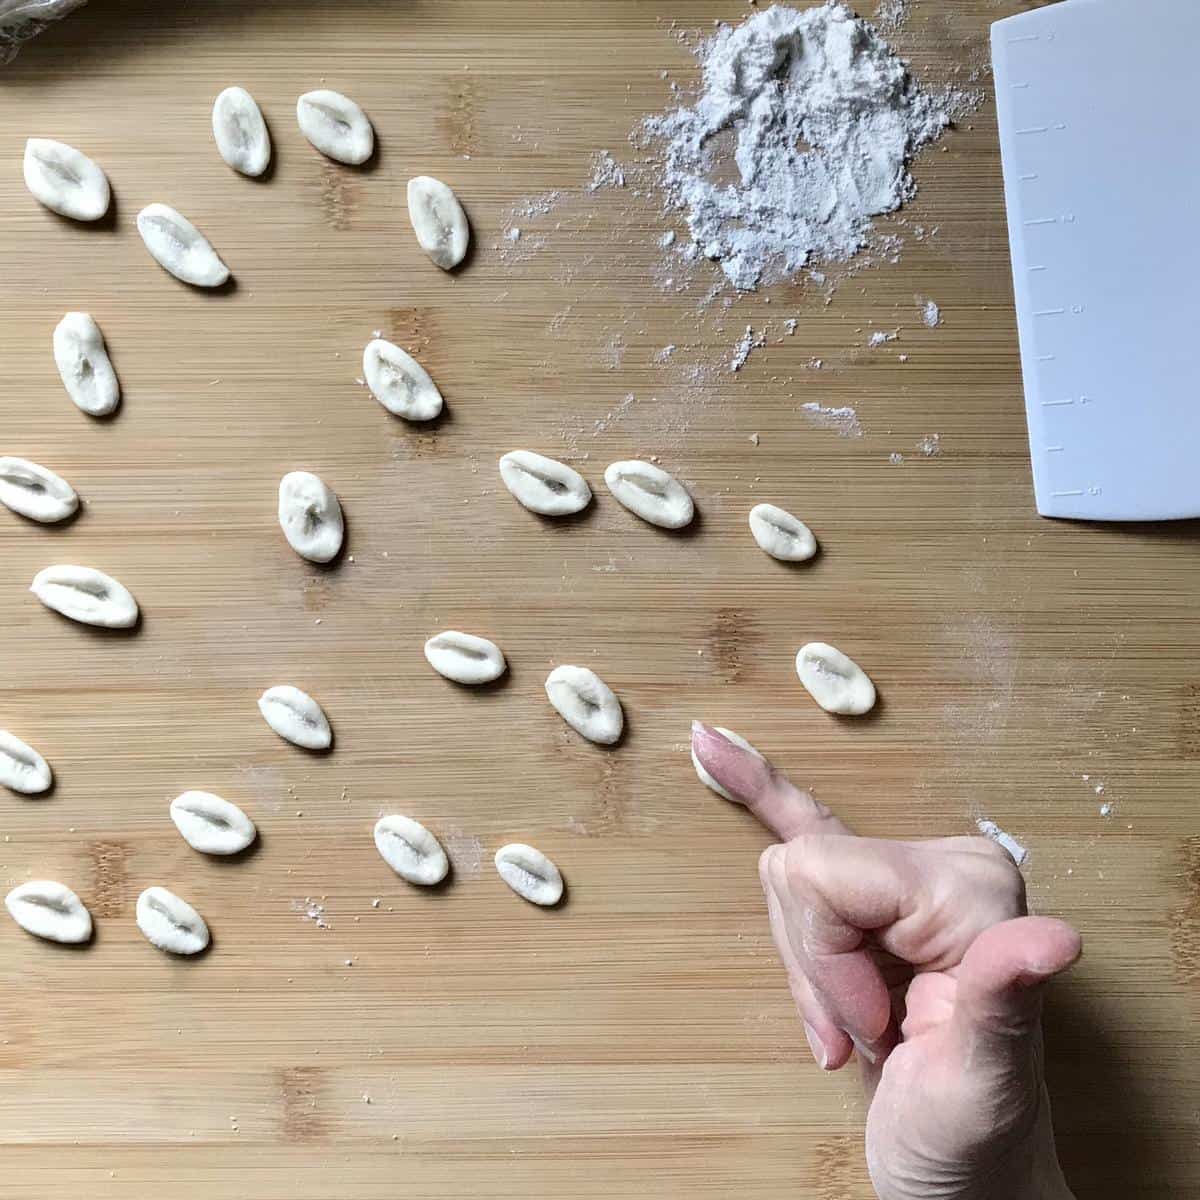
Use a floured pinky finger to create this shape by applying gentle pressure to the dough.
Then, give the piece of dough a little roll.
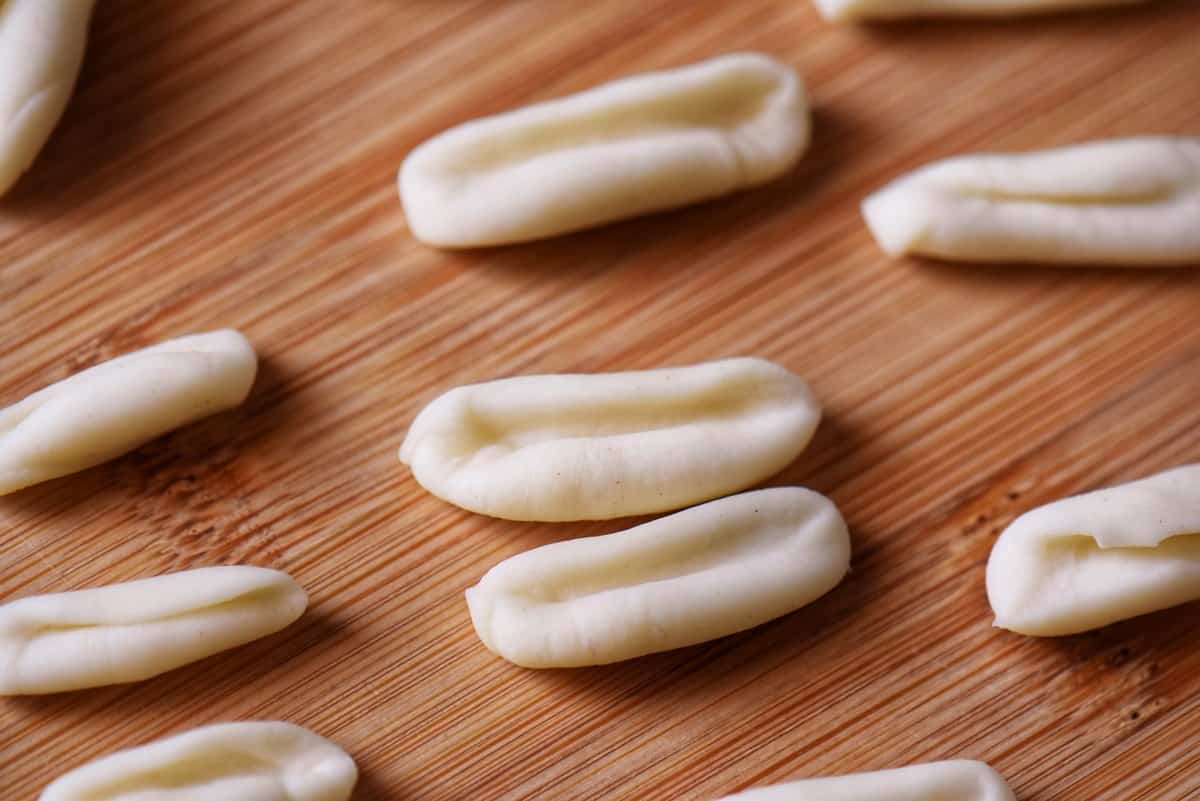
You can also use your thumb by pressing into the dough and rolling away from your body.
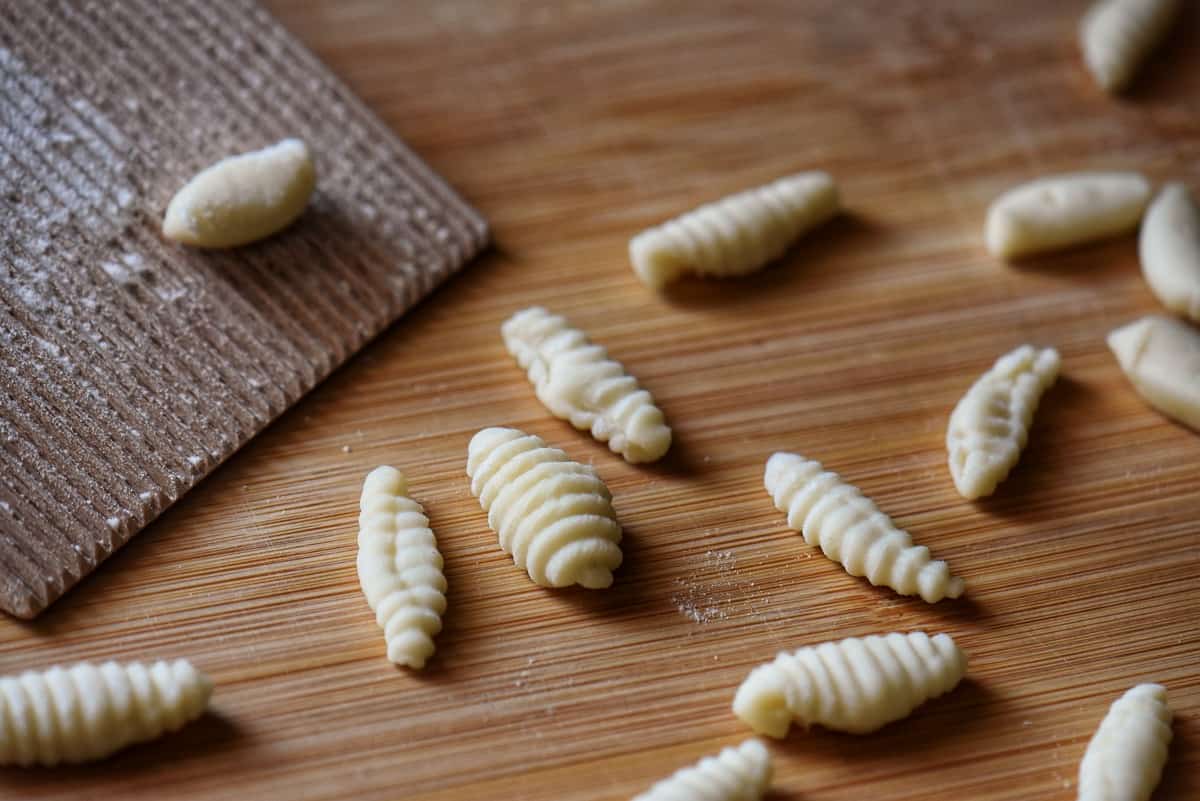
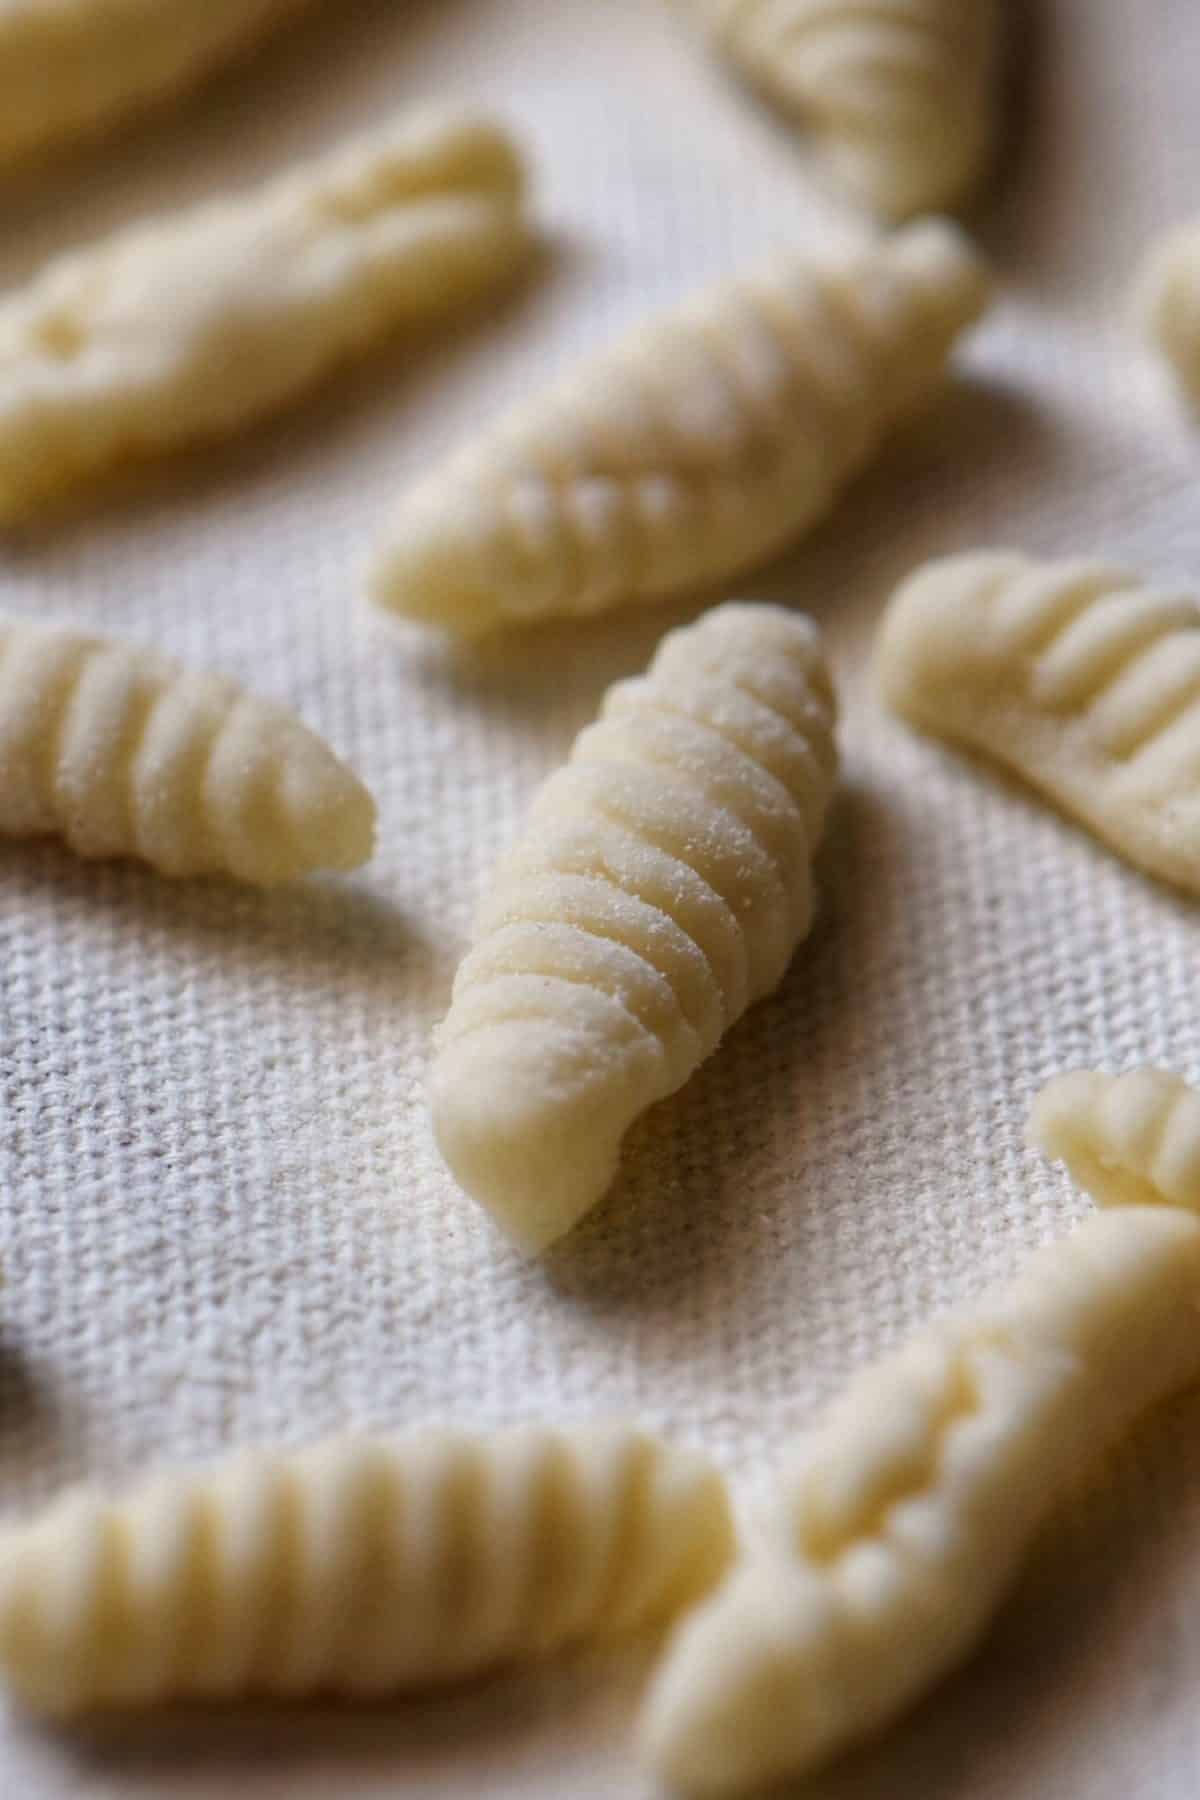
Create the second shape with the help of a gnocchi board.
Place an individual piece of dough on a floured pasta board.
Once again, apply gentle pressure and press down into the dough, dragging it down.
The little groves on the pasta dough are just waiting to be combined with your favorite sauce!
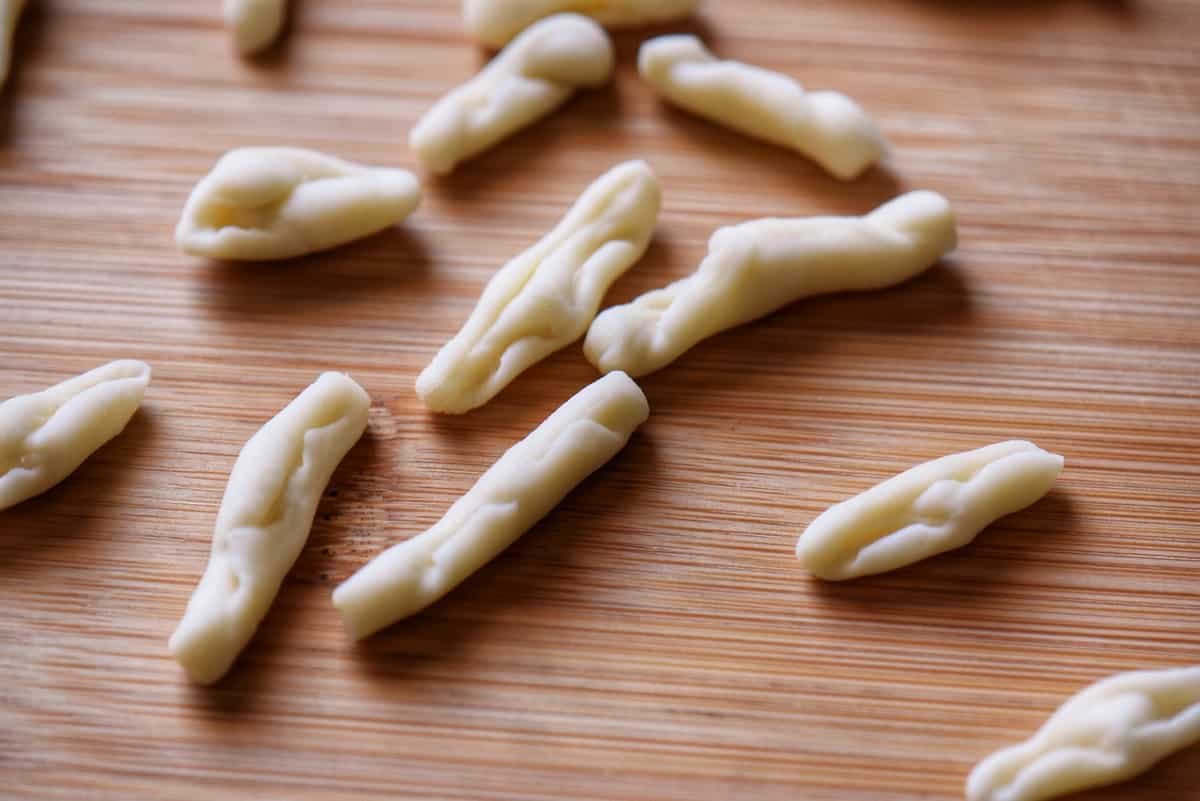
Create the third shape by placing your index and middle finger on the individual piece of dough.
Apply gentle pressure and press down into the dough, dragging it towards you.
This creates a little space or crevice, which is great for picking up the sauce.
Transfer the newly shaped cavatelli to the floured tea towel. Place in a single layer without touching one another.
Continue this process with the rest of the dough.
Allow to air dry for 30 minutes before cooking.
Cooking the freshly made ricotta pasta
To cook your freshly made ricotta cavatelli pasta, bring a pot of water to a rolling boil and add about 1 tablespoon of salt per quart. (For more detailed tips on cooking pasta, check out this article on How to Cook Pasta.)
Slowly add the cavatelli to the boiling water, trying to shake off as much flour as possible before adding them to the pot. Stir gently and frequently to prevent the pasta from sticking together or to the bottom of the pot.
Cook the fresh pasta for 2-3 minutes until it’s “al dente,” meaning tender but firm to the bite. Check for doneness after a minute to avoid overcooking, as overcooked pasta can become mushy and unappetizing.
Observing them floating to the surface lets you easily determine when these are cooked and ready. Use a slotted spoon to scoop them up or drain it using a colander. Toss them immediately with your favorite pasta sauce and enjoy!
If freezing, place the baking sheet of cavatelli in the freezer. Once frozen, transfer to a freezer bag and store in the freezer.
Tips
- You can substitute the all-purpose flour with “00” flour for pasta, bread flour, or a mixture of the two. You can also replace up to half of the all-purpose flour with semolina flour.
- If the dough appears wet and tacky at the end of the kneading process, add ½-1 tablespoon of flour until the right consistency is achieved.
- On the other hand, if it appears dry and crumbly, sprinkle a little water (or milk) until the right consistency is achieved.
- While shaping the pasta, keep the rest of the dough covered with the cling wrap to prevent it from drying out.
- Do not flour your work surface when rolling the rope of dough. The extra flour makes it harder to roll the dough.
- If you don’t have a gnocchi board, you can use the side of a cheese grater to obtain textured pasta.
- Freeze cavatelli for up to 1 month for optional results.
More cavatelli recipes
Broccoli Rabe Cavatelli Pasta: Blanch broccoli rabe and add cooked cavatelli, garlic, and red pepper flakes for a simple and nutritious dish.
Cavatelli with Tomato Ricotta Sauce: Toss boiled cavatelli with a tomato-based sauce (like marinara sauce), fresh basil, and Romano cheese for a comforting classic.
Roasted Red Pepper Pasta: Blend roasted red peppers, onions, garlic, tomatoes, olive oil, and Parmesan cheese for a sweet and smoky sauce that pairs perfectly with cavatelli.
Avocado Pesto Pasta: Blend avocado, spinach, garlic, basil, walnuts, lemon juice, and Romano cheese for a creamy and indulgent pesto sauce perfect with cavatelli.
Sauteed broccoli and cavatelli recipe: This sauteed broccoli and cavatelli recipe combines the soft pillowy texture of homemade ricotta cavatelli with the wholesome goodness of broccoli. Pure comfort food.
Recipe Origin
The memories of making gavadeel with my nonna and mom are dear to my heart. I wanted to recreate that nostalgic experience in my kitchen.
While they traditionally used the one-finger method to shape the cavatelli, I decided to experiment with different shapes and techniques inspired by a pasta-making video I came across.
I found that shaping the cavatelli pasta dough in a slightly different way gave it a unique texture and appearance that I loved. It’s amazing how a simple change in technique can elevate a classic recipe to new heights.
The joy of cooking and carrying on family traditions is something I cherish, and I hope that this recipe inspires you to create your cherished memories in the kitchen.
So, whether you stick with the traditional flour and water cavatelli pasta dough or try this ricotta variation, I encourage you to make cavatelli.
It’s a labor of love that brings people together and fills the kitchen with warmth and delicious aromas. Enjoy the process, experiment with shapes and techniques, and savor every bite of this homemade pasta dish made with love and nostalgia.
THANKS SO MUCH for following and being part of the She Loves Biscotti community where you will find Simple & Tasty Family-Friendly Recipes with an Italian Twist.
If this is your first time visiting, welcome! I would love to offer you my FREE weekly e-mail newsletter delivered straight to your inbox. When you subscribe, you will also receive a FREE DOWNLOAD that summarizes my top 10 tips on How to Cook Pasta. You can unsubscribe any time you want.
Ciao for now,
Maria
★★★★★ If you have made this cavatelli recipe made with ricotta, I would love to hear about it in the comments below and be sure to rate the recipe!
Recipe
Ricotta Cavatelli
WANT TO SAVE THIS RECIPE?
Ingredients
- 500 grams all-purpose flour sifted, 3½ cups
- 500 grams ricotta
- 1 egg
- 4 tablespoons water or milk
- 1 teaspoon salt
- extra flour for rolling
Instructions
Stand Mixer Method:
- Simply place all of the ingredients in the bowl of a stand mixer. With the dough hook, knead for 8-10 minutes on medium speed.
- The dough should pull away from the sides and the bottom of the bowl. The texture should be soft.
Traditional Method:
- Place the flour on a wooden board and shape it in a well. You also use a large bowl.
- Add the rest of the ingredients in the middle of the well. Beat together and slowly incorporate the flour with a fork. You will obtain a raggy dough.
- Transfer to a lightly floured wooden board.
- Knead for about 8-10 minutes or until dough is smooth and elastic. If it feels sticky, add a little bit of flour. If, on the other hand, it feels dry, sprinkle a few drops of water over the dough and continue kneading.
- Wrap the ball of dough in cling wrap.
- Cover with a tea towel. Leave it on the counter to rest, at room temperature, for about 30 minutes.
- During this waiting period, line 1-2 rimmed baking sheets with tea towels and sprinkle a little bit of flour over them. This will prevent the cavatelli from sticking together.
Cutting the dough:
- Cut off a section of our freshly made ball of dough.
- Using both hands, apply a gentle pressure to stretch it out into a rope shape that is about ½ inch thick.
- Flatten the rope by applying gentle pressure over the top.
- Use a pastry cutter or a knife to cut the rope evenly into ½ inch pieces.
Shaping the dough:
- Use your fingers or a gnocchi board to shape the pasta. Refer to details in the post.
- Place cavatelli on large baking sheets that have been lined with tea towels and lightly dusted with flour. Place in a single layer and not touching one another.
- Continue until all the dough has been formed into cavatelli.
- Allow to air dry for at least 30 minutes.
- If using immediately, drop in a large pot of salted boiling water for a few minutes. The cavatelli are done when they float to the top. (Try to shake off as much as the flour as possible before boiling them). Taste to make sure they are cooked to your liking.
- If freezing, place the tray of cavatelli in the freezer and once frozen, place in a plastic bag in the freezer. They can be cooked frozen. (It should take 6-8 minutes to cook. Once they rise to the top, they should be done. Taste to make sure they are cooked to your liking).
- Serve with your favorite sauce.
Notes
- If the dough appears wet and a little sticky, add 1 tablespoon of flour until the right consistency is achieved.
- On the other hand, if the dough appears dry and crumbly, add 1 tablespoon of milk (or water) at a time until the right consistency is achieved.
- While shaping the pasta, keep the rest of the dough covered with the cling wrap to prevent it from drying out.
- Do not flour your work surface when rolling the rope of dough. The extra flour makes it harder to roll the dough.
- In the absence of a gnocchi board, use the side of a cheese grater.
- Freeze cavatelli for up to 1 month.
- You can substitute the all-purpose flour with "00" flour for pasta, bread flour, or a mixture of the two. You can also replace up to half of the all-purpose flour with semolina flour.
Jo
Hi Maria!
Can I use this dough in a cavatelli machine/maker? My mom didn’t write down her recipe! It was her cavatelli maker 🙂
Thank you for always sharing your wonderful recipes!
Maria
My pleasure Jo! It should work. If the dough is too “soft,” you can always add a couple of tablespoons of flour to get it to the right consistency. Thanks for stopping by Jo!
Patricia
When company comes over, they seem just a little disappointed when I don’t make cavatelli bolognese. Great and easy recipe. I have a cavatelli maker that makes this a snap! Thanks!
Maria
Thanks so much for sharing Patricia! So happy to read this!
Patricia
My boys love cavatelli, and this recipe is so good. I make it bolognese and it’s a hit every time! Thanks! ****”
Maria
Such a great idea! Thanks for sharing Patricia!
lizzie
I am looking to make these in the morning.. can I make the dough tonight and keep it in the fridge overnight? or is it best to make the dough the same day I plan on making the pasta?
Thanks!
Maria
Thanks for your interest Lizzie. That’s a great question, I have never tried. I will sometimes shape them and leave them in the fridge or even freeze them overnight. That being said, I think it should be fine. I would cover it properly.
Margaret
Hi Maria:
Since we have all been spending so much time at home I decided to make the ricotta cavatelli. The dough comes together in a snap. I used a standing mixer. I chose to use the pinkie press method to form them. A little time consuming but worth the effort. Your recipe makes two pounds. I froze them and I made a pound with sautéed broccoli and grated cheese last week and added the pasta water to the sauce as you recommended in your cavatelli and broccoli recipe. Restaurant quality I was told by my family. I love a meatless meal. The best part is I still have another pound in the freezer.
Maria
Amazing Margaret! I just love the reference to the pinkie press… I am going to quote you on that 🙂 Thanks so much for sharing!
Maria
Great recipe! It was easy to follow and we enjoyed making them. My husband did the imprints!
Maria
Fantastic Maria! Thanks for sharing!
Jay
Gave it a shot and it turned out delicious. 1st time making them. Great instructions. To the T. Great hints too.
Maria
Thanks so much Jay!
2pots2cook
Sweet Heavens Maria ! I haven’t made these beauties for ages ! It brings so heart warming memories back !!!!! Pinning and sharing and everything….. people need to make these , they just need to 🙂 Ti abbraccio !
Maria
I absolutely agree with you! Thanks so much for stopping by.