

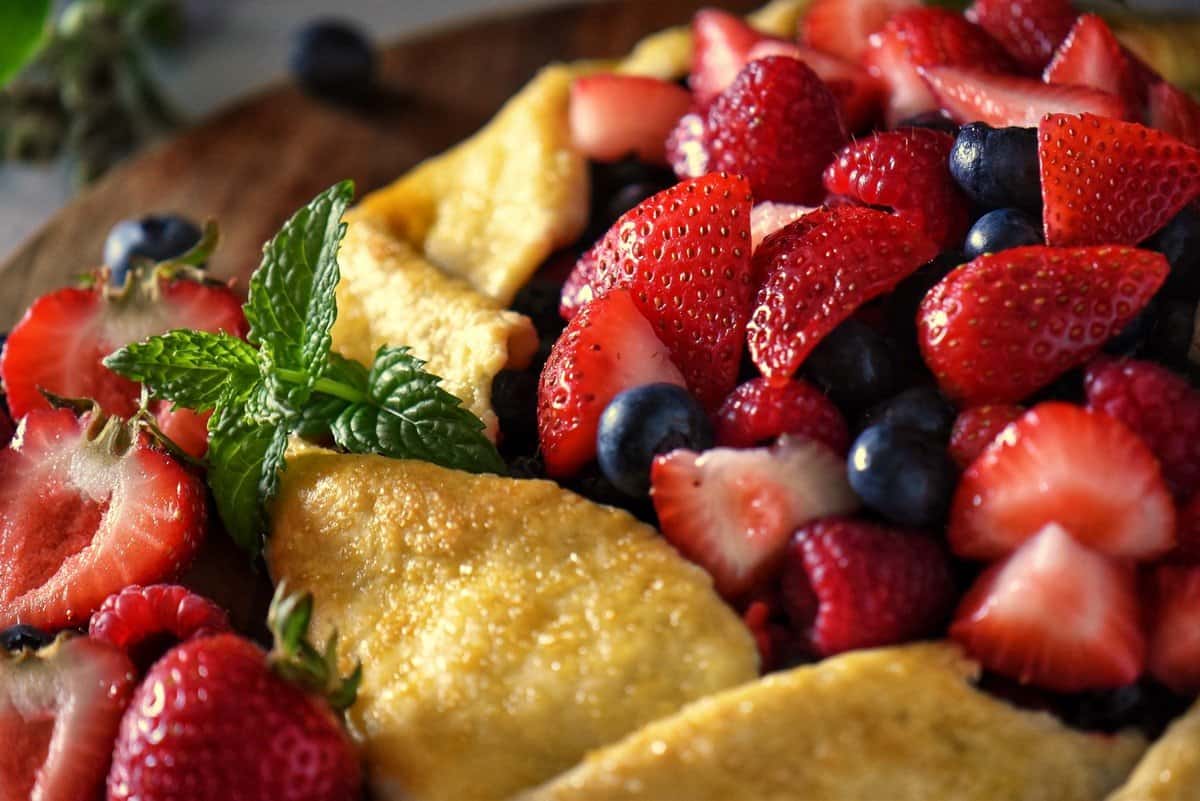
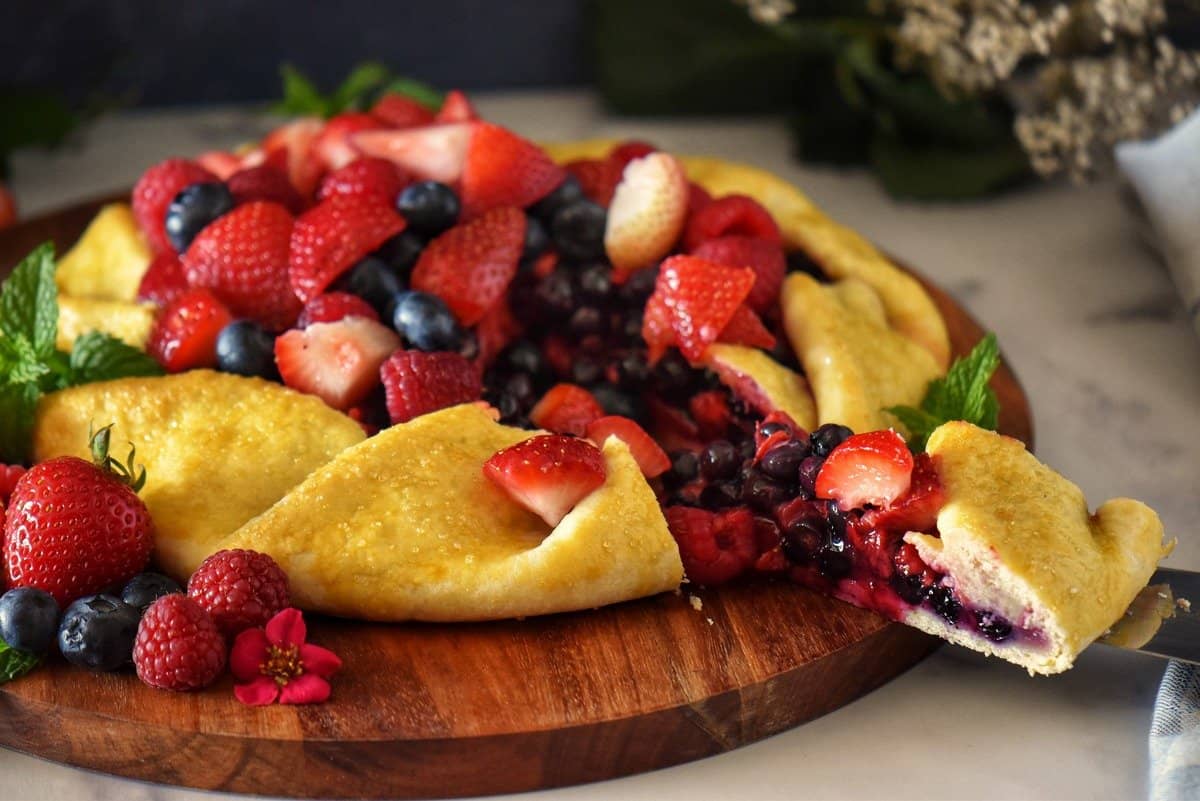
This Berry Crostata Recipe is the best Italian dessert to end any summer meal. This easy-to-make but impressive-looking homemade dessert, made with pasta frolla and filled with summer berries, is baked to perfection and then topped with fresh macerated fruit. Refreshing and delicious!

You might wonder what makes this recipe the “best ever” fruit crostata.
Well, let me tell you!
Let me start by saying that this is an excellent way to showcase those wonderful small fruits available at your farmers’ market during the summer berry season.
There are several benefits to buying local and in season. It usually implies lower prices.
Additionally, since the harvest date is closer to consumer availability and consumption, the crops are more likely to be fresh. As a result, this fresh produce probably has better nutritional value and fewer contaminants. This reduction in travel time is also beneficial on so many levels.
Another point in my “best ever” case is that this recipe is super simple to put together.
By definition, a crostata is a free-form, rustic-looking pie baked on a baking sheet that may be sweet or savory.
Freeform implies no pans; it also (usually) implies no fancy lattice top and no crimping. This open-faced pie is ideal since we’ll be loading the sweet shortcrust dough with lots of small fresh fruits, particularly strawberries, blueberries and raspberries.
Jump to:
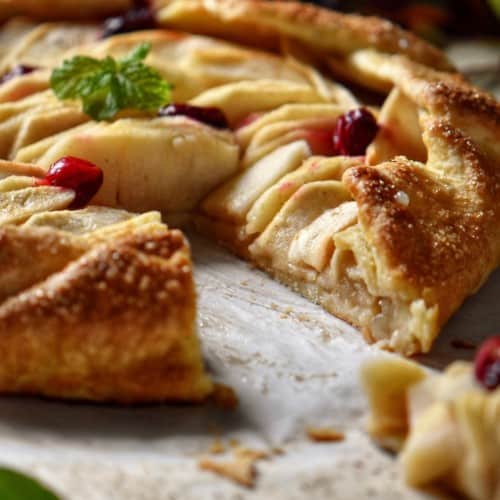
What’s the difference between galette, crostata and a tart?
In case you are wondering, galette and crostata are interchangeable terms when referring to this rustic dessert. One is the French term and the latter is Italian.
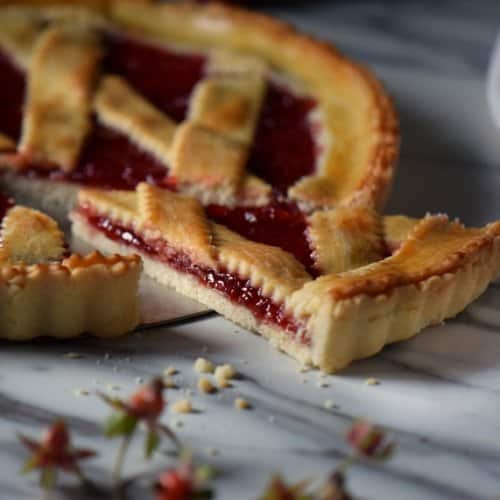
On the other hand, a tart has a particular shape, whether round, rectangular or square. It is baked in a pan with a removable bottom so that the pretty fluted sides are showcased when unmolded. Here is an example of an Asparagus Ricotta Tart made with a polenta crust.
Let me show you how easy it is to make the “best ever” crostata or if you prefer this berry galette!
Mise en Place
Before assembling this fruit crostata, we must prepare the filling and the pastry dough. We can prepare the berry topper while the crostata is baking.
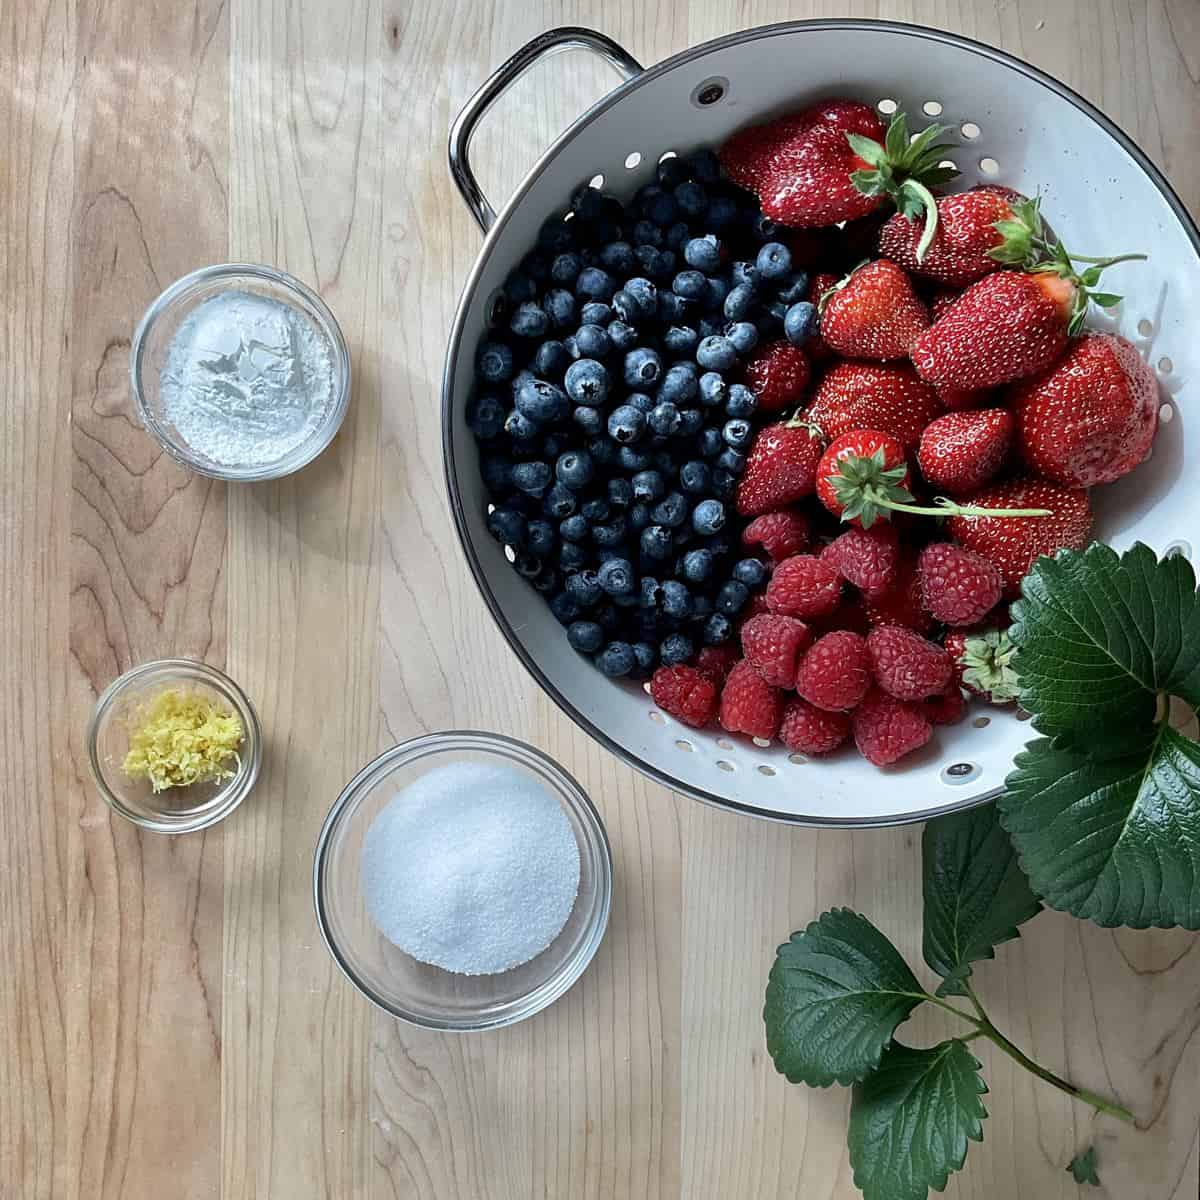
Fruit filling: In a large bowl, whisk together ¼ cup of granulated sugar and 3 tablespoons of cornstarch. Add 4 cups of your favorite small fruits (rinsed and dried). Add 1 teaspoon of lemon zest and toss to coat.
Crostata pastry dough: The ingredients to make crostata pastry dough comes together very quickly and provide the perfect base for the fruit.

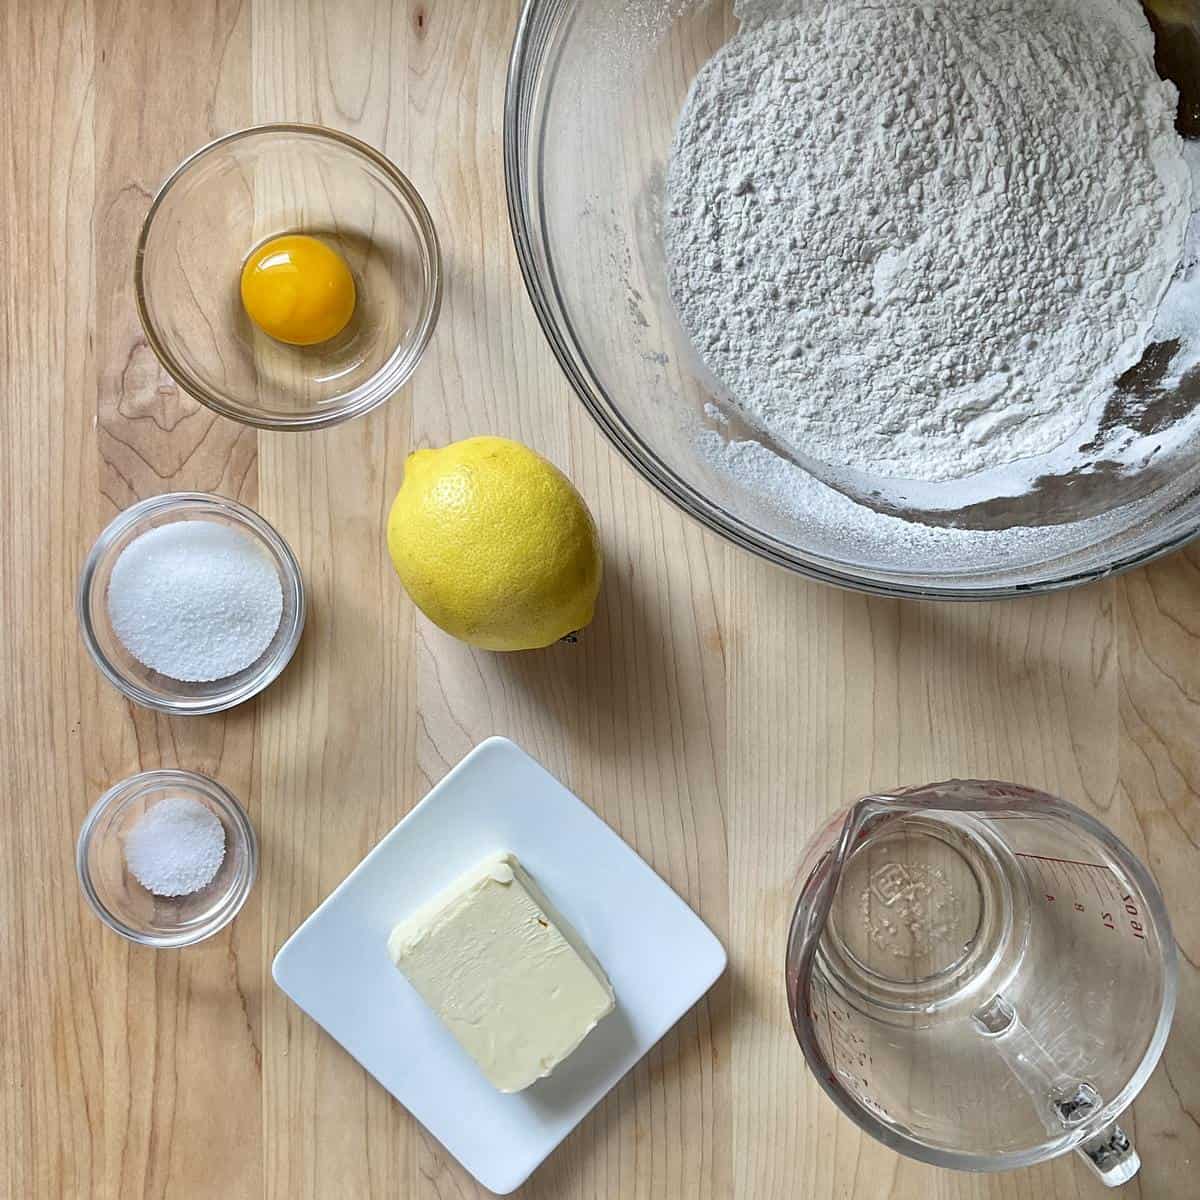
In a medium bowl, whisk together 1½ cups (210 grams) of all-purpose flour with 2 tablespoons of granulated sugar, ½ teaspoon of lemon zest and ½ teaspoon of kosher salt. Using a cheese grater, grate one-third cup of frozen butter over dry ingredients. With your fingertips, toss gently to coat the butter with flour. Then, gently rub together for 1-2 minutes.
Whisk together one-third of a cup of ice-cold water with one egg yolk in a small bowl.
Once the grated butter is worked into the flour, just sprinkle a tablespoon at a time of the egg yolk and ice water combination over a small section of the flour; toss together with a fork and push it aside
Add another tablespoon and repeat until you have used up all the liquid. Then, with your fingertips, gently knead the dough a few times; before you know it, you will have a ball of dough.
Instructions
Now that we have fruit filling and the pastry dough, it is time to assemble our crostata.
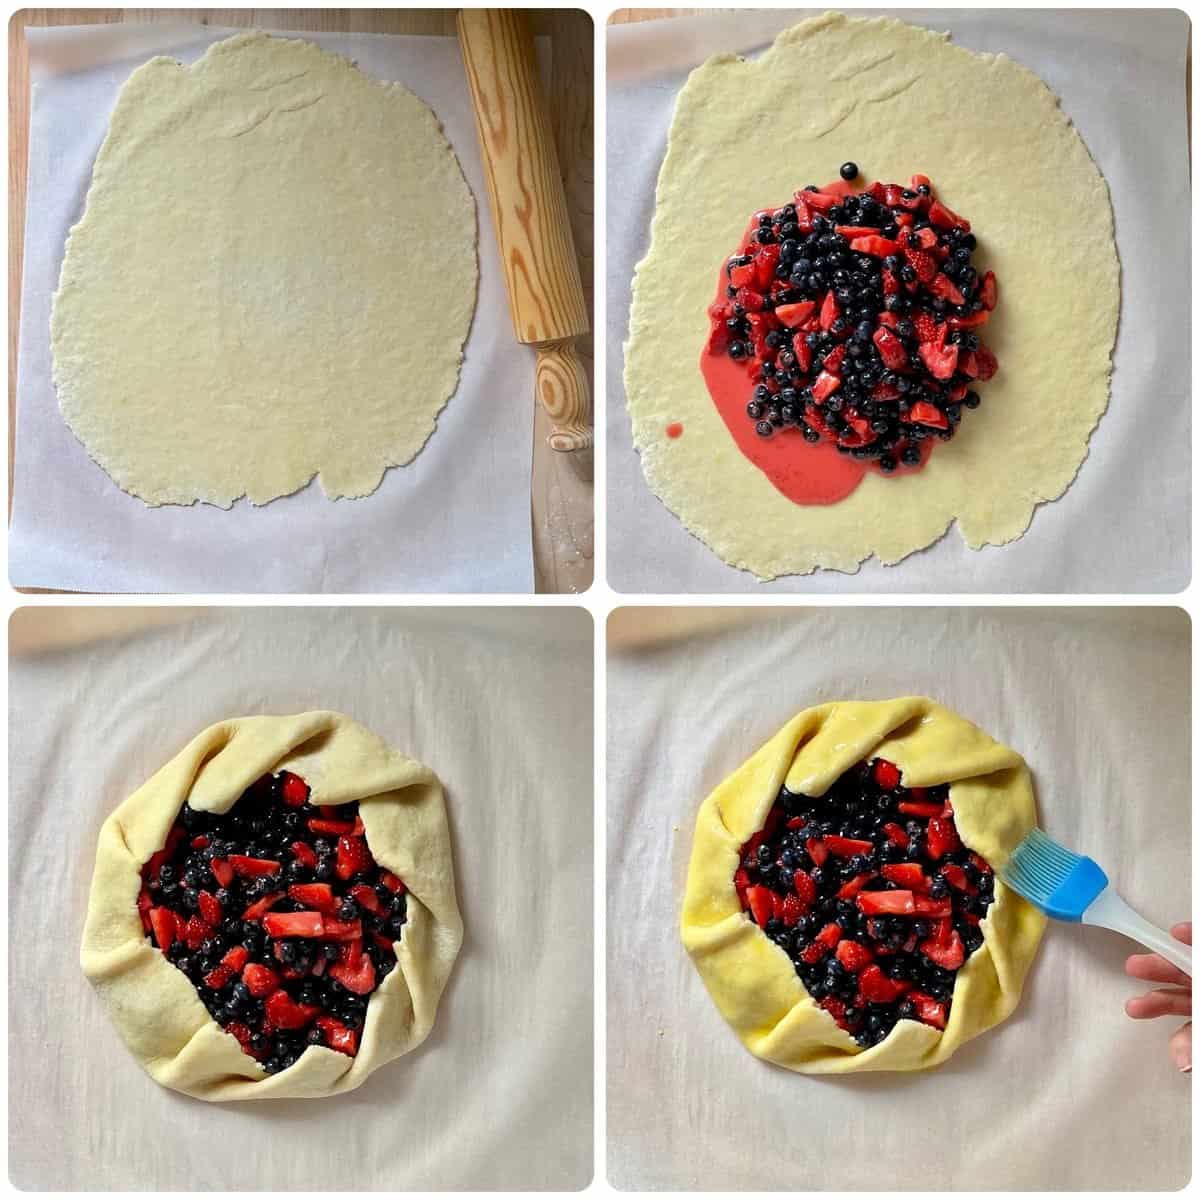
Place the ball of dough between two pieces of parchment paper that have been lightly floured. Roll out the dough to an oval approximately 16 x 12 inches. Once again, this is a rustic pie, so any lopsided shape works.
Transfer the parchment paper with the rolled-out dough directly to the baking sheet.
Place the fresh fruit in the middle of your stretched-out dough, leaving at least 2 inches all around.
The next step is to bring up the sides of the dough and partially fold it over the filling. Remember, there is no right shape for the crostata.
A brushing of egg wash followed by a little sprinkle of coarse sugar and your crostata is ready for the oven.
Bake at 375℉ (190°C) for 25 minutes. Then place a sheet of foil over the berry filling and continue to bake for another 20 minutes or until the filling is bubbly and the crust becomes golden brown.
Allow to cool on the baking sheet for about 5-10 minutes. Then, transfer carefully to a wire rack to continue to cool down for the fruit to set.

While the crostata is baking, prepare the berry topper.
In a small bowl, combine 1½ cups of mixed small fruits with 2 tablespoons of granulated sugar and 2 tablespoons of freshly squeezed lemon juice.
Let stand at room temperature for at least 1 hour.
When ready to serve, spoon the macerated berries over the baked fruit filling of the crostata. Garnish with mint leaves (if desired) and enjoy!
How to serve
This Italian fruit crostata is the perfect dessert to enjoy on its own. For an extra touch of creaminess add some sweet ricotta. For a homemade dessert a little more decadent, try adding a scoop of vanilla ice cream
Tips
- Use any combination of small berries available to you to make the fruit filling or the berry topper.
- If making homemade pastry dough is inconvenient for you at this time, feel free to use a commercial product.
- Serve the crostata warm or at room temperature.
Can frozen berries be used in this crostata recipe?
Yes! If it is the off-season for small fresh fruits, frozen berries can be used in this recipe. Here’s how:
- use 4 cups of assorted frozen fruit;
- place the frozen fruit and lemon zest in a saucepan and heat over medium heat for about 3-5 minutes;
- add the cornstarch and sugar combination and stir together to combine;
- increase the heat to medium-high;
- bring the fruit mixture to a gentle boil and stir continuously for about 1 minute;
- remove from heat and allow to cool down completely (mixture will thicken);
- continue assembling the crostata as outlined below using the cooled-down cooked fruit filling. (Note: total baking time will be reduced as the filling is already cooked).
Nutrition Trivia
It is hard to resist the bright colors of these small fruits -no Photoshop application is required. Generally, the vibrant colors are due to a type of pigment called flavonoids. Not only are they beautiful to look at, but they are nutritional powerhouses. [SOURCE]
As you know, flavonoids are best known for their antioxidant health benefits. So, the next time you see that deep blue color of a blueberry or the bright redness of a strawberry, know that when you consume them, you are well on your way to healthy eating!
Crostata Recipes you will love

Recipe origins
I’ve adapted this crostata recipe from one that I found in a magazine entitled "Cook's Secrets"
As I do in most recipes that I test, I reduced the amount of sugar because the local strawberries I used in this recipe were already quite sweet. Feel free to adjust the added sugar quantity to your taste preferences.
I would also like to mention that many decades ago, Chef Michael Smith shared his secret on how to make the perfect biscuit. I applied his flawless method of grating frozen butter directly into the flour and using my fingertips to make this pastry dough.
No food processor, no sticky mess to deal with when cutting in the butter with a pastry blender (personally, one of my least favorite tools in the kitchen). As an added bonus, clean-up consists of washing your hands.
This crostata recipe is a show-stopping dessert that can wow your guests before tasting it.
Have I convinced you that this is the best ever crostata?
Only one way to find out!
THANKS SO MUCH for following and being part of the She Loves Biscotti community, where you will find Simple & Tasty Family-Friendly Recipes with an Italian Twist.
Ciao for now,
Maria
If you haven’t already joined, here is the link where you can sign up for my weekly e-mail newsletter. This way, you won't miss any of my new recipes and it’s free!
★★★★★ If you have made this Italian Crostata recipe, I would love to hear about it in the comments below and be sure to rate the recipe!
Recipe

Berry Crostata Recipe: The Best Italian Dessert
WANT TO SAVE THIS RECIPE?
Ingredients
For the fruit filling:
- ¼ cup granulated sugar
- 3 tablespoons cornstarch
- 4 cups mixed fresh small fruit cut-up strawberries, blueberries, raspberries
- 1 teaspoon lemon zest finely grated
For the pastry dough:
- 1½ cups all purpose flour 210 grams
- 2 tablespoons granulated sugar
- ½ teaspoon lemon zest
- ½ teaspoon salt
- ⅓ cup butter frozen
- ⅓ cup ice cold water
- 1 egg yolk
For the egg wash:
- 1 egg
- 1 tablespoon water
- 1 tablespoon of Turbinado or coarse sugar for sprinkling on egg wash
For the berry topper:
- 1½ cups mixed small fruit cut-up strawberries, blueberries, raspberries
- 2 tablespoons granulated sugar
- 2 tablespoons lemon juice freshly squeezed
- Mint leaves for garnish.
Instructions
- Preheat the oven to 375℉ (190°C); position the rack in the middle.
For the fruit filling:
- Whisk together ¼ cup of granulated sugar and 3 tablespoons of cornstarch. Add 4 cups of your favorite small fruits (rinsed and dried) to a large bowl.
- Add 1 teaspoon of lemon zest and toss to coat. Set aside for now.
For the pastry dough:
- In a medium bowl, whisk together the flour, sugar, zest and salt.
- Using a cheese grater, grate frozen butter over dry ingredients.
- Toss gently (with fingers) to incorporate the butter.
- In a small bowl, whisk together the ice cold water and egg yolk.
- Sprinkle one tablespoon of egg yolk-water mixture over a small section of the dry ingredients..
- Incorporate together with a fork and push it aside.
- Add another tablespoon and repeat until you have used up all the liquid.
- Gently knead the dough (with your fingertips) a few times and before you know it, you will have a ball of dough.
- Place the ball of dough between two pieces of parchment paper which have been lightly floured.
- Roll out the dough to an oval approximately 16 x 12 inches.
- Transfer the parchment with the rolled out dough directly on the baking sheet. Set aside while we prepare the fruit filling.
- Pile the fruit in the middle of your stretched out dough, leaving at least 2 inches all around.
- Bring up the sides of the dough and partially fold it over the filling. Leave the middle of the crostata open.
- Beat the egg and water together and brush over the exposed dough.
- Sprinkle coarse sugar over egg washed crust.
- Bake for 25 minutes.
- Place a sheet of foil over the berry filling and continue to bake for another 20 minutes or until the filling is bubbly and the crust becomes golden brown.
- Allow to cool on the baking sheet for about 5-10 minutes. Then, transfer carefully to a wire rack to continue to cool down for the fruit to set.
- While the crostata is baking, prepare the berry topper.
For the berry topper:
- In a small bowl, combine the mixed small fruit with granulated sugar and lemon juice.
- Let stand at room temperature for at least 1 hour.
- When ready to serve, spoon berry topper over cooked center fruit filling of the crostata.
- Garnish with mint leaves (optional).
Video
Notes
Nutrition
This post was originally published on June 24, 2017 and republished on July 1, 2022, with updated photos, content and a video. Thanks for sharing.
Sarah
Best recipe ever! You had me at grated butter. I knew it would be terrific — even though I’m not a regular baker — because you can see where this recipe is going before you start. I replaced half the flour w/ whole wheat flour, and half the sugar w/ coconut sugar (two things that could have ruined the texture), and still this pastry came out gorgeous! Definitely chill everything, even the rolling pin. Oh, and we used tart plums that could have used more sugar – but dang if this crust didn’t more than make up for it and steal the show. Thank you for sharing this recipe.
Maria
Amazing Sarah! I just love your variation! Thanks so much for sharing.
holly
I love the recipe and i love the idea of grating the frozen butter. I think it would be great for pie dough also
Maria
Thanks Holly! The frozen butter trick works like a charm every single time. Appreciate you stopping by and taking the time to comment 🙂
Inna
Your site got me motivated :)) I baked ziti, made roasted sweet peppers, bruschetta, fried zucchini and crostata with strawberries and blueberries 😉 Phew!
Maria
That’s amazing Inna… I’m salivating over here… now I wish I was your neighbor 🙂 Have a great week-end ♥♥♥
2pots2cook
Carissima, so happy to find you ! Great works you do ! Will be back for more ! Ciao !
Maria
Grazie mille ♥ Welcome !!!
Jovina Coughlin
looks delicious and beautiful.
Maria
Thanks so much Jovina! Have a great week end ♥