

You will love this traditional recipe for Italian Easter Taralli Cookies. These featherlike tadal cookies are both crunchy and chewy.
A short while ago, I shared a picture of the egg taralli that were made by la signora Filomena, my friend’s mom.
There were so many of you that wrote to me requesting the recipe.
In the span of a few weeks, I tried the recipe three times, trying to get it right. I am finally ready to share this recipe for these taralli cookies with all of you and more importantly, la signora Filomena’s advice when making them.
For those of you visiting for the first time, you need to know that I have a taralli obsession.
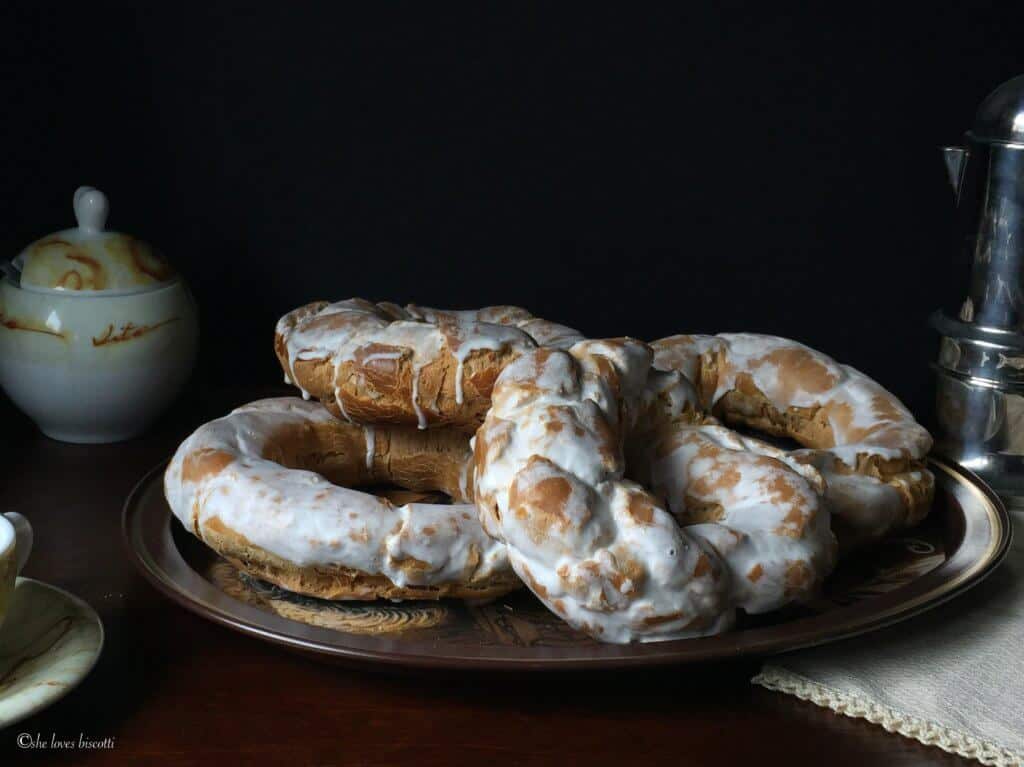
A while back, I posted my mom’s glazed Italian egg taralli. My mom would always make these around Easter and throughout the year because we loved them that much.
I have tried to reproduce her recipe -it’s good, but I am curious to see the results if I apply la signora Filomena’s tips. With that being said, my to-do list just got longer… I will redo my mom’s egg taralli recipe with la signora Filomena’s advice.
But for now, here are the best taralli cookies for Easter… are you ready?
How to make Easter taralli cookies
We will be using both the whisk and dough hook of the stand mixer to make this recipe. If you feel like getting a workout, feel free to knead the dough by hand.
I will usually start by sifting the flour and salt together and setting it aside. La signora Filomena uses one teaspoon of salt… I reduced it to ¾ of a teaspoon. I might just try ½ teaspoon the next time… but I digress…
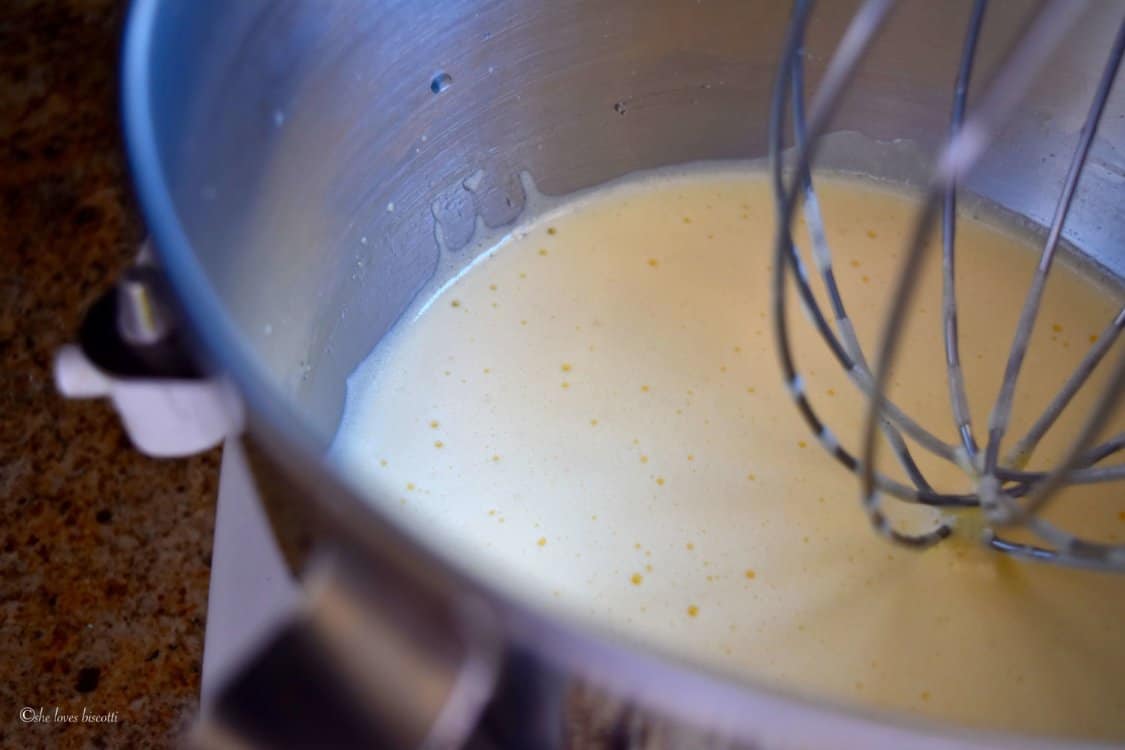
We will now whisk the room temperature eggs at medium-high speed for about 4-5 minutes.
At this point add the sugar and the oil. Please note that there is only one tablespoon of sugar… this is not a typo. There really is just one.
Have you noticed how so many traditional recipes will have the same quantity for the ingredients? Take for example this recipe for the Best Homemade Italian Easter Egg Taralli di Filomena; 5 eggs; 5 tablespoons of oil, which will give you 5 taralli.
Okay, so enough math 😉
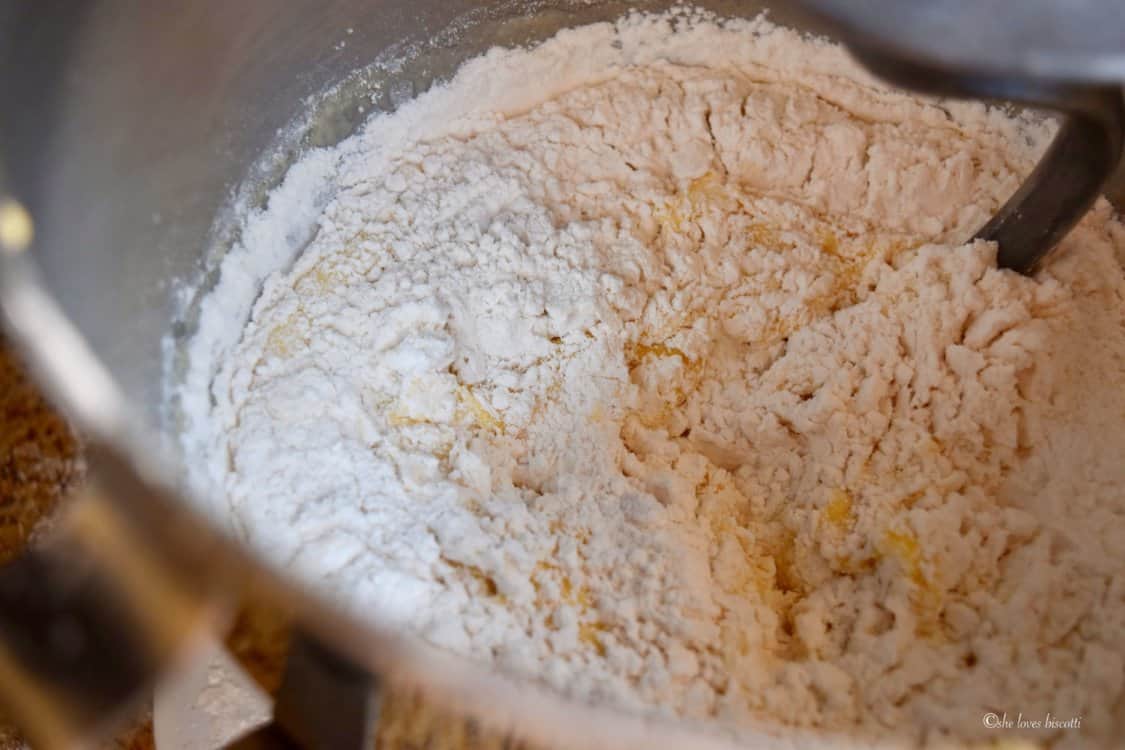
At this point, I incorporate about one-third of the flour and then switch over to the dough hook to incorporate the remainder of the flour. Let your stand mixer do all the work for about 10 minutes.
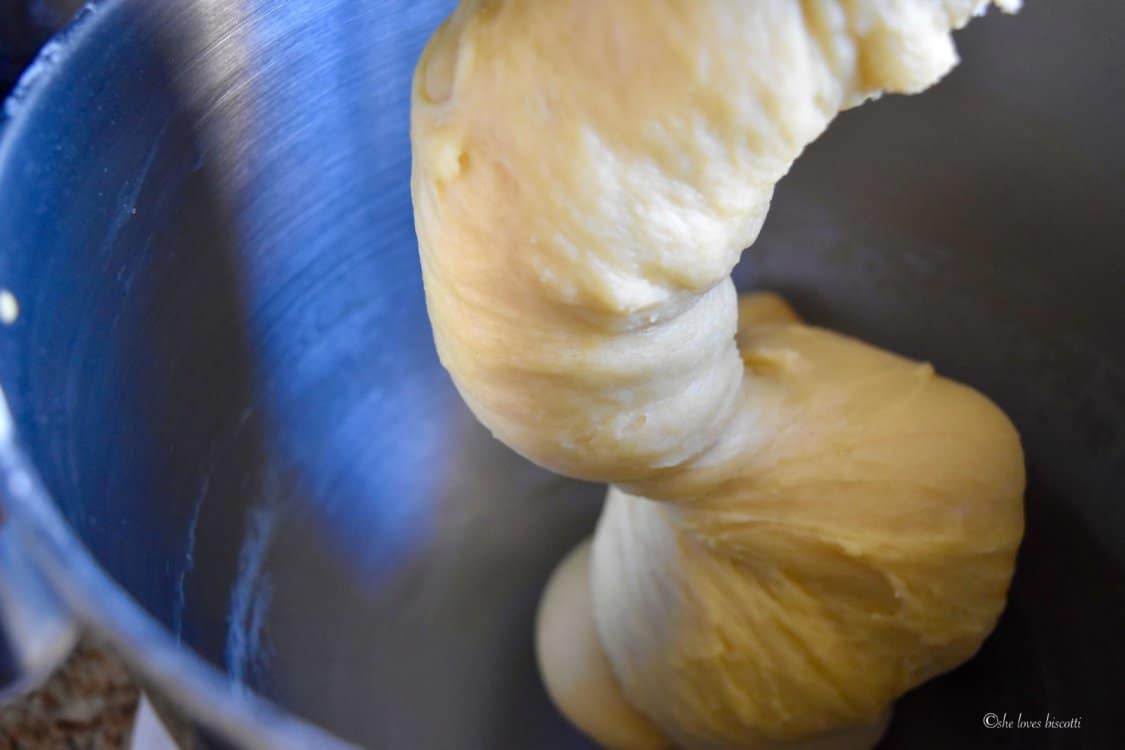
At the end of the kneading process, the dough should pull away from the sides of the bowl.
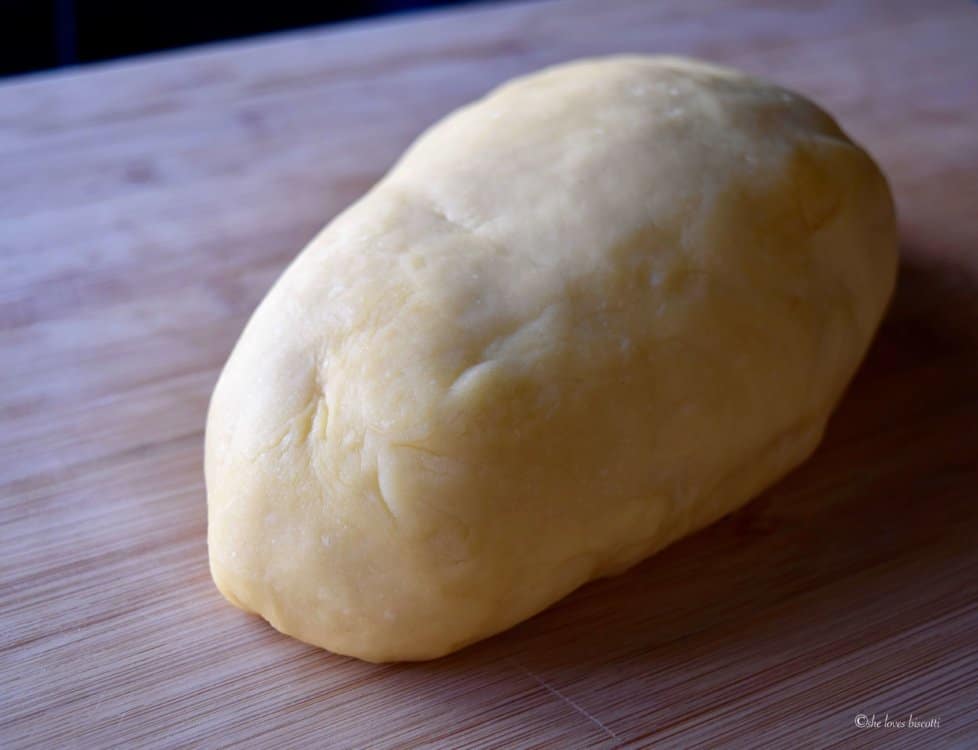
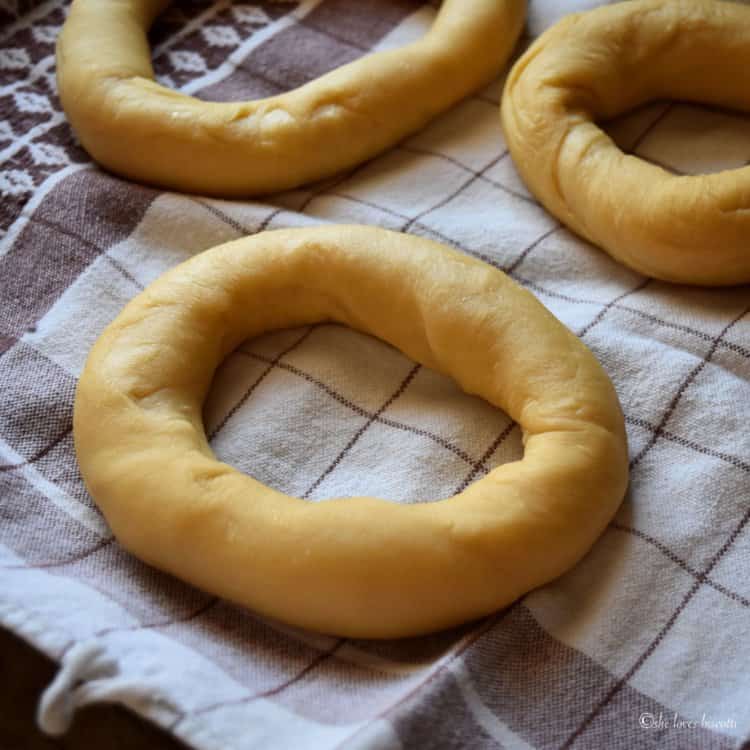
Shape the dough into a log; wrap it in plastic wrap and let it rest for at least 30 minutes at room temperature (I will usually place a tea towel over the top). The longer it rests, the easier the taralli will be to shape.
I will now cut the dough into 5 equal pieces. Each piece of dough weighed in at 160 grams. Please feel free to make smaller taralli if that works for you. Working with one piece of dough at a time, shape as follows…
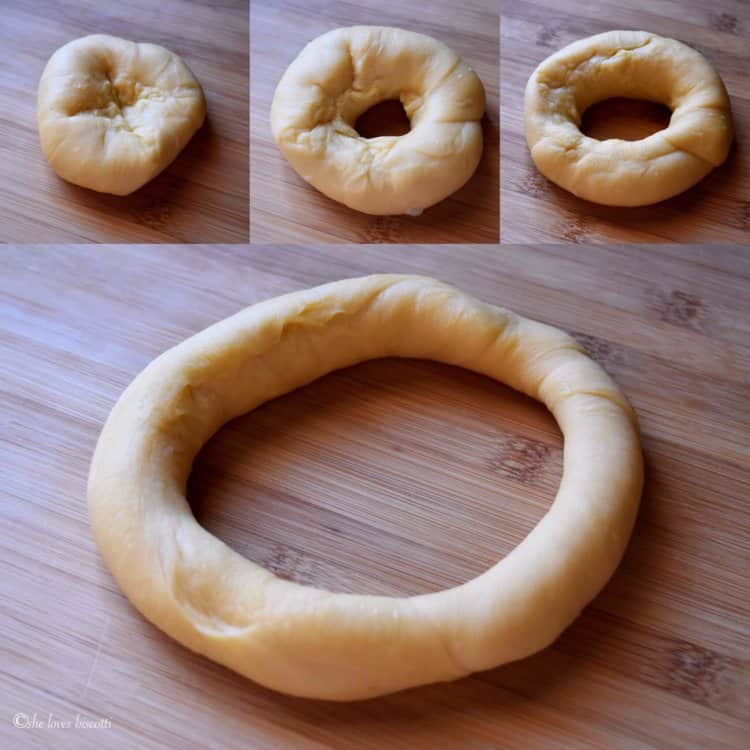
With thumb and forefinger, pinch the middle piece of the dough to create a hole. Slowly enlarge the hole, while forming a donut shape. Repeat until all 5 pieces of dough have been formed. Be sure to keep the unshaped pieces of dough covered so that they do not dry out before you have a chance to shape them.
Bring a large pot of water to 200°F (essentially, really hot water with a couple of bubbles escaping to the surface).
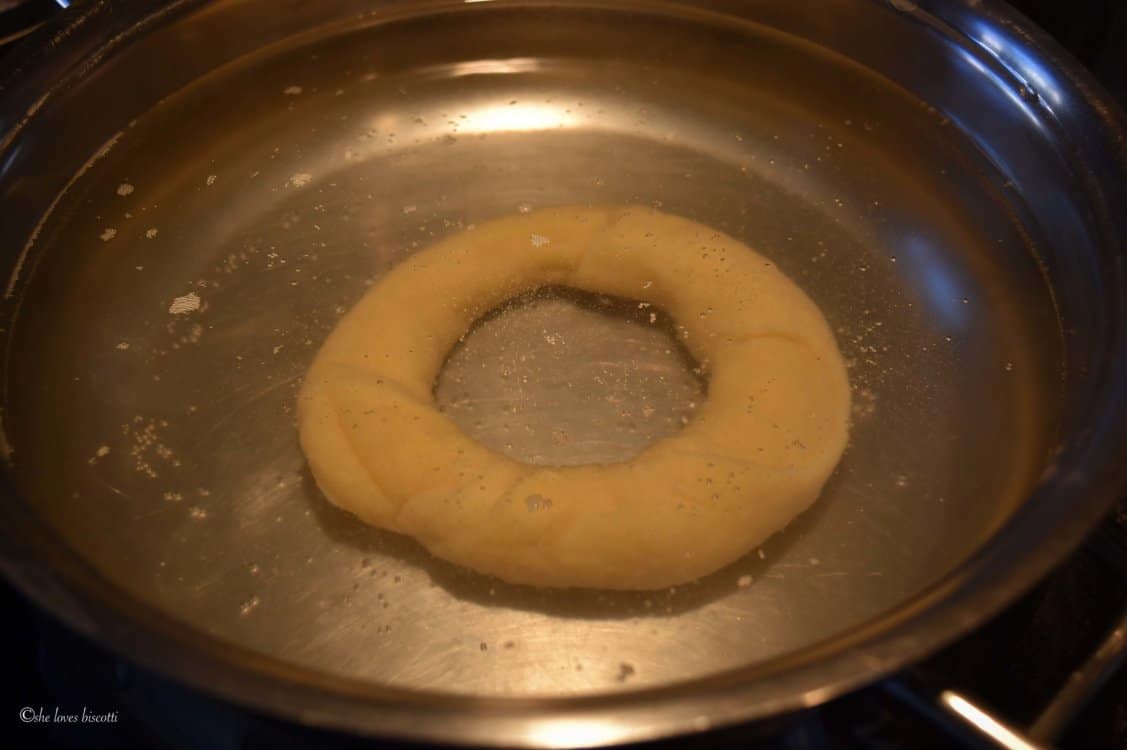
Place the taralli in the water and remove it with a slotted spoon once they float to the top (about 3-4 minutes). Make sure the taralli do not stick to the bottom of the pot by gently moving it around. My pot will only accommodate one taralli, so it’s one taralli at a time for me.
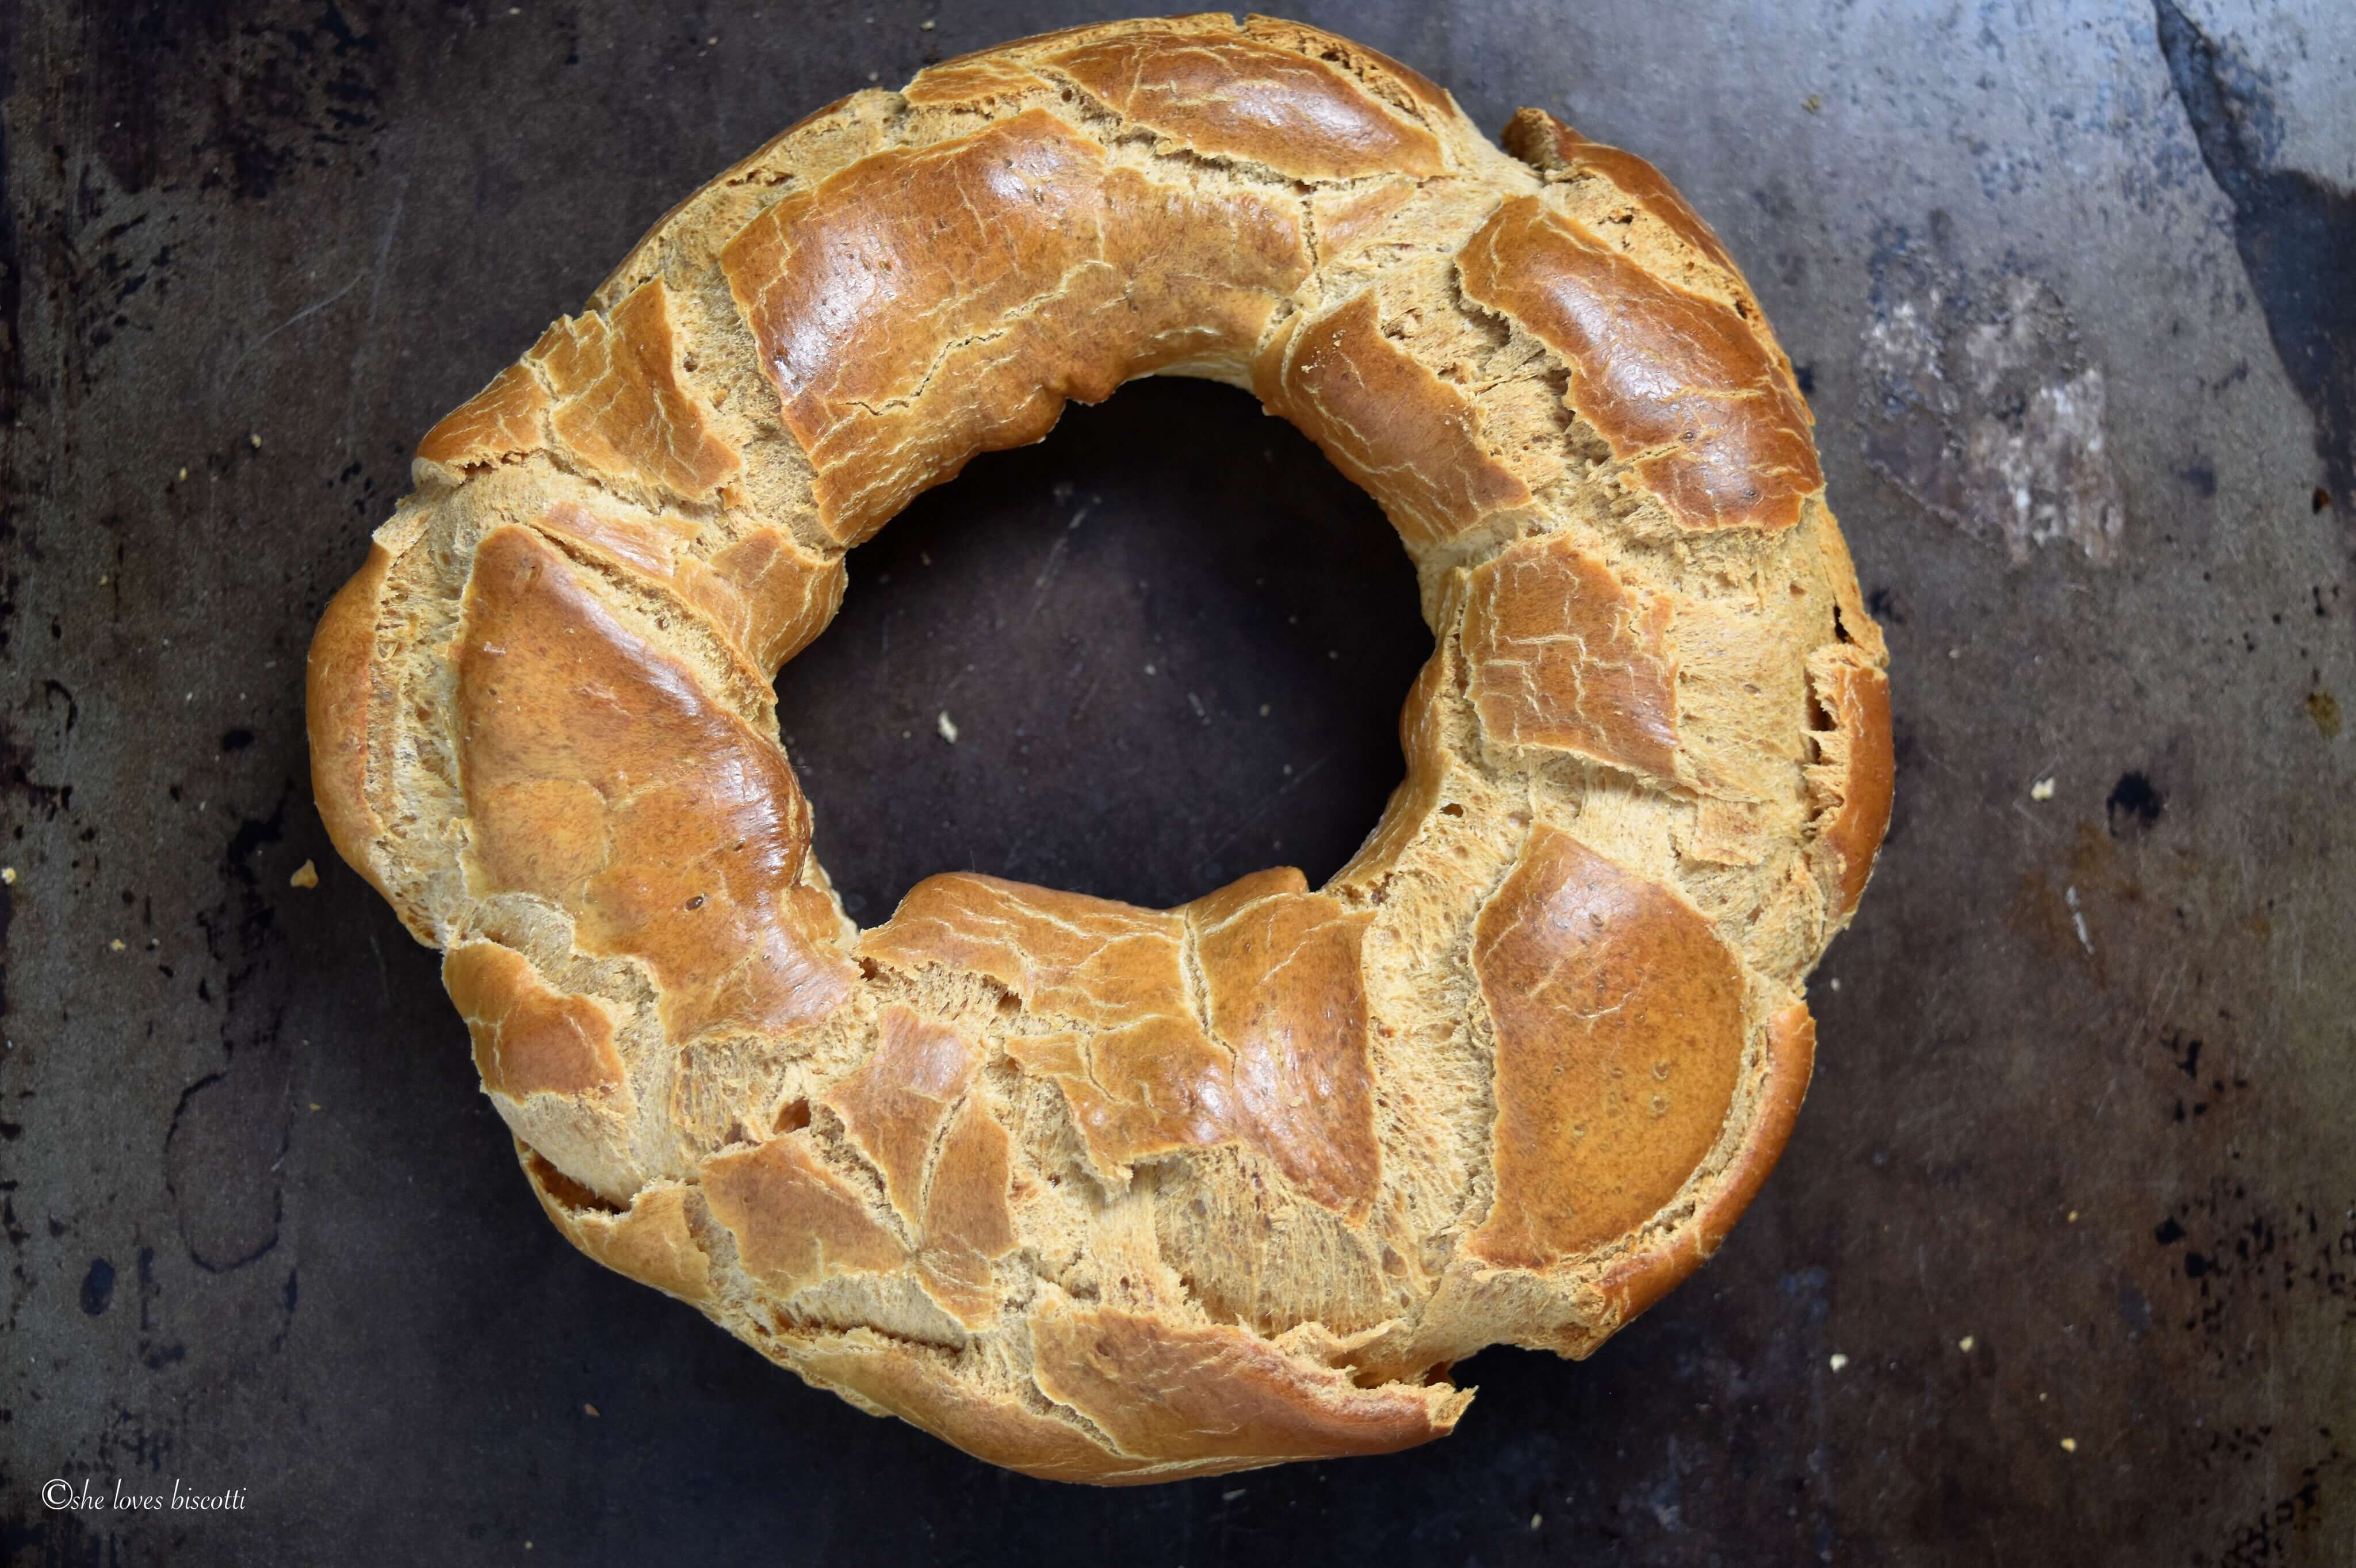
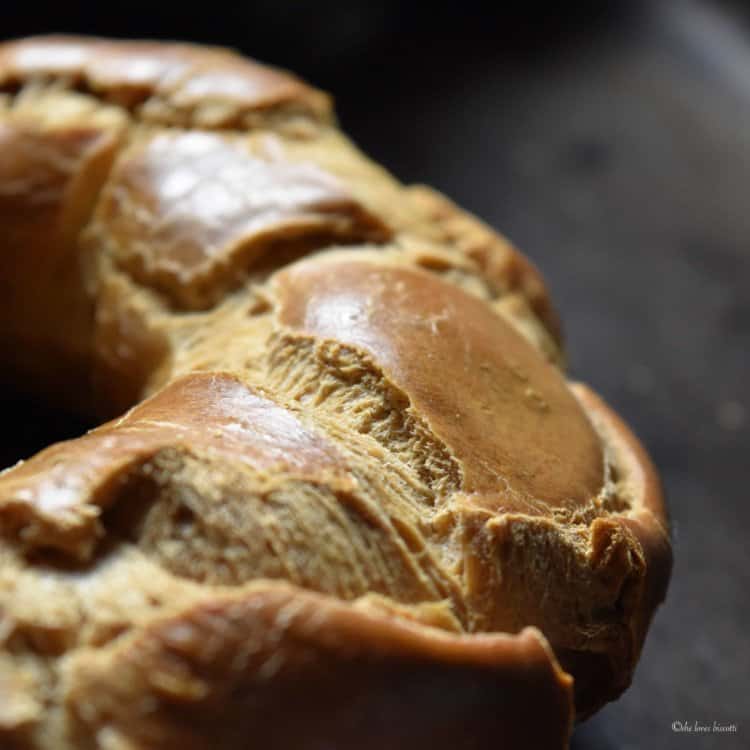
Place the boiled taralli on a clean tea towel and repeat the process until all the taralli have been given a hot water bath. Turn them over so that they become completely dry. The boiled taralli will be placed directly on oven grates, which should be positioned in the middle of the oven.
I was surprised to learn that unlike my mom’s recipe, la Signora Filomena does not slit her taralli.
Bake in a preheated oven at 425° F (220° C) for about 5 minutes; then reduce to 400° F (200° C) for another 10 minutes; reduce again to 375° F (190° C) for another 10 minutes and finally to 350° F (175° C) for another 10-15 minutes, until cracked, golden brown and light. If you find they are getting too dark, place a sheet of aluminum foil loosely over the top.
If you prefer more chewy taralli, I would recommend a shorter amount of time, about 8 minutes at all intervals except for the initial one.
La signora Filomena told me that in order for the taralli to puff up, you must learn how to “control the oven temperature… that’s the secret”.
Well, you and I both know that every oven is different. It took me three trial runs to get these taralli the way I wanted them to be. So, if at first you don’t succeed try and try again.
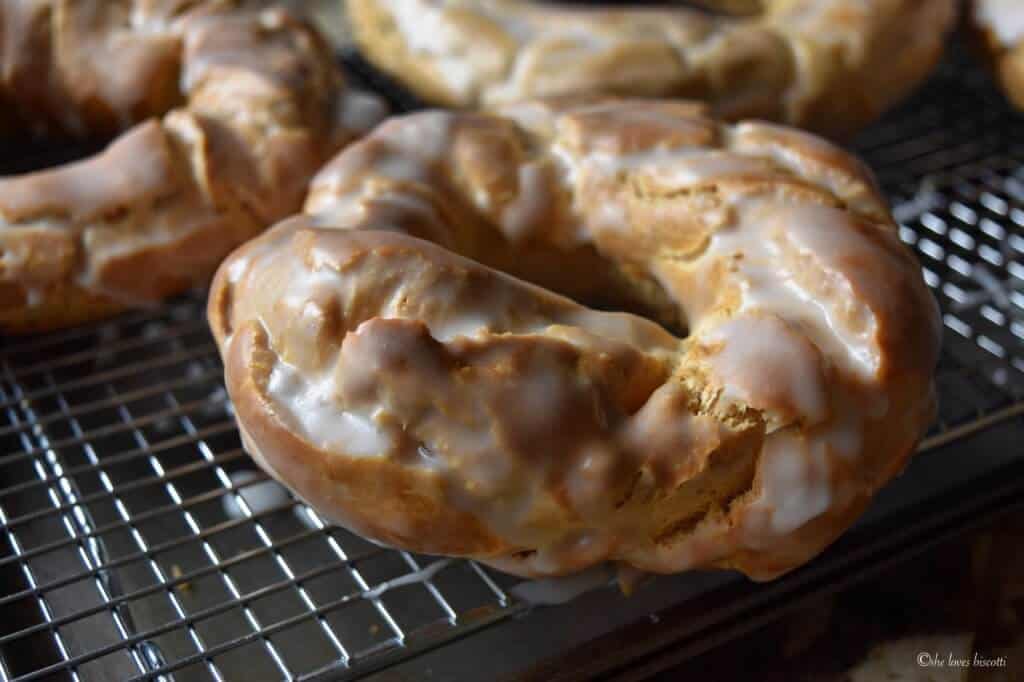
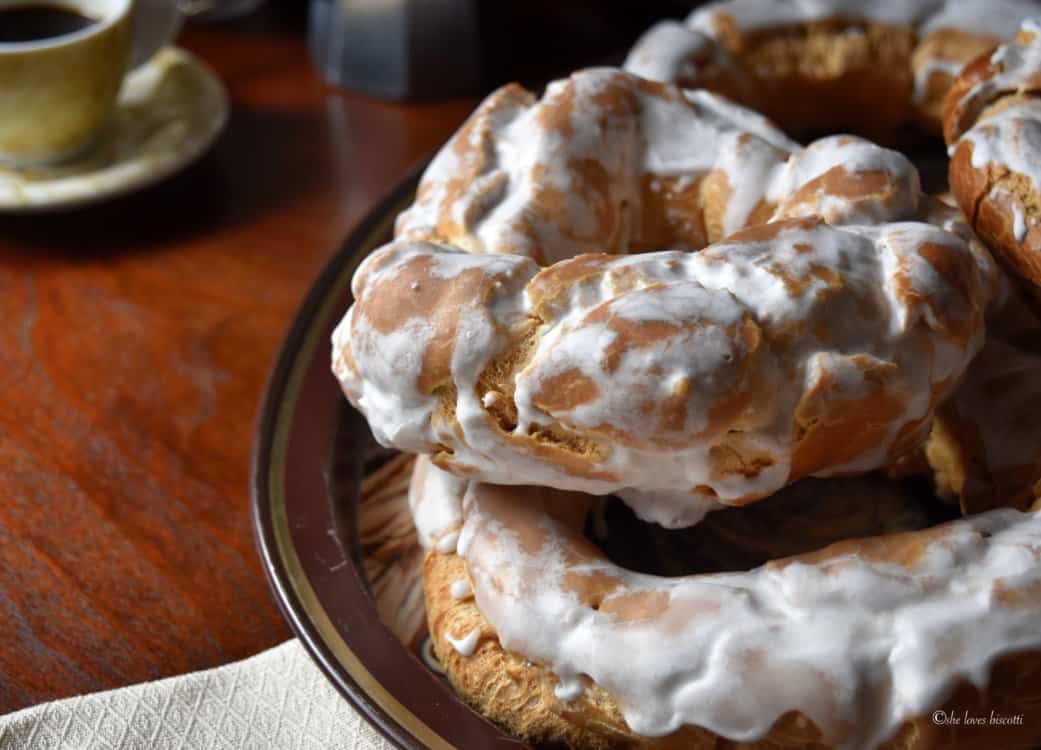
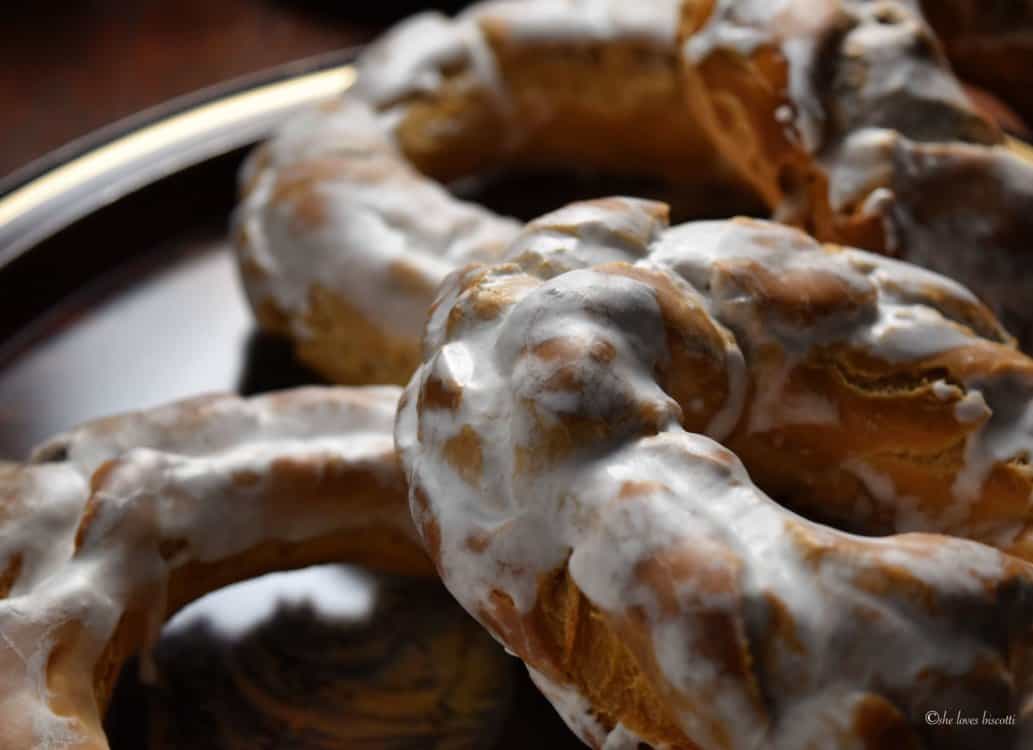
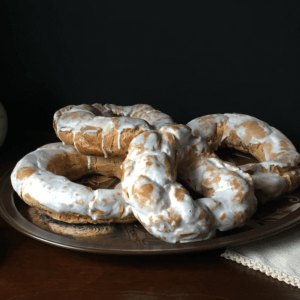
As far as the glaze is concerned, it is a simple combination of a few tablespoons of freshly squeezed lemon juice and confectioners sugar… we are basically looking for a spreadable glaze. I used my mom’s recipe for the glaze.
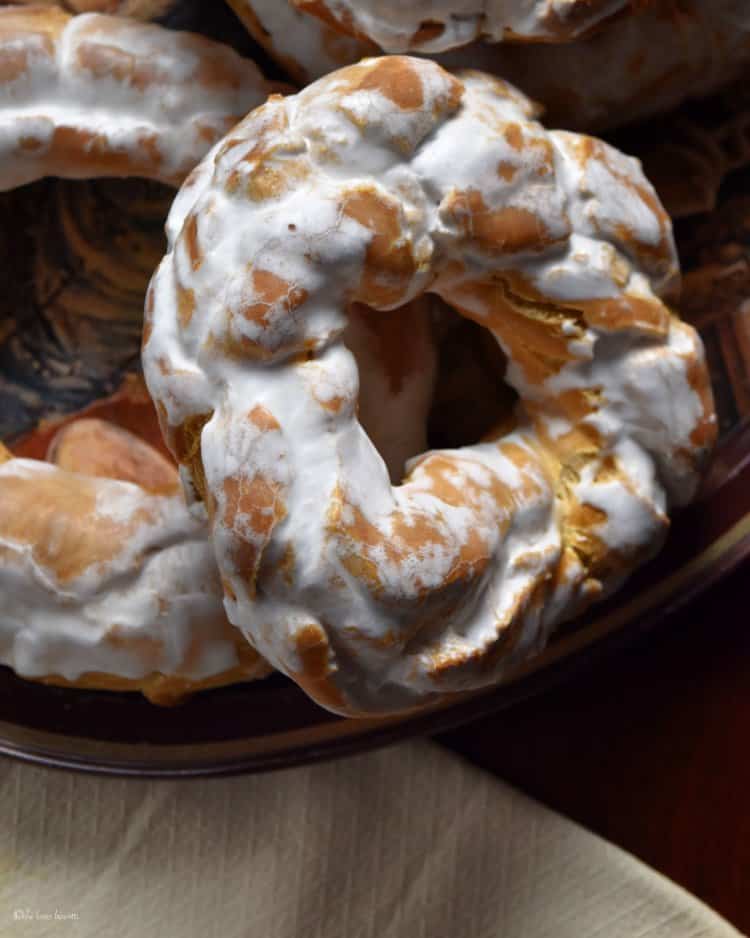
Once the glaze hardens, it becomes glossy. They can be stored at room temperature, lightly covered with wax paper for a couple of weeks.
Easter food traditions we love
Celebrate Easter with friends and family by exploring Easter’s rich culinary traditions!
- Savoury Easter Cheese Pie
- Italian Easter Sweet Bread
- Pizza Rustica Recipe
- Cozonac
- Koulourakia
- Crescia
- Sweet Ricotta Easter Pie
Recipe inspiration
As was previously mentioned in the Italian Fennel Taralli post, my friend’s mom makes the most amazing taralli. Today, I have shared her recipe and tips on how to make these popular Easter egg taralli. In my humble opinion, these are out of this world! But then again, I have a taralli obsession 😉
If you do decide to give the Best Homemade Italian Easter Egg Taralli di Filomena a try, I would love to hear about it. I will keep you informed on the outcome of these tips and tricks on my mom’s egg taralli recipe.
Wishing you all a great baking week!
THANKS SO MUCH for following and being part of the She Loves Biscotti community where you will find Simple & Tasty Family-Friendly Recipes with an Italian Twist.
And if you are new here, welcome! You may want to sign up for my weekly e-mail newsletter. You can unsubscribe any time you want.
Ciao for now,
Maria
★★★★★ If you have made this Italian Easter taralli recipe, I would love to hear about it in the comments below and be sure to rate the recipe!
Recipe
Easter Taralli Cookies
WANT TO SAVE THIS RECIPE?
Ingredients
- 3 cups all purpose flour
- ¾ teaspoon salt
- 5 eggs room temperature
- 1 tablespoon sugar
- 5 tablespoons vegetable oil
Instructions
- In a large mixing bowl, sift together flour and salt. Set aside.
- In a large mixing bowl (of stand mixer), with whisk attachment, beat the eggs on medium-high speed for 4-5 minutes.
- Add the sugar and the oil.
- On low speed, add about ⅓ of the flour mixture.
- Switch to dough hook and incorporate the remainder of the flour.
- Knead for approximately 10 minutes.
- Form into a log; wrap dough in plastic wrap and let it rest for at least 30 minutes at room temperature (I will usually place a tea towel over the top).
- Cut dough into 5 pieces (work with one piece of dough at a time; keep the rest of the dough covered).
- With thumb and forefinger, pinch the middle to create a hole. Slowly enlarge the hole, while forming a donut shape.
- Continue to form the rest of the dough.
- Bring a large pot of water to a 200°F (what we want is really hot water with a couple of bubbles escaping from the surface).
- Place the taralli in the water and remove with slotted spoon once they rise to the top (about 3-4 minutes). Make sure they do no stick to the bottom of the pot.
- Place on clean tea towel.
- Repeat process until all the taralli have been boiled.
- Place boiled taralli directly on oven grates or on a parchment lined cookie sheet.
- Bake in a preheated oven at 425° F (220° C) for 5 minutes; then reduce to 400° F (200° C) for another 10 minutes; reduce again to 375° F (190° C) for another 10 minutes and finally to 350° F (175° C) for another 10-15 minutes, until cracked, golden brown and light to the touch (set oven rack in the center). If you find they are getting too dark, place a sheet of aluminum foil loosely over the top.
- Remove from oven once golden colored.
- Cool completely before glazing.
Mary
My mother used to make them like your recipe but she would make about a dozen so I guess she used more flour and eggs. She also put more sugar. They are so good. I will try them now but might double the recipe.
Maria
Thank you for sharing Mary.
Tonya
Just made them for my brothers wedding. My great aunt would make these in our family but when she made them boy oh boy… she made lots. She made them for my 50th, that was her last time she made them. God bless her. Thank you.
Maria
Congratulations to your brother!
Thank you so much for sharing Tonya! Food memories are so special ♥
Ann B.
Hi Maria,
Thank-you for your dedication and thoroughness. Have you ever tried not boiling before baking? Fro what I have gathered, in Italy, many people didnot have ovens. They would boil their “sweets” to somewhat preserve them until the family had there turn at the community oven which could be a church, a bakery, etc. I made these Easter taralli about 5 years ago. I did experiment without boiling first. They came out pretty good. It is the “chalky texture/taste that is the goal & they weren’t Chalky. If short on time & want to skip the boiling, then,Good cookies, but not the classic Easter Taralli.
Maria
Hi Ann, thanks for reaching out. This makes a lot of sense. I have not tried but now I am intrigued. Anxious to try this!
Connie Rose
These taralli are great!. I made them smaller, though. Dough balls were the size if walnuts. 5 stars!!!!
Maria
So thrilled to read this! Thanks Connie!
Deb
These came out terrific! Easy directions and tips to follow . Will definitely make again. Thanks for the recipe!
Maria
My pleasure Deb! Thanks for sharing!
Kari
I came across these many years ago in a Italian grocery store. Have
never forgotten how good they were. Now I have the recipe…thank
you so very much. I am going to make some soon.
Maria
My pleasure Kari! Enjoy!
Rose
Hello
Can I freeze the Taralli’s? What is the shelf life if I don’t freeze them? Thank You.
Maria
Thanks for your interest Rose. Taralli will keep for at least a couple of weeks at room temperature. I store them in a paper bag. Yes, they can also be frozen.
Carmela
Hi Maria
Looks like a recipe and method my Nonna uses to make certain breads by boiling them. I am just curious why your not using any leavening agents?
Maria
Thanks for your interest Carmela. The eggs do all the work in this recipe… no need for leavening agents. Thanks for stopping by.
Fran
I made these over the weekend. They didn’t look like yours once I finished baking them but were good. I couldn’t resist so I slit the sides before baking and then frosted them. Mine were chewy and I love them like that. The recipe was easy to put together and turned out great for a first timer making these. Will make again for sure
Faye
Once boiled, I leave my taralli to dry out overnight and then bake.
Maria
That is very interesting Faye, thanks so much for sharing. I can see how that would contribute to a lighter tasting taralli. I must try this… thanks again!