
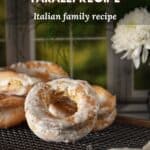
A signature crunchy sugar glaze gives this family recipe for Egg Taralli just the right amount of sweetness to create a simple Easter cookie. With just a few simple ingredients and my step-by-step guide, you too can make this sweet taralli recipe, just like nonna used to make.
If you want to explore a similar recipe, check out my Sweet Easter Taralli Cookies recipe for another delightful variation of a taralli recipe for Easter.
Jump to:
Introduction
Easter baking is just as exciting as Christmas baking in my Italian household, with special occasions like graduations, showers, engagements, and weddings also warranting special Italian cookies.
As you may be aware, certain foods, including eggs, are restricted for some religions during the Lenten period. As a result, eggs (which symbolize rebirth) play a crucial role in Easter baking.
Italian Easter bread and crescia are examples of the many delicious Easter-baked goods featuring eggs. Sweet ricotta pie, savory fiadone (shadone) and pizza rustica are other popular Easter dishes requiring many eggs.
Today, I’m excited to share my family’s recipe for sweet taralli, which has a unique twist compared to other taralli recipes.
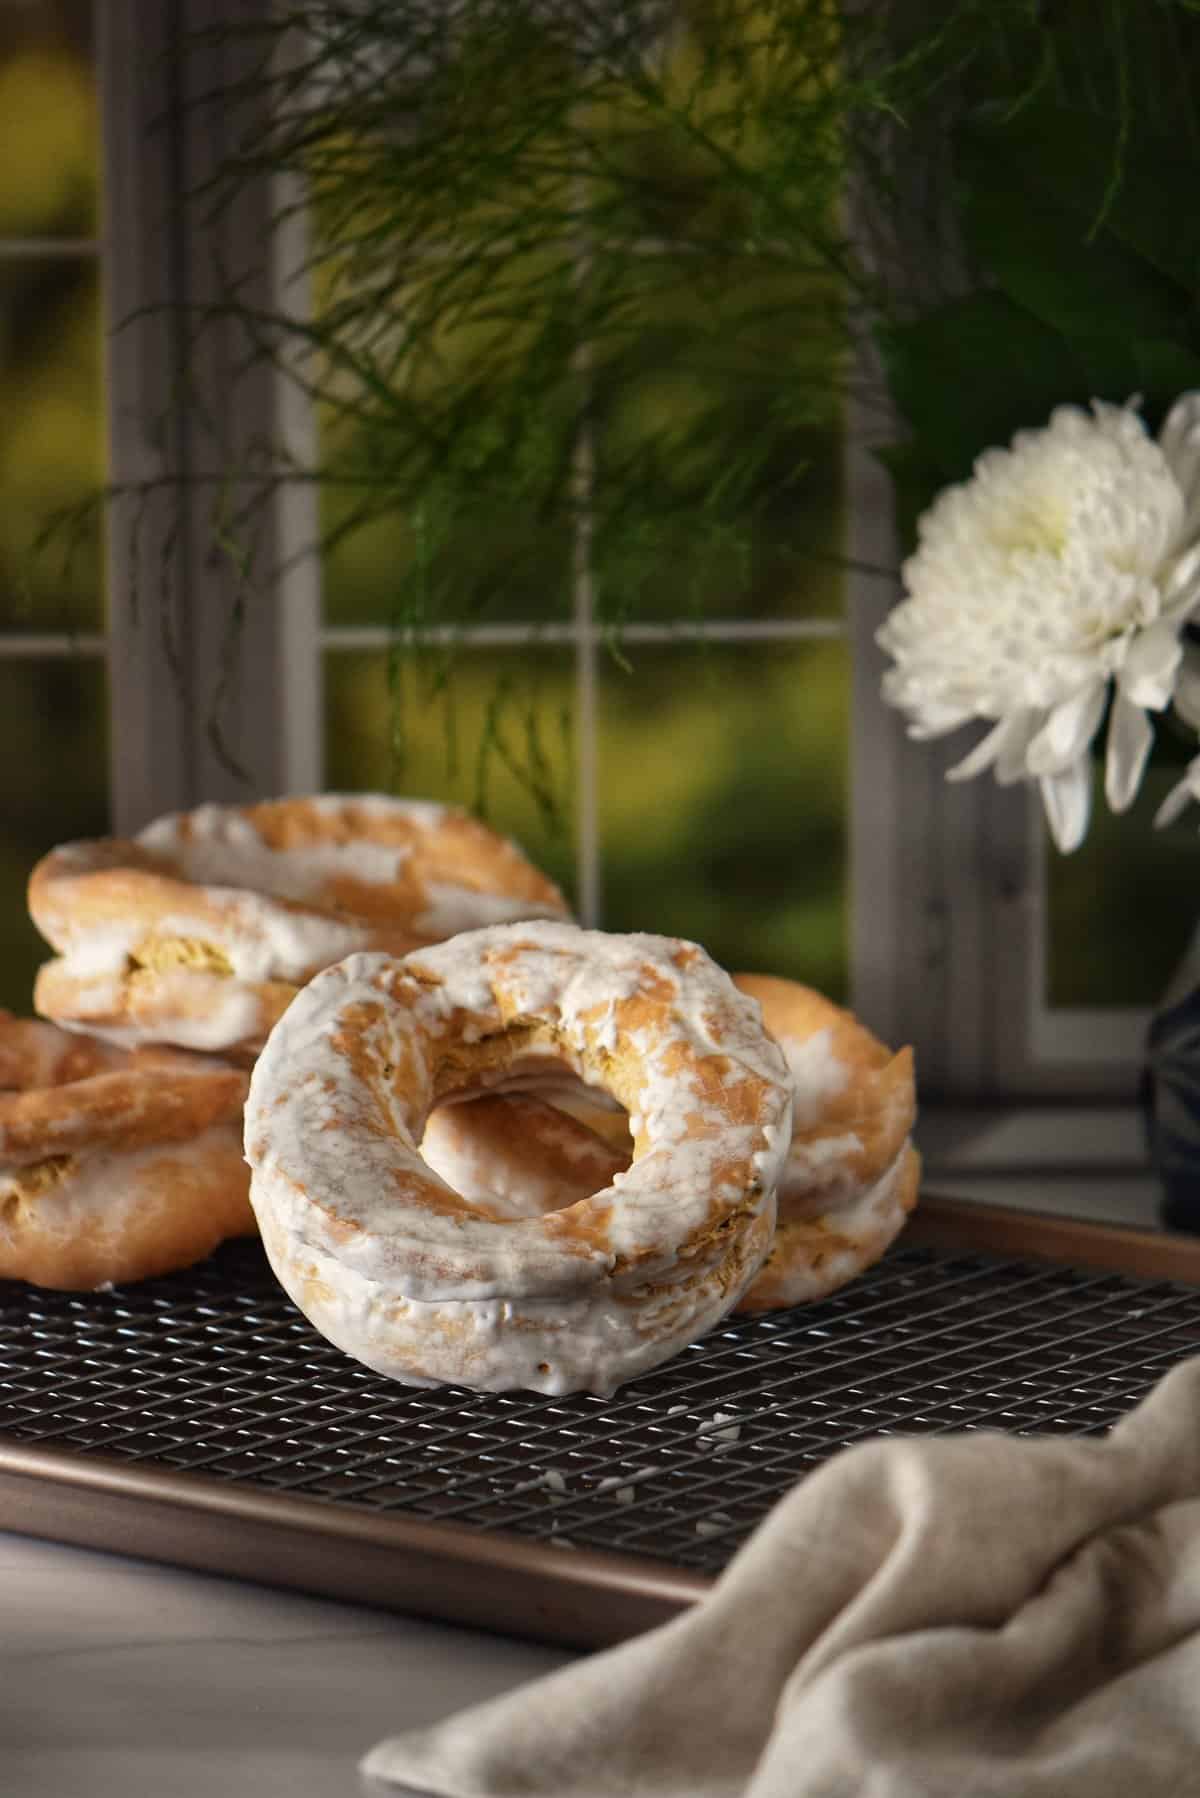
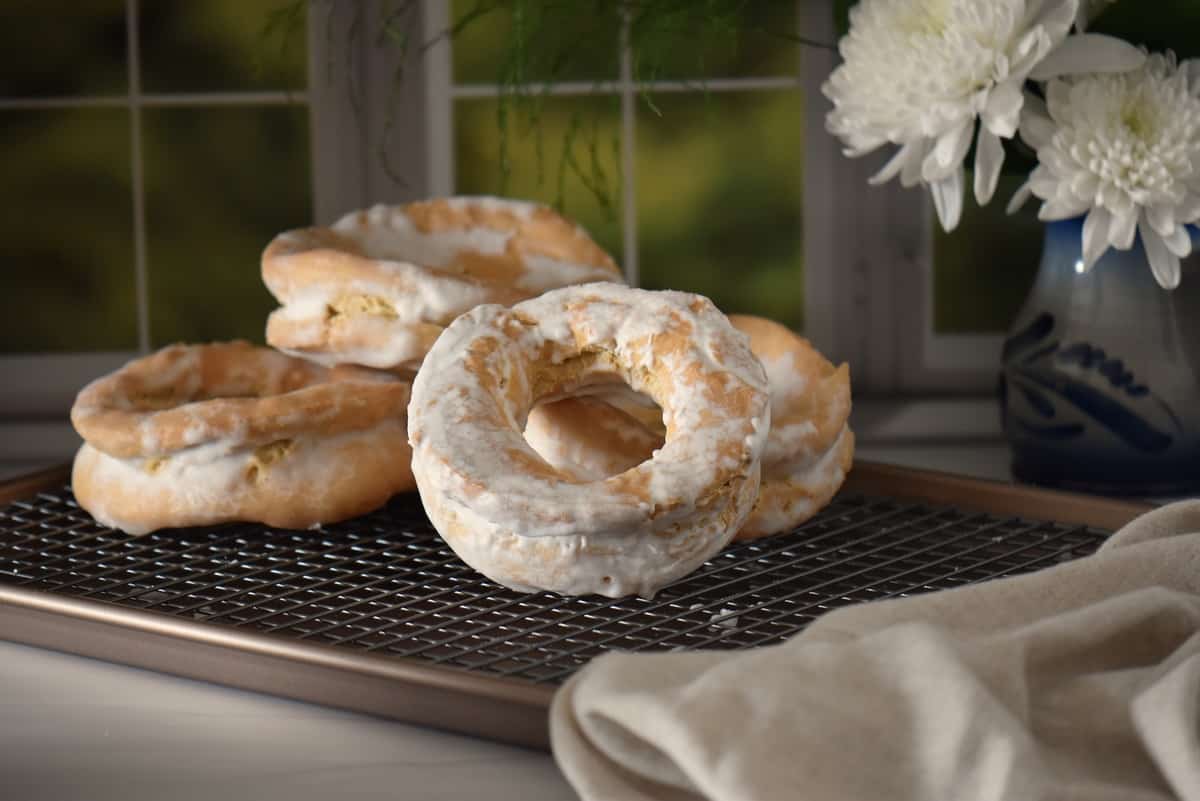
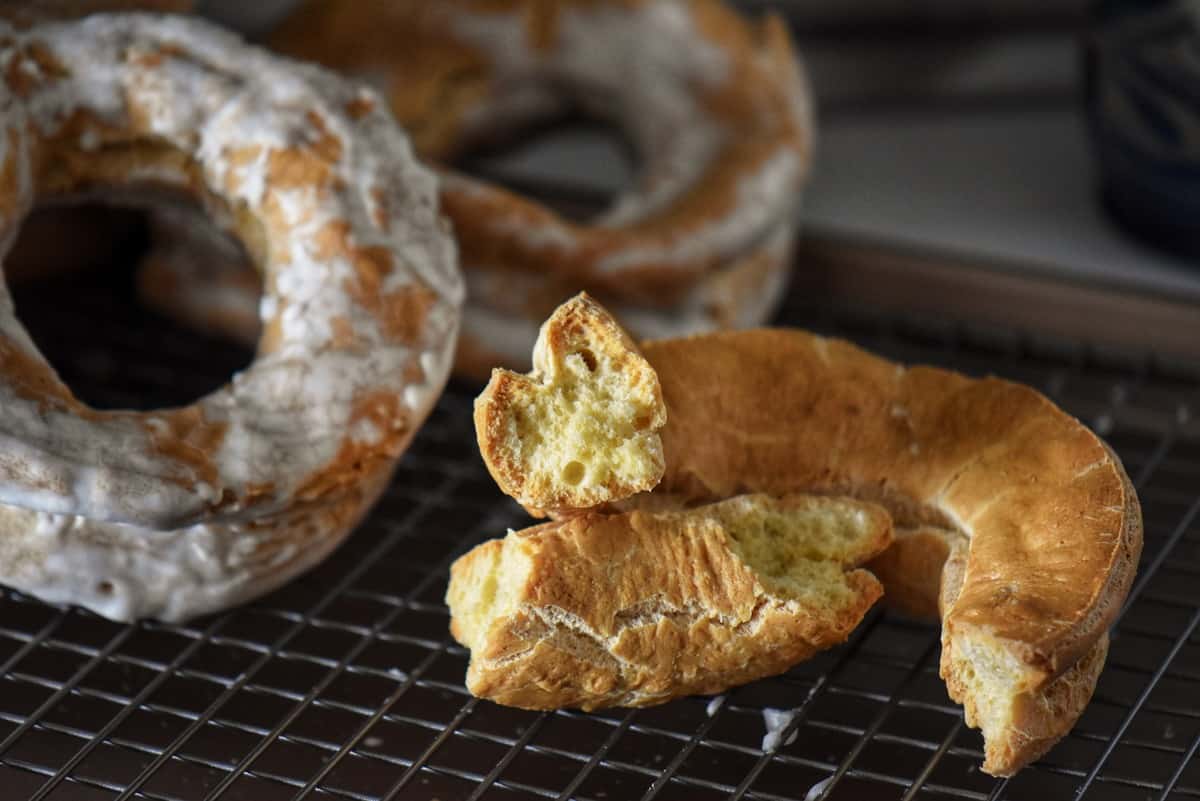
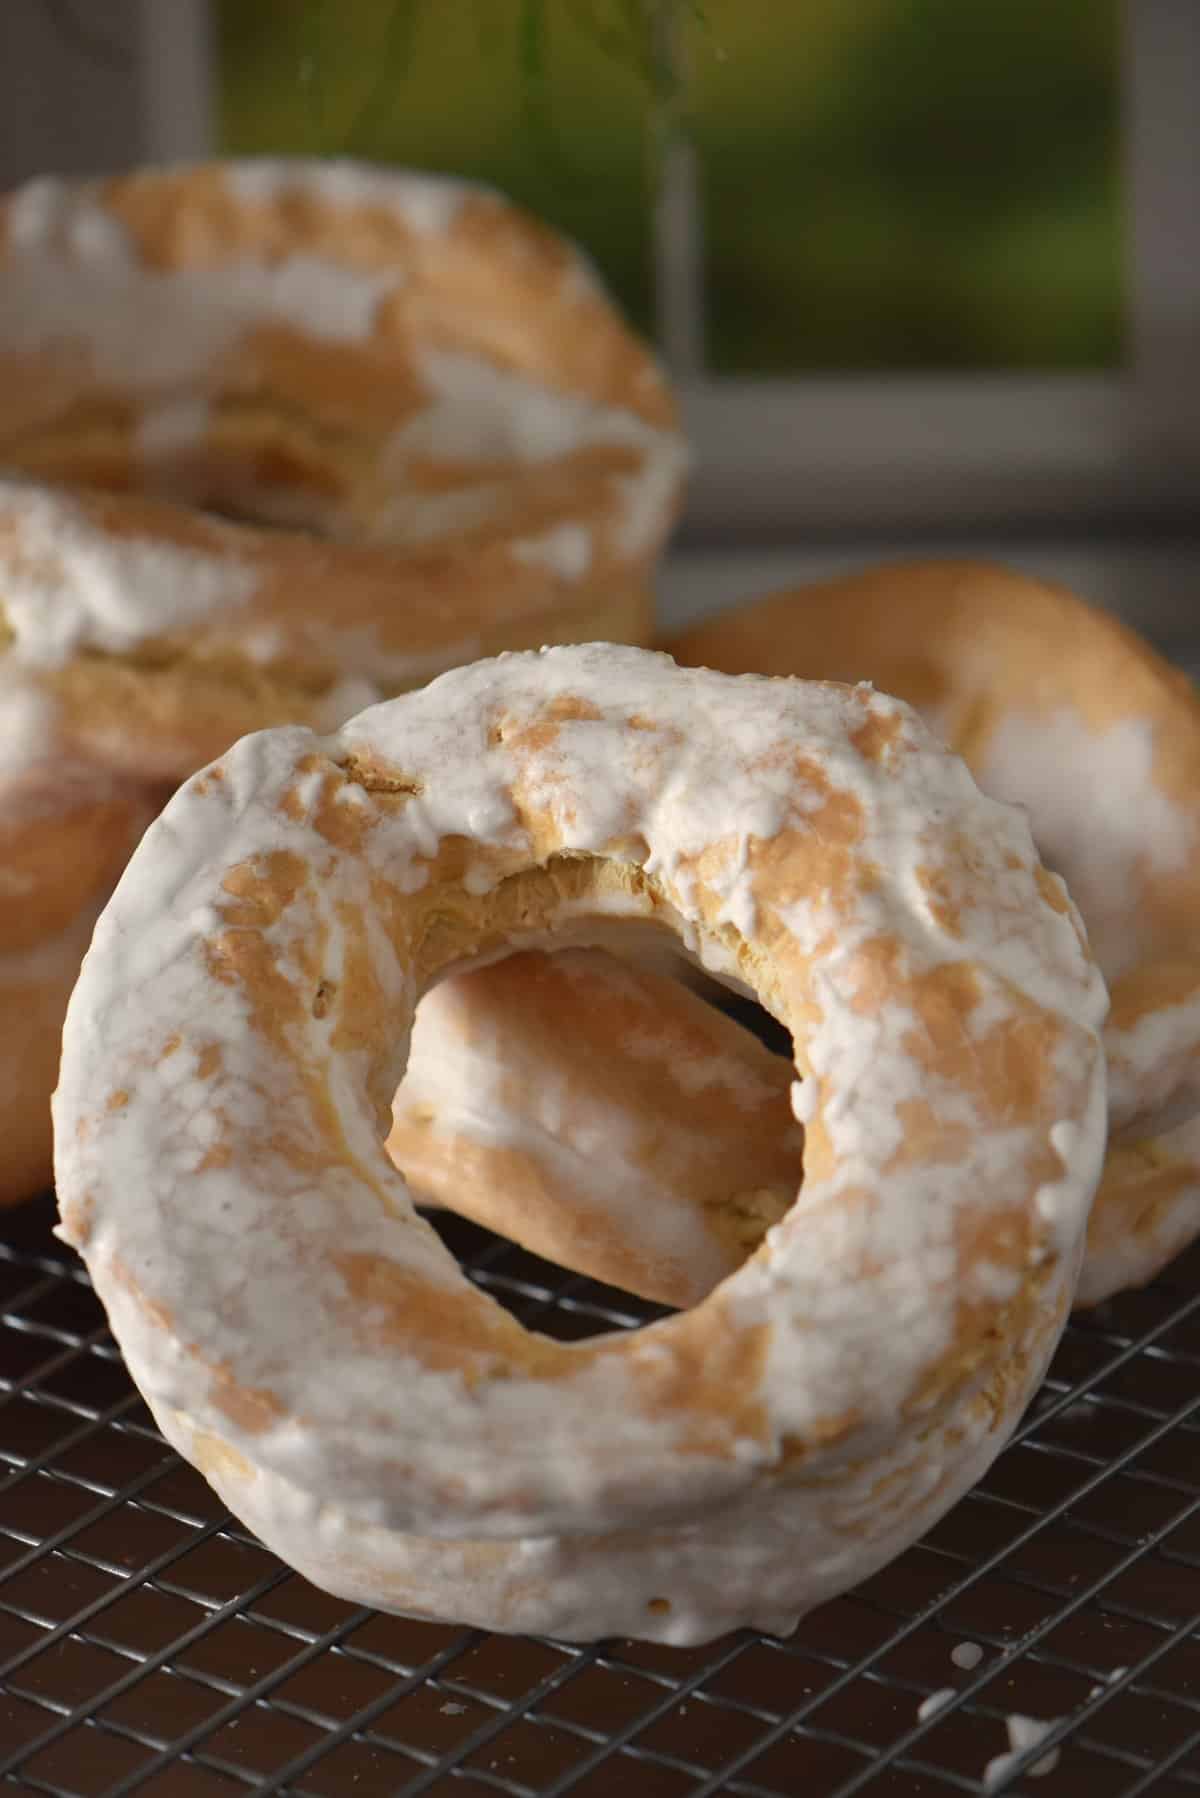
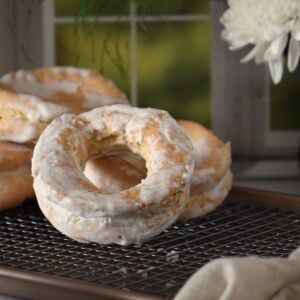
Despite only including a small amount of sugar (just a couple of tablespoons for 3½ cups of flour), these taralli still manage to deliver a subtle sweetness thanks to the addition of a delicious icing sugar glaze.
This white glaze sets these taralli apart from others and gives them their signature look. With a hard crust and a light, airy interior, these glazed taralli are truly irresistible.
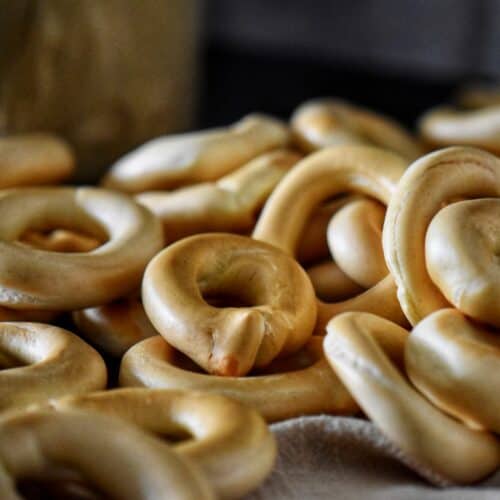
What are taralli?
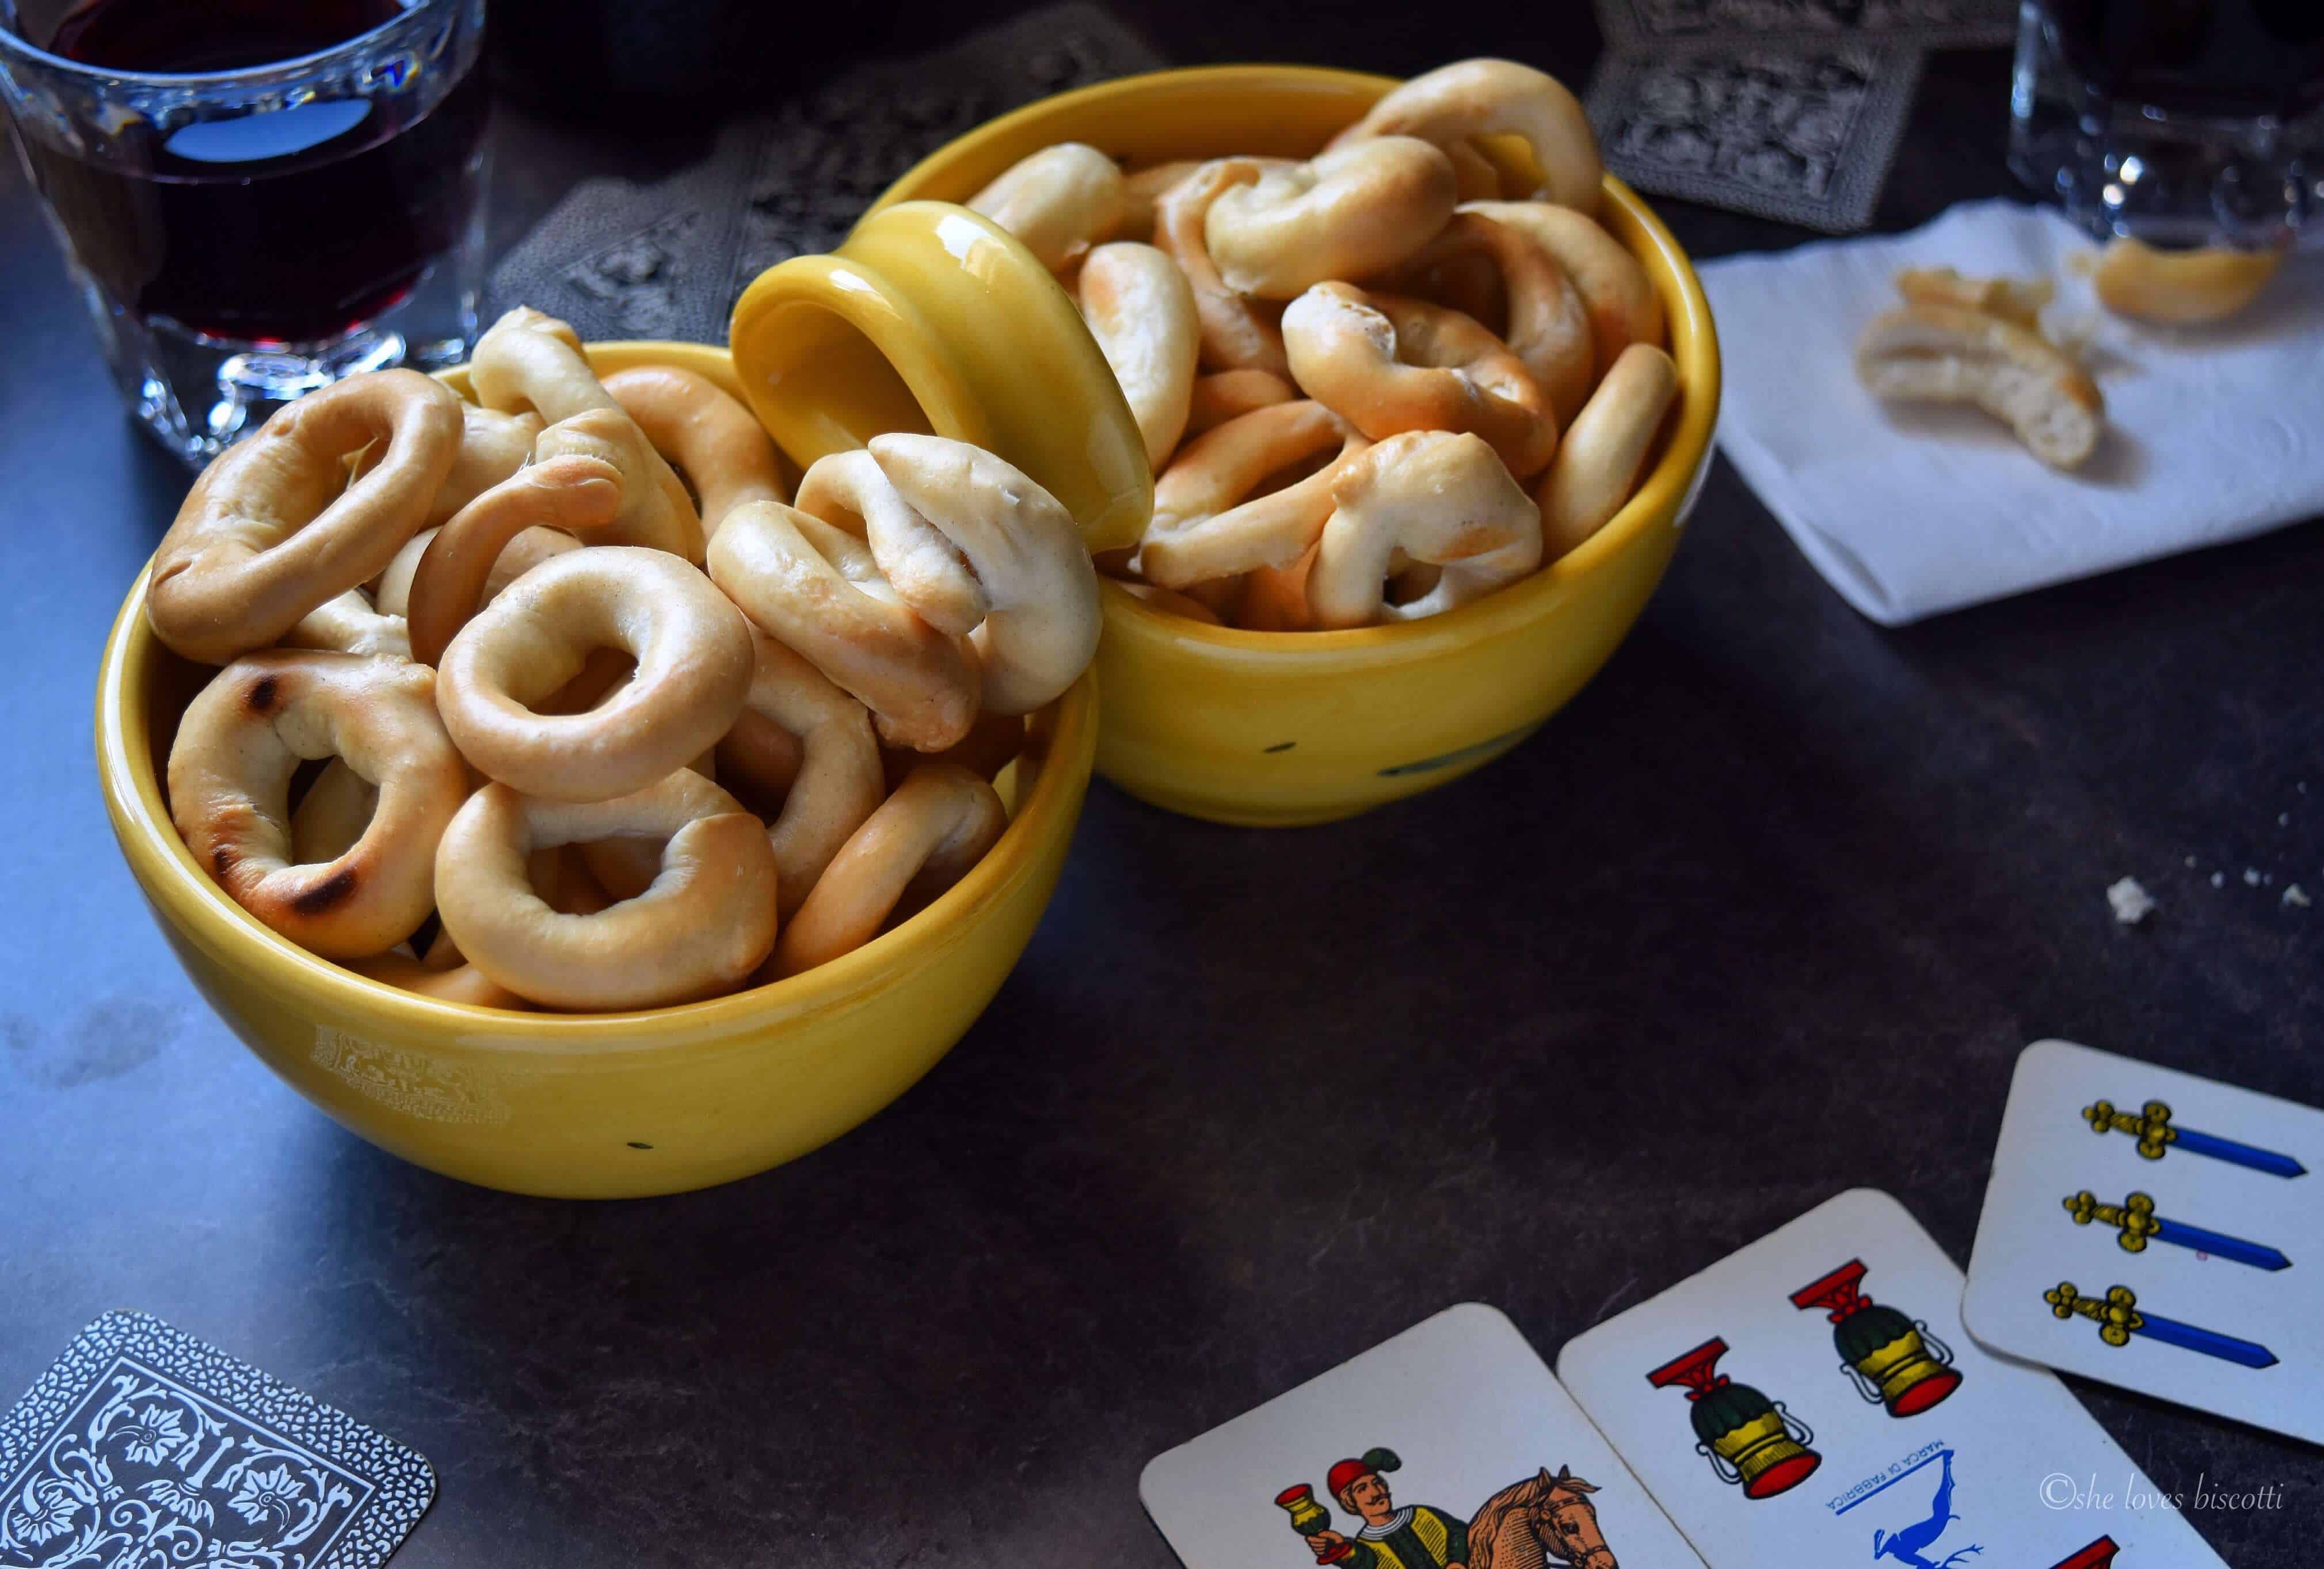
Taralli are a Southern Italian snack food similar to a cracker or breadstick. They are typically ring-shaped and made from simple flour, water, and olive or vegetable oil dough. They can be savory, sweet, and flavored with herbs and spices, such as fennel seeds, black pepper, or chili flakes.
Taralli are a popular snack throughout Italy and are often enjoyed with a glass of wine or as a mid-day snack.
Despite variations in ingredients, such as the inclusion of yeast, wine, or liquor, and differences in preparation methods, such as boiling, the shape remains consistent, even if their size may differ.
In this recipe, the dough rests for a certain period after combining the ingredients. Then, the taralli dough is shaped into the classic form, boiled, scored, and baked directly on the oven grates.
If you’re a fan of traditional Italian taralli, then you definitely won’t want to miss out on this recipe for sweet glazed egg taralli. These crunchy little treats are the perfect addition to any Easter celebration.
How to make the taralli dough
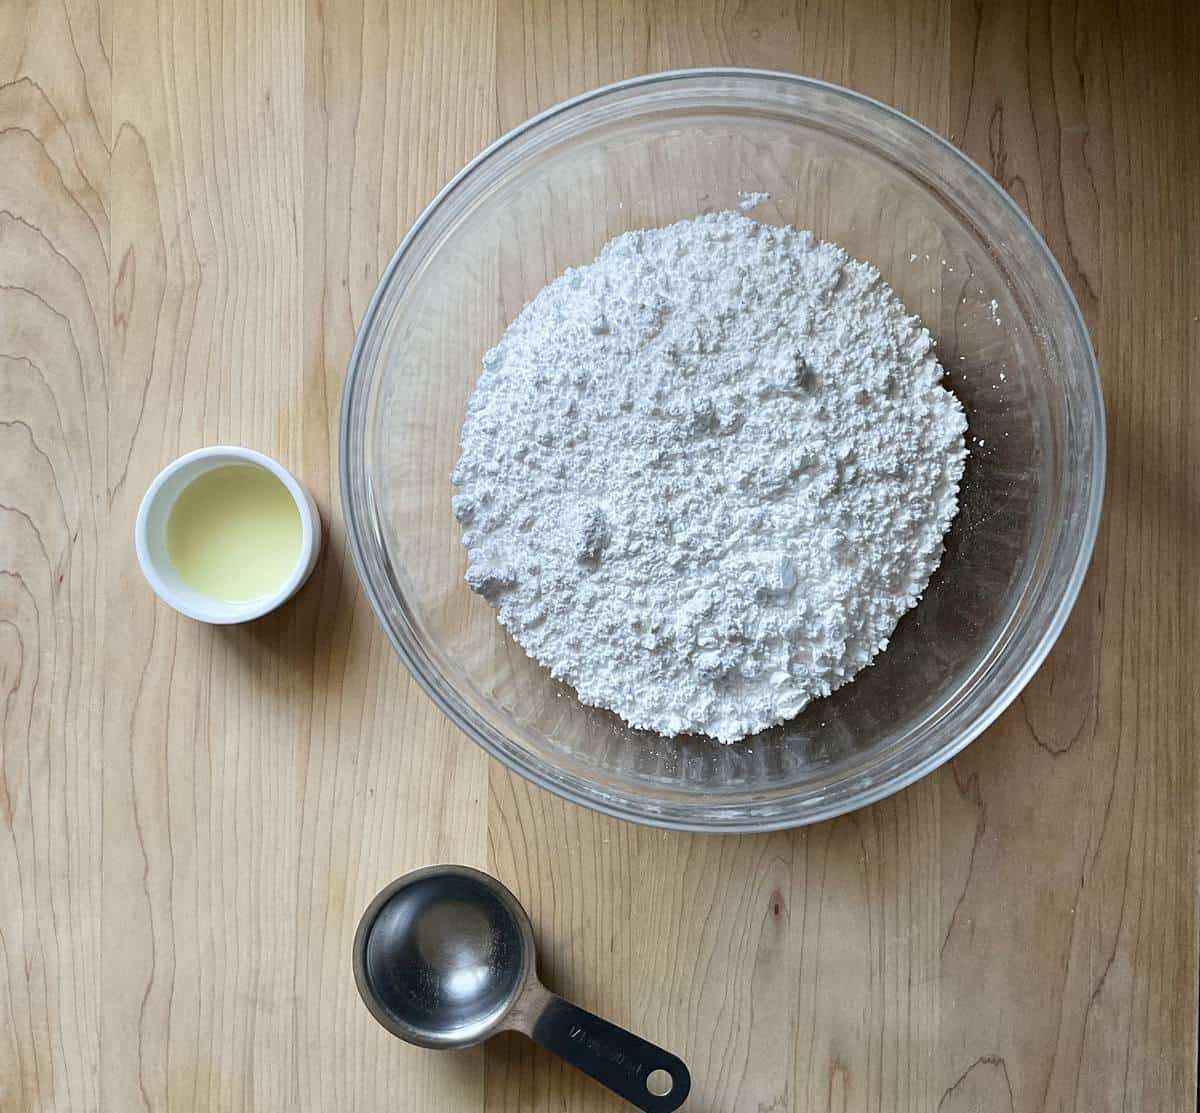
Sift or whisk together 3½ cups of all-purpose flour (500 grams), ½ teaspoon of baking powder, and a pinch of salt in a large mixing bowl. Set it aside for now.

Place 6 room-temperature eggs in the bowl of a stand mixer, and with the whisk attachment, beat them on medium-high speed for 4-5 minutes or until double in volume.
Add 2 tablespoons of sugar and continue to whisk for about 2 minutes. At this point, your whisked eggs should be thick.
Add 2 tablespoons of vegetable oil, ½ teaspoon pure vanilla extract, and the zest of one lemon. Continue to whisk together.
Add 2 teaspoons of sambuca to this egg mixture and whisk together. You can also use grappa or Marsala wine.
Switch to a dough hook and add the flour mixture.
Knead for approximately 7-10 minutes.
The dough should be soft, smooth, and slightly tacky at the end of this process. You will notice the dough pulling away from the sides of the bowl while still adhering slightly to the bottom. If the dough is sticky, add 1-2 tablespoons of flour.
How to cut and make taralli dough balls
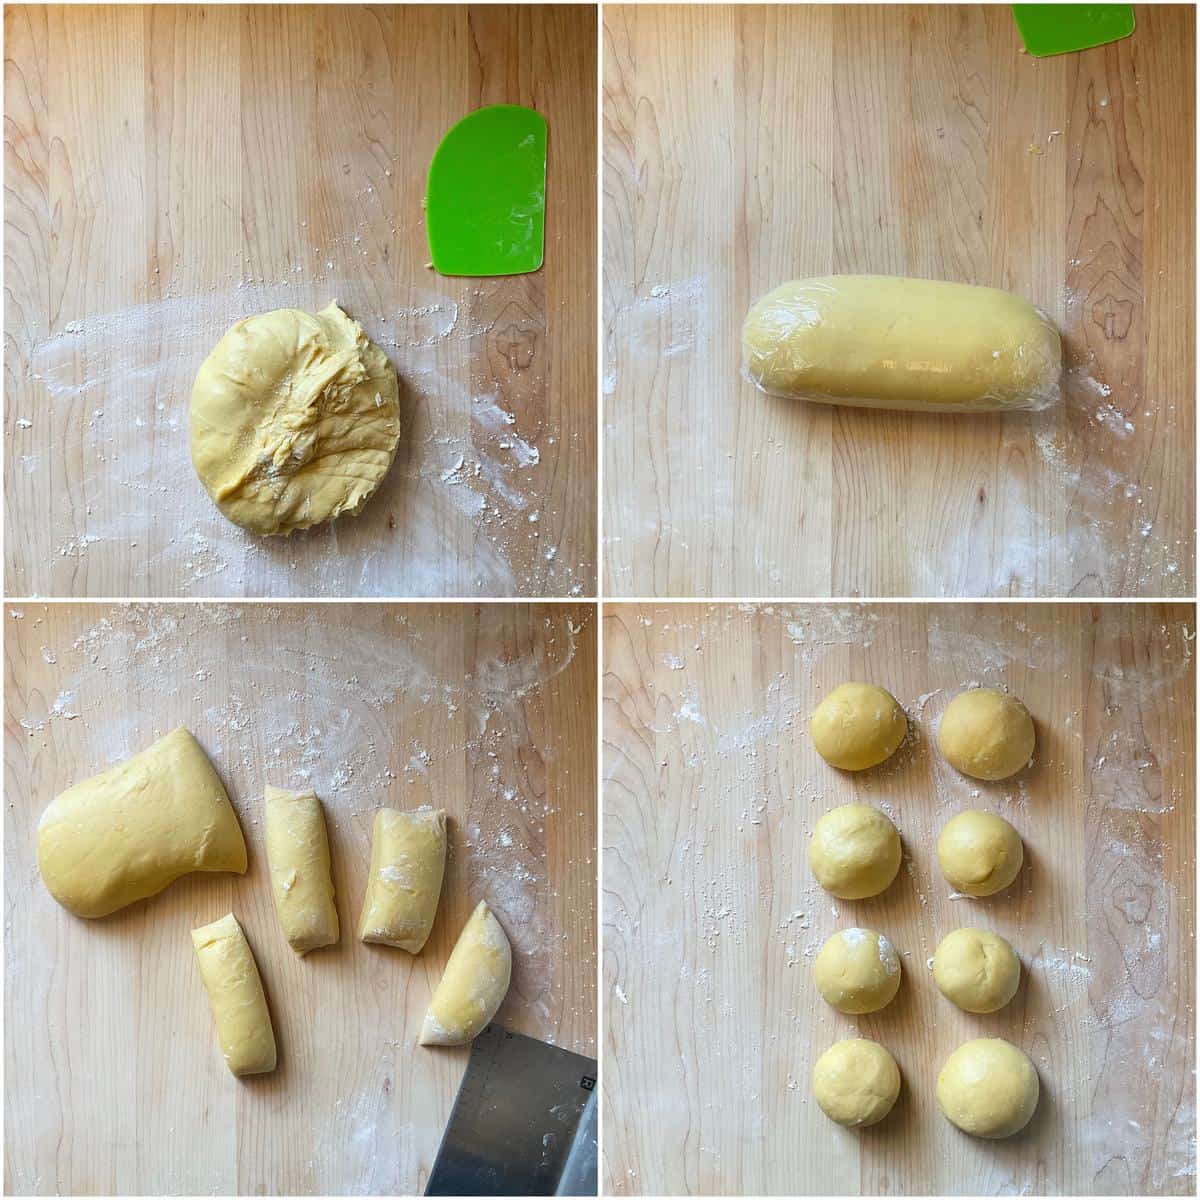
With damp hands, remove the dough from the dough hook. Then, knead on a lightly floured surface for 30-60 seconds until smooth. The dough should no longer be tacky. If it is, dust with flour and knead a little more.
Shape the dough into a log and wrap it in plastic wrap. Let it rest for 30 minutes at room temperature. (I will usually place a tea towel over the top).
To obtain 8 pieces of dough, cut the log into two halves. Proceed to cut each of these halves in half, resulting in four pieces. Then, cut each of these four pieces in half again, resulting in a total of eight pieces of dough.
To make taralli, work on a single piece of dough at a time, keeping the remaining dough covered.
Join the ends of one section of a dough ball together and knead it with the palm of your hands for 2 minutes to form a small, round dough ball.
Place the dough ball on a lightly floured section of your wooden board and cover it with plastic wrap. Continue to shape the rest of the dough into small balls. Let them rest, covered, for 10 minutes at room temperature.
How to shape the taralli
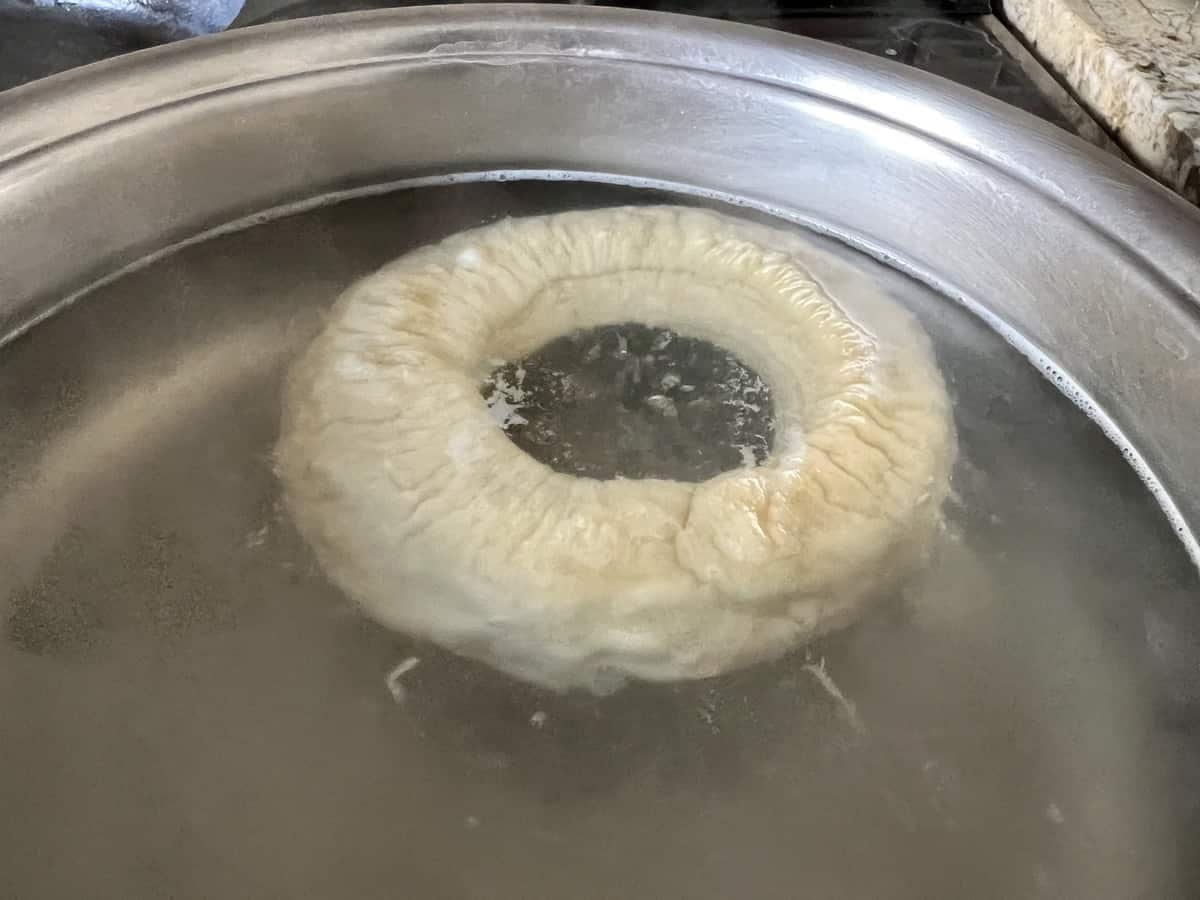
Before we begin shaping the taralli, bring a large pot of water to 200°F/93℃. We want hot water with some bubbles escaping to the surface.
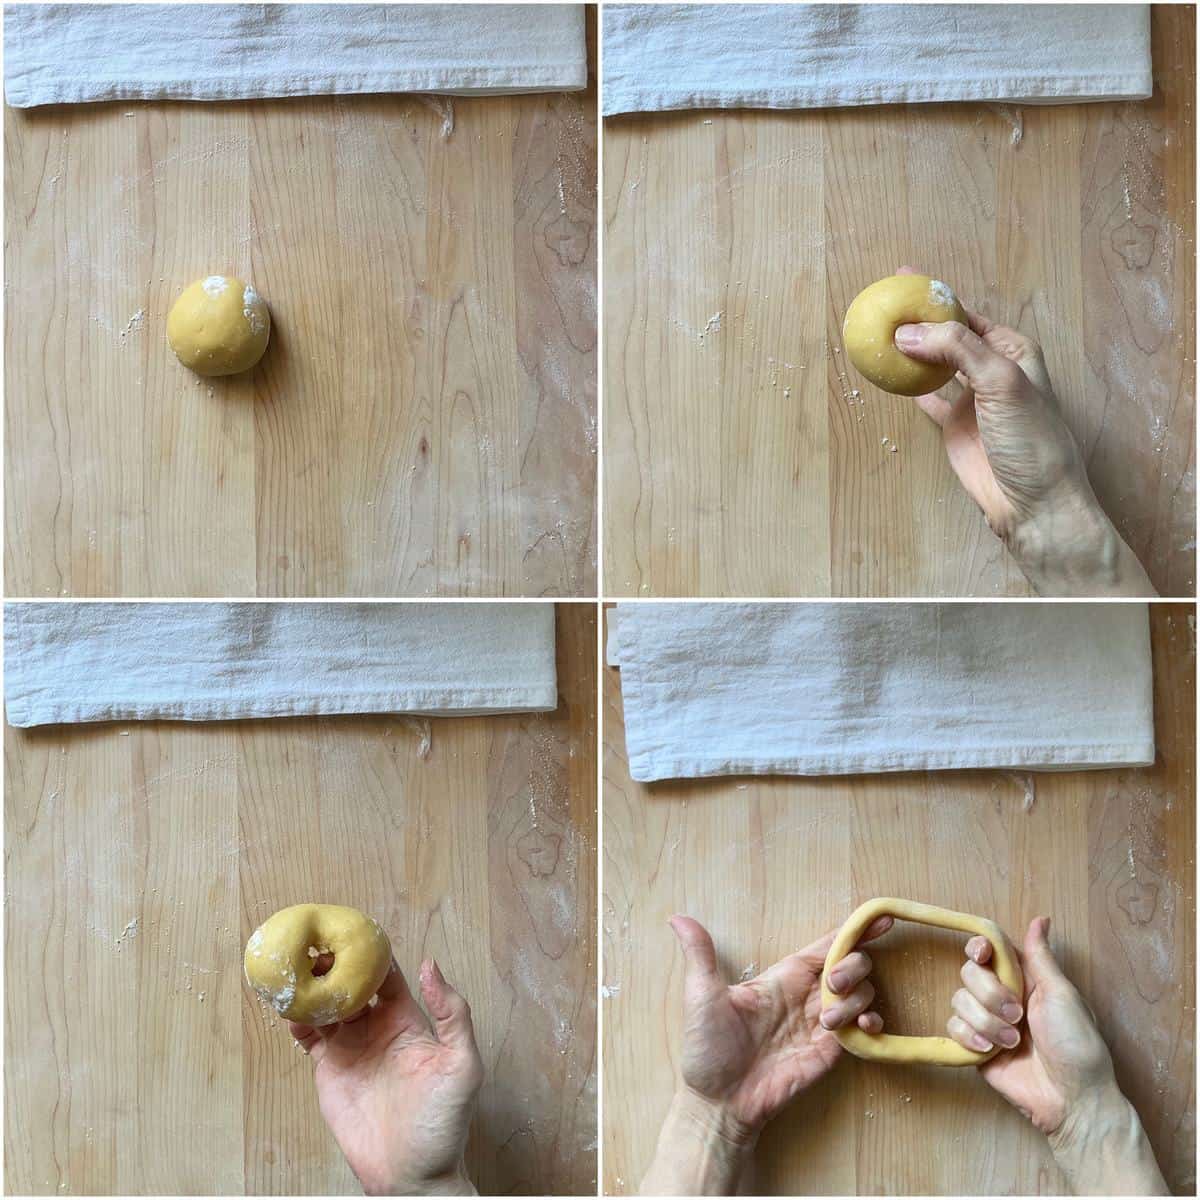
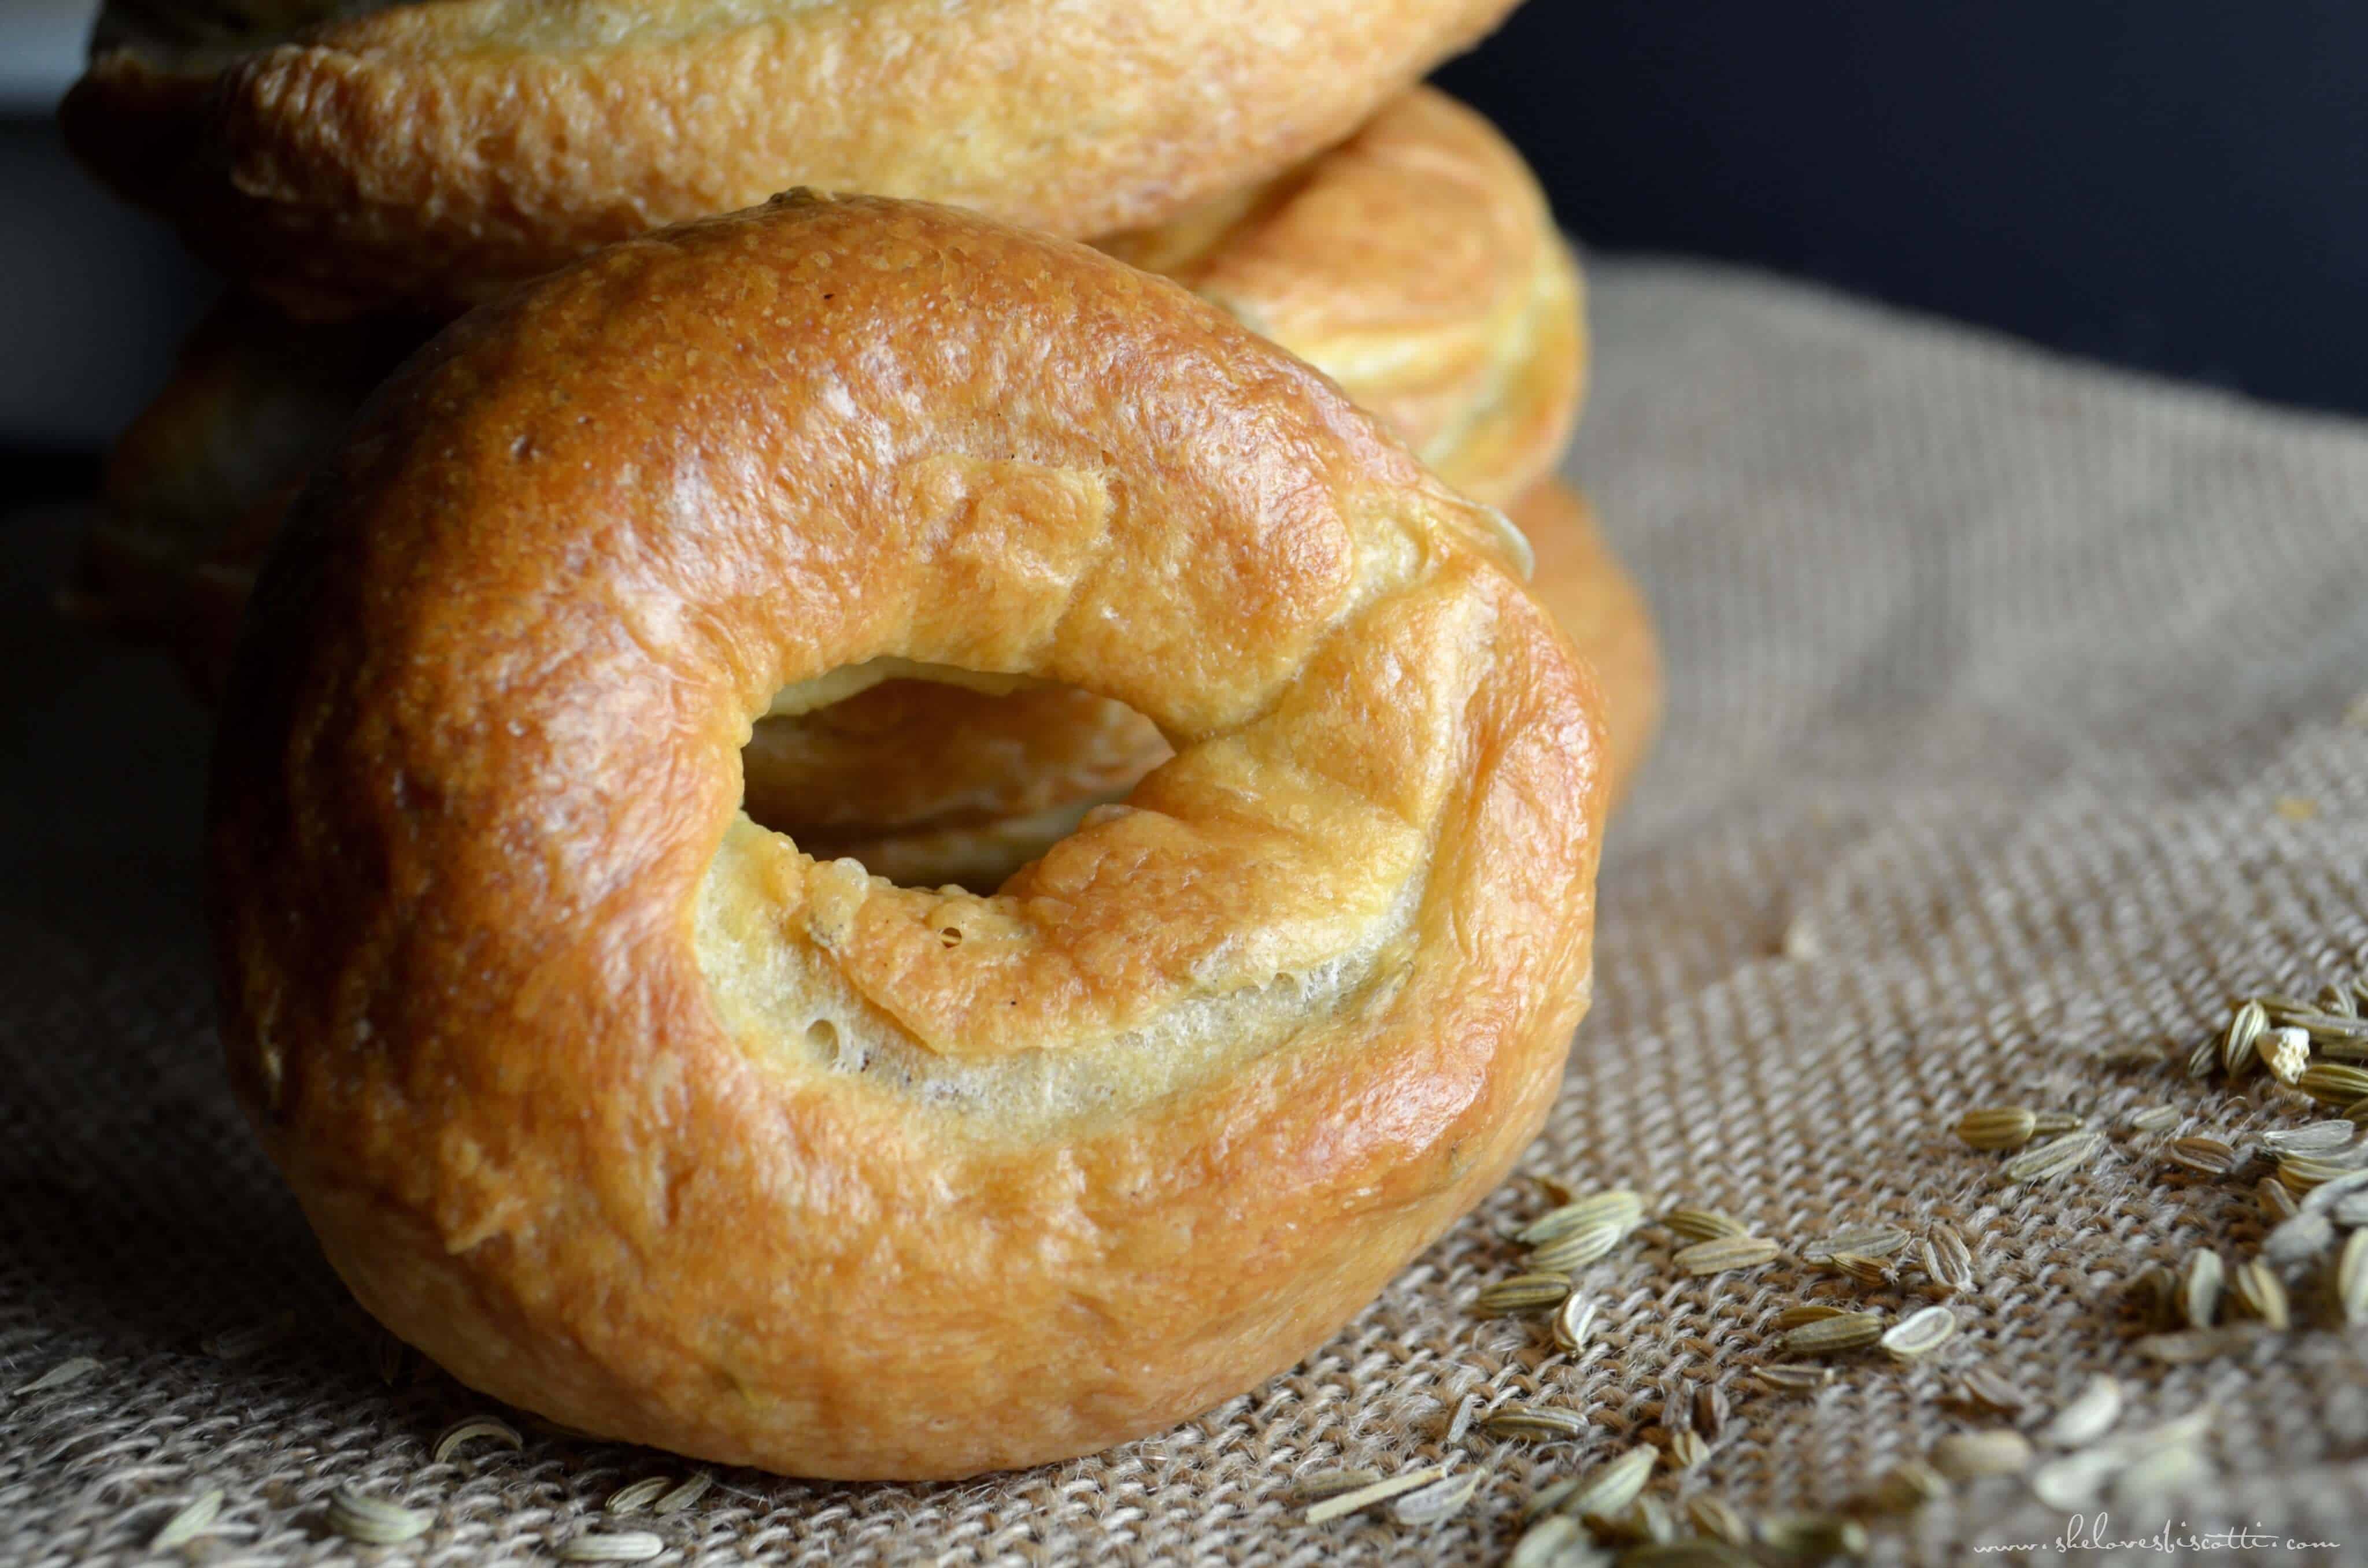
Working with one dough ball at a time, use your thumb and forefinger to pinch the middle of the ball to create a hole. Gradually enlarge the hole while shaping the dough into a round donut shape.
Extend the ring to about 4-5 inches.
Boiling the taralli
Take a tarallo and put it in a pot of hot water. Immediately, use a wooden spoon to move the tarallo around so it doesn’t adhere to the bottom of the pot. Remember that the water should not be boiling or simmering but rather very hot, with just a few bubbles rising to the surface.
Once the tarallo rises to the top (approximately 2-3 minutes), remove it from the water with a slotted spoon. Transfer it to a tea towel to drain.
Repeat this process to shape and boil all the dough balls.
Air dry the taralli on a tea towel for 15 minutes before baking.
Scoring and baking
To get started, preheat your oven to 400°F/200°C. Place the oven grate in the center of the oven.
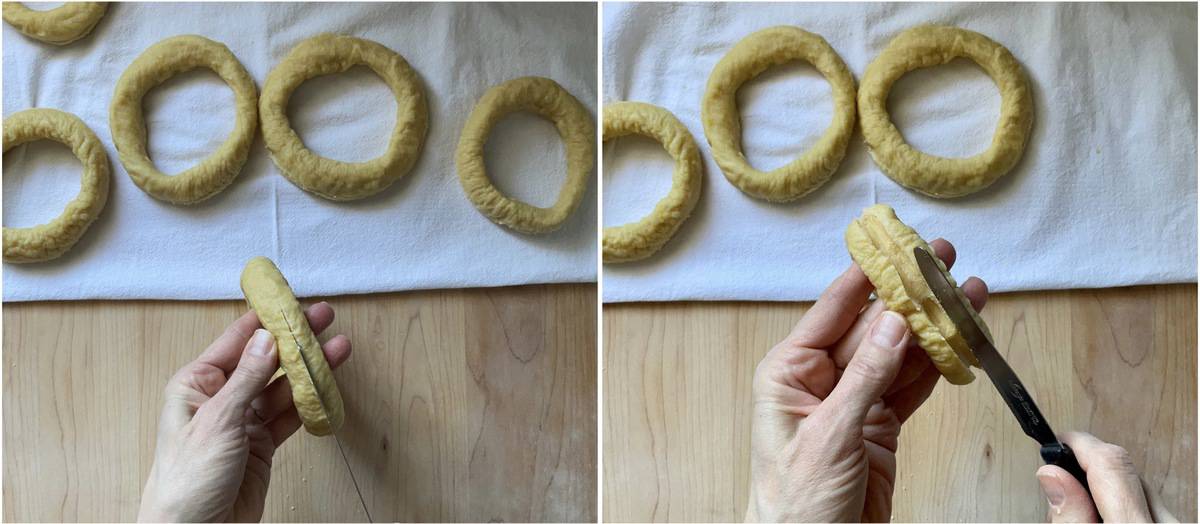
Take each tarallo and use a sharp knife or razor blade to make a shallow cut across the top of the dough, forming a line that runs around the circumference of the tarallo.
Repeat this process for each tarallo, making sure the cuts are evenly spaced and not too deep, as they should only penetrate the surface of the dough.
Place the scored taralli directly on the oven grates or a baking sheet lined with parchment paper, ensuring they are evenly spaced and not touching each other.
Reduce the oven heat to 375°F/190°C and bake for 10 minutes.
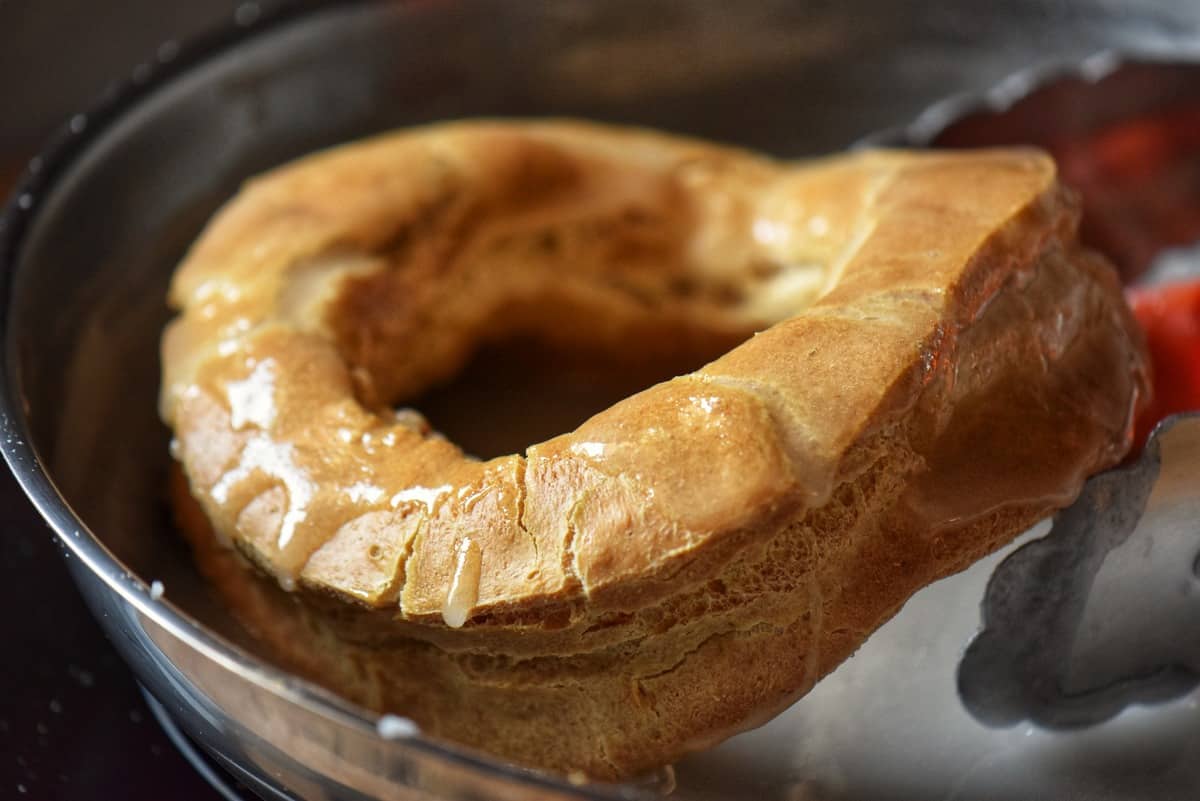
Reduce the heat to 325°F /160°C and bake for another 20-25 minutes until cracked, golden brown and light to the touch. Check every 5-10 minutes to ensure they are not getting too dark. If they start to get too brown, loosely cover them with foil.
Remove taralli from the oven and cool on a wire rack.
Once cooled completely, you can begin glazing your taralli.
How to glaze
Once the taralli are baked and cooled, it is time to make the signature sugar glaze. You need to work quickly as the glaze quickly hardens and sets.
Combine 3 cups (375 grams) of powdered sugar and 4 tablespoons of water in a small pot. Turn the heat to the lowest setting and whisk continuously for 30-60 seconds. Please note that you can adjust the consistency by adding more or less liquid as needed.
Remove from the heat and add 2 teaspoons of freshly squeezed lemon juice.
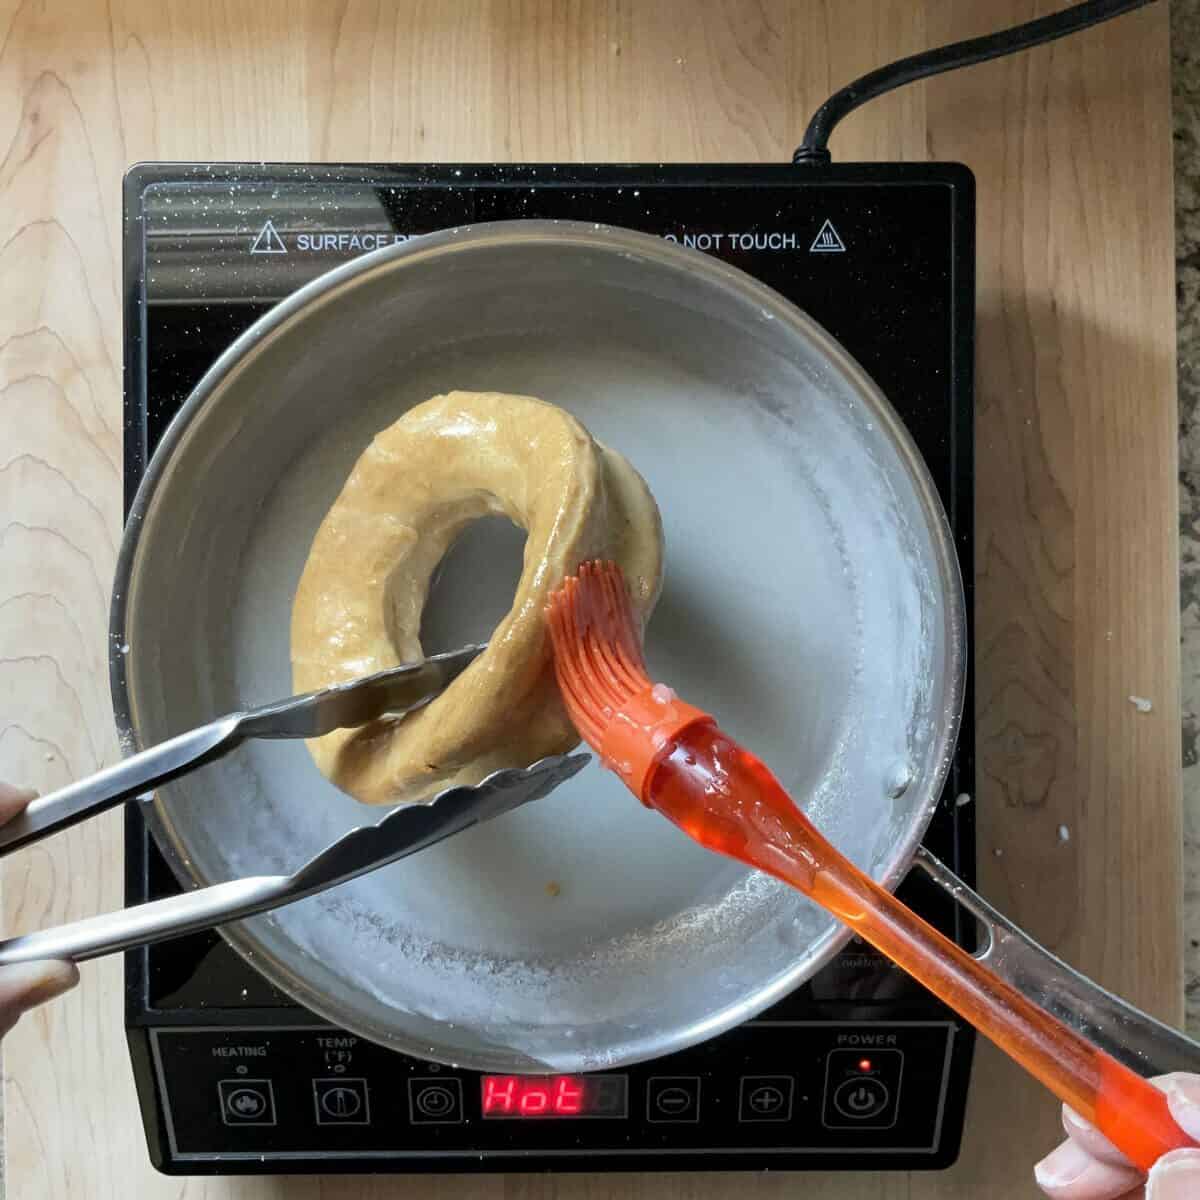
Use tongs to dip each tarallo into the glaze, coating it evenly on all sides. You can use a small pastry brush to brush the glaze onto the sides.
Place the glazed taralli on a wire rack set over a baking sheet or piece of parchment paper to catch any excess glaze. Allow the glaze to dry and set completely before serving or storing the taralli.
If desired, you can add additional flavorings to the glaze, such as vanilla extract or lemon zest, to enhance the flavor of the taralli.
Tips
- The most precise technique to measure flour is by weight. If you don't have a kitchen scale, fluff your flour, scoop it using a dry measuring cup, and level it off with the back of a knife. For reference, 1 cup of all-purpose flour = 142 grams [source].
- Use room-temperature eggs.
- Let the dough rest for at least 30 minutes before shaping.
- Work with small portions of dough to avoid drying out.
- Boil the taralli before baking to achieve a crispy texture.
- Air dry the boiled taralli on a tea towel for at least 15-20 minutes before baking.
- You need to work quickly when glazing the taralli as the glaze quickly hardens and sets.

FAQ
“Taralli” and “tarallo” are essentially the same thing, with “taralli” being the plural form and “tarallo” being the singular form of the word in Italian.
Scoring taralli after they have been boiled is an important step in the cooking process that allows them to bake evenly and achieve the desired texture.
After boiling, boiled taralli can stick to a tea towel due to the moisture on the dough’s surface. As the taralli cools and dries, the moisture evaporates and can cause the dough to stick to the towel, causing damage to the surface. To avoid this, use a dry tea towel, pat the taralli dry immediately after boiling, and place it on a dry tea towel. Cool the taralli quickly by frequently turning them over. Gently peel them away from the towel’s surface to avoid sticking.
Store the glazed taralli in a large tin container at room temperature for up to a week.
For longer storage, freeze the taralli for up to 3 months without their glaze. To thaw, remove them from the freezer and let them sit at room temperature for about 30 minutes to an hour.
More taralli recipes
There are many variations of taralli recipes across Italy, with different regions and even individual families having unique twists on the classic recipe. As someone with a few “food obsessions,” I must confess that taralli are among them.

One of my favourites is my nonna’s authentic taralli recipe. They have a dry almost chalk-like texture that make a great snack any time of the day. Another family favorite is my mom’s recipe for these soft taralli. They are great to make sandwiches with!
If you are looking for a savory recipe, try these fennel taralli, or this recipe for taralli with anise.
Recipe origins
A few weeks ago, I walked into a pastry shop in the city’s east end and noticed glazed taralli on the shelf.
I initially planned to buy the bag but changed my mind after picking it up. I instinctively felt the need to make my mom’s recipe.
Deciphering my mom’s recipe was a challenge. Like many Italian women, she did not specify the exact amount of flour, instead opting for the elusive “farina quanto basta.” Which translates to adding as much flour as necessary. It took me about six attempts, but I can honestly say that I am finally happy with my results.
And so, as I continue to document as many of my family’s old recipes as possible, I am very happy to share this glazed taralli with all of you.
I hope you enjoy this delicious Easter treat as much as my family.
Just for you! A printable baking checklist to help you keep track of all your baking needs.
If you love to bake, this is for you! Simply subscribe to my weekly newsletter and receive this FREE BAKING CHECKLIST PRINTABLE!
This way, you won't miss any of my new recipes, and it's FREE!
THANKS SO MUCH for following and being part of the She Loves Biscotti community, where you will find Simple & Tasty Family-Friendly Recipes with an Italian Twist.
Ciao for now,
Maria
★★★★★ If you have made this sweet taralli recipe, I would love to hear about it in the comments below and be sure to rate the recipe!
Recipe
Glazed Egg Taralli Recipe: Taralli all’Uovo
WANT TO SAVE THIS RECIPE?
Ingredients
Dough:
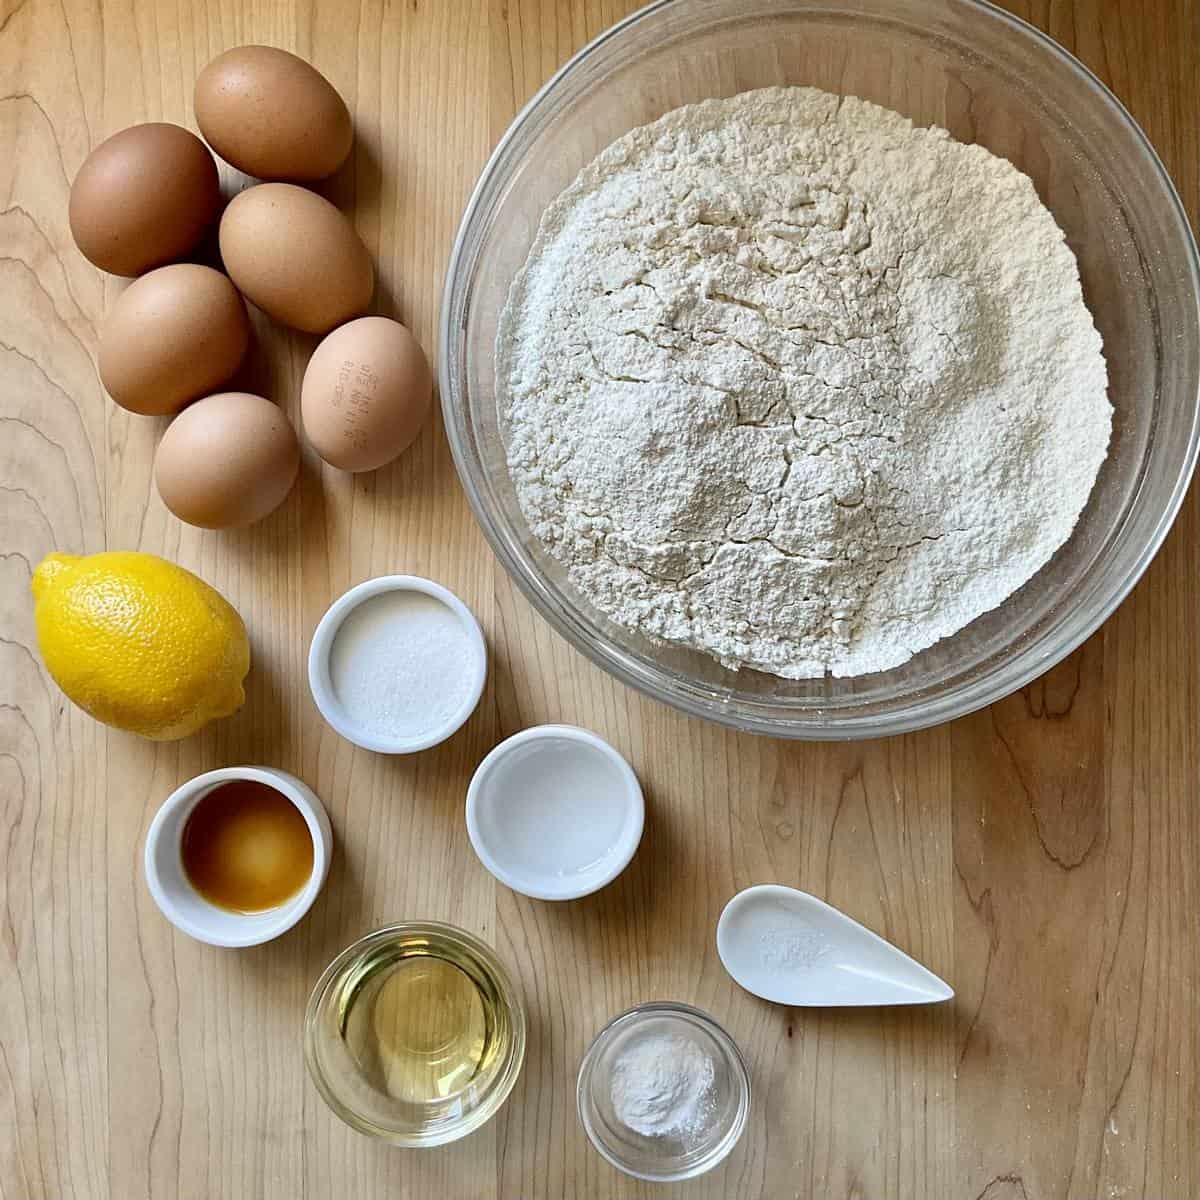
- 3½ cups all purpose flour 500 grams, plus more for kneading
- ½ teaspoon baking powder
- pinch salt
- 6 eggs room temperature
- 2 tablespoons sugar
- 2 tablespoons vegetable oil or olive oil
- ½ teaspoon vanilla extract
- zest of one lemon
- 2 teaspoons of sambuca grappa or Marsala wine
Icing:
- 3 cups icing sugar
- 4 – 4½ tablespoons water
- 2 teaspoons lemon juice freshly squeezed
- ½ teaspoon vanilla extract optional
Instructions
- In a large mixing bowl, sift together flour, baking powder and salt. Set aside.
- Place the eggs in the bowl of a stand mixer, and with the whisk attachment, beat them on medium-high speed for 4-5 minutes or until double in volume.
- Add sugar and continue to whisk for about 2 minutes. At this point your whisked eggs should be thick.
- Add oil, vanilla extract and lemon zest. Continue to whisk together.
- Add sambuca to this egg mixture and whisk together.
- Switch to a dough hook and incorporate the flour.
- Knead for approximately 7-10 minutes. The dough should be soft, smooth, and slightly tacky at the end of this process. You will notice the dough pulling away from the sides of the bowl while still adhering slightly to the bottom. If the dough is sticky, add 1-2 tablespoons of flour.
- Form into a log; wrap the dough in plastic wrap and let it rest for 30 minutes at room temperature (I will usually place a tea towel over the top).
- Cut dough into 8 pieces. To obtain 8 pieces of dough, cut the log into two halves. Proceed to cut each of these halves in half, resulting in four pieces. Then, cut each of these four pieces in half again, resulting in a total of eight pieces of dough.
- To make taralli, work on a single piece of dough at a time, keeping the remaining dough covered.
- Join the ends of one section of a dough ball together and knead it with the palm of your hands for 2 minutes to form a small, round dough ball.
- Place the dough ball on a lightly floured section of your wooden board and cover it with plastic wrap. Continue to shape the rest of the dough into small balls. Let them rest, covered, for 10 minutes at room temperature.
- With thumb and forefinger, pinch the middle to create a hole. Slowly enlarge the hole while forming a donut shape (refer to the photo in the article).
- Continue to form the rest of the dough.
- Bring a large pot of water to 200°F/93℃. We want hot water with a couple of bubbles escaping to the surface.
- Place the taralli in the water. Immediately, use a wooden spoon to move the tarallo around so it doesn't adhere to the bottom of the pot. Remember that the water should not be boiling or simmering but rather very hot, with just a few bubbles rising to the surface.
- Once the tarallo rises to the top (approximately 2-3 minutes), remove it from the water with a slotted spoon. Transfer it to a tea towel to drain.
- Repeat process until all the taralli have been boiled. Air dry the taralli on a tea towel for 15 minutes before baking.
- To get started, preheat your oven to 400°F/200°C. Place the oven grate in the center of the oven.
- Take each tarallo and use a sharp knife or razor blade to make a shallow cut across the top of the dough, forming a line that runs around the circumference of the tarallo.
- Place boiled and scored taralli directly on oven grates or on a parchment-lined cookie sheet.
- Reduce the oven heat to 375°F/190°C and bake for 10 minutes.
- Reduce the heat to 325°F /160°C and bake for another 20-25 minutes until cracked, golden brown and light to the touch. Check every 5-10 minutes to ensure they are not getting too dark. If they start to get too brown, loosely cover them with foil.
- Remove taralli from the oven and cool on a wire rack. Once cooled completely, you can begin glazing your taralli.
Icing:
- Combine 3 cups (375 grams) of powdered sugar and 4 tablespoons of water in a small pot. Turn the heat to the lowest setting and whisk continuously for 30-60 seconds. Please note that you can adjust the consistency by adding more or less liquid as needed.
- Remove from the heat and add 2 teaspoons of freshly squeezed lemon juice.
- Use tongs to dip each tarallo into the glaze, coating it evenly on all sides. You can use a small pastry brush to brush the glaze onto the sides.
- Place the glazed taralli on a wire rack set over a baking sheet or piece of parchment paper to catch any excess glaze. Allow the glaze to dry and set completely before serving or storing the taralli.
Notes
- The most precise technique to measure flour is by weight. If you don't have a kitchen scale, fluff your flour, scoop it using a dry measuring cup, and level it off with the back of a knife. For reference, 1 cup of all-purpose flour = 142 grams [source].
- Use room-temperature eggs.
- Let the dough rest for at least 30 minutes before shaping.
- Work with small portions of dough to avoid drying out.
- Boil the taralli before baking to achieve a crispy texture.
- Air dry the boiled taralli on a tea towel for at least 15-20 minutes before baking.
- You need to work quickly when glazing the taralli as the glaze quickly hardens and sets.
Nutrition
This post was originally published on March 18, 2016, and republished on April 4, 2023, with updated content and photos. Thanks for sharing!
Maria
H Maria,
I made the dough earlier today. Something came up and am not able to make the taralli. Can I make them tomorrow?
Maria
Hi Maria, to be honest I have never tried. I would refrigerate the dough and then bring it to room temperature before continuing with the recipe…would love to hear about your results. Good luck ♥
Leslie
I love this recipe! Thank you so much for sharing it! Every time I was near the north end of Boston, our little Italy, I always stopped in at a certain pastry store on Hanover St to purchase taralli for my Italian grandmother. (Sadly, that pastry store moved away from making these wonderful treats.) She love the glazed ones as well as the peppercorn ones. I made this recipe and it took me to happy memories I shard with my beloved grandmother. Thank you again for sharing!
Maria
So thrilled to read this! My pleasure Leslie!
Donna M Marino
This is a GREAT recipe. My Aunt Tina made these every year (some with the icing, some without, which I prefer). Her recipe literally says this: “Add enough flour to mix with your hands until dough is not sticky.” So, how much is that???!!
I made these today and they are amazing. My Aunt would be proud!
Maria
How wonderful Donna! Thanks so much for sharing!
Mary
Great recipe, extremely simple and they came out beautiful!!
Maria
Fantastic Mary!
Ur pal val
These Easter egg taralli look just like the ones I see in the pastry shops in and around town. pinning the recipe to try. Thanks for sharing 🙂
Maria
In fact, they are very similar. Hope you get a chance to try these Easter egg taralli. Thanks for stoppin by 🙂
Phyl
Hi Maria
I made recipe however taralli had a hard knot inside dough that didn’t rise perhaps? I realise that the water was boiling when I cooked them. Could that have contributed to hindering the rise?
Thanks
Phyl
Maria
Hi Phyl! Great question! I don’t think so… my initial thought was to ask you if the flour was properly sifted and if it was kneaded for the proper amount of time.
Johanna Jack
I having been looking for this recipe for years. S relative of mine made these and they were my favorites! They called them ginettes? Also could you suggest what to use instead of sambucco? Not a fan of that flavor. Maybe limoncello??? Can’t wait to try them!!!
Maria
I also get very excited when I find a recipe I’ve been looking for! Although I haven’t tried it, I think limoncello would probably work. You might want to look at this other recipe I have posted… https://www.shelovesbiscotti.com/best-homemade-italian-easter-egg-taralli-di-filomena/ It is similar to my mom’s recipe… but no alcohol. Appreciate your comment, thanks for stopping by Johanna 🙂
Lisa Taylor
I am so excited to try this recipe! The pictures look very much like what my mom used to make. I have tried to make chumells (which is what she used to call them) from her recipe but they never came out quite like hers. Your recipe has a few extra ingredients so maybe that is what I was missing. She did not use the glaze but the cookie itself was crunchy and a little sweet. Thanks for sharing your recipe!!
Maria
My pleasure! There is always a little bit of trial and error when it comes to recreating a family recipe without having the actual measurements let alone the actual ingredients of the recipe. Hope it works out for you. Appreciate your comment 🙂
Shelly
Lisa you are the first person outside of my family to say chumellies and I have looked a lot…my noni also made them but just eggs flour sugar and oil. I make them all the time!
Maria
Fantastic Shelly! Thanks for dropping by ♥
Lisa Taylor
Hi Shelly – I want that same taste as my mom’s. If you don’t mind, please tell me the amounts of flour, sugar, oil and egg that in your noni’s recipe.
Rosa
Beautiful!!
Maria
Thanks so much Rosa 🙂
Sonia and mom
I have great memories of these sweet treats?
Maria
Hi Sonia and mom, Thanks for the comment…it just brings a smile to my face 🙂