

Is there a secret to making the Best Homemade Italian Potato Croquettes? Only one way to find out …one thing is for sure, these croquettes make one of the best Italian appetizers! You also won’t believe how simple and easy this recipe is to make.

These crocchette di patate are a guaranteed crowd-pleaser, whether you choose to serve them as part of your appetizer platter or as a side dish. They are nice and crispy on the outside; and the interior is soft and creamy. They are so versatile that you can eat them hot or cold. In Italy, they are extremely popular street food.
Who can resist a good spud, regardless of how it has been transformed? But did you know that the type of potato that you use can make all the difference in the final product?
So what is this potato-croquet secret I am talking about?
Well, there are actually a few secrets I would like to share with you.
In order to make the Potato Croquettes, you need to use a mealy potato that becomes dry and fluffy when it is cooked. The Russet potato, also known as the Mighty Idaho, is the spud for us today. Just in case you are wondering, this is also the ideal potato to make Perfect Hash Brown Potatoes, gnocchi or would you believe CINNAMON ROLLS!!!
You want to know another secret? Steam the potatoes instead of boiling them. That way, you end up with potatoes that are slightly drier than their boiled counterpart. Baking the potatoes, as opposed to boiling them, is another alternative that will provide excellent results.
Now that I have revealed all my secrets, let’s make the best potato croquettes!
How to make the Best Potato Croquettes
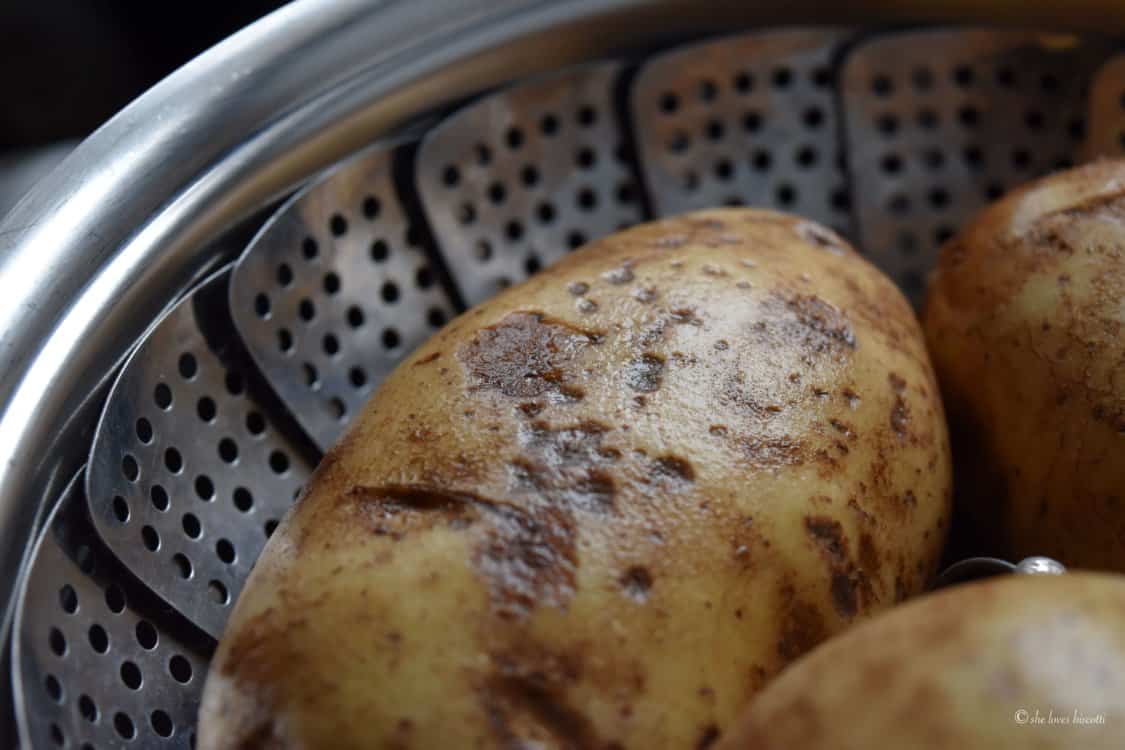
As mentioned, make sure to steam the Russet potatoes that we are going to use to make this recipe for Italian Potato Croquette.
I absolutely love garlic with these easy potato sides, so I will add a few cloves to be steamed alongside my russets. The potatoes are cooked when you can easily poke through the skin reaching the interior of the potato with a paring knife. This usually takes about 35-45 minutes, depending on the size of your potato. Always steam your potatoes with the skin.
Just in case you are wondering, you can make mashed potato croquettes with leftover mashed potatoes. So, if you are like me, the next time Thanksgiving rolls around and you made way too many mashed potatoes, just make this recipe!
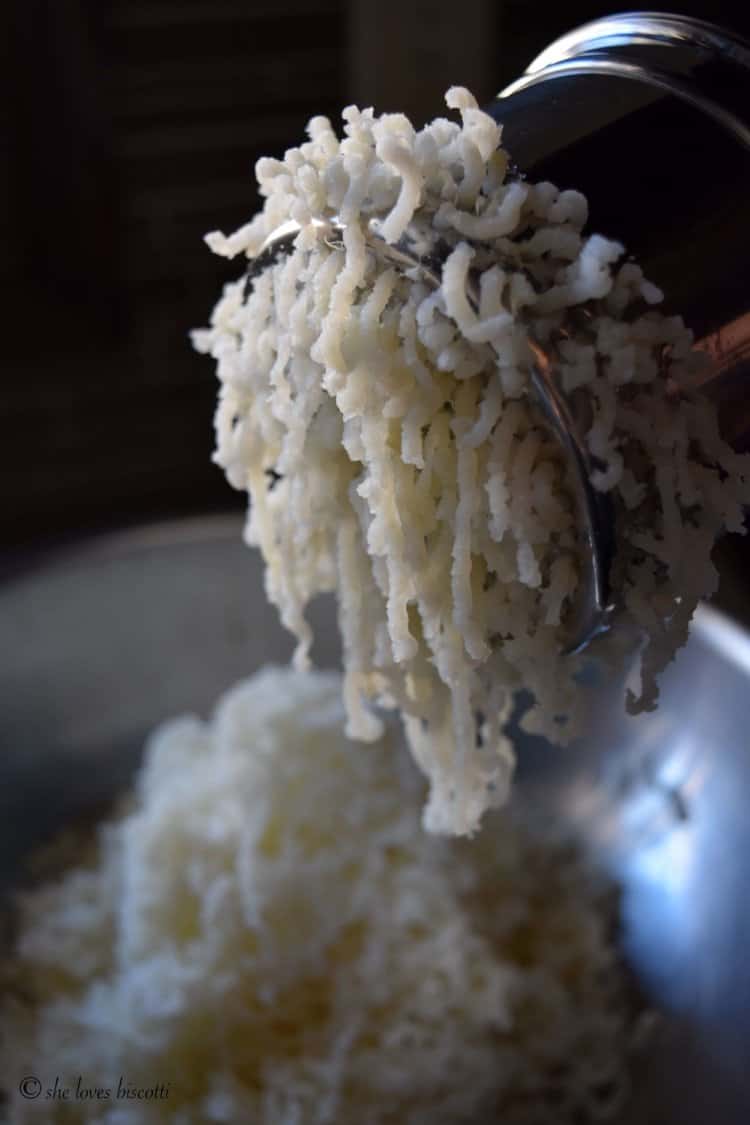
When the potatoes have slightly cooled down, remove the skins and pass them through a potato ricer or a food mill. Gently combine the beaten egg, Romano cheese, chopped parsley and pepper. Once the ingredients are combined, resist the temptation to over-mix – that will result in a gluey texture.
As a side note, I add only a few pinches of salt, because I think that the cheese provides more than enough salt. 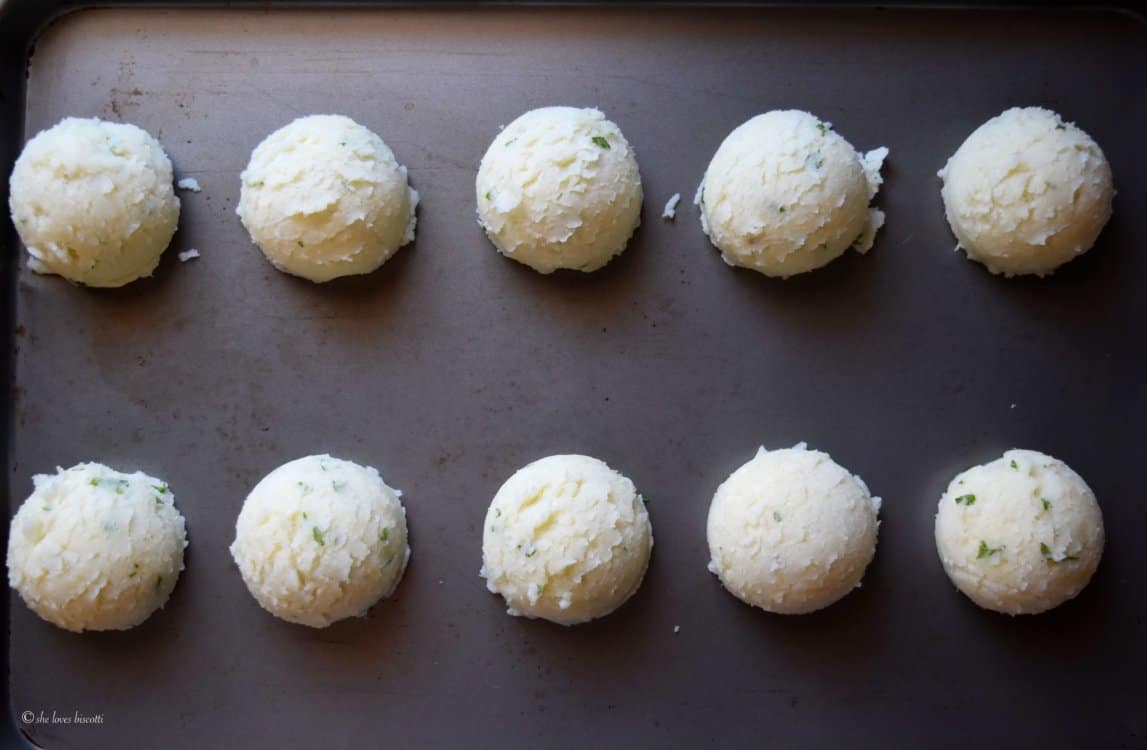
At this point, I will use my largest disher to make large scoops. With about 1½ pounds of mashed potatoes, I can usually make about 10 scoops. As you can see, I place all my scoops on a baking sheet.
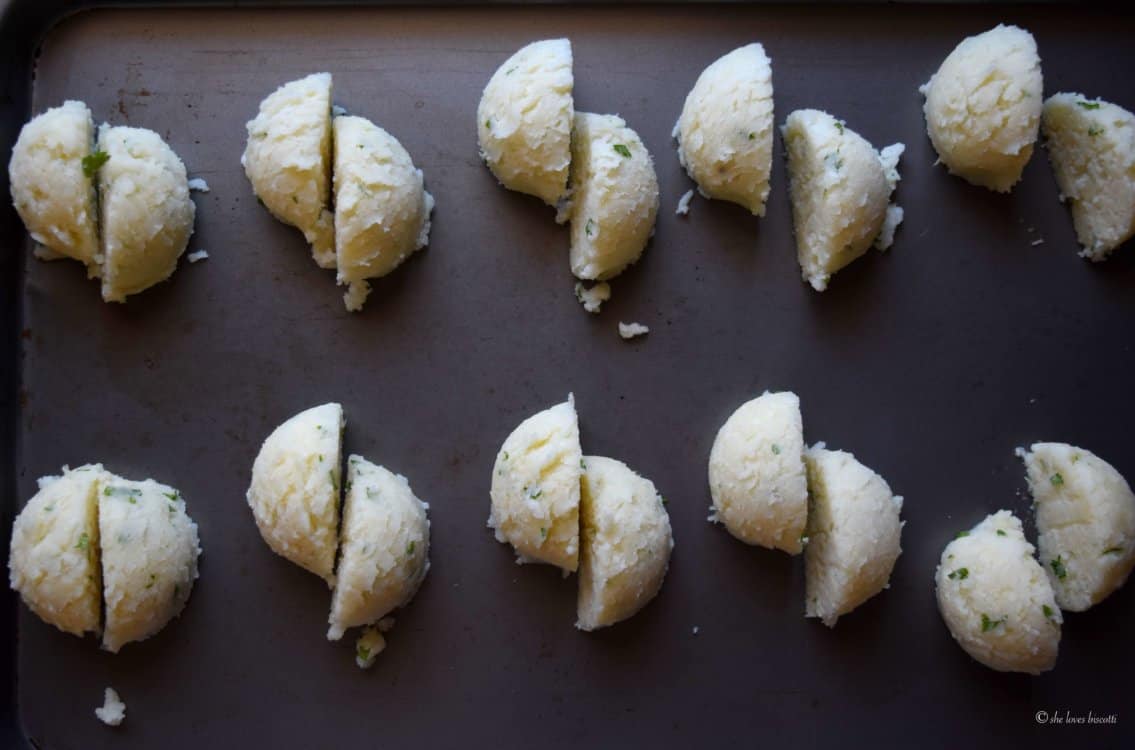
I will then cut each scoop in half, and continue to shape each croquette into a log shape.
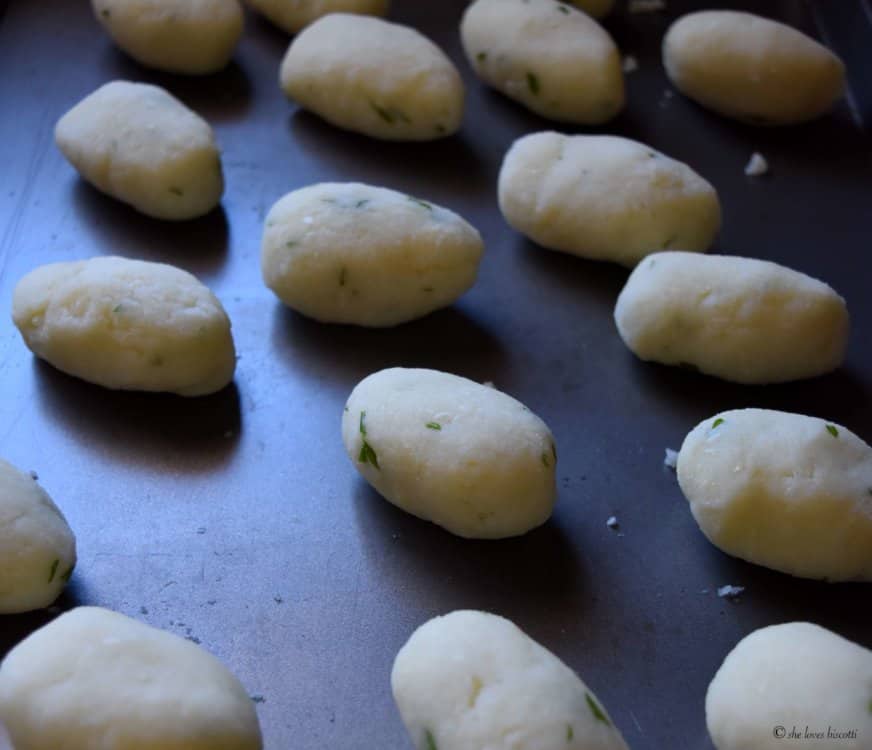
I will first roll each section into a small round ball and then proceed to roll into a log. Once you get the hang of it, it should take you just a few minutes to get them all done. This is perhaps a little obsessive but I cannot for the life of me freelance these little guys.
Okay, so now that you have formed your croquettes, place them in the fridge for about 20 minutes or so.
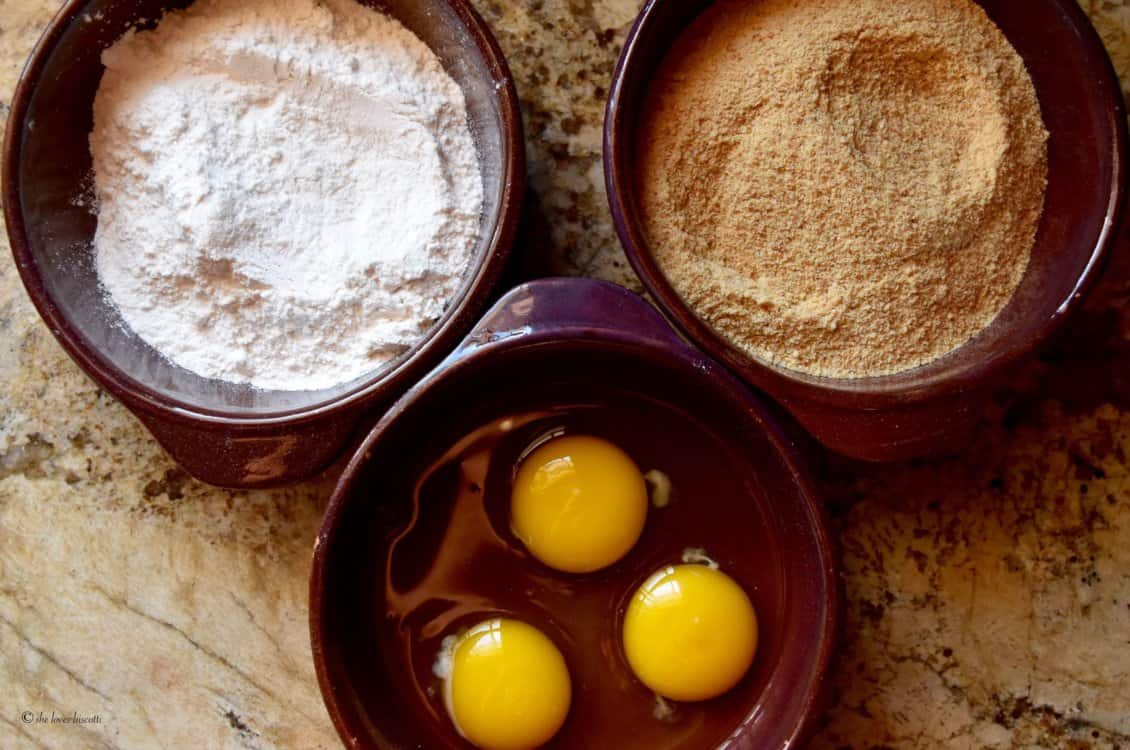
In the meanwhile, you can do some prep stuff. Prepare three shallow bowls. In one shallow bowl, place the flour and season with pepper and salt (optional); in the second shallow bowl, whisk 2-3 eggs with 1 tablespoon of water; in the third shallow bowl, place the breadcrumbs (either homemade or store-bought).
I also line a baking dish with parchment paper, because these guys are going in the oven. Did you actually think that we were going to deep fry these little nuggets of goodness?
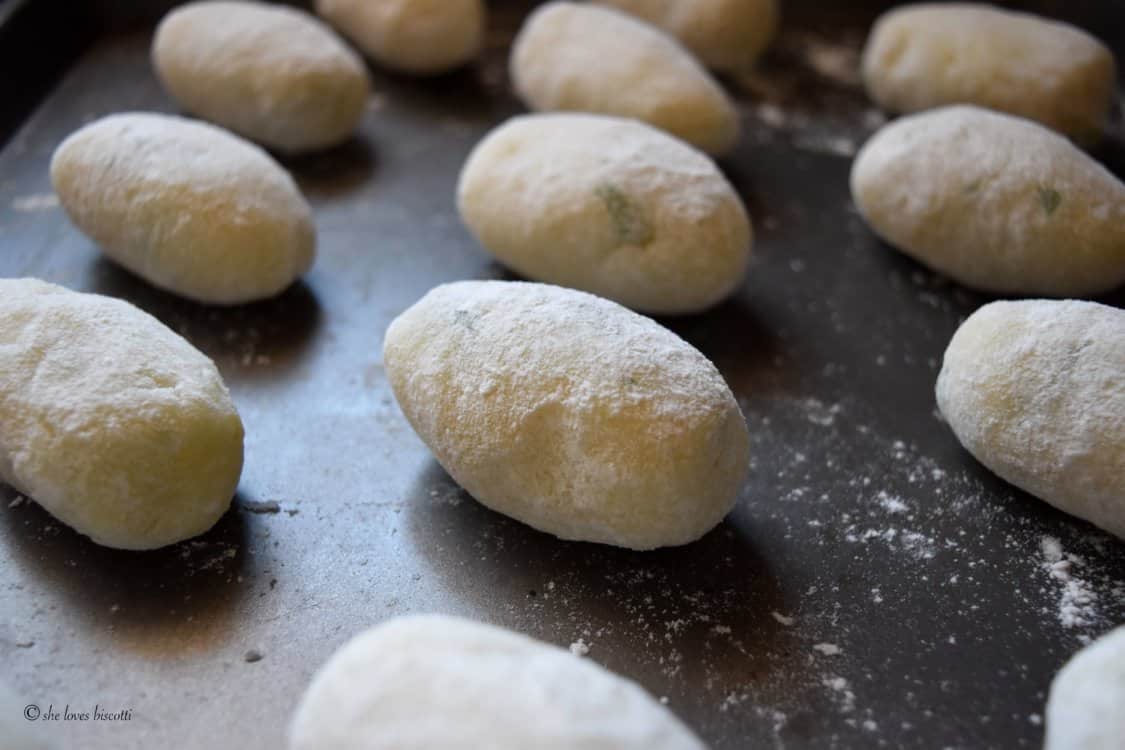
Roll each croquette in the flour mixture, making sure to shake off the excess flour. Then place them back on the baking sheet. I continue to roll all of the croquettes in the flour. Notice there is just a light coating of flour. I find that this extra step helps to develop more of a crust.
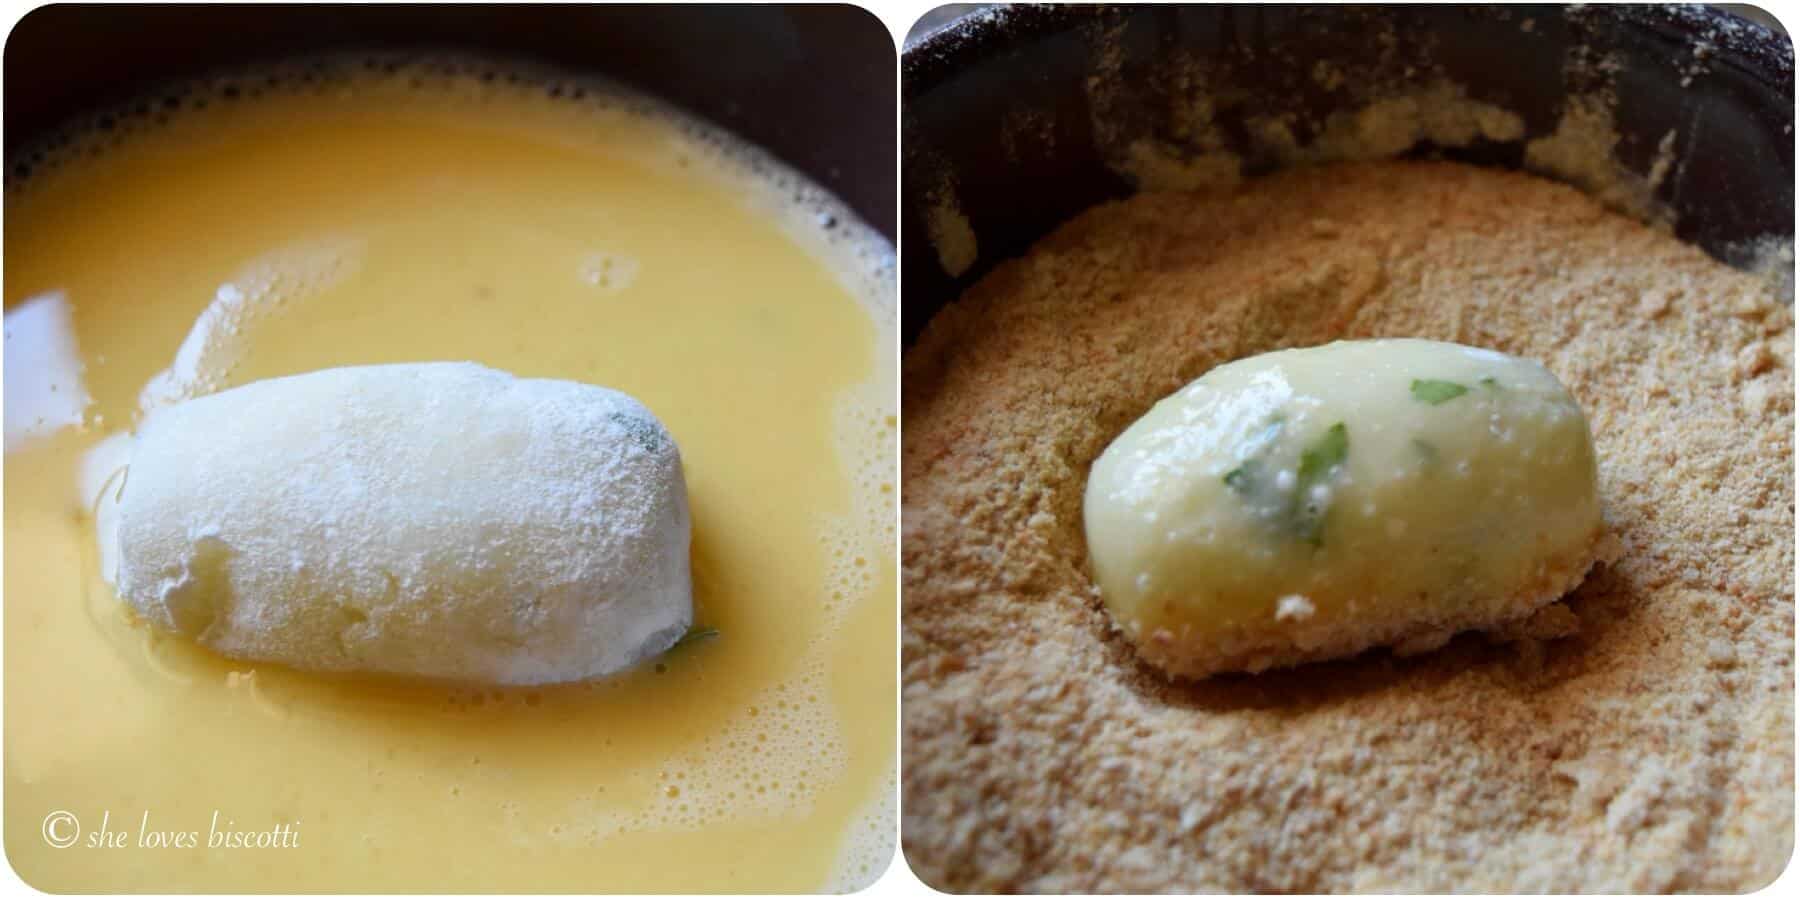
Dip each flour-coated croquette in the egg wash, followed by a roll in the breadcrumbs. I will then place them back on the baking sheet.

The traditional method will dictate that these croquettes are deep-fried. So, at this time, I will put on my dietitian’s hat and show you how to make croquettes without deep frying them and without sacrificing (too much) on taste. So, are you ready for a little unconventional method?
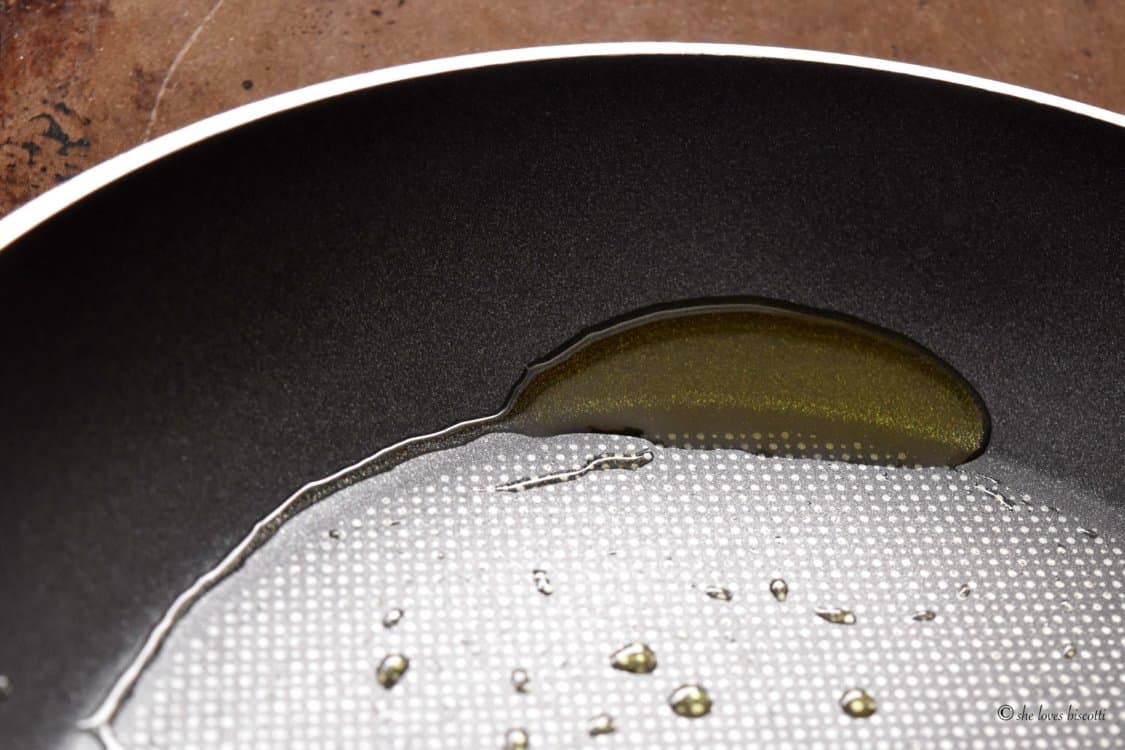
I would like to propose the following: In a non-stick pan, over high heat, heat about 1-1½ teaspoons of olive oil. Manually roll each croquette in the pan while absorbing just enough of the oil to coat the exterior (please do not get burned).
Allow the oil to be equally absorbed between 5 croquettes.
Once you have 5 croquettes in the pan, shake the pan with a back and forth motion. In essence, the croquettes are being “pan-fried” and rolled into a smooth shape.

Notice how polished and uniform they become. This will take just a few minutes. So shake the pan back and forth and occasionally lift the pan from the heat, in order to avoid burnt croquettes, until you get a nice golden color.

Then transfer the croquettes to the parchment-lined baking dish and place them in a preheated 375℉ oven. Continue to make another batch. All in all, I repeat this procedure 4 times.
Once I have “pan-fried” my croquettes, I will leave them in the oven for about 15 minutes. Once again, unconventional, but you get that crispy exterior taste without deep frying.
Leftover Mashed Potato Recipes we love

Recipe origin
As you can well imagine, these potato croquettes would often be served at large family gatherings during my youth.
If you are interested, and if you love potatoes and garlic, you have to try these Crispy Italian Oven Roasted Garlic Potatoes (just click on the link… ). It goes without saying that my mom would deep fry these croquettes. Throughout the years, I have tried to adopt a healthier version of this irresistible appetizer.
Did you know that these potato croquettes can also be stuffed with fresh mozzarella cheese?
When forming your croquettes, just enclose a small sliver of fresh mozzarella and when heated, the mozzarella becomes all stringy and gooey and delicious! My mom would often prepare her crocchette di patate like this.

And there you have it my dear friends, a few of the secrets to making the Best Homemade Italian Potato Croquettes. Enjoy!
THANKS SO MUCH for following and being part of the She loves biscotti community where you will find Simple & Tasty Family-Friendly Recipes with an Italian Twist.
If you haven’t already joined, here is the link where you can sign up for my weekly e-mail newsletter. This way, you won’t miss any of my new recipes and it’s free!
Ciao for now,
Maria
★★★★★ If you have made this Italian Potato Croquette recipe, I would love to hear about it in the comments below and be sure to rate the recipe!
Recipe

Best Homemade Italian Potato Croquettes
Ingredients
- 1½ pounds riced potatoes can also use mashed potatoes
- 1 egg slightly beaten, room temperature
- ½ cup grated Pecorino Romano cheese about 25 grams
- 1 tablespoon parsley finely chopped
- salt and pepper to taste
shallow bowl #1
- ¼ cup flour
shallow bowl #2
- 2 eggs slightly beaten
- 1 tablespoon water
shallow bowl #3
- ½-3/4 cup breadcrumbs
for stir-frying
- 6 teaspoons olive oil separated
Instructions
- Combine riced potatoes with the beaten egg, Romano cheese, chopped parsley, salt and pepper.
- Divide the mixture into 20 croquettes (please refer to text for details).
- Prepare 3 shallow bowls with flour in the first, eggwash in the second, and breadcrumbs in the third bowl.
- Roll each croquette, one by one in the flour, make sure to remove excess flour.
- Dip each floured croquette in the egg wash and finally roll in the breadcrumbs.
- In batches of 5 croquettes, "pan fry" in 1-1½ teaspoon of olive oil (please refer to text for details).
- Once all the croquettes have been "pan fried" place in a baking dish and in a preheated oven at 375℉ for 15 minutes.
- Serve immediately.
Perry Kinard
Easy and delicious. Also easy to manipulate to taste. I did a southern style to go with my crawfish ….was a hit
Maria
So thrilled to read this, thanks Perry. Sounds absolutely delicious!
Lina
Can I deep fry these as well? Thanks x
Maria
Thanks for your interest Lina. Yes, in fact, that is how my mom would make them. Enjoy!
Marisa LaPorte
can I use sweet potatoes instead??
Maria
Thanks for your interest Marisa. Unfortunately, I have never tried it. I would love to hear about your results if you do decide to give it a try.
Janice
Can you use Panko instead of breadcrumbs?
Maria
Thanks for your interest Janice. Although I have never tried I think you should get great results.
Elizabeth Chiapperino
I used leftover mashed potatoes, measuring out 1.5 lbs of mashed and followed the recipe.
I used Gluten Free Bread crumbs, added fresh parsley to those as well along with 1/4 of grated Parmesan Reggio to make up the 3/4 cup of crumbs.
They came out perfect.
I used an ice cream scoop to portion.
Maria
Thanks so much for sharing Elizabeth. This is great for those that would like to try a gluten-free version. Great comment!
Sandy
Hi Maria
Have you ever made a gluten free version substituting the flour and bread crumbs?
These look delicious!!
Maria
Thanks Sandy. I have not, but a reader just left a comment about a gluten-free version she made. Perhaps that can be your inspiration. Thanks for stopping by, appreciate it!
Patricia
Can I make these ahead, Putin fridge and cook the next day?? Thanks
Maria
I tried this one Christmas to save time and was not happy with the results… the breadcrumbs absorbed too much moisture and they never got crispy since these are not deep-fried.
I prefer to make them and then refrigerate them. I will then take them out of the fridge an hour or so before I plan on serving them and just place them on top of a warm oven.
Or, if you have room, you can place them in the oven. I recommend your oven’s lowest temperature just enough for them to warm up.
Thanks so much for stopping by, appreciate it.
Olivia
Stuffed with cheese curds and placed in a plate of gravy…..ohhhhhhhhhh my😋😋
Maria
Sounds amazing Olivia!
David
Oh my goodness what a great idea!
Mary Ann
I made this recipe last night for dinner and my family was raving about it. I will never make potato croquettes as I used to. This is now my new go to family pleaser.
Thank you Maria.
Maria
Fantastic Mary Ann! Thanks so much for sharing!
Sally
My kids loved these, thanks!
Maria
Fantastic Sally! I am thrilled to hear this! Thanks for taking the time to share, appreciate it.