


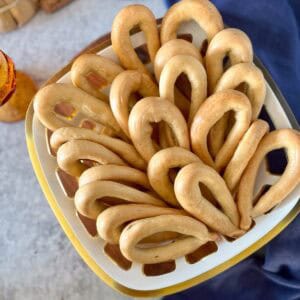
This Italian Anise Taralli recipe uses yeast for a light, crisp texture and incredible flavor-perfect for snacking or pairing with wine!
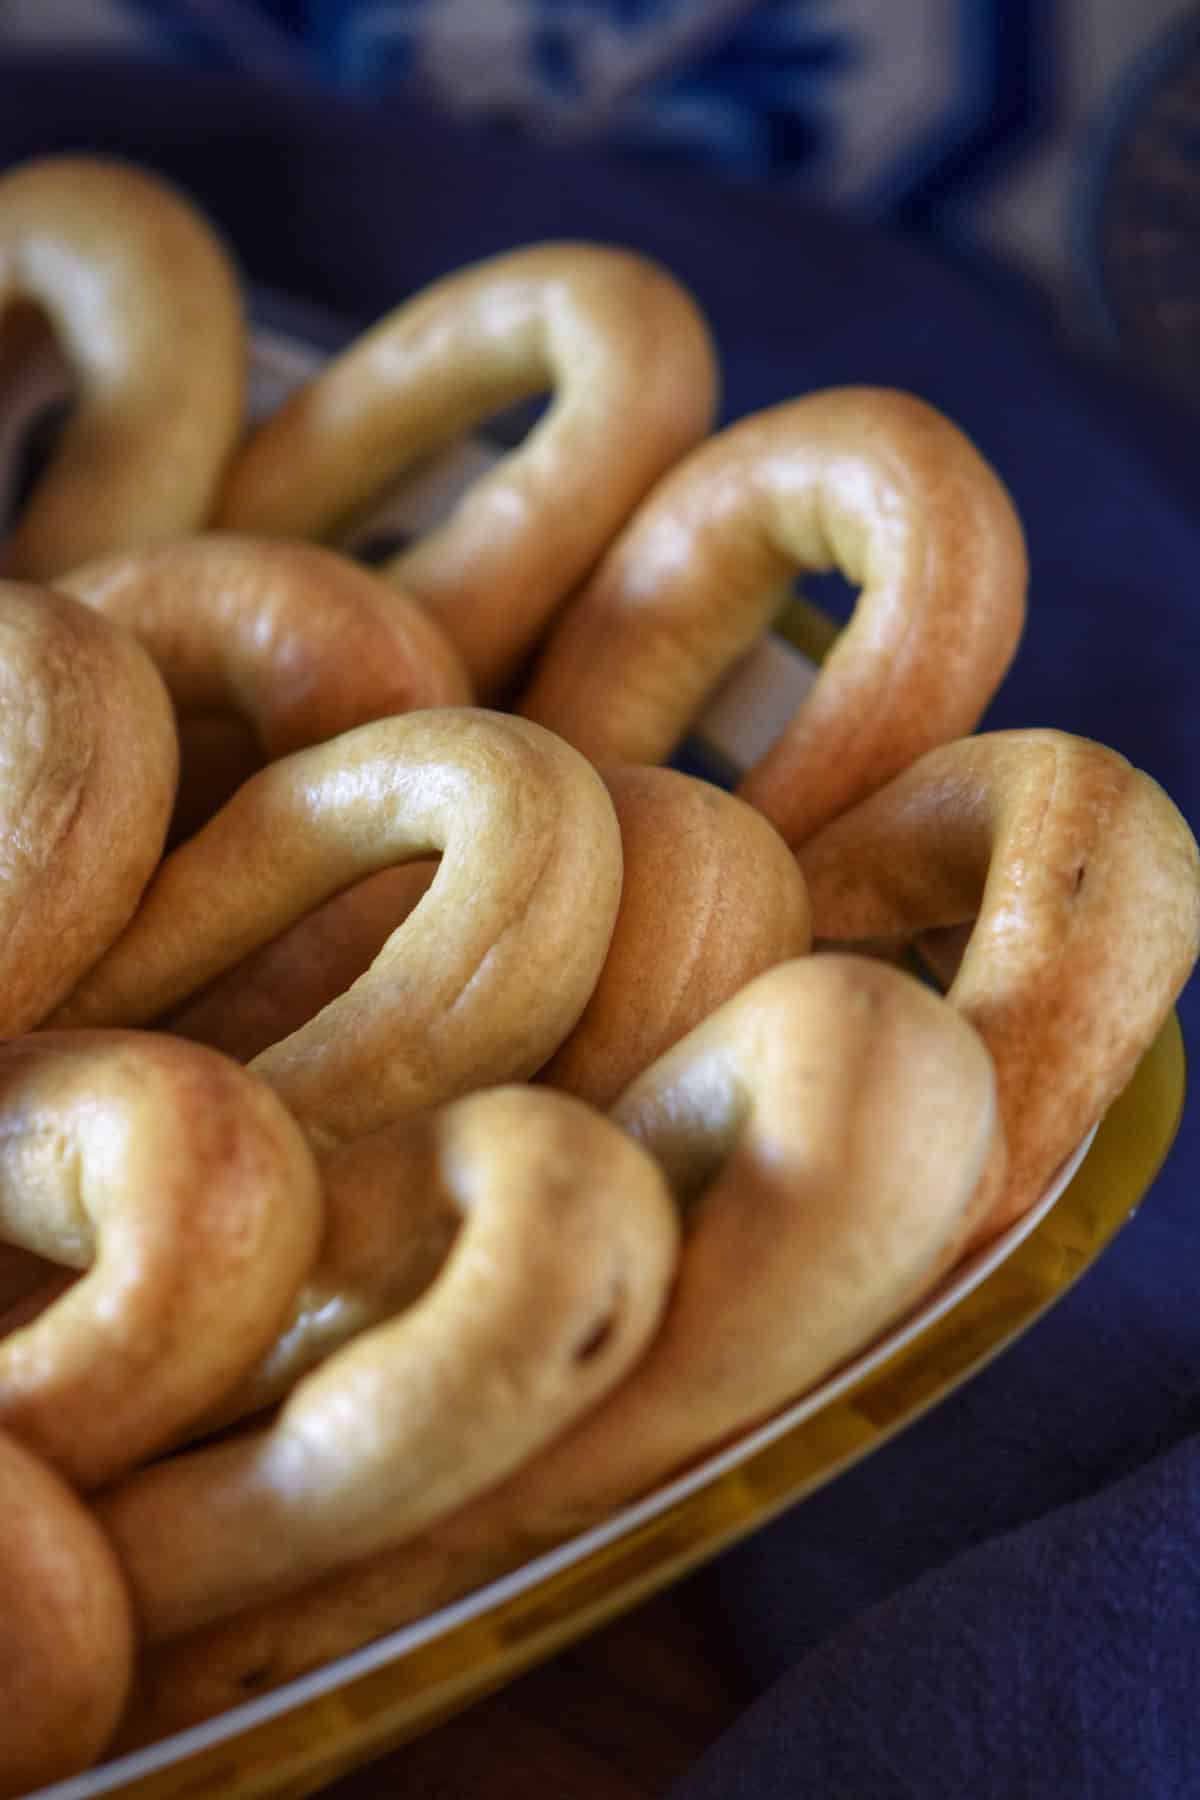
These crunchy Italian anise taralli are, in my humble opinion, the ultimate snack food.
While traditional Italian taralli making might seem time-consuming, the recipes are often simpler than they appear-and far superior to anything you'll find in a store.
Taralli have been a part of my life for as long as I can remember. Growing up in an Italian home, I watched my nonna and mom make them weekly. A family favorite was this fennel taralli recipe.
My fascination with these “Italian crackers” led me on a quest to explore different takes on this classic treat.
It's fascinating how taralli recipes vary across Italy-each region has its version, from Bari (taralli Baresi), to Puglia (taralli Pugliese), Calabria (taralli Calabrese) to Naples (taralli napoletani).
This particular recipe uses yeast to give the taralli their light, airy texture. The process starts by activating the yeast with water and sugar. Once it's ready, mix it with the rest of the ingredients and let your stand mixer do the work.
Be sure to watch the video in the recipe card to see how easily this all comes together.
Before I share the step-by-step photos of taralli making, here's a quick look at the prep and cook time. While the process requires a bit of patience, you will love the final product!
Let's break it down!
Jump to:
Prep and Bake Time
The times to prepare and bake these yeast-based taralli recipe can be estimated as follows:
- Prep Time: 20 minutes (proofing, mixing and kneading dough)
- Resting Time: 1 hour (for dough to rise)
- Shaping & Boiling Time: 25-30 minutes (rolling, shaping, and boiling in batches)
- Baking Time: 20-25 minutes (375°F for 10 minutes, then 350°F for 10-15 minutes)
- Total Time: ~2 hours 15 minutes (including resting time)
Making anise taralli is a rewarding process that involves mixing, shaping, boiling, and baking to achieve their signature crisp texture. And with just a few easy steps, you’ll have a fresh batch ready to enjoy.
Let’s make them together!
Ingredients
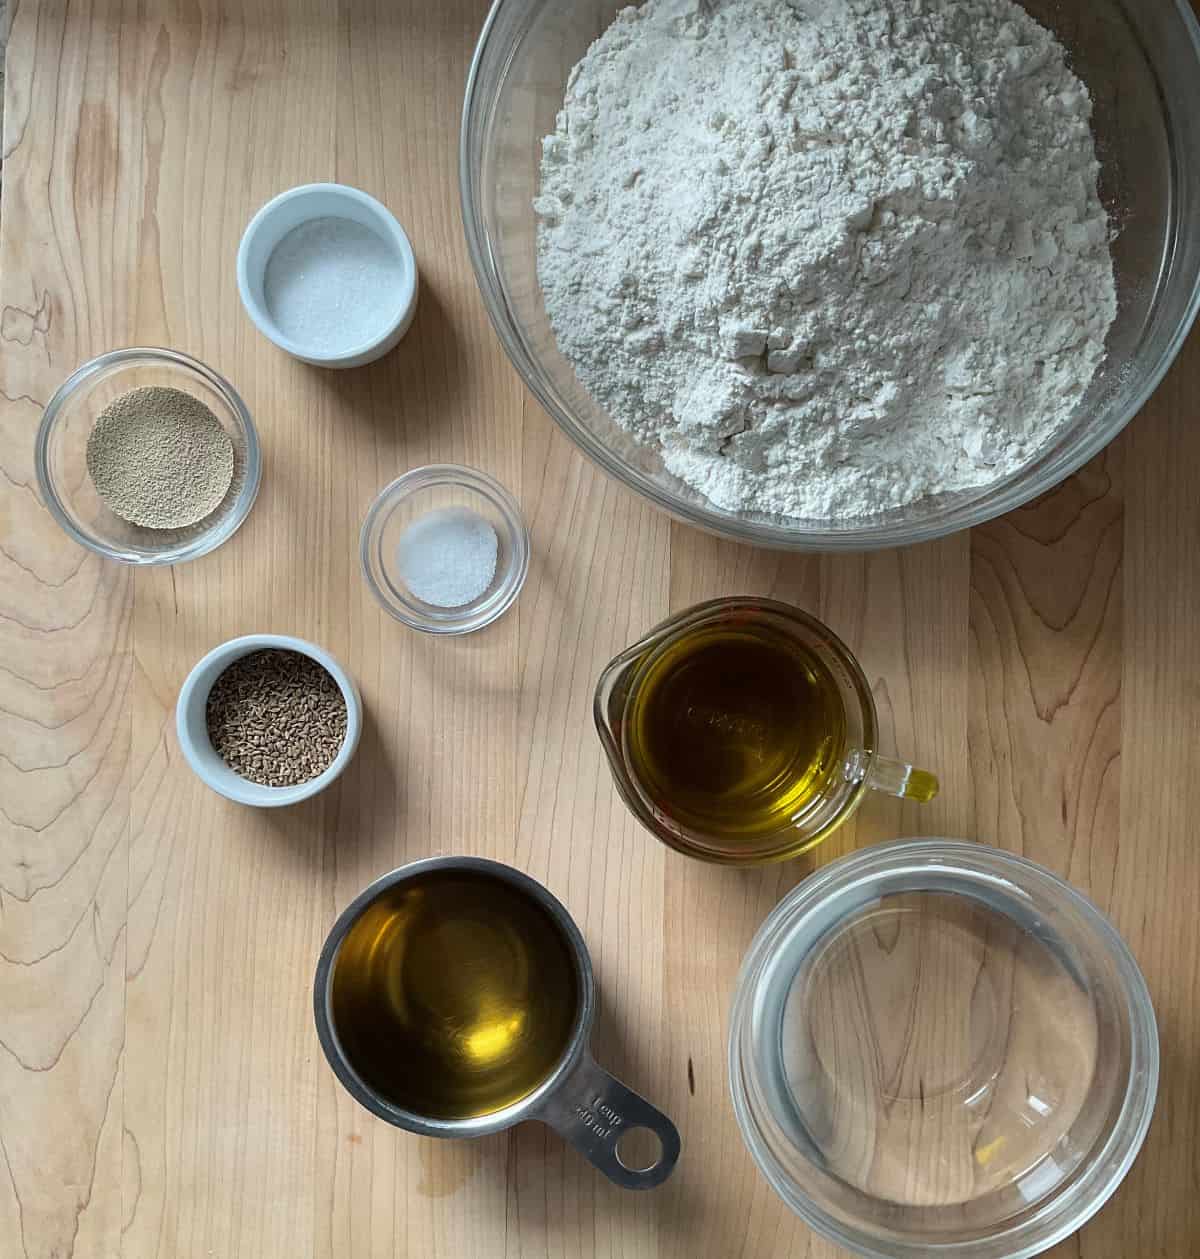
To make these crunchy, flavorful taralli, you'll need a handful of simple pantry staples:
- Active Dry Yeast & Sugar: The yeast helps give the taralli a light, crisp texture, while the sugar activates it and aids in fermentation.
- Water: Lukewarm water ensures the yeast activates properly, allowing the dough to rise slightly.
- All-Purpose Flour: Provides structure and the perfect balance of crispness and crunch.
- Salt: Enhances the flavors and gives the taralli that savory touch.
- Anise Seeds: The star of this recipe! Anise adds a warm, slightly sweet, and aromatic flavor that makes these taralli so unique. I like to toast the seeds lightly before adding them to the dough to enhance their natural sweetness and deepen their flavor.
- Olive Oil: Adds richness and helps create a tender yet crisp texture.
- White Wine: A traditional ingredient that enhances the flavor and contributes to the crispiness of the taralli after baking.
Substitutions and Variations
- Anise Seeds: If you're not a fan of anise seeds or prefer a milder licorice flavor, fennel seeds can be used instead of anise seeds.
- White Wine: Dry vermouth can be used as an alternative to white wine, offering a similar depth of flavor. For a non-alcoholic version, simply use water.
- Olive Oil: While olive oil imparts a rich, fruity flavor, you can substitute it with vegetable oil for a more neutral taste.
- Bread Flour: You can substitute bread flour for all-purpose flour for a slightly chewier texture. Bread flour has more protein, resulting in a denser, chewier dough. Note: You might need to adjust the quantity as I find that bread flour tends to absorb more liquid than all-purpose flour.
Step-by-Step Instructions
- In a small bowl, combine 2¼ teaspoons active dry yeast (8 grams), 1 teaspoon of granulated sugar, and 1 cup of lukewarm water (approximately 100°F / 38°C). Stir and let it sit for about 10 minutes, until the mixture becomes foamy.
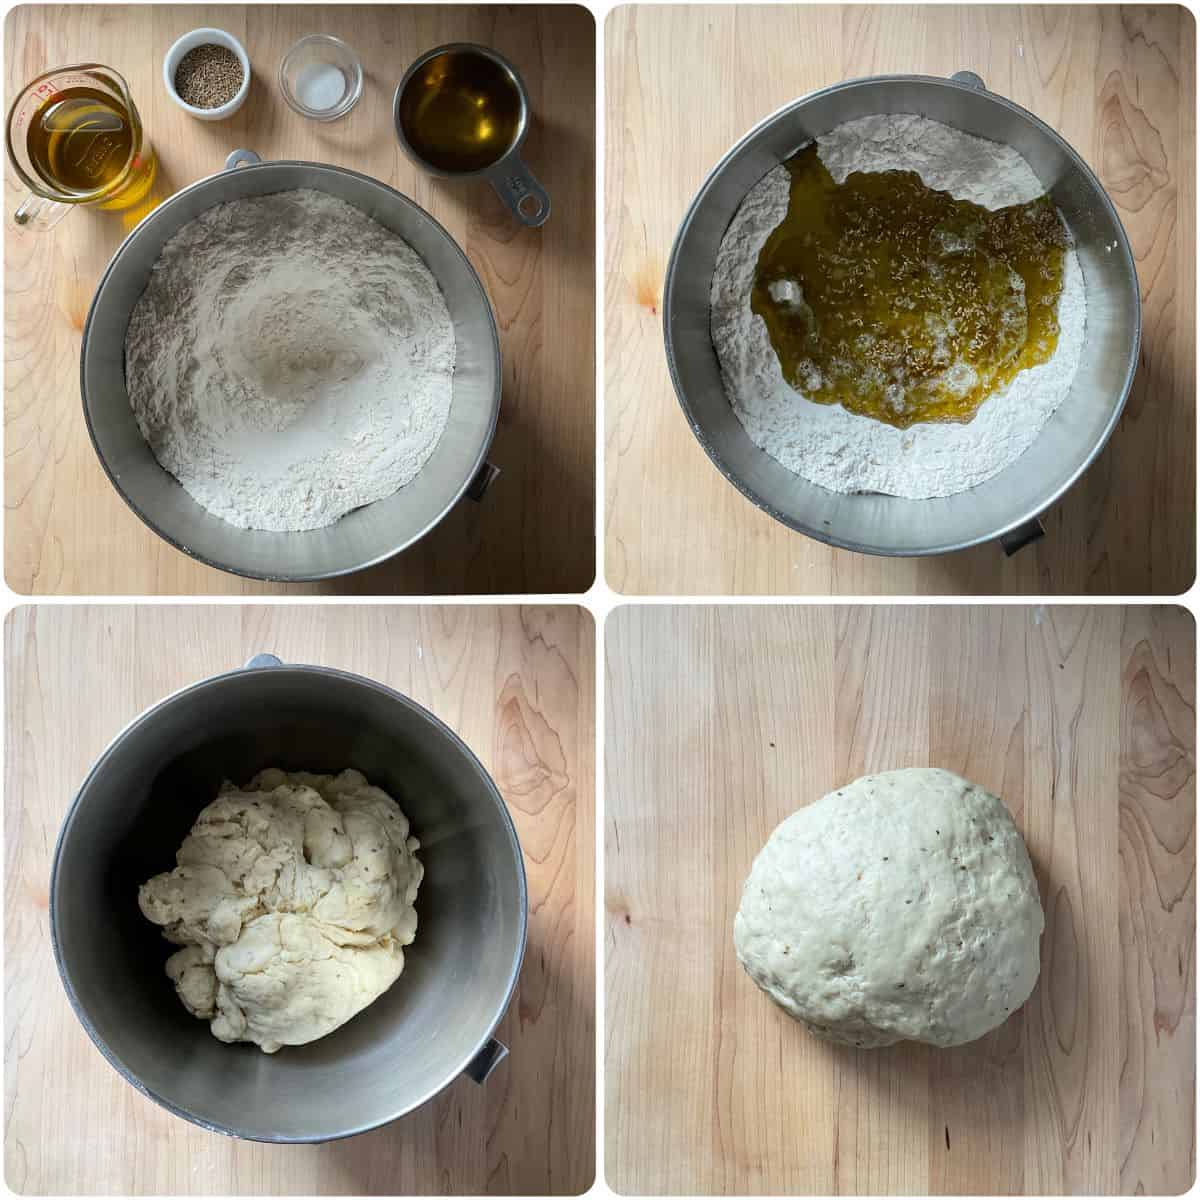
- In the bowl of your stand mixer, combine the 1 kg all-purpose flour (approximately 7 cups), 1½ teaspoons salt (or to taste), and 1 heaping tablespoon of toasted anise seeds (or to taste). Whisk together to ensure they're evenly distributed.
- Make a well in the center of the dry ingredients. Add ¾ cup olive oil and 1 cup white wine. Add the foamy yeast mixture.
- Using the dough hook attachment on your stand mixer, knead the dough on a low setting for about 10 minutes, or until it becomes smooth and elastic. If you prefer to knead by hand, simply do so on a lightly floured surface for the same amount of time.
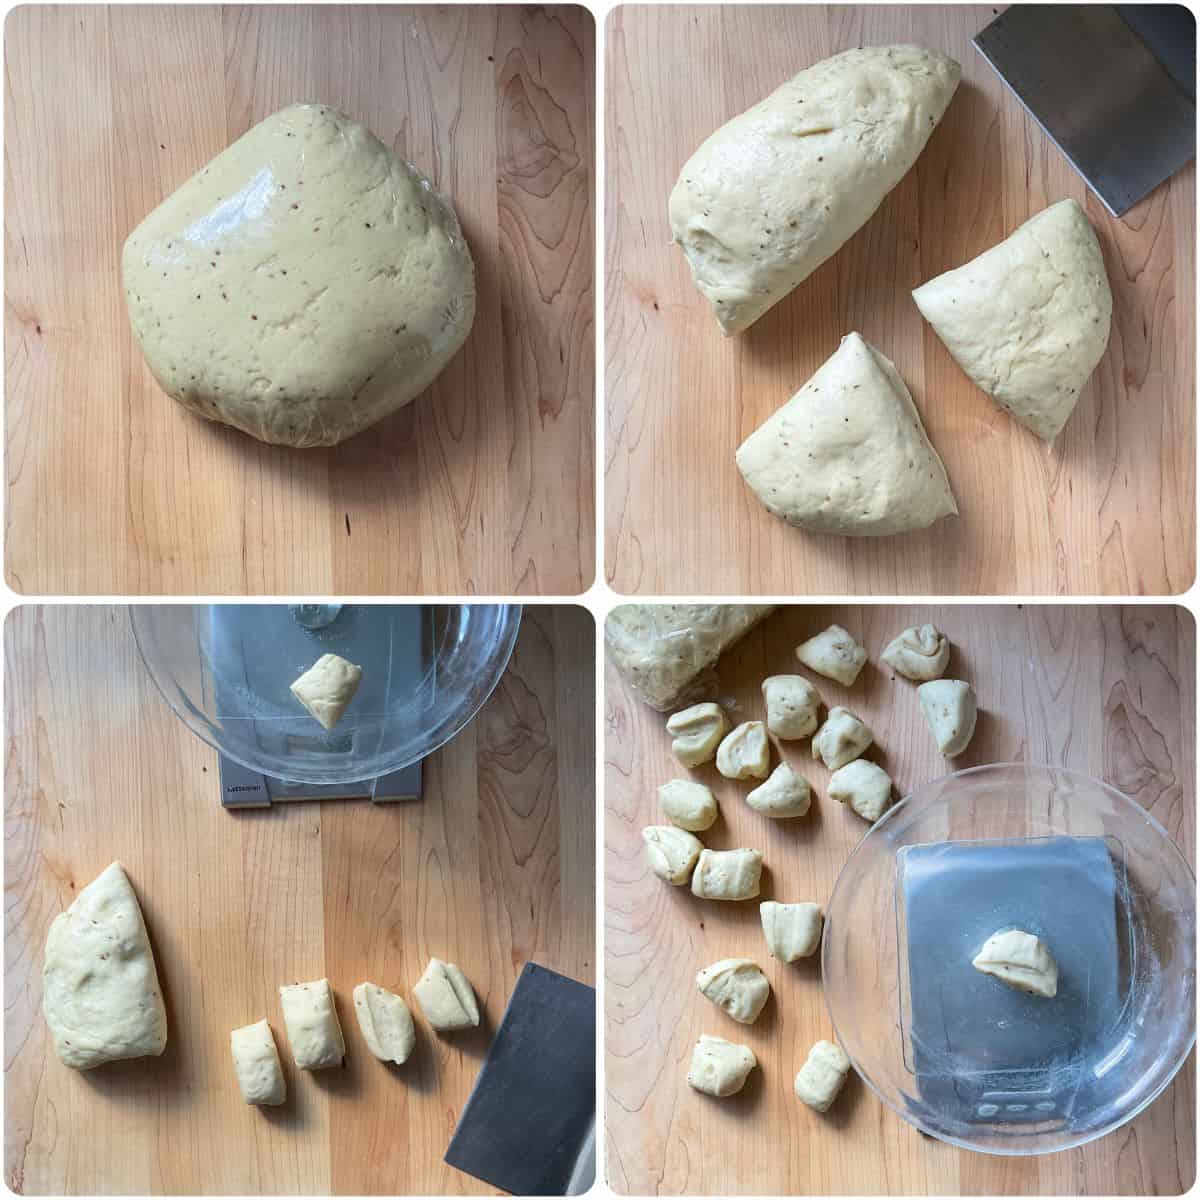
- Cover the dough with plastic wrap. Let it rest for at least 1 hour or until it has risen and doubled in size. During this rest period, the gluten structure relaxes and the “rested” dough will be a lot easier to roll out.
- After the dough has rested, I then place the dough ball on an un-floured wooden board and knead it a few times before separating the dough into quarters. Cover the sections you’re not working with to keep them from drying out.
- Cut each quarter into 16 pieces. I like to use a food scale to ensure that each piece of dough weighs approximately 25 grams.
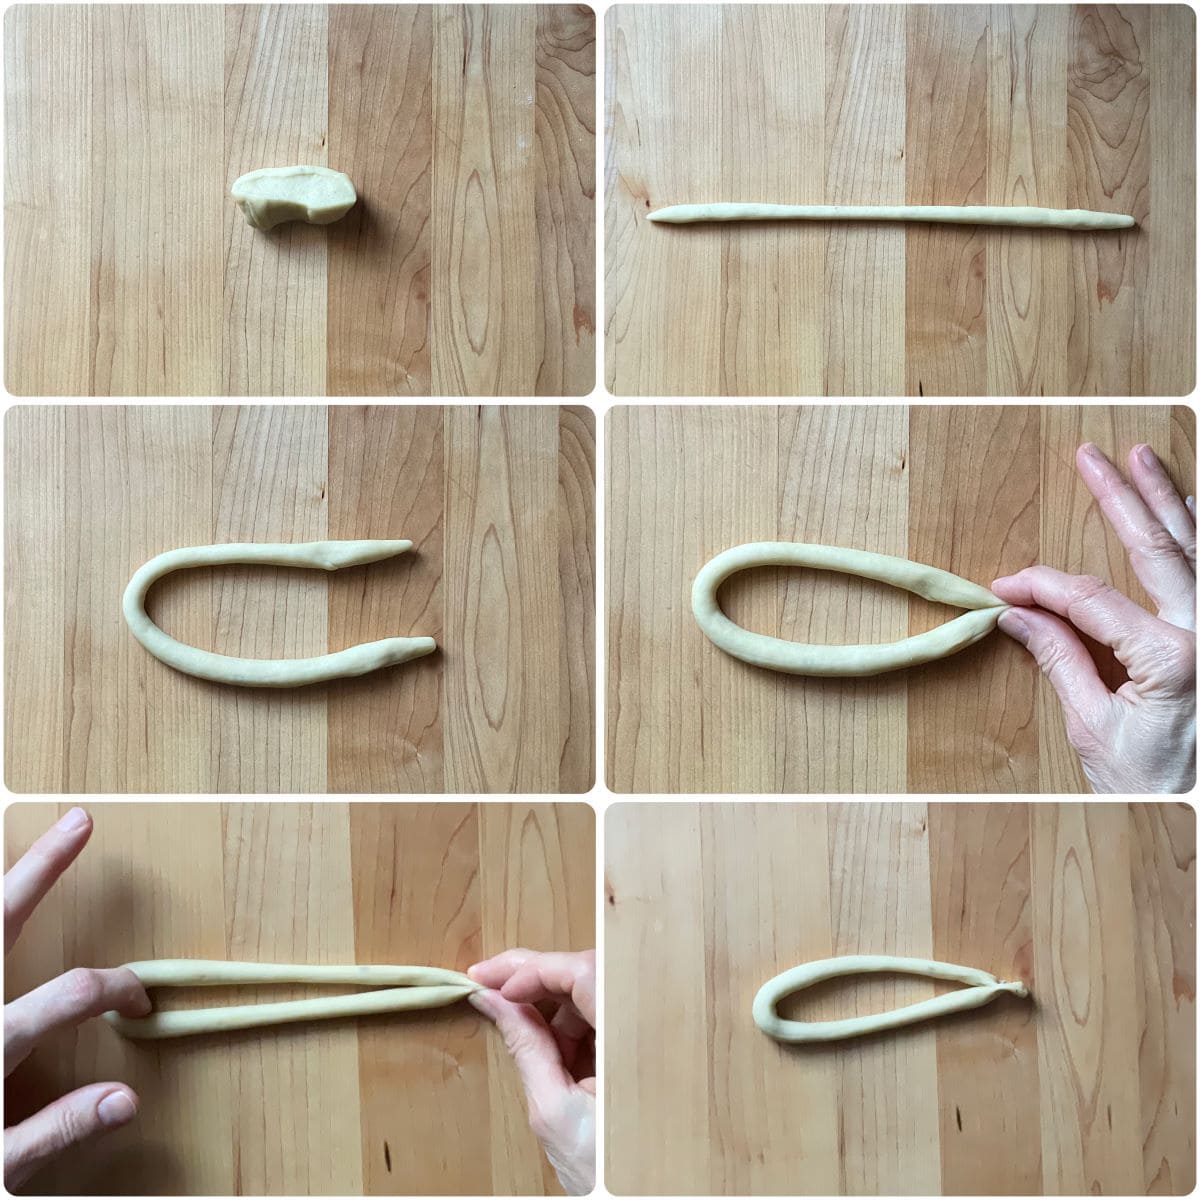
- Roll each piece into a rope 8-10 inches (20-25 cm) long and about ½ inch (1 cm) in diameter. Shape each rope into a ring, pressing the ends together firmly to form the tarallo shape.
- Once I have shaped about half of the dough into taralli, I bring a large pot of water to a boil.
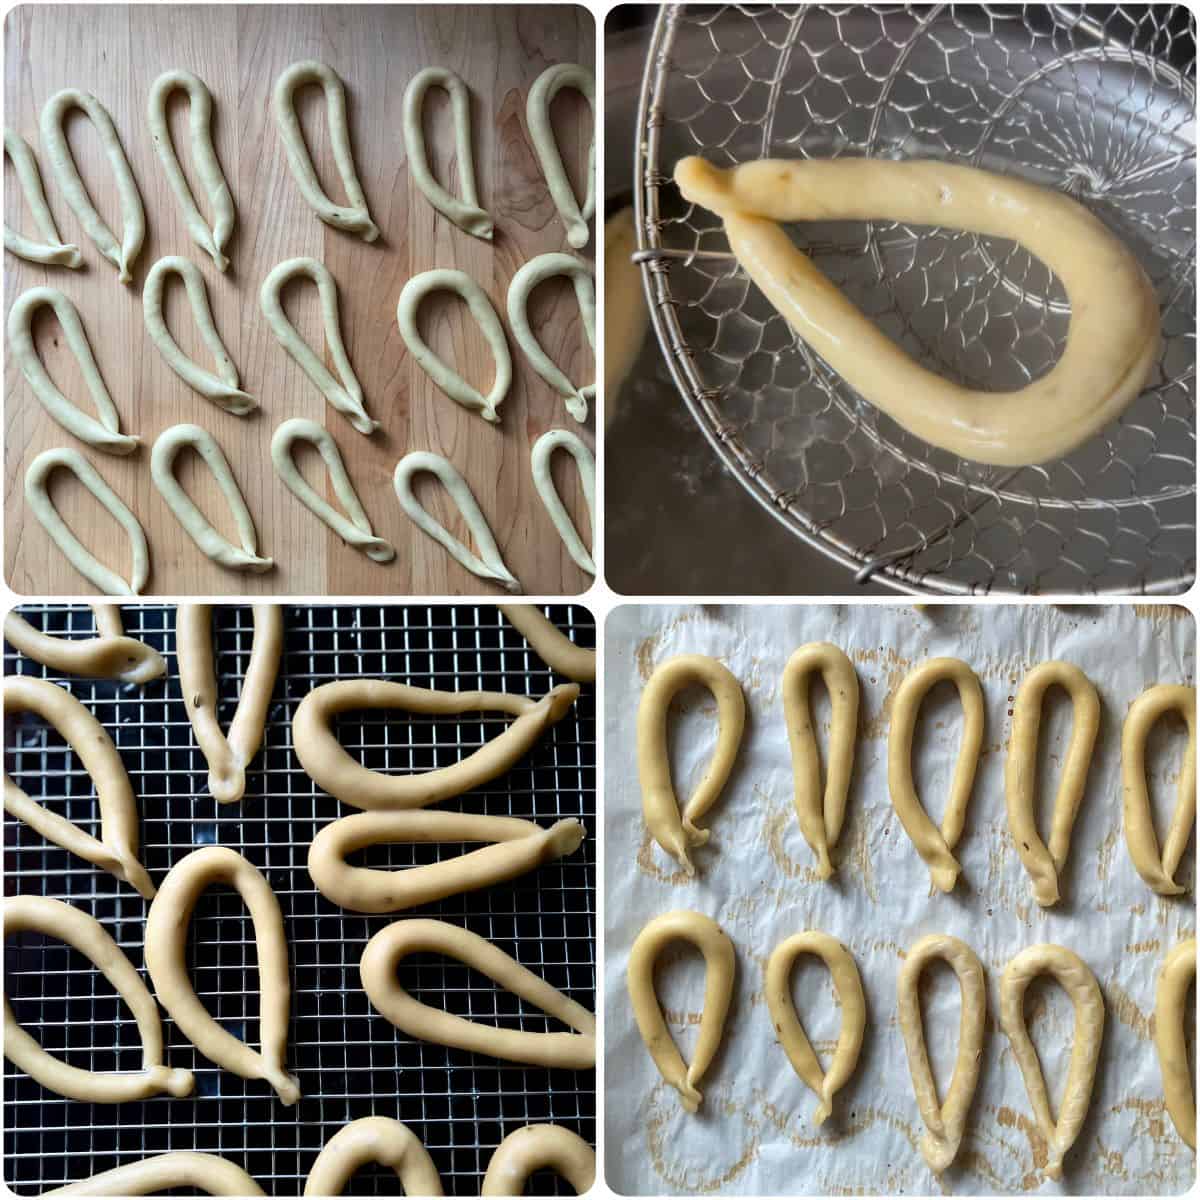
- Working in batches of 3-4, carefully drop the taralli into the water. Once they float to the surface (this should take about 15 seconds), remove them with a slotted spoon and place them on a cooling rack to drain.
- Preheat your oven to 375°F (190°C). Arrange the boiled taralli on a parchment-lined baking sheet or directly on oven grates. Bake for 10 minutes at 375°F (190°C), then lower the temperature to 350°F (175°C) and bake for another 10-15 minutes, until they are golden brown and crispy.
- While one batch of taralli is baking, continue shaping and boiling the remaining dough.
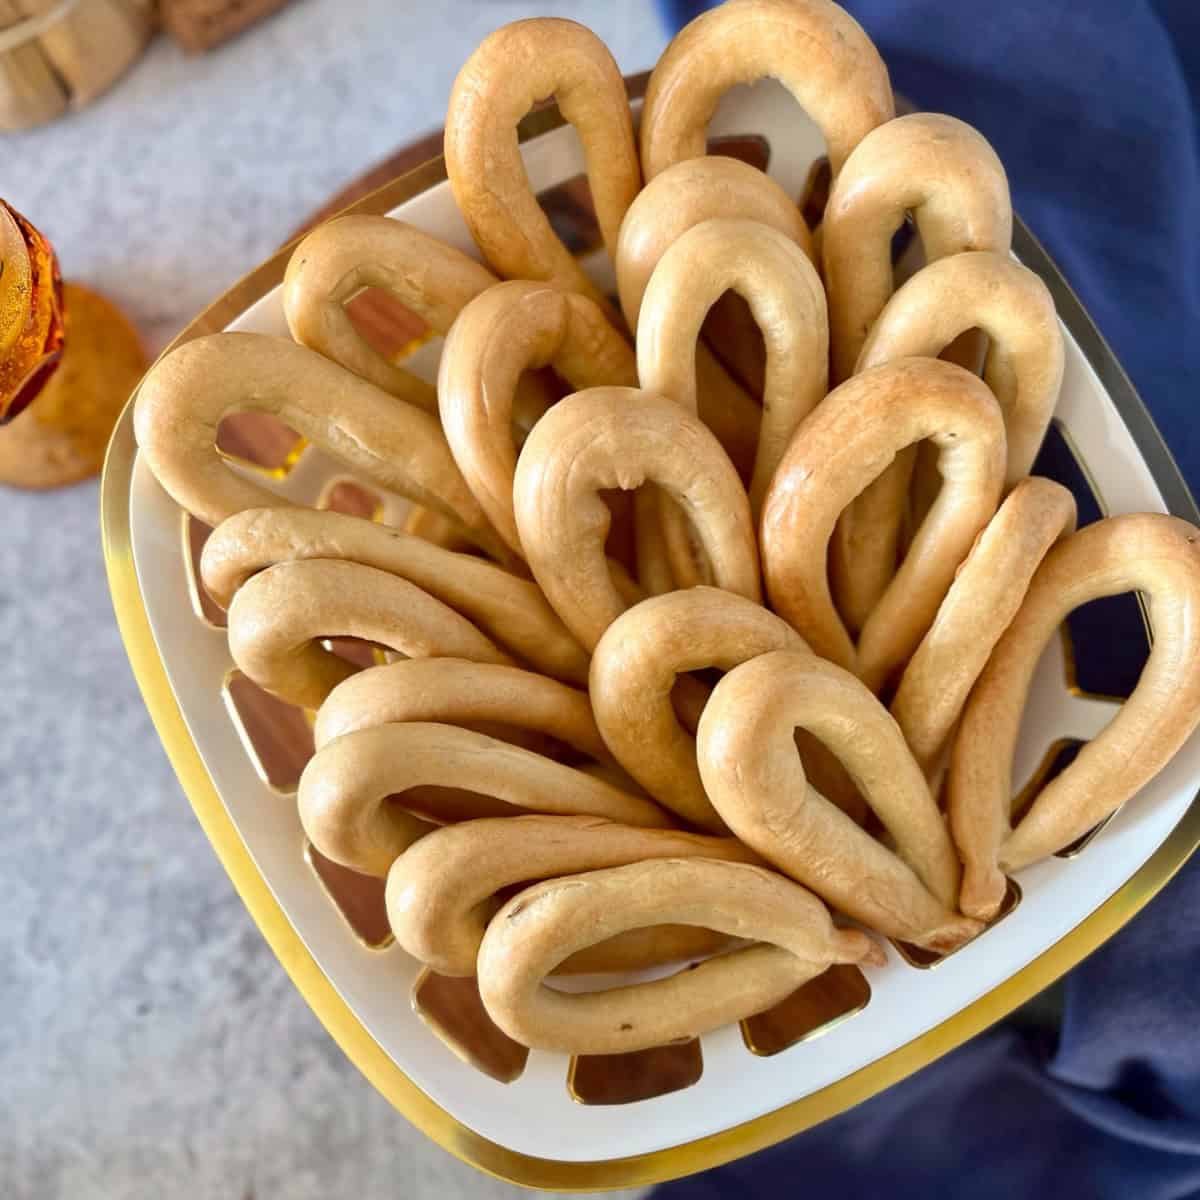
- Let the taralli cool on a wire rack before serving. Enjoy them as a snack or paired with your favorite wine!
Tips
- Ensure the water is lukewarm and not too hot (about 100-110°F). If it's too hot, it can kill the yeast. Also, wait for the yeast to foam up after 10 minutes. If it doesn’t, the yeast may be expired, and it's best to start with fresh yeast.
- For best results, be sure to use a kitchen scale to weigh the flour for precise measurements. This is my point of reference: 1 cup of all-purpose flour=5 ounces =142 grams. Source
- Lightly toast the anise seeds in a dry skillet over medium heat for a minute or two, just until fragrant. This simple step intensifies their flavor and adds an extra layer of flavor to your taralli.
- There's no need to flour the wooden board when rolling out the taralli. The olive oil in the dough prevents sticking, making it easy to shape. Not using flour also helps the ends pinch together securely, preventing them from separating during boiling.
- Feel free to adapt any sized ring shape when making these taralli; there is no right or wrong shape. It's all about personal preference.
- If you prefer your taralli to have less of a crunch, check the texture after 20 minutes (of total baking time) and pull them out when you want.
- Taralli continue to crisp up as they cool to room temperature, so keep this in mind when determining doneness.
FAQ
A dry white wine is best for making taralli. Classic choices include Pinot Grigio, Trebbiano, or Verdicchio. These wines have a mild flavor that enhances the dough without overpowering the anise flavor. Avoid sweet wines, as they can alter the taste and texture. If you prefer a slightly richer flavor, a dry Marsala can also work well.
Yes, you can easily halve the recipe if you want to make a smaller batch. Just divide all ingredients in half, and follow the same instructions. Keep in mind that the resting, boiling, and baking times should stay the same.
More Italian Anise Recipes
Anise's distinctive aroma and flavor make it a perfect addition to delicious cookies. Here are some of my favorite Italian cookie recipes that feature this remarkable spice.
Recipe Origin
It was almost ten years ago that a colleague of mine shared his mom's recipe for these addictive, crunchy taralli made with yeast.
She was born in the beautiful city of Cosenza in Calabria, Southern Italy, and like so many immigrants, she made her way to North America.
As part of a fundraiser for their local church, she and her friends bake thousands of these savory treats-using a sausage attachment to press the dough into long coils, which are then cut and shaped into rings. Such a brilliant and efficient way to keep an old tradition alive!
When my colleague learned of my taralli obsession, he graciously shared his mom’s recipe with me, and I will forever be grateful.
There are countless variations of this simple Italian snack. Some recipes include yeast, eggs, and/or wine, while others use varying herbs like fennel, anise, or spices like black pepper or chili flakes. The best part? You can mix and match flavors to make them your own.
Whether you’re making taralli for snacking or enjoying them with a glass of wine, they will surely bring a taste of tradition to your table.
I hope you give this recipe a try!
Enjoy!
THANKS SO MUCH for following and being part of the She Loves Biscotti community, where you will find Simple & Tasty Family-Friendly Recipes with an Italian Twist.
Ciao for now,
Maria
★★★★★ If you have made this taralli recipe, I would love to hear about it in the comments below and be sure to rate the recipe!
Recipe
Crunchy Italian Anise Taralli with Yeast
WANT TO SAVE THIS RECIPE?
Ingredients
- 2¼ teaspoons active dry yeast 8 grams
- 1 teaspoon granulated sugar
- 1 cup water lukewarm
- 1 kg all-purpose flour approximately 7 cups
- 1½ teaspoons salt or to taste
- 1 tablespoon anise seed heaping, or to taste, toasted
- ¾ cup olive oil
- 1 cup white wine
Instructions
- In a small bowl, combine yeast, sugar and water.
- Stir and let stand for 10 minutes (will get foamy).
- In the bowl of a stand mixer, combine the rest of the ingredients.
- Add the yeast mixture.
- With dough hook attachment knead for approximately 10 minutes until you have a soft, smooth elastic dough. Alternately, you can knead by hand.
- Cover loosely with plastic wrap and tea towel and allow dough to rest for at least 1 hour.
- Place the ball of dough on an un-floured wooden board.
- Knead the dough for about 1 minute.
- Separate the dough into quarters (cover the dough you are not using).
- Cut each quarter into 16 pieces. (each piece should weigh about 25 grams-almost 1 oz).
- Roll each piece into a rope 8-10 inches (20-25 cm) long and about ½ inch (1 cm) in diameter. Shape each rope into a ring, pressing the ends together firmly to form the tarallo shape. DO NOT FLOUR YOUR BOARD.
- Bring a large pot of water to boil, then reduce heat so that the water simmers.
- Plunge the taralli in boiling water; 3-4 at a time. Once they surface to the top, remove with slotted spoon. The boiling process (per batch) should take less than 15 seconds.
- Place on cooling rack to drain.
- Repeat process until all the taralli have been boiled.
- Place boiled taralli directly on oven grates or on a parchment lined cookie sheet.
- Bake in a preheated oven at 375° F for 10 minutes, then lower heat to 350° F for another 10-15 minutes until golden brown and crisp. (Set oven rack in the center).
- WATCH THE VIDEO ON THE RECIPE CARD TO SEE HOW EASY THIS RECIPE IS TO MAKE.
Video
Notes
- Ensure the water is lukewarm and not too hot (about 100-110°F). If it's too hot, it can kill the yeast. Also, wait for the yeast to foam up after 10 minutes. If it doesn’t, the yeast may be expired, and it's best to start with fresh yeast.
- For best results, be sure to use a kitchen scale to weigh the flour for precise measurements. 1 cup=142 grams
- Lightly toast the anise seeds in a dry skillet over medium heat for a minute or two, just until fragrant. This simple step intensifies their flavor and adds an extra layer of flavor to your taralli.
- There's no need to flour the wooden board when rolling out the taralli. The olive oil in the dough prevents sticking, making it easy to shape. Not using flour also helps the ends pinch together securely, preventing them from separating during boiling.
- Feel free to adapt any sized ring shape when making these taralli; there is no right or wrong shape. It's all about personal preference.
- If you prefer your taralli to have less of a crunch, check the texture after 20 minutes (of total baking time) and pull them out when you want.
- Taralli continue to crisp up as they cool to room temperature, so keep this in mind when determining doneness.
Nutrition
I originally published this post on January 23, 2016, and republished it on January 31, 2025, with updated content, photos and a video. Thanks for sharing!
Ersilia De Marco
I have made these taralli several times. The recipe is the same as what my mother used to make. It is easy and the taralli are excellent.
Maria
How wonderful Ersilia! Thank you for sharing!
Sally
These were so easy to make! And they came out great! I used fennel and black pepper.
Maybe it will help someone to know that they don’t puff much while baking. I could have left all of them on my jumbo cooling rack for baking (I just stuck the whole rack in the oven), but I was afraid that they would grow in size, so I took half off and did another round of baking. Since the recipe doesn’t mention whether you can bake two racks at once, I didn’t want to risk that either.
Whatever… I am so pleased with the results. Thanks!
Maria
My pleasure Sally. Thanks for sharing. I have never tried to bake both racks at once. I will keep it in mind the next time I make these.
Jan
Do I have to boil these or can I just bake them?
Maria
Thanks for your interest Jan. I have always boiled them. I have never skipped this step when making this recipe for taralli.
Marlene Haigh
I use to make these with my grandmother. She used fennel and this recipe is spot on. I made this and just cooked and dozen and froze the rest of the dough. I just let the frozen dough raise overnight on the counter and was good to go the next day. Thanks
Maria
How wonderful Marlene! Thanks for taking the time to share.
Dora
We’re do I get black anise? My mother always used it. But can’t find anyone?
Marlene Haigh
Just like I remember. Thank you I made this recipe with fennel just like my Grandmother used to make. I would get up early and help her. Thanks for the wonderful memory.
Maria
My pleasure Marlene. Thanks for sharing. Food memories are the best!
Maria G
I know there are recipes for no boil Taralli, can your recipe be used without boiling? I follow and tried most of your recipes, they are great, very Italian. Thank you .
Maria
Thanks, Maria. I have always made these taralli with the boil method. Would love to hear about your results if you do decide to try this recipe without boiling.
Chantelle
So excited to try this recipe!! My Nonna & Nonno are from Calabria and they used to make these for me all the time, unfortunately no one can read their handwriting and so many things aren’t written down.
Definitely gonna try this and pass it on for generations to come!
Maria
How wonderful Chantelle! Enjoy!
Judith
Maria I love this recipe!!!
I’ve made it three times in a very short period of time, I’m addicted! Not only to the taralli but to the process.
I need advice on one issue: when I measure the flour by cups (not weight) they come out very different than if I weigh 142gm per cup. I like both very much but they’re different! The one type measured by cups is drier the other is more fragile. I also experiment with different types of olive oil.
Fantastic recipe!
Maria
Great comment Judith. The amount of flour used will definitely have an effect on the texture of the final product. Using a scale is usually the best way to measure flour. Thanks for stopping by, appreciate it.
william J maggiore
I lived in Fresno, California in the 1940’s…my mother used to make this recipe after Mrs Palumbo brought it from Mushcite, Italy at the turn of the century… there were also many Italian ladys that had the same recipe, and it was very famous…they used muscatel for the wine…basically, your recipe is the same except for the wine… I suspect these ladies used muscatel wine because it was very cheap to purchase, and Fresno was a wine producing area…I will name a few families for you that I can remember.. Joe Travato, Mr. Ficareli, Mr Maggiore, Joe DeLuca, Frank Ochinera, Mr. Gamber, Gene Peracchi, Pete Cassinerio, so many others, I can’t remember, but those torallis were a very big hit in those days… I got my mothers recipe and still make them… thank you… William Maggiore (age 84)
Maria
Thanks so much for taking the time to share William. There is a reason why taralli have stood the test of time! Thanks for stopping by. Stay safe.
Tom Grieco
William sounds like you lived on the westside. My dad grew up there Vito Grieco. There was 6 boys 2 girls. They had the store & saloon on Walnut & California . My mom also grew up on the westside Josephine Shempre. All of her cousins were Scambray’s. Both last names were spelled wrong. Can’t wait to make the tarallis
Lindsay Hannan
Mr. Maggiore,
I was shocked and warmed to read your comment. I was randomly looking to see if others knew of or had similar recipes for these “cookies”, as my grandfather called them. His family brought their recipe of Tarallis over from the “old country” when they immigrated from a small town called Bisceglie, Italy, to the US and settled in Fresno in the 20s. We call them “tadads” or “tadalles”. There was a clan of my grandfather’s family that lived on Whites Bridge Ave; our family name is Mongelli. There are still many Mongellis that live in Fresno. Sometimes connections are microscopic in a small world. We still make our family’s recipe every Christmas.
ND
Have you ever used natural yeast / wild yeast in this recipe?
If yes, should it be active or discard?
Maria
Thanks so much for your interest. Unfortunately, I have not tried. Perhaps another reader that had tried can help out. Thanks so much for stopping by.