

This easy recipe shows you how to make homemade chili flakes by dehydrating fresh chili peppers and grinding them into flakes. This spicy seasoning is perfect for flavoring Italian food recipes. For example, red chili flakes add heat and spice to Calabrian pizza, pasta, and Italian giardiniera and are great for flavoring garlic knots and this Italian focaccia recipe.
In addition, crushed chili peppers give soups, stews, chili, and marinades a distinct spicy flavor. Chili flakes are a fantastic ingredient for adding warmth to so many foods.
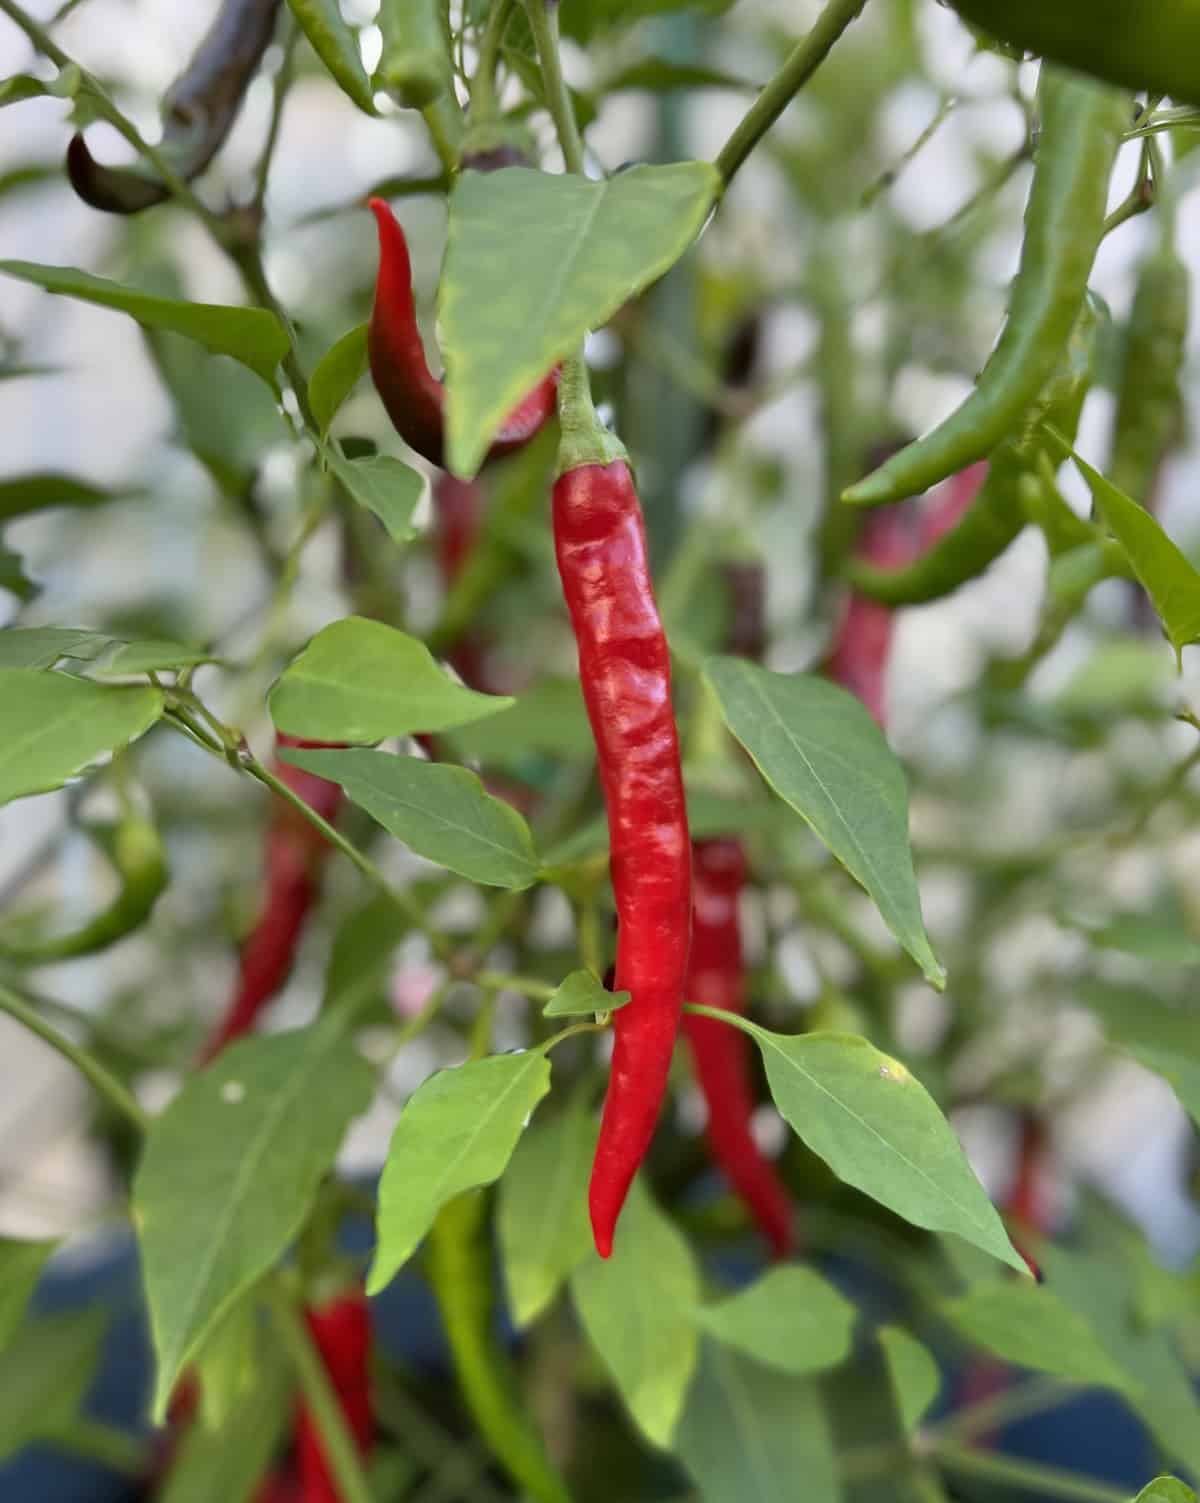
When you grow chili peppers in your backyard garden or buy them fresh from a farmers market or stores, you may end up with more than you know what to do with.
Making homemade chili flakes offers a great option for preserving their spicy flavor for use in recipes throughout the year.
Creating this spice at home provides you with such a vibrant flavor. This process is much easier than it may seem, and store-bought options cannot compare in terms of quality or taste.
Using this homemade condiment in meals becomes second nature when you have it on hand!
Jump to:
What are chili flakes?
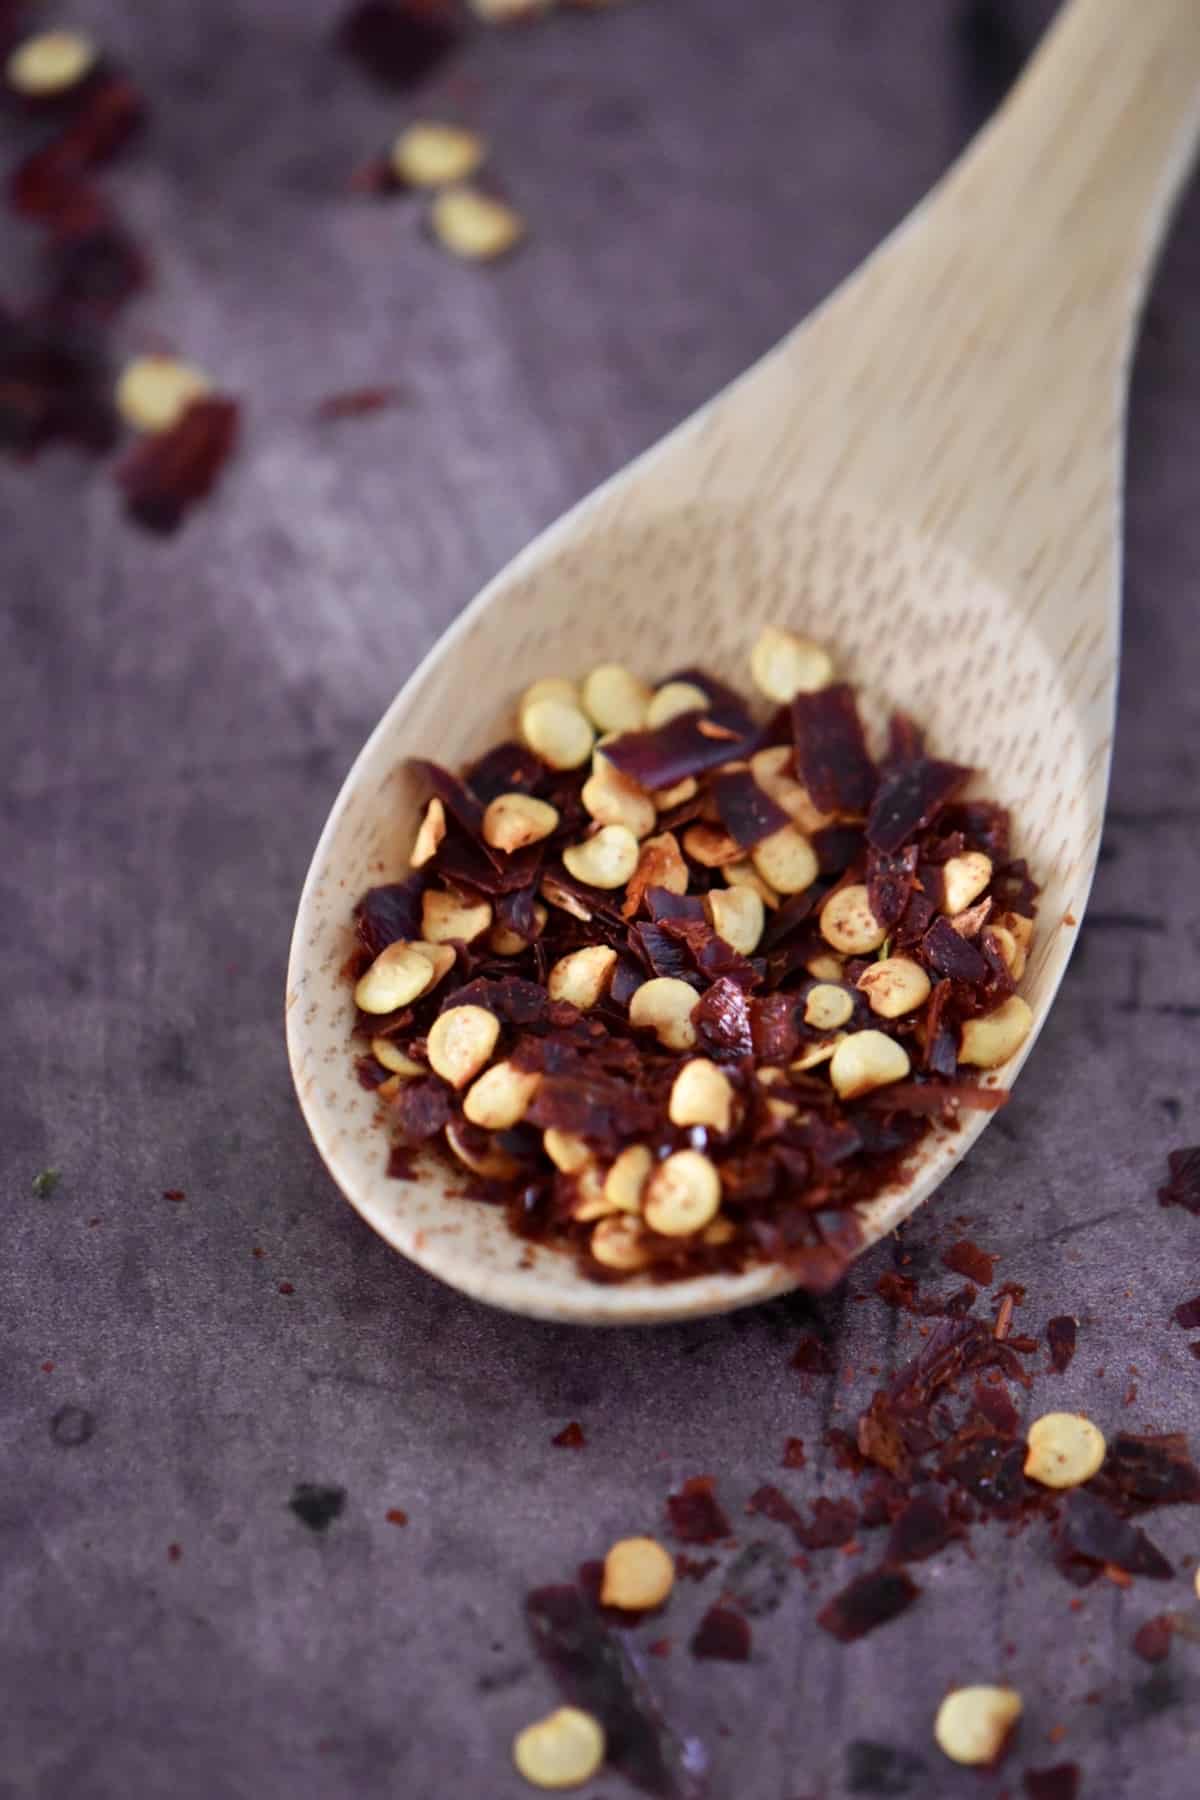
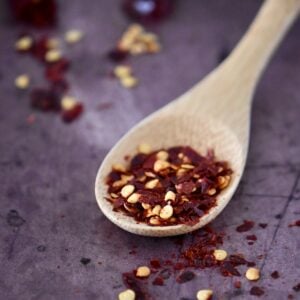
Chili flakes, also known as crushed chili peppers, are a spice or condiment made from crushing dried chili peppers. They’re typically red and have a spicy, peppery flavor. Depending on your geographical location, you can spell them as “chili flakes,” "chilli flakes" or "chile flakes." All refer to the same thing, and a little goes a long way with this potent spice!
With or without seeds?
The seeds, and more importantly, the ribs containing capsaicinoids (the component that makes peppers hot), make hot pepper flakes spicy. If you want your flakes to be more pungent, leave the ribs and seeds in. However, if you prefer a milder flavor, remove them.
Choosing the best chilis
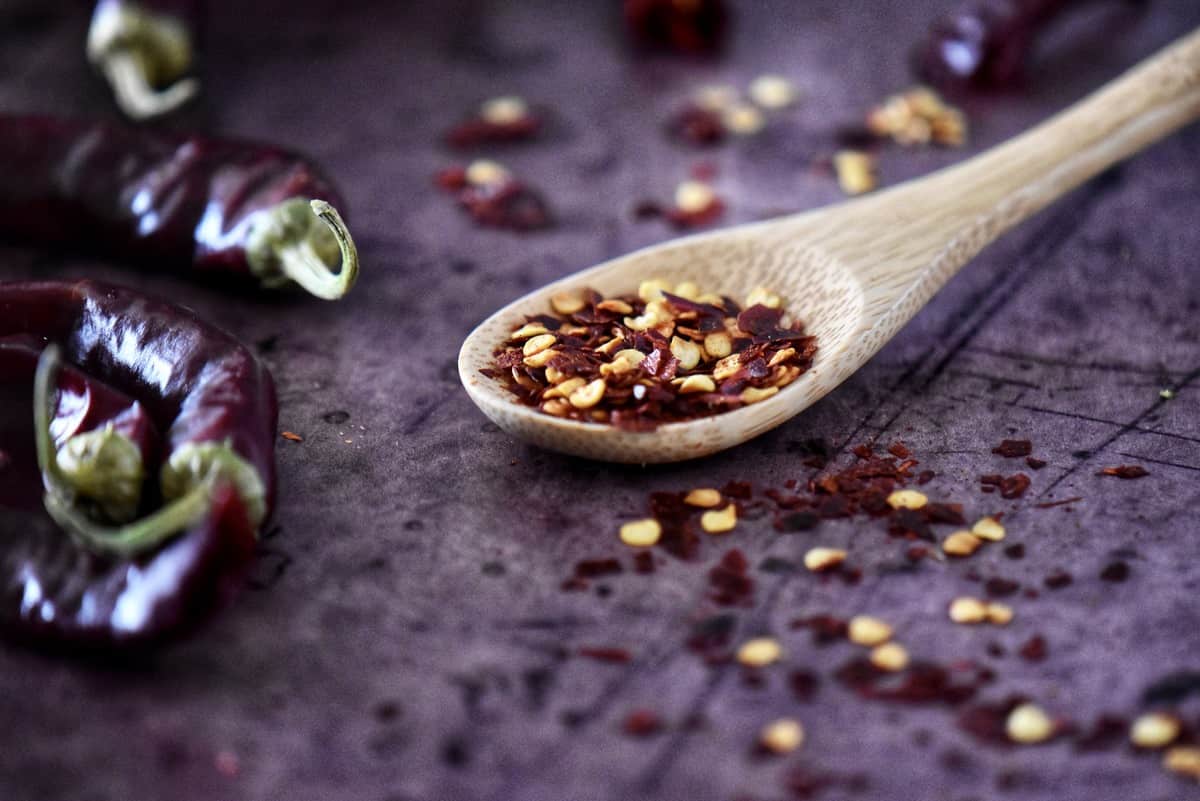
Traditional chili flakes come from chili or cayenne peppers, but these relatively small, red chilis are the most commonly used in preparing this seasoning.
However, making similar flakes with jalapenos, Anaheim peppers, or others is possible.
No matter what varieties you choose, only use peppers at the peak of freshness. You want them to be entirely ripe for maximum flavor.
When buying fresh chilies, follow the same guidelines as when purchasing bell peppers. Choose those with brightly colored, firm skin without blemishes. Avoid any with soft flesh or spots on the skin.
If harvesting from your garden, wait until the peppers are completely red before picking them. Avoid any that have started to wrinkle as these will be past their prime.
Preparing the chili peppers
Making chili flakes is very simple, but before handling the peppers, wear gloves. This protects your skin and prevents future issues like accidentally rubbing your eye with a spicy finger.
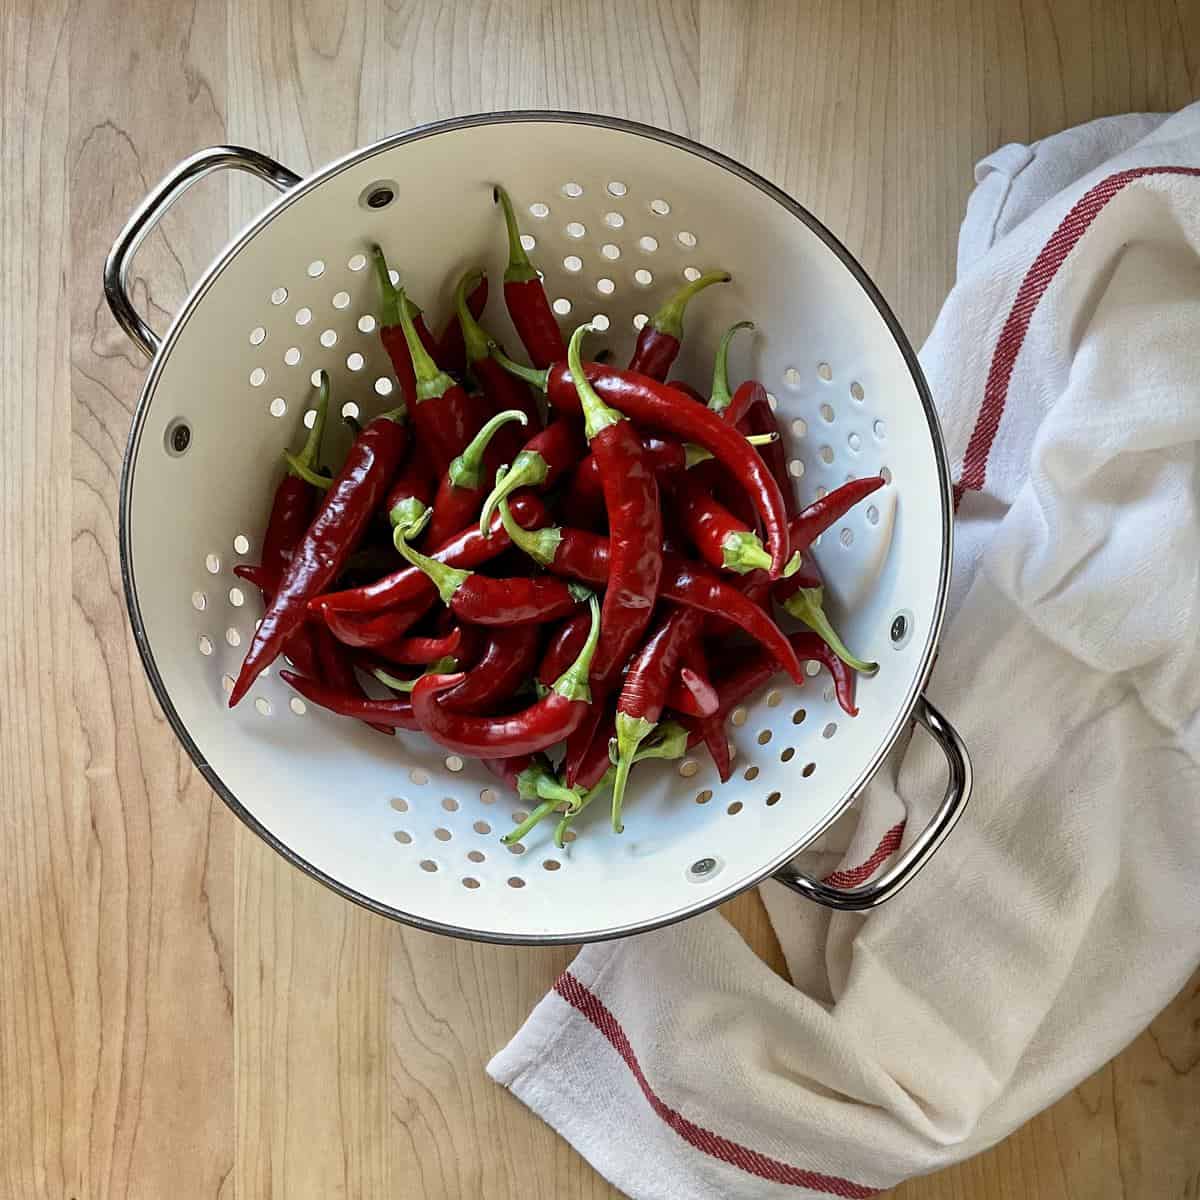
After harvesting from your backyard garden or gathering a basket or bag of peppers from the local market, wash them with fresh water. Remove all dirt, debris, leaves, and long stems. Do not use any peppers that have spots or bruises. Dry thoroughly with a clean tea towel.
Once the peppers are dry, we can begin the drying process. This step is what will give your flakes their signature flavor. If you prefer a milder taste, slice them in half lengthwise and remove the ribs and seeds from the peppers. If you want a spicier result, leave them in.
Pepper drying options
There are a few ways to dry your whole peppers to make flakes, and each one offers different benefits. You may want to try other methods and compare the results to see what you like best. The goal is to remove the moisture without cooking the peppers, no matter what method you use.
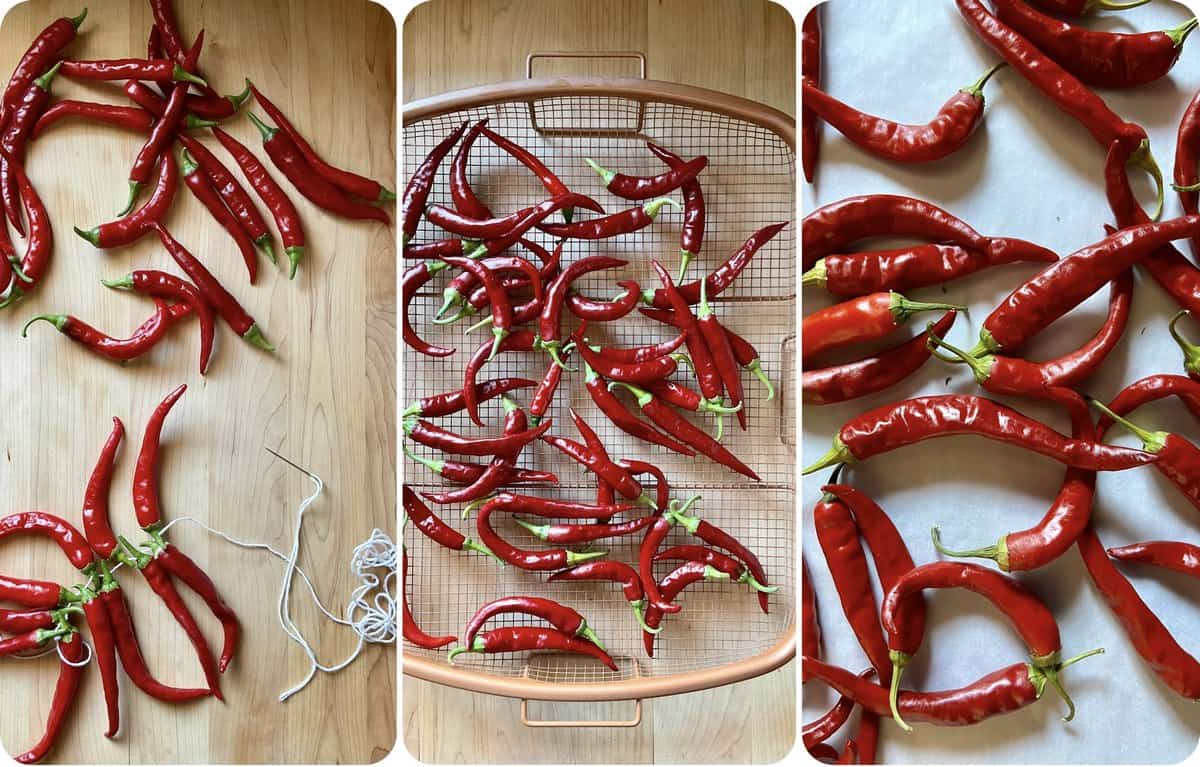
Here is a quick summary of the three most common drying options.
Air drying
This is the simplest way to dry chili peppers and requires no special equipment. It takes the longest time, so plan if you choose this route.
Simply string your whole chilis with a needle and thread, leaving a bit of space between them, and then hang them in a warm, dry place out of direct sunlight. A covered porch often works well.
Proper air circulation is essential to prevent mold or other problems. Depending on the humidity and temperature, your peppers may take a few weeks to dry thoroughly.
Food dehydrator drying
A dehydrator is the quickest way to dry chili peppers but requires special equipment. As all dehydrators are different, it is important to use your manufacturer's instructions for these specific settings. For example, most recommend placing the chili peppers in a single layer on the dehydrator racks and employing approximately 125 to 140°F (52 to 60°C) for 6 to 8 hours.
The time needed to dehydrate the peppers depends entirely on their size, juiciness, and freshness. The peppers should be dry and crispy at the end of this process.
Oven Drying
Using an oven is another relatively quick method taking only a few hours to dry your chili peppers. Preheat the oven to its lowest setting, usually between 170 and 200°F (77 and 93°C). If your oven doesn’t go that low, prop the oven door open slightly to help regulate the temperature.
Line cookie sheets with parchment paper, place the room-temperature peppers on top in a single layer and put them in the oven. Check the peppers every 30 minutes to ensure they are not burning. It usually only takes a few hours to oven dry peppers.
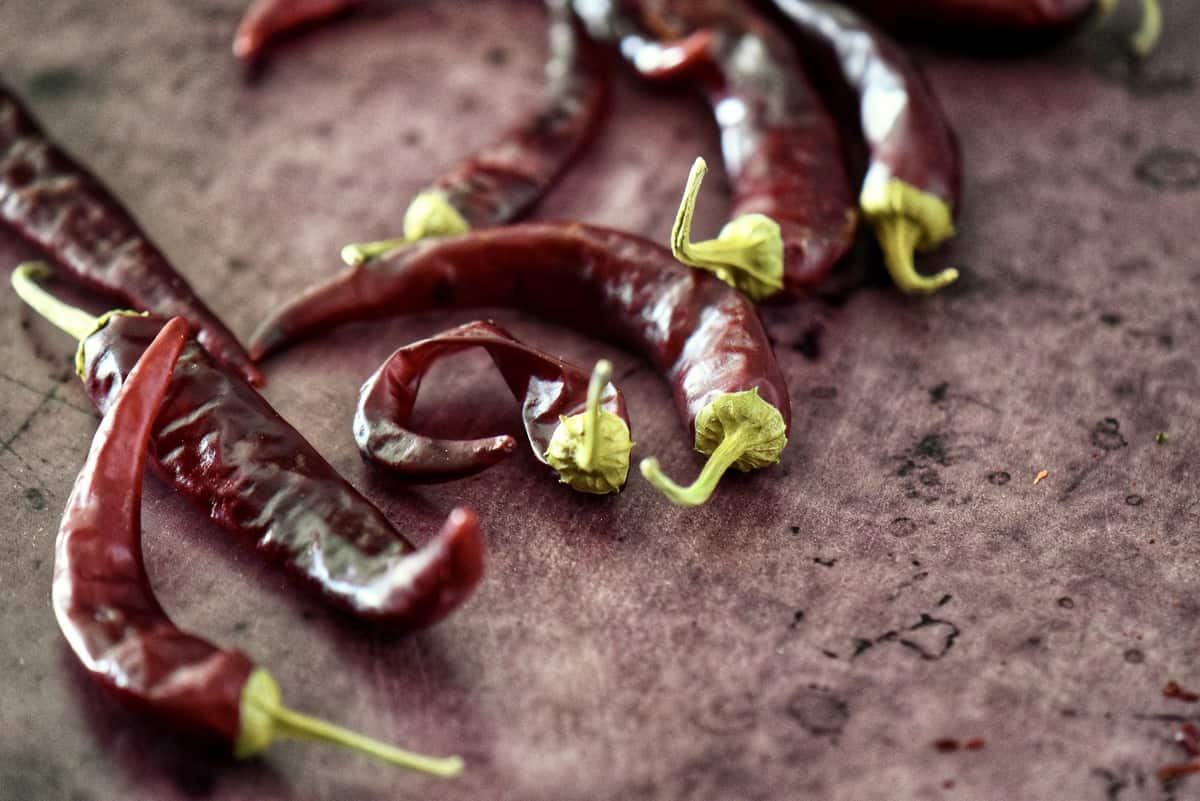
After the peppers are 100% dry, let them cool down completely before moving on to the next step. Again, remember to wear your protective gloves. Even when dry, these vegetables can cause a burning sensation that is very difficult to get rid of, even with soap and water.
Making chili flakes from dried peppers
The first thing we will do is break off the green tips and discard them. You now have a few options to transform your dry chile peppers into chile flakes.
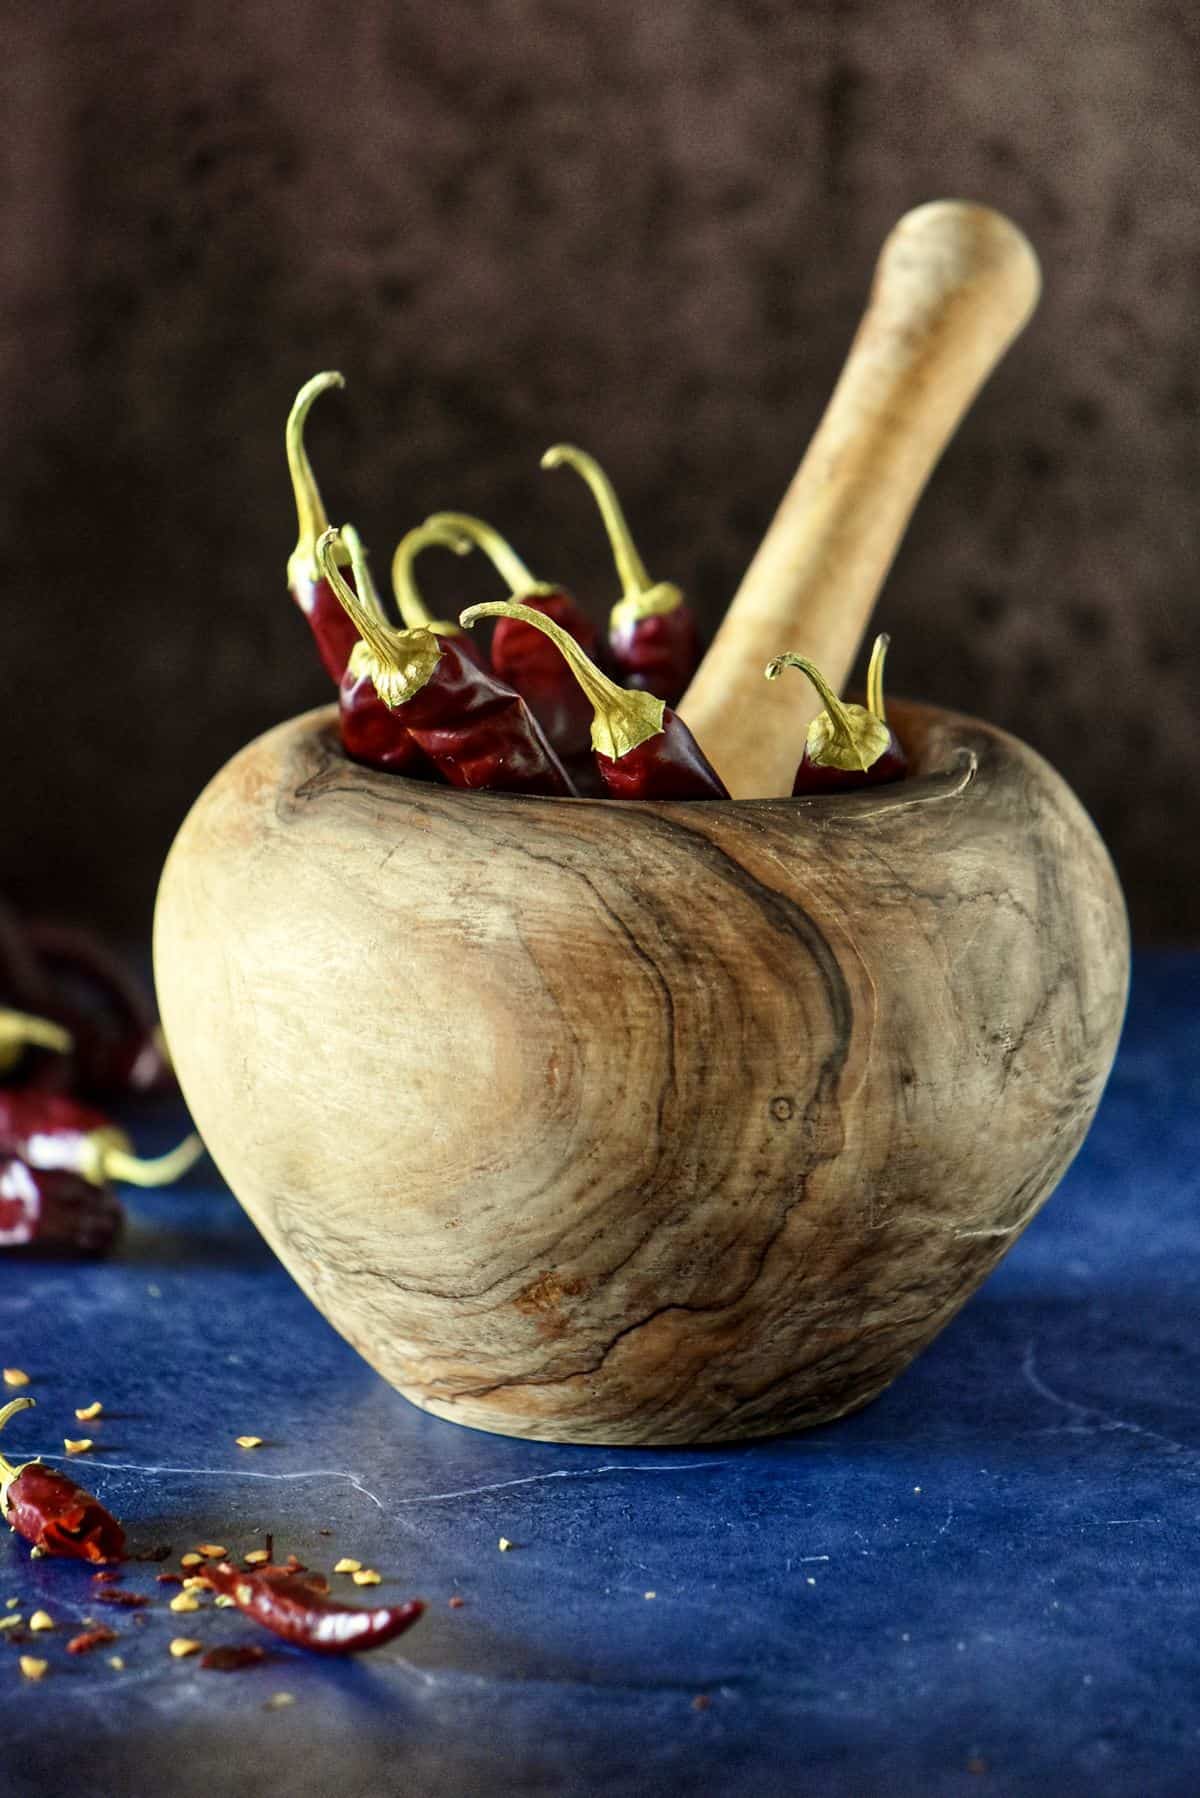
Use a mortar and pestle
This is the most traditional way and will give you more control over the size of your crushed red pepper flakes. Remove the green tips and place the dried peppers in the mortar. Grind them with the pestle until they're the desired consistency.

Use a plastic Ziploc bag
Remove the green tips and place the peppers in the bag, then simply crush them with your hands. This is the simplest way of making chilli flakes, but it does result in uneven-sized pieces that may not suit your needs perfectly.
You can also gently bash them with a rolling pin or the bottom of a heavy mug until they're broken into pieces.
Use a food processor or spice grinder
This method is much easier and faster but gives you less control over the final product. Remove the green tips and add the dried peppers to the food processor or spice grinder and pulse until they're the desired consistency. Be careful not to create a fine powder by processing or grinding too much if you intend to use flakes instead. Using a coffee grinder is another option.
PLEASE NOTE: Only blend the chili powder in a ventilated area, as it releases potent fumes. Additionally, do not remove the lid until the chili particles have settled to avoid being overpowered by the smell.
One final alternative
You may also decide to store your dry pepper whole and rub them between your fingers to create flakes as you need them. This is the best way to preserve their flavor and potency for long-term storage.
Storing chili flakes
Whether you store your dried chili peppers whole or crushed, it's essential to store them properly to maintain freshness and flavor. If they remain at room temperature, the flakes will soften due to the humidity and lose their flavor over time.
Store them in an air-tight container or mason jar in a cool, dry place like your pantry for a shelf life of up to six months. They can also be stored in the fridge or freezer if you want them to last even longer. Be sure to label your container or freezer-safe bag with the name and date.
Now that you know how to make chili flakes let’s put them to good use!
How do you use chili flakes?
Chili flakes are a great way to add flavor and spice to any dish. While they are frequently associated with Mexican and South American cooking, they are also an important ingredient in many Italian dishes.
The last time you visited your local pizzeria, do you remember the glass shaker jar of chili flakes on the table? These are typically used to add a little extra heat.
You can add the same delicious flavors to your homemade pizza.
If you are a fan of spicy food, here are some more ideas on how to use the great flavor of crushed dried chilies:
- use them when making frittata or quiche
- add them to soups and stews for an extra kick
- make simple pasta dishes like this broccoli rabe pasta more interesting by adding chili flakes
- mix them into ground beef or lamb before cooking burgers
- add them to your homemade salad dressing
- mix chile flakes into olive oil to create a flavorful dipping sauce for focaccia
- toss them with roasted vegetables like Italian potatoes, carrots, and Brussels sprouts.
FAQ
The primary difference between these two types of seasonings is the peppers used. Chili flakes are made from a single type of pepper, while red pepper flakes can be made from a wider variety of dried peppers, including bell peppers and cayenne peppers. As a result, chili flakes tend to be milder than red pepper flakes. In terms of flavor, chili flakes have a fruitier taste, while red pepper flakes are more intense.
If you don’t have chili flakes, you can use several other spices in your dish, including cayenne pepper, red pepper flakes, paprika, or even allspice. These provide a nice pop of heat. Adjust the amount you use according to the recipe and your personal preferences.
One way to test if your chili peppers are dry enough is to try crushing them. If they easily crumble, they are ready to be stored. If they bend or are gummy, they need more time to dry.
Another way to confirm their dryness is to shake them (watch the video included in this article for a demonstration). If you hear the seeds rattling, that means they’re dry.
Hot pepper recipes
If you enjoy the heat that chili peppers provide, be sure to try these Italian recipes that use chili flakes:
Penne all’Arrabbiata: This popular pasta features penne pasta in a spicy tomato sauce made with chili flakes.
Nduja: A spreadable salami from Calabria, Italy, traditionally made with pork, paprika, and chili flakes. It’s often used as a topping for bruschetta or pizza.
Spaghetti, aglio, olio e peperoncino: One of the most popular Italian dishes that use this seasoning is spaghetti with garlic, olive oil and chili flakes.
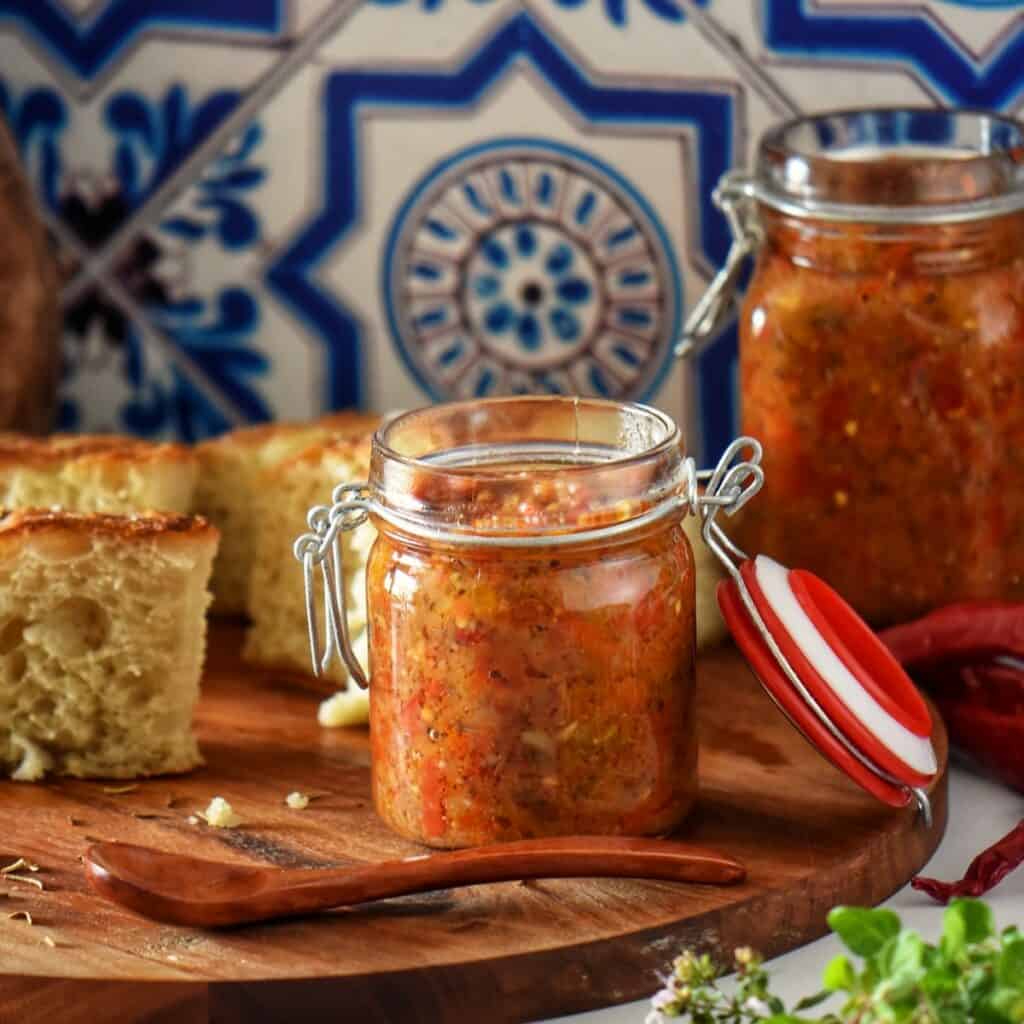
Bomba Sauce
Are you looking for something a little different? Try this recipe for bomba sauce aka la bomba calabrese. This Calabrian condiment is easy to make and has a fiery kick from the fresh hot peppers.
Always taste
Now that you know how to make and use chili flakes get creative in the kitchen and enjoy!
When using chili flakes in recipes or as a garnish for a meal, the most crucial step is “to taste.” This instruction ensures that each person only uses as much hot and spicy seasoning as they can handle. It also ensures that the chili flakes do not overpower the other flavors.
Depending on the number of seeds and the types of peppers used, chili flakes can cover a relatively wide range of heat levels. When cooking, it always makes sense to start with less than you think you need, taste frequently, and add more in small increments until you get to the perfect flavor.
Conclusion
Chili flakes are a great way to add heat and flavor to your favorite dishes. If you grow your chili peppers, try making your flakes at home. With a little time and effort, you’ll have a delicious seasoning that will last for months and is much better than anything you could buy at the store.
THANKS SO MUCH for following and being part of the She Loves Biscotti community, where you will find Simple & Tasty Family-Friendly Recipes with an Italian Twist.
Ciao for now,
Maria
★★★★★ If you have made these homemade chili flakes, I would love to hear about it in the comments below and be sure to rate the recipe!
Recipe
How to Make Homemade Chili Flakes
WANT TO SAVE THIS RECIPE?
Ingredients
- 1 kg chili peppers (fresh) 35 ounces (or as many as you want)
- water
Instructions
- Properly rinse all the chili peppers with running water. Dry thoroughly with a tea towel.
- Once the peppers are dry, begin the drying process. If you prefer a milder flavor, slice them in half lengthwise and remove the ribs and seeds from the peppers. If you want a spicier result, leave them in.
Dehydrator drying:
- A dehydrator is the quickest way to dry chili peppers but requires special equipment. As all dehydrators are different, it is important to use your manufacturer's instructions for these specific settings. For example, most recommend placing the chili peppers in a single layer on the dehydrator racks and employing approximately 125 to 140°F (52 to 60°C) for 6 to 8 hours.
- The time needed to dehydrate the peppers depends entirely on their size, juiciness, and freshness. The peppers should be dry and crispy at the end of this process.
Oven drying:
- Using an oven is another relatively quick method taking only a few hours to dry your chili peppers. Preheat the oven to its lowest setting, usually between 170 and 200°F (77 and 93°C). If your oven doesn't go that low, prop the oven door open slightly to help regulate the temperature.
- Line cookie sheets with parchment paper, place the peppers on top in a single layer, and put them in the oven. Check the peppers every 30 minutes to ensure they are not burning. It usually only takes a few hours to oven-drying peppers.
Air drying:
- This is the simplest way to dry chili peppers and requires no special equipment. It takes the longest time, so plan if you choose this route.
- Simply string your whole chilis with a needle and thread, leaving a bit of space between them, and then hang them in a warm, dry place out of direct sunlight. A covered porch often works well.
Making chili flakes:
- The first thing we will do is break off the green tips and discard them. You now have a few options to transform your dry chile peppers into chile flakes.
- USE A MORTAR AND PESTLE: This is the most traditional way and will give you more control over the size of your crushed red pepper flakes. Remove the green tips and place the dried peppers in the mortar. Grind them with the pestle until they're the desired consistency.
- USE A PLASTIC ZIPLOC BAG: Remove the green tips and place the peppers in the bag, then simply crush them with your hands. This is the simplest way of making chilli flakes, but it does result in uneven-sized pieces that may not suit your needs perfectly.
- USE A FOOD PROCESSOR OR SPICE GRINDER: This method is much easier and faster but gives you less control over the final product. Remove the green tips and add the dried peppers to the food processor or spice grinder and pulse until they're the desired consistency. Be careful not to create a fine powder by processing or grinding too much if you intend to use flakes instead. Using a coffee grinder is another option.
Storing chili flakes:
- Store in an air-tight container or mason jar in a cool, dry place like your pantry for a shelf life of up to six months. They can also be stored in the fridge or freezer if you want them to last even longer. Be sure to label your container or freezer-safe bag with the name and date.
Video
Notes
- Making chili flakes is very simple, but before handling the peppers, wear gloves. This protects your skin and prevents future issues like accidentally rubbing your eye with a spicy finger.
- 1 serving = ½ teaspoon
- total yield: approximately ½ cup
diane
can i use dried chile peppers
Maria
Thanks for reaching out Diane. Yes, simply crush them to create the flakes. Enjoy!