

Make light, pillowy homemade ricotta gnocchi in minutes with simple ingredients-no potatoes required. Step-by-step instructions, tips, sauce pairings & freezer tips included.
Do you enjoy making homemade pasta or gnocchi, but don't always have the time?
These ricotta gnocchi are the perfect solution!
Unlike traditional potato gnocchi, this version comes together in minutes with just a few simple ingredients. No boiling or mashing-just mix, roll, and cut!
Just like my recipe for ricotta cavatelli, this has been my go-to for decades, especially on busy weeknights.
What I adore about these gnocchi is their incredible versatility. They soak up any sauce beautifully, whether it's a bright basil pesto, a rich tomato sauce, or a simple brown butter and sage.
Plus, they freeze wonderfully, so you can prepare a batch ahead of time and have delicious homemade pasta ready whenever you need it.
Ready to get started?
Jump to:
Prep and Cook Time
The total time to make ricotta cheese gnocchi can be estimated as follows:
- Draining Time (if using store-bought ricotta): 30-60 minutes (can be done ahead)
- Prep Time (measuring ingredients, mixing dough): ~5 minutes
- Resting/Chilling Time (optional but helps with texture): ~15-20 minutes
- Shaping & Cutting Gnocchi: ~10 minutes
- Cooking Time (boiling the gnocchi): ~2-3 minutes
- Total Time: 30-35 minutes (excluding draining time)
This recipe is quick, easy, and versatile, giving you soft, pillowy gnocchi in no time!
Let’s make them together!
Ingredients
- Whole Milk Ricotta: I love using homemade ricotta for this recipe. Its creamy texture and fresh flavor make all the difference. If using store-bought ricotta, drain it well to remove excess moisture. If it's too wet, you may need to add a little extra flour.
- Egg: A whole egg helps bind the dough. You can also use egg yolks only.
- Grated Cheese: I prefer Pecorino for its bold, slightly tangy flavor, but Parmigiano-Reggiano is a great alternative. You may need to adjust the added salt when using a saltier cheese.
- Salt, Pepper, and Nutmeg: Simple seasonings that enhance the ricotta's delicate flavor. A pinch of nutmeg adds subtle warmth.
- Flour: “00” flour is ideal because of its fine texture, keeping the gnocchi light. If you don't have “00” flour, all-purpose flour works well too! Start with the suggested amount, but you can add a little more if the dough feels too sticky. Chilling the dough for 15-20 minutes can also help firm it up without adding extra flour.
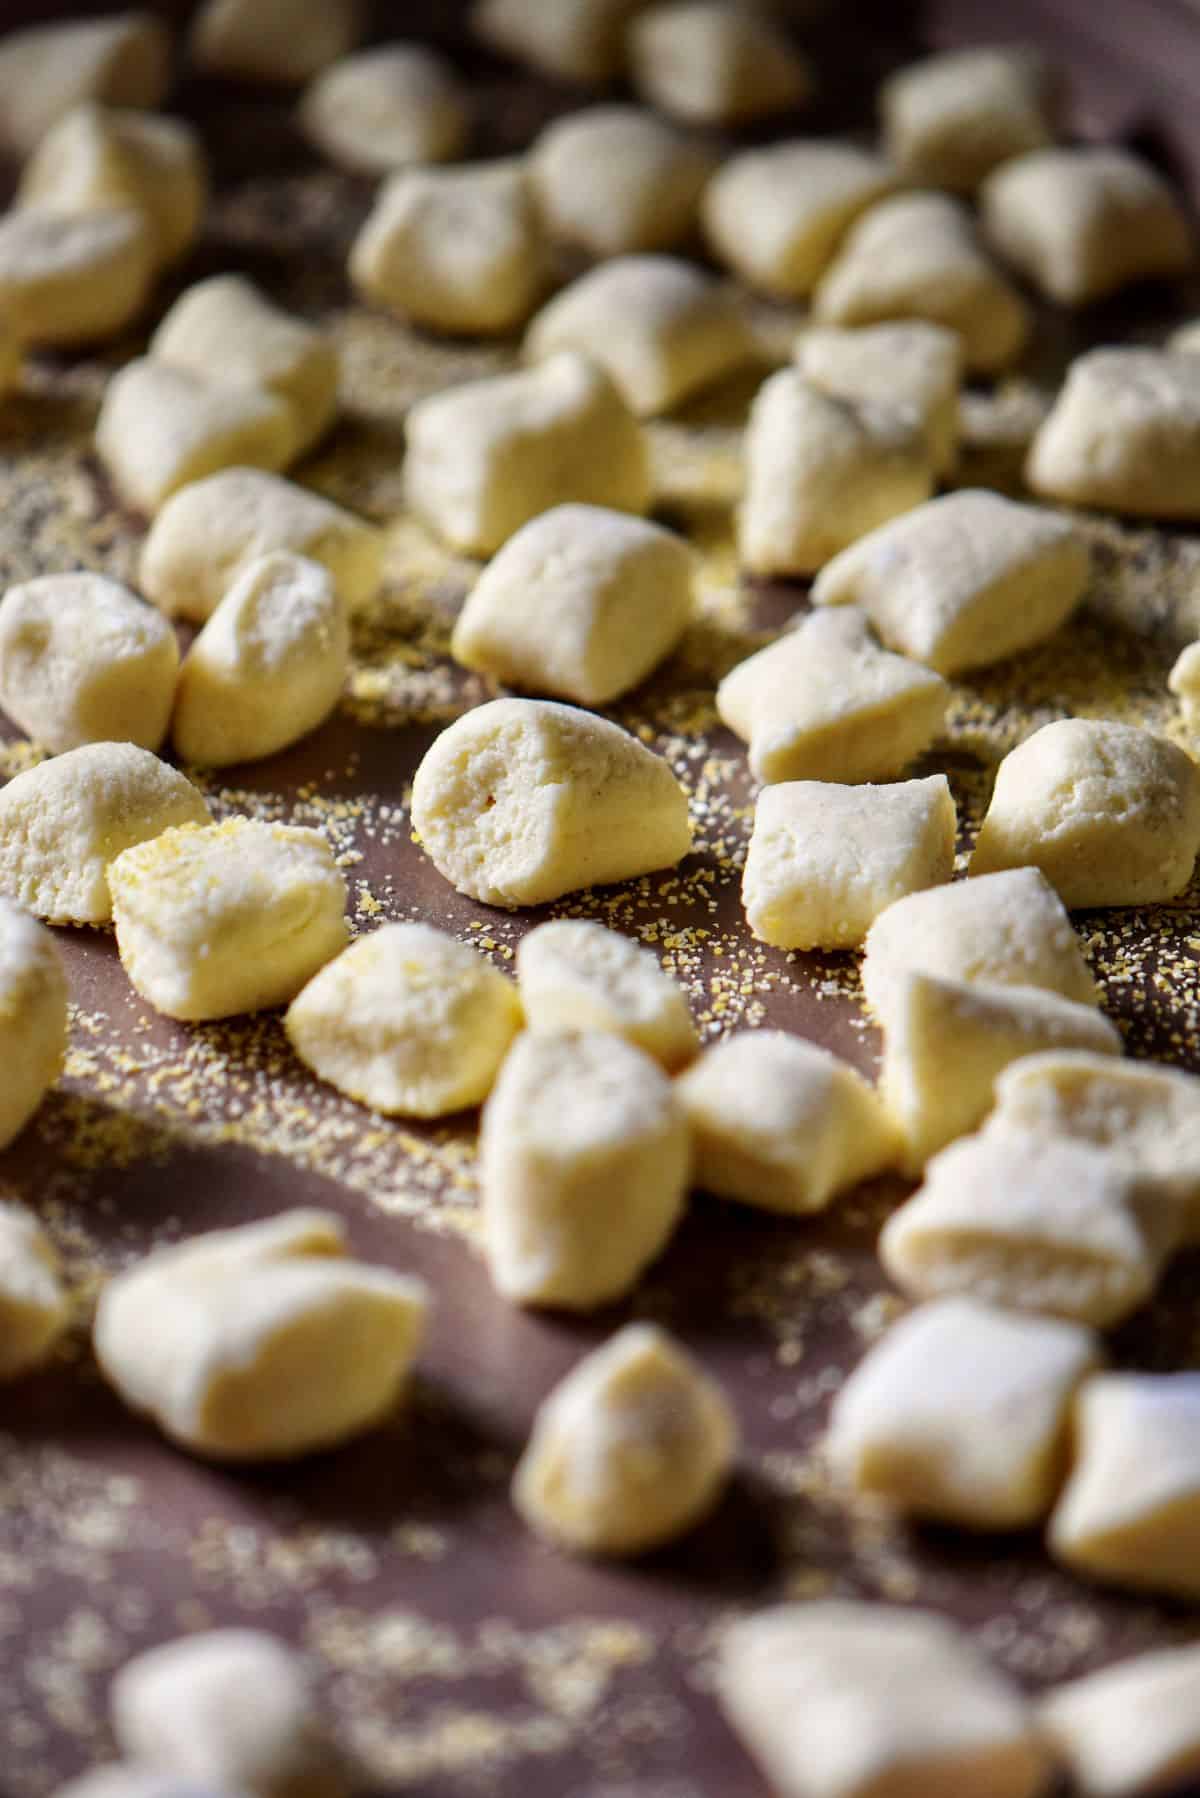
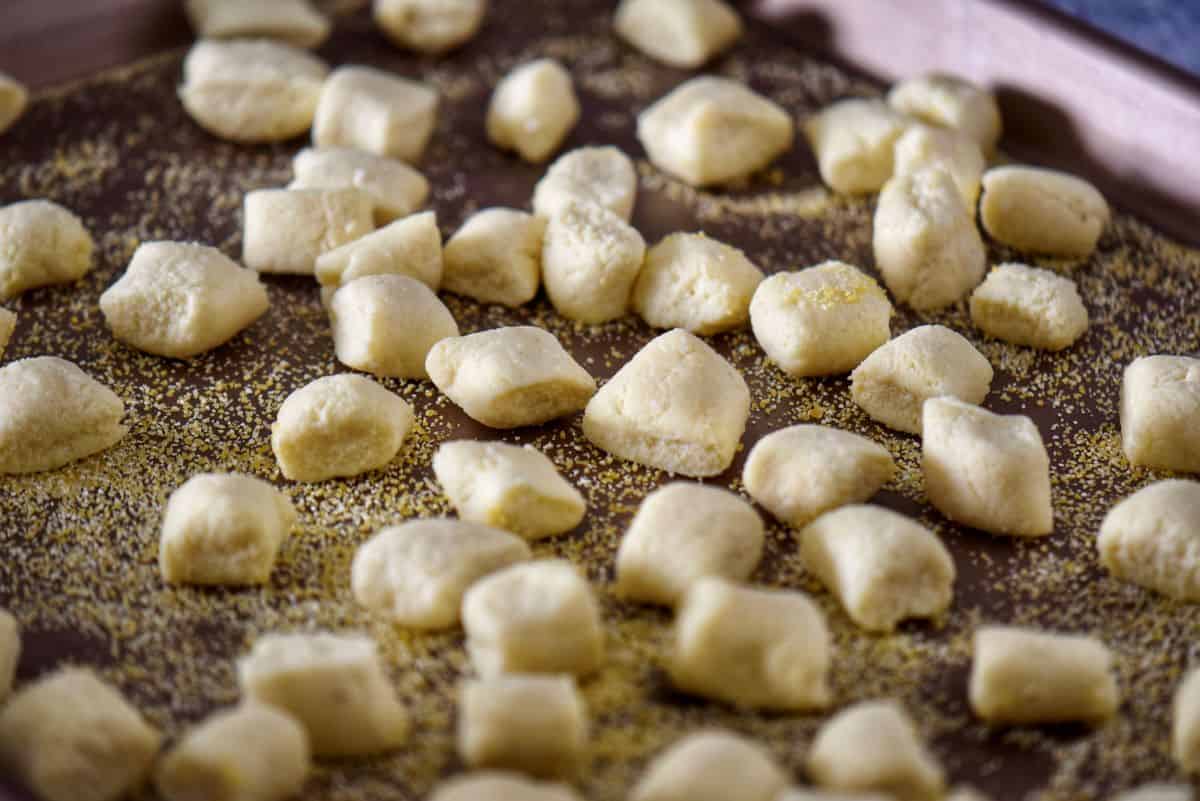
- Extra Flour for Rolling & Semolina for Preventing Sticking: Lightly flour your work surface when rolling out the dough. Once shaped, place the gnocchi on a semolina-dusted tray to prevent sticking while you finish the batch. While you can use flour, I prefer semolina.
Step-by-Step Instructions
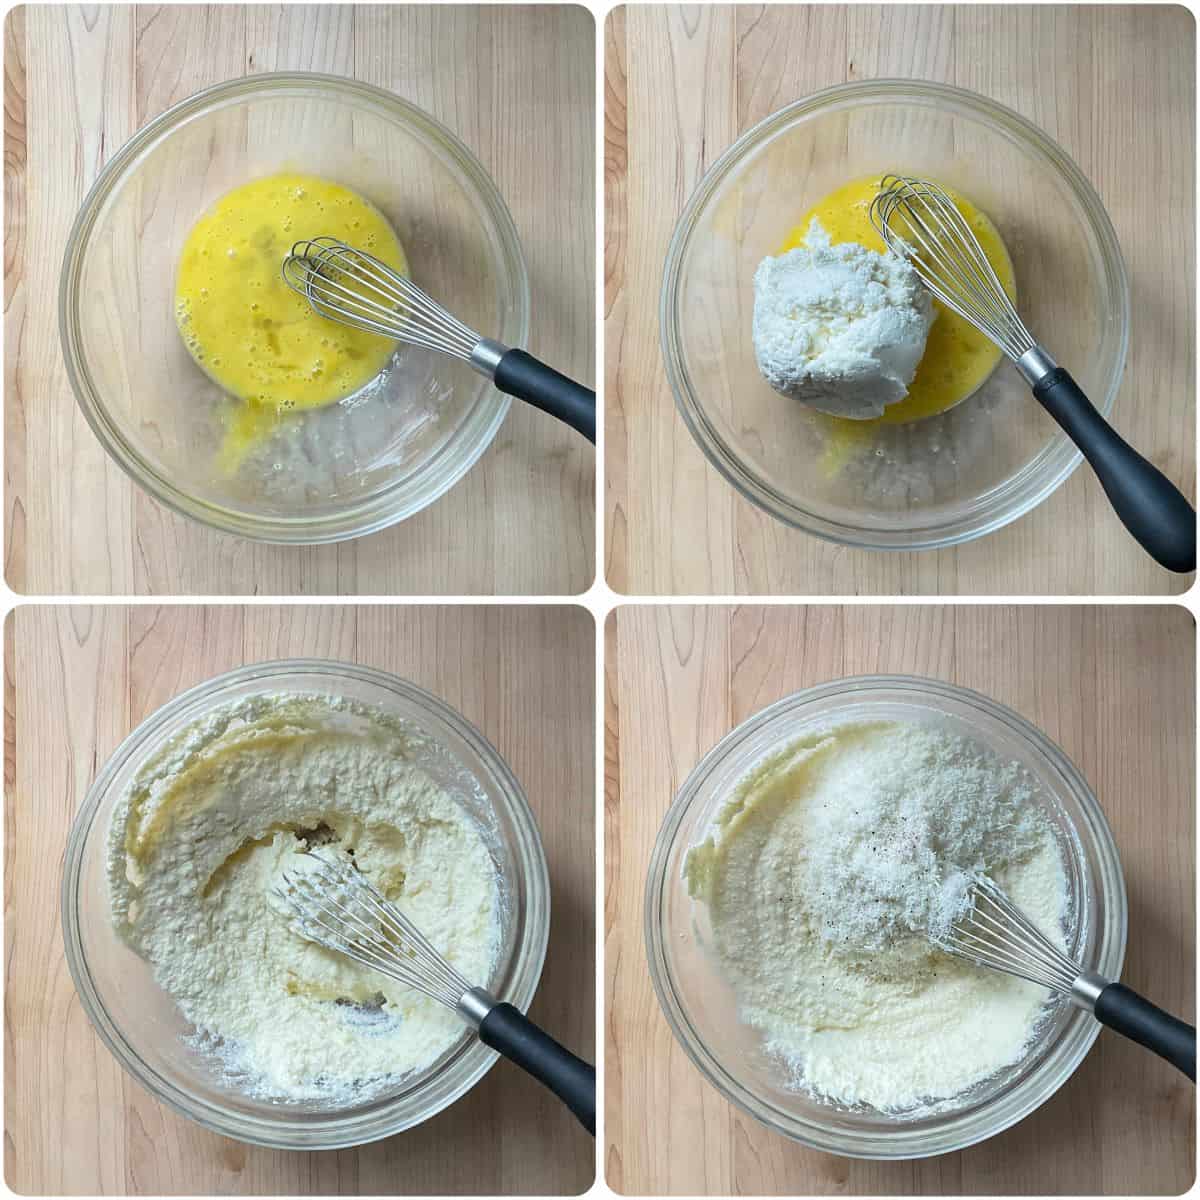
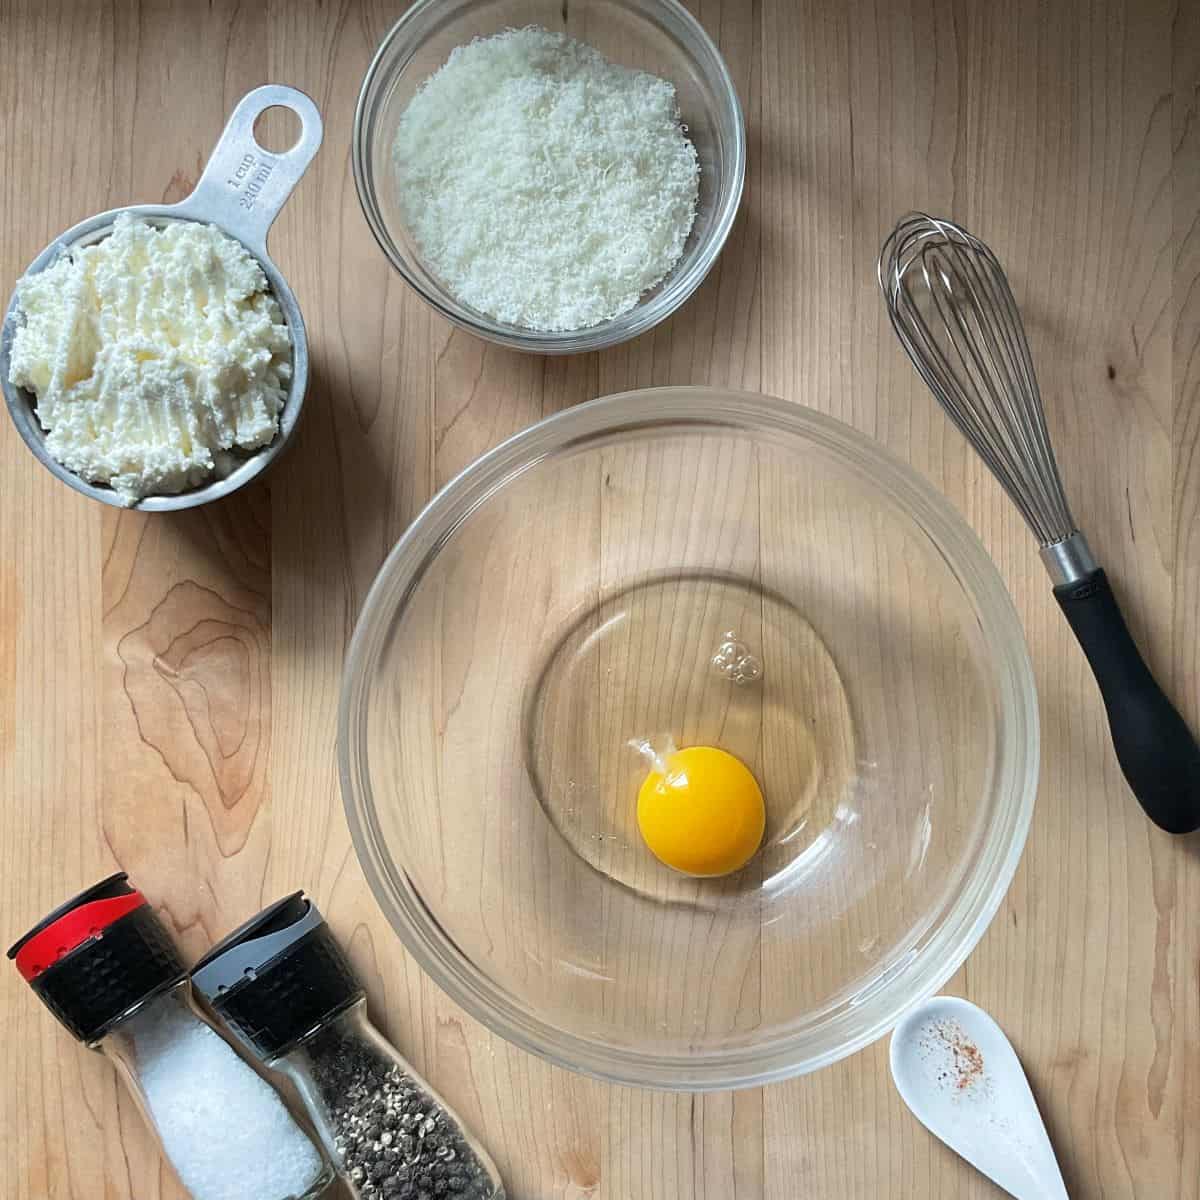
- In a medium-sized bowl, whisk together 250 grams (1 cup) of drained ricotta, 1 egg, 40 grams (½ cup) of grated cheese, ¼ teaspoon salt, pinch of pepper, and a pinch of nutmeg until smooth and well combined.
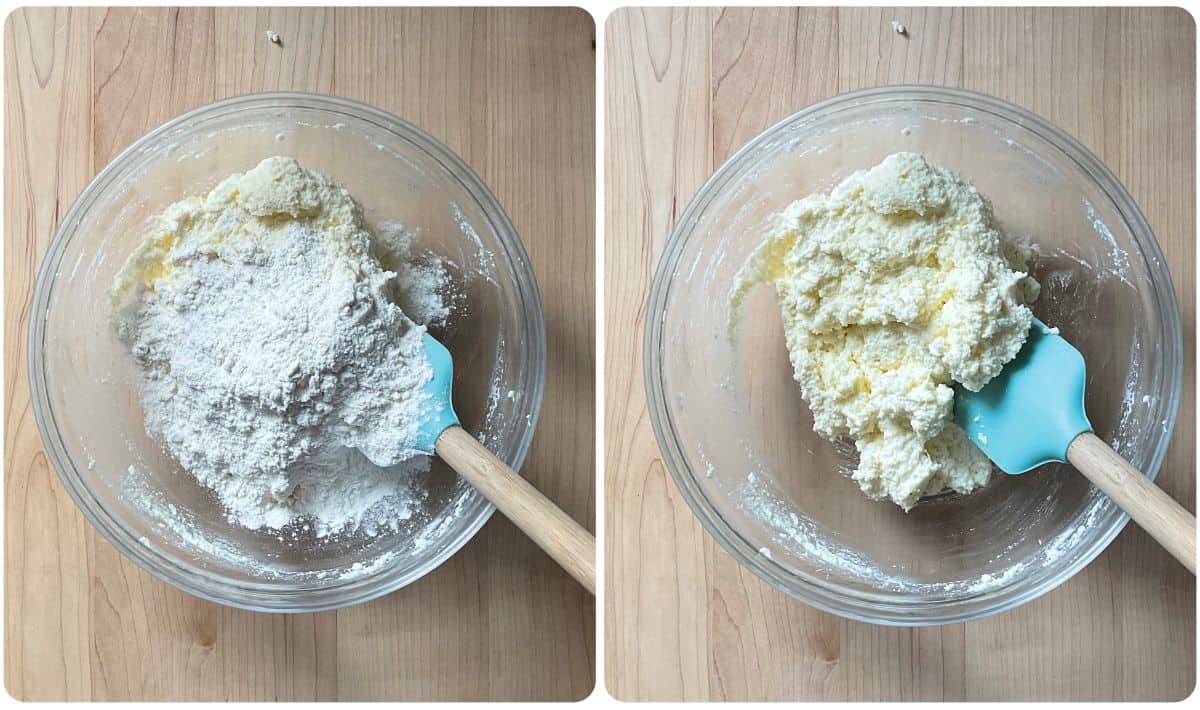
- Add 70 grams (½ cup) of “00” flour into the ricotta mixture. Using a spatula, gently fold in the flour until it starts to come together. The dough will be soft but should hold its shape.
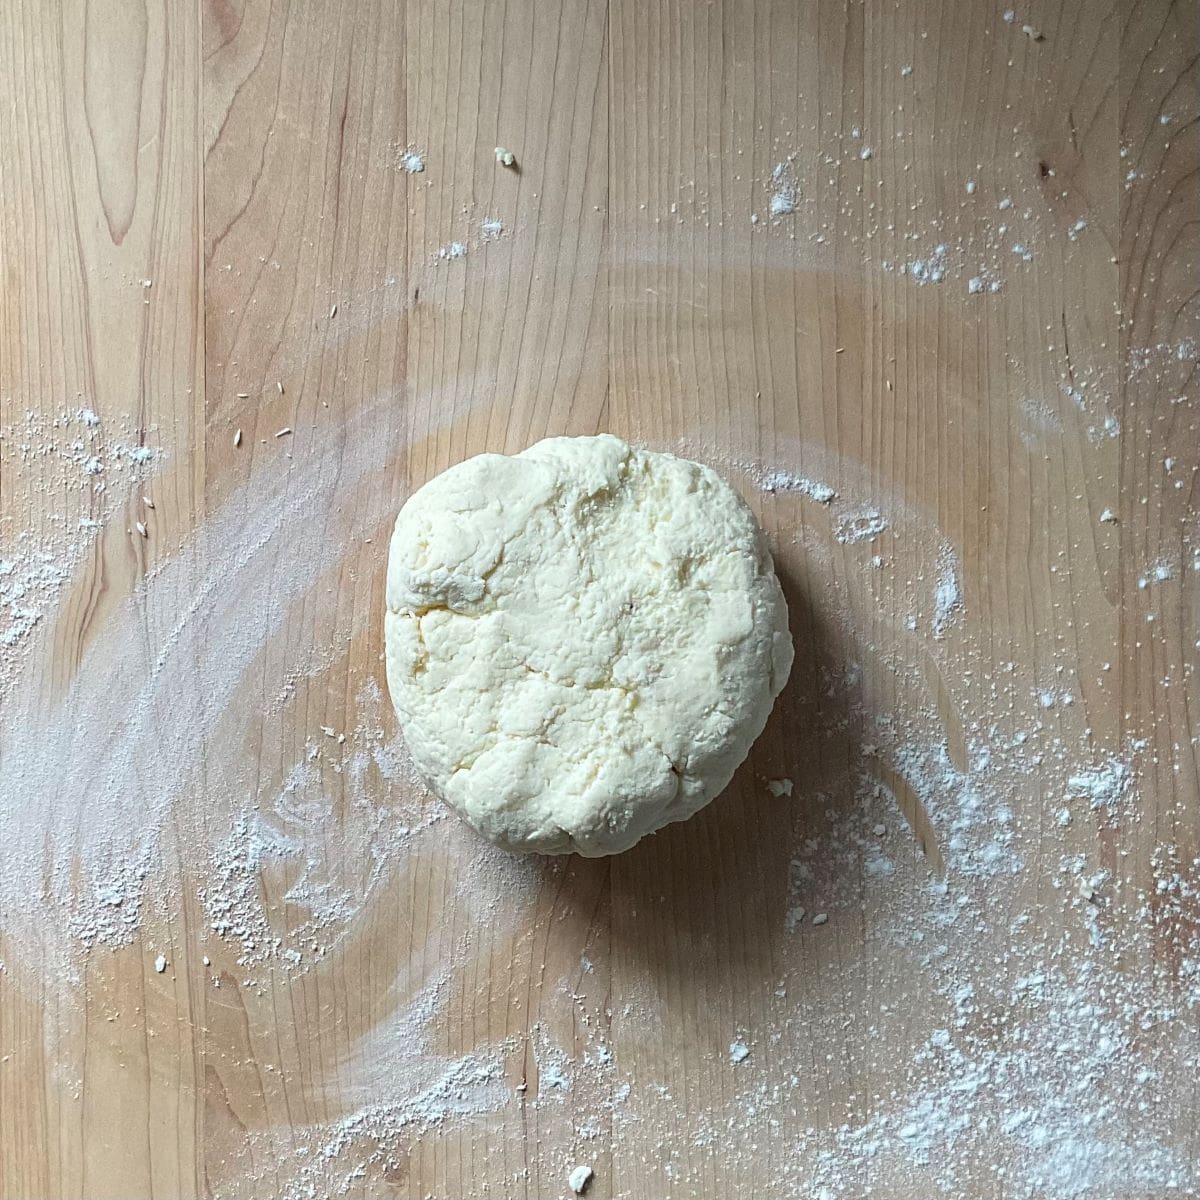
- Transfer the dough to a lightly floured cutting board. Gently knead the dough for about 1-2 minutes, just until it comes together into a smooth ball. Be careful not to overwork it, or the gnocchi may turn out dense.
- Place the ball of dough back in the bowl. Cover it with a clean towel and refrigerate for about 15 minutes. This helps to firm it up and makes it easier to shape.
- Sprinkle semolina on a tray or baking sheet. Set aside for now.
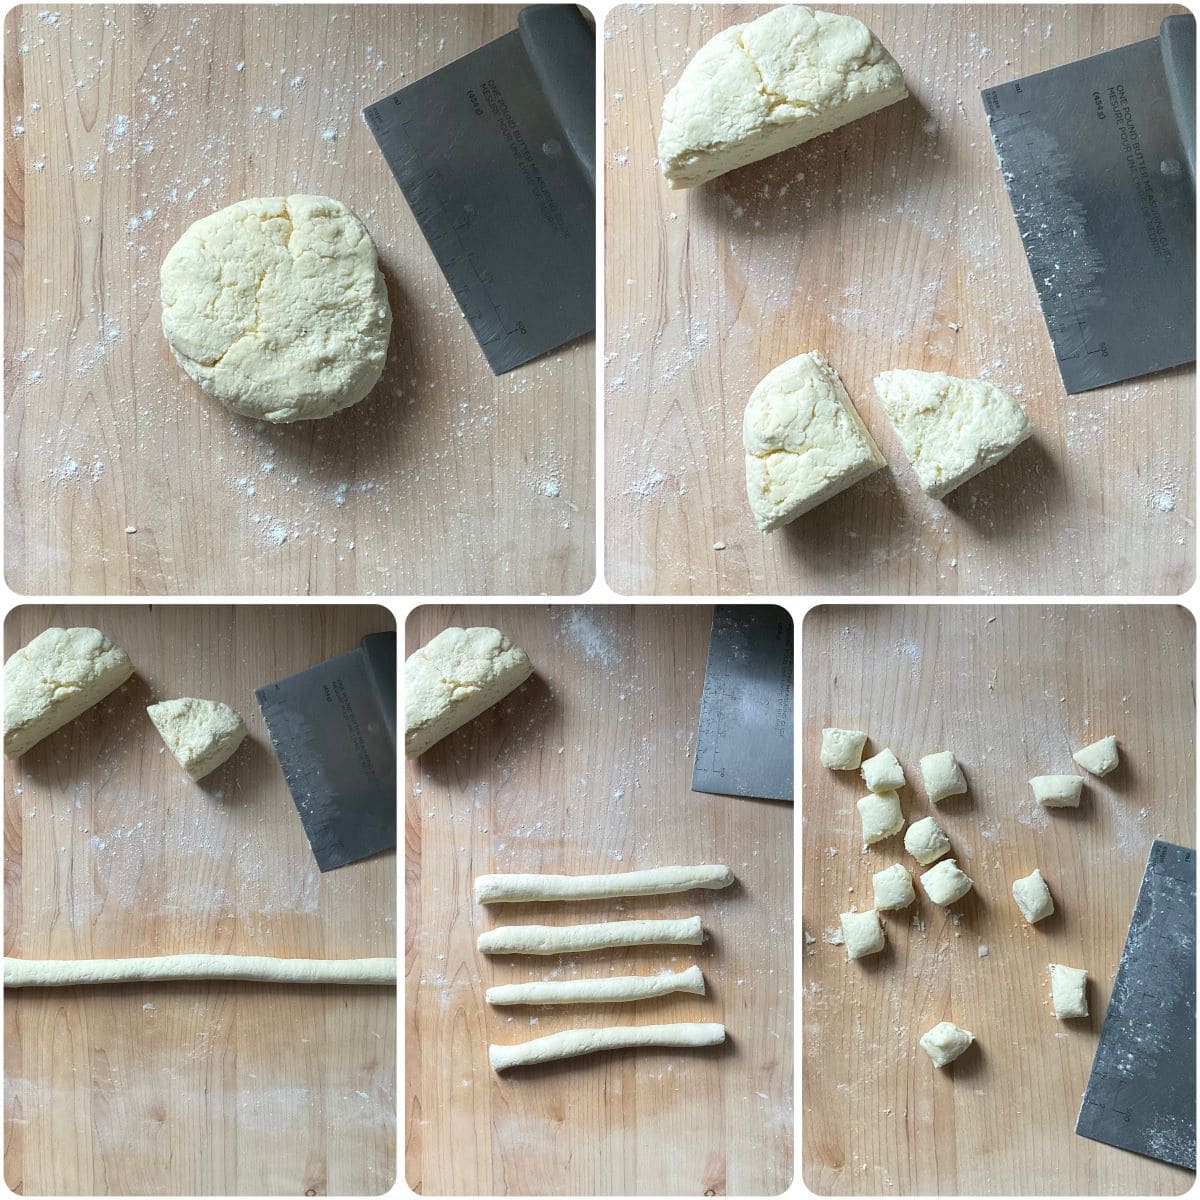
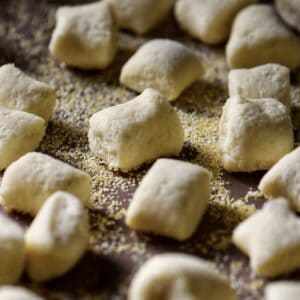
- Divide the dough into four small portions and roll each piece into a long rope, about ¾ inch (2 cm) thick. Cut the ropes into approximately 1-inch (2.5 cm) pieces. After you shape the gnocchi, place them on the semolina-dusted tray to prevent sticking. I prefer to skip making grooves to maintain their lightness. Continue with the rest of the dough.
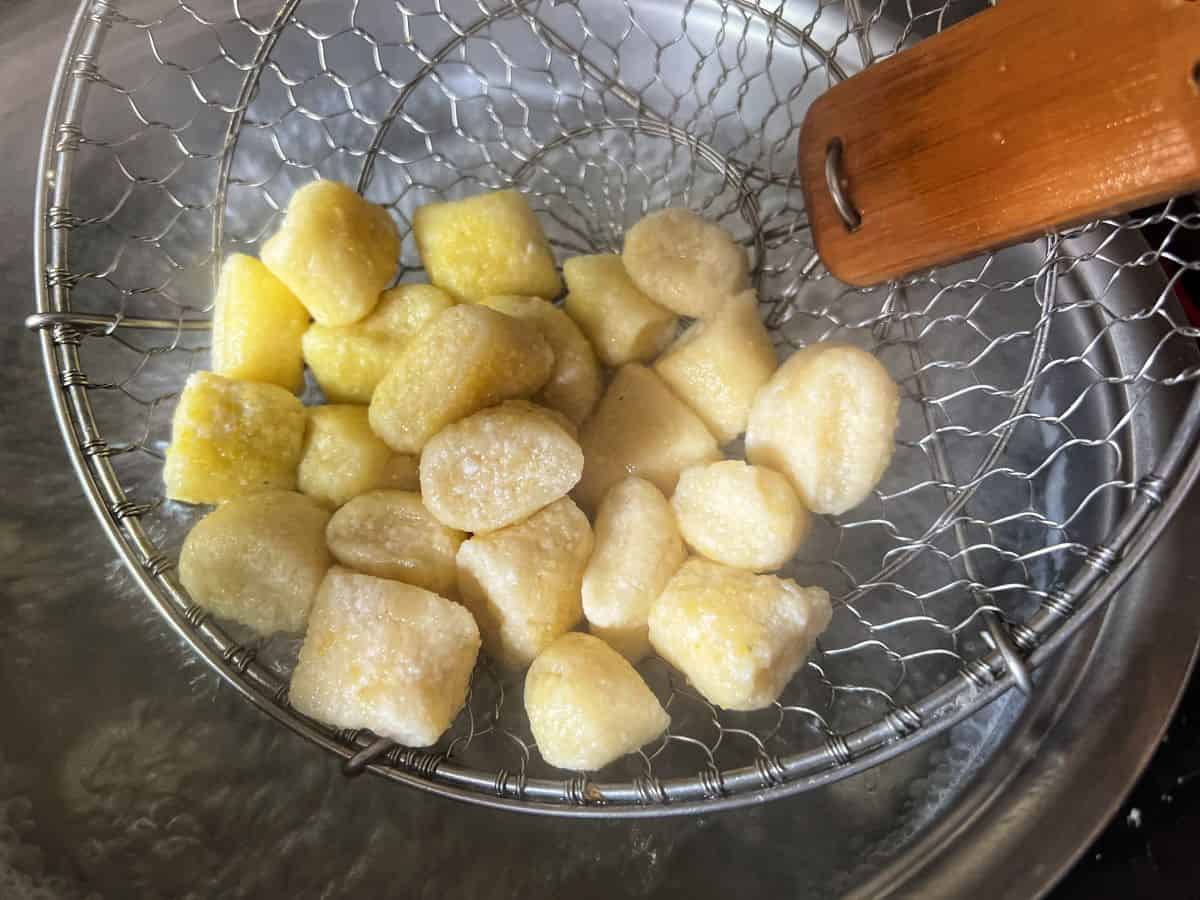
- Bring a large pot of salted water to a boil. Gently drop the gnocchi into the boiling water. Once they float to the surface, they are done. Remove with a slotted spoon or a spider strainer.
Toss your homemade gnocchi with your favorite sauce. Serve immediately and enjoy!

Optional Step: If you're not cooking the gnocchi immediately, you can refrigerate or freeze them for later use.
- To Refrigerate: Place the tray of uncooked gnocchi in the refrigerator. Cover and chill for up to two hours before cooking.
- To Freeze: Place the tray of uncooked gnocchi in the freezer. Once frozen, transfer the gnocchi to a freezer-safe bag or container. They can be stored in the freezer for up to 3 months. When you’re ready to cook, there’s no need to thaw-just drop them straight into boiling water.
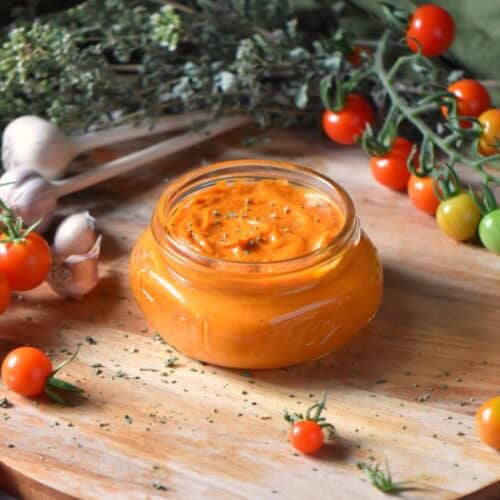
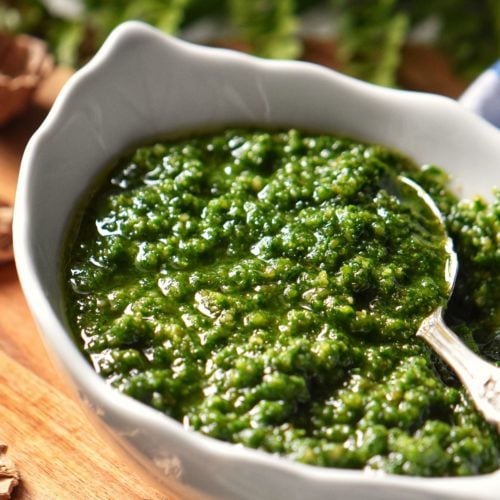
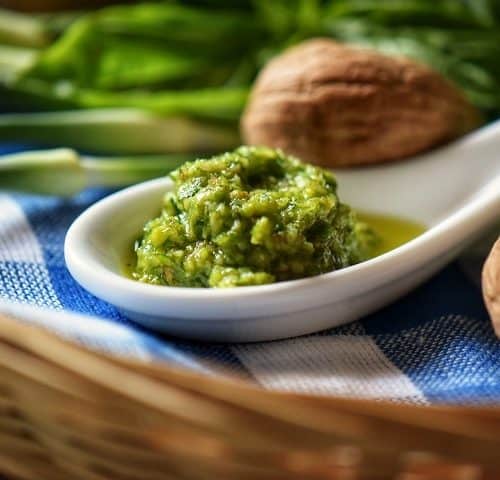
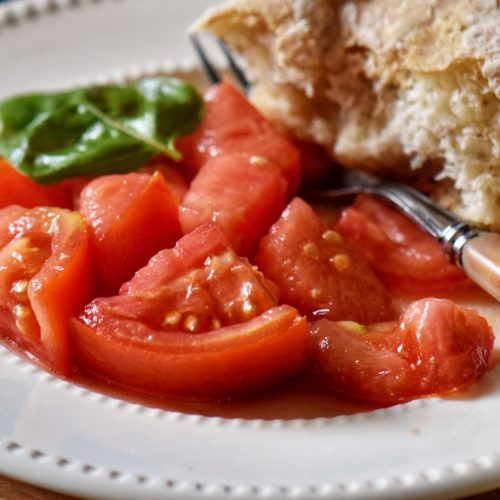
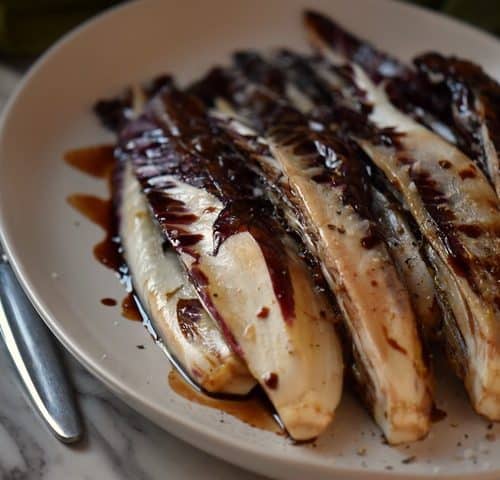
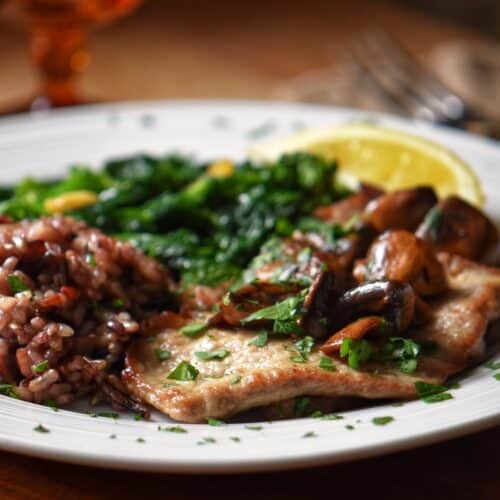
Sauce Pairing Guide
Ricotta gnocchi are incredibly versatile and pair beautifully with a variety of sauces. Whether you prefer a light, herbaceous basil pesto or this quick Italian marinara sauce recipe, here are some other delicious options to complement your homemade gnocchi:

Tips for Light and Tender Ricotta Gnocchi
- Drain the ricotta well. If you’re using store-bought ricotta, give it time to drain-at least 30 minutes, or longer if it’s very wet. This keeps your dough from getting too sticky and helps you avoid adding extra flour, which can make the gnocchi dense.
- Less flour is better. Start with the recommended amount and add just a little more if needed. Too much flour = heavy gnocchi, and we want them light and pillowy!
- Mix gently. Overmixing makes the dough tough. Stir until just combined, then stop.
- Chill the dough if needed. If it feels too soft, a quick 15-20 minutes in the fridge will firm it up-no need to keep adding flour.
- Use semolina instead of flour for dusting. It keeps the gnocchi from sticking without making them heavy.
- Test a gnocchi first. Boil one to check the texture. If it falls apart, mix in a little more flour.
- Cook in batches. If you add too many at once, the water cools down, and they can turn gummy.
- Handle the dough with care. The lighter your touch, the softer your gnocchi! While traditional gnocchi often have grooves to hold sauce, I prefer to skip this step. It helps maintain the lightness of the gnocchi.
Troubleshooting Tips and FAQ
Excess moisture in the ricotta can cause sticky dough. Be sure to drain store-bought ricotta well before using it. If the dough is still too sticky, you can add a little more flour, but avoid using too much, as it can make the gnocchi dense. You can also try chilling the dough for 15-20 minutes to firm it up before shaping.
Yes! While “00” flour gives a softer texture, all-purpose flour works well, too. Start with the recommended amount and only add more if needed.
Adding too much flour or overworking the dough does create dense and heavy gnocchi. Try to use just enough flour to bring the dough together. The less flour, the lighter the gnocchi! Also, gently mix and knead the dough until it forms a ball-don't overwork it. If possible use “00” flour, as it has a finer texture than all-purpose flour.
Possible causes include overcooking or too many in the pot at once. To avoid this, as soon as the gnocchi float to the top, taste one and remove if done.
Also, cook in small batches to prevent overcrowding and water temperature from dropping.
Not enough flour or over-mixed dough can cause this to happen. Test one gnocchi first before boiling the full batch-if it falls apart, mix in a little more flour, just a tablespoon at a time. If using very fresh, wet ricotta, it may need extra draining.
Unlike potato gnocchi, which are often rolled over a fork or gnocchi board to create ridges, ricotta gnocchi are much softer and more delicate. They don't need ridges to hold onto sauce because their light, pillowy texture naturally absorbs and clings to flavors. Plus, skipping this step makes them even quicker and easier to prepare!
Absolutely! You can refrigerate the shaped gnocchi on a floured tray for up to a couple of hours before cooking. You can also freeze them for longer storage-freeze them in a single layer before transferring them to a bag.
It depends on how you serve it! Gnocchi can be made as a main dish when paired with a hearty sauce. If you're serving a multi-course meal, you can enjoy gnocchi as a side alongside a protein like roasted chicken or grilled fish. Traditionally, in Italian cuisine, gnocchi is often served as a primo piatto (first course), followed by a meat or seafood dish.
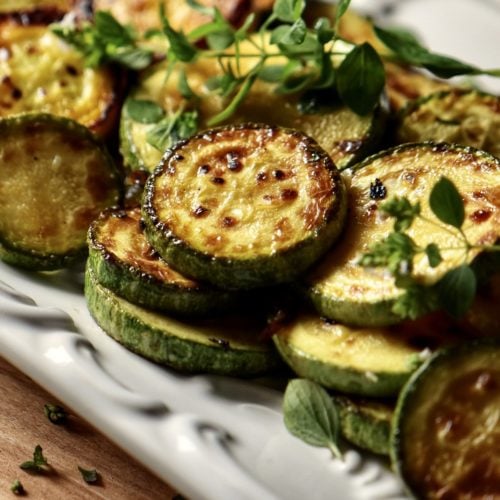
Serving Suggestions
When serving gnocchi, you can enhance the meal with a variety of complementary dishes and sides. Here are some great options:
Recipe Origin
Growing up in an Italian family, pasta was a constant in our home.
My mom loved making classic potato gnocchi.
Surprisingly, I didn't discover ricotta gnocchi until I was an adult, looking for quick, homemade ricotta dishes to serve my family. Their simplicity won me over immediately-no boiling or ricing potatoes, just a handful of ingredients.
If you have visited here before, you know that I love anything made with ricotta, especially easy ricotta recipes.
If you've ever made gnocchi that turned out dense or rubbery, you're not alone.
The real challenge isn't making them-it's getting them as light as a feather so they almost melt in your mouth.
But don't worry!
Ricotta gnocchi, just like sweet potato gnocchi, are much more forgiving than the potato version, and with a little practice and this recipe, you'll be making delicate, pillowy gnocchi in no time.
If you're new to making gnocchi, it’s okay if they're not perfect the first time. Like any homemade pasta, they get better with a bit of practice. And trust me, once you get the hang of it, you'll want to make them all the time!
Now, as empty nesters, my husband and I turn to this recipe whenever we want a comforting meal without too much effort. It makes two generous portions as an entree or four as a side, and it pairs beautifully with anything from a fresh summer pesto to a rich winter tomato sauce.
If you've never made gnocchi before, don't be intimidated! A little practice goes a long way, and soon, you'll have a go-to homemade pasta that's as versatile as it is delicious!
THANKS SO MUCH for following and being part of the She Loves Biscotti community, where you will find Simple & Tasty Family-Friendly Recipes with an Italian Twist.
Ciao for now,
Maria
P.S. If you love ricotta as much as I do, check out my Ricotta Cheese section for delicious recipes, tips, and creative ways to use this creamy cheese in both sweet and savory dishes!
★★★★★ If you have made these ricotta cheese gnocchi, I would love to hear about it in the comments below and be sure to rate the recipe!
Recipe
How to Make Ricotta Cheese Gnocchi
WANT TO SAVE THIS RECIPE?
Ingredients
- 1 egg room temperature
- 250 grams whole milk ricotta approximately 1 cup, drained
- 40 grams grated cheese ½ cup, Parmigiano-Reggiano or Romano cheese
- ¼ teaspoon salt or to taste
- pinch pepper or to taste
- pinch nutmeg
- 70 grams "00" flour ½ cup
- extra flour for rolling for rolling
- semolina to prevent sticking on tray
Instructions
- In a medium bowl, whisk together the egg, the drained ricotta, grated cheese, salt, pepper, and nutmeg. Mix until smooth.
- Add the flour to the ricotta mixture. Gently mix with a spatula until a soft dough forms.
- Lightly flour a clean surface and turn the dough out. Sprinkle a bit of flour over the top of the mound. Knead it gently for a minute until it is smooth but still soft.
- Place the ball of dough back in the bowl. Cover it with a clean towel and refrigerate for about 15 minutes. This helps to firm it up and makes it easier to shape.
- After refrigeration, divide the dough into 4 smaller portions. Roll each portion into a long rope about ¾ inch (2 cm) thick. Cut the rope into 1-inch (2.5 cm) pieces to form the gnocchi.
- After you shape the gnocchi, place them on a semolina-dusted tray to prevent sticking.
- Continue until all the dough has been formed into gnocchi.
- If using immediately, drop in a large pot of salted boiling water for a few minutes. The gnocchi are done when they float to the top. Taste to make sure they are cooked to your liking.
- If freezing, place the tray of gnocchi in the freezer and once frozen, place in a plastic bag in the freezer. They can be cooked frozen. (It should take 2-3 minutes to cook. Once they rise to the top, they should be done. Taste to make sure they are cooked to your liking).
- Serve with your favorite sauce.
Video
Notes
- Drain the ricotta well. If you’re using store-bought ricotta, give it time to drain-at least 30 minutes, or longer if it’s very wet. This keeps your dough from getting too sticky and helps you avoid adding extra flour, which can make the gnocchi dense.
- Less flour is better. Start with the recommended amount and add just a little more if needed. Too much flour = heavy gnocchi, and we want them light and pillowy!
- Mix gently. Overmixing makes the dough tough. Stir until just combined, then stop.
- Chill the dough if needed. If it feels too soft, a quick 15-20 minutes in the fridge will firm it up-no need to keep adding flour.
- Use semolina instead of flour for dusting. It keeps the gnocchi from sticking without making them heavy.
- Test a gnocchi first. Boil one to check the texture. If it falls apart, mix in a little more flour.
- Cook in batches. If you add too many at once, the water cools down, and they can turn gummy.
- Handle the dough with care. The lighter your touch, the softer your gnocchi! While traditional gnocchi often have grooves to hold sauce, I prefer to skip this step. It helps maintain the lightness of the gnocchi.
- To Refrigerate: Place the tray of uncooked gnocchi in the refrigerator. Cover and chill for up to two hours before cooking.
- To Freeze: Place the tray of uncooked gnocchi in the freezer. Once frozen, transfer the gnocchi to a freezer-safe bag or container. They can be stored in the freezer for up to 3 months. When you’re ready to cook, there’s no need to thaw-just drop them straight into boiling water.
Cathi
Hi Maria
Can this recipe be doubled?
Maria
Thanks for your interest Cathi. Yes! Enjoy ♥
Miriam
So easy and so delicious! I used gluten free all-purpose flour as I didn’t have gluten free OO flour and the result was a soft, melt-in-your-mouth delight! I used jarred marinara sauce and served a green salad alongside.
Will definitely make again…..Thank you!
Maria
I am so thrilled to read this! Thanks so much for sharing Miriam, this will help so many readers!
Sara
Omg! Absolutely loved the recipe!! Really delicious – thank you!
Maria
Thanks so much for sharing Sara!