

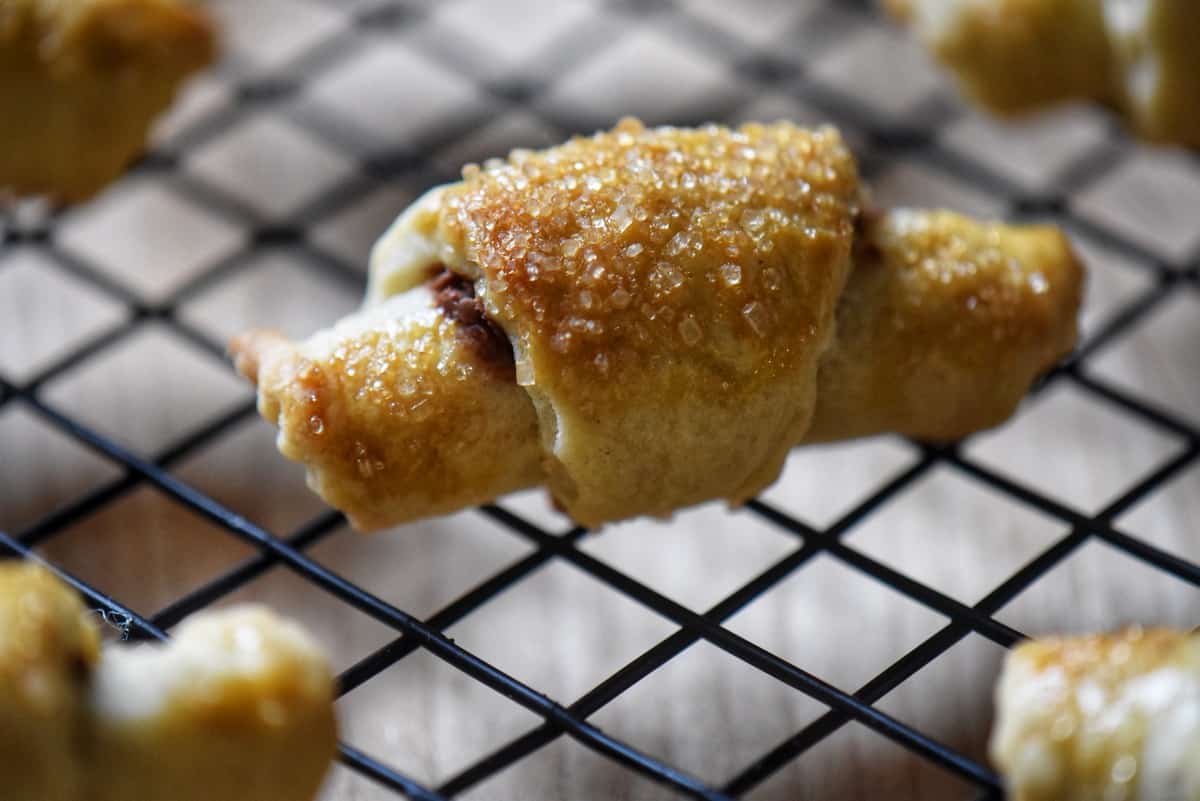
Bake a big batch of irresistible Butterhorn Cookies with Nutella® filling! These flaky pastries are crowd-pleasers, ideal for parties and celebrations!

If you’re looking for a special occasion cookie worth a small investment in time, these flakey, mini-croissant-shaped cookies will not disappoint.
The yeast-based dough is filled with a simple Nutella® spread that will impress family and friends. You will find eating only one of these cookies nearly impossible.
Don’t let the time commitment deter you from making these amazing butterhorn cookies. With my two-day strategy for dividing and conquering tasks, you’ll have them ready to enjoy in no time.
These Nutella®filled cookies are easy to make and will be a hit with anyone who tries them. The combination of a flakey yeast dough filled with a gooey chocolate spread is irresistible!
Jump to:
How to make
As mentioned, my approach to preparing this butterhorn cookie recipe involves splitting the tasks over two days. Let me show you how effortless and uncomplicated this process can be!
Day 1: Make the yeast dough
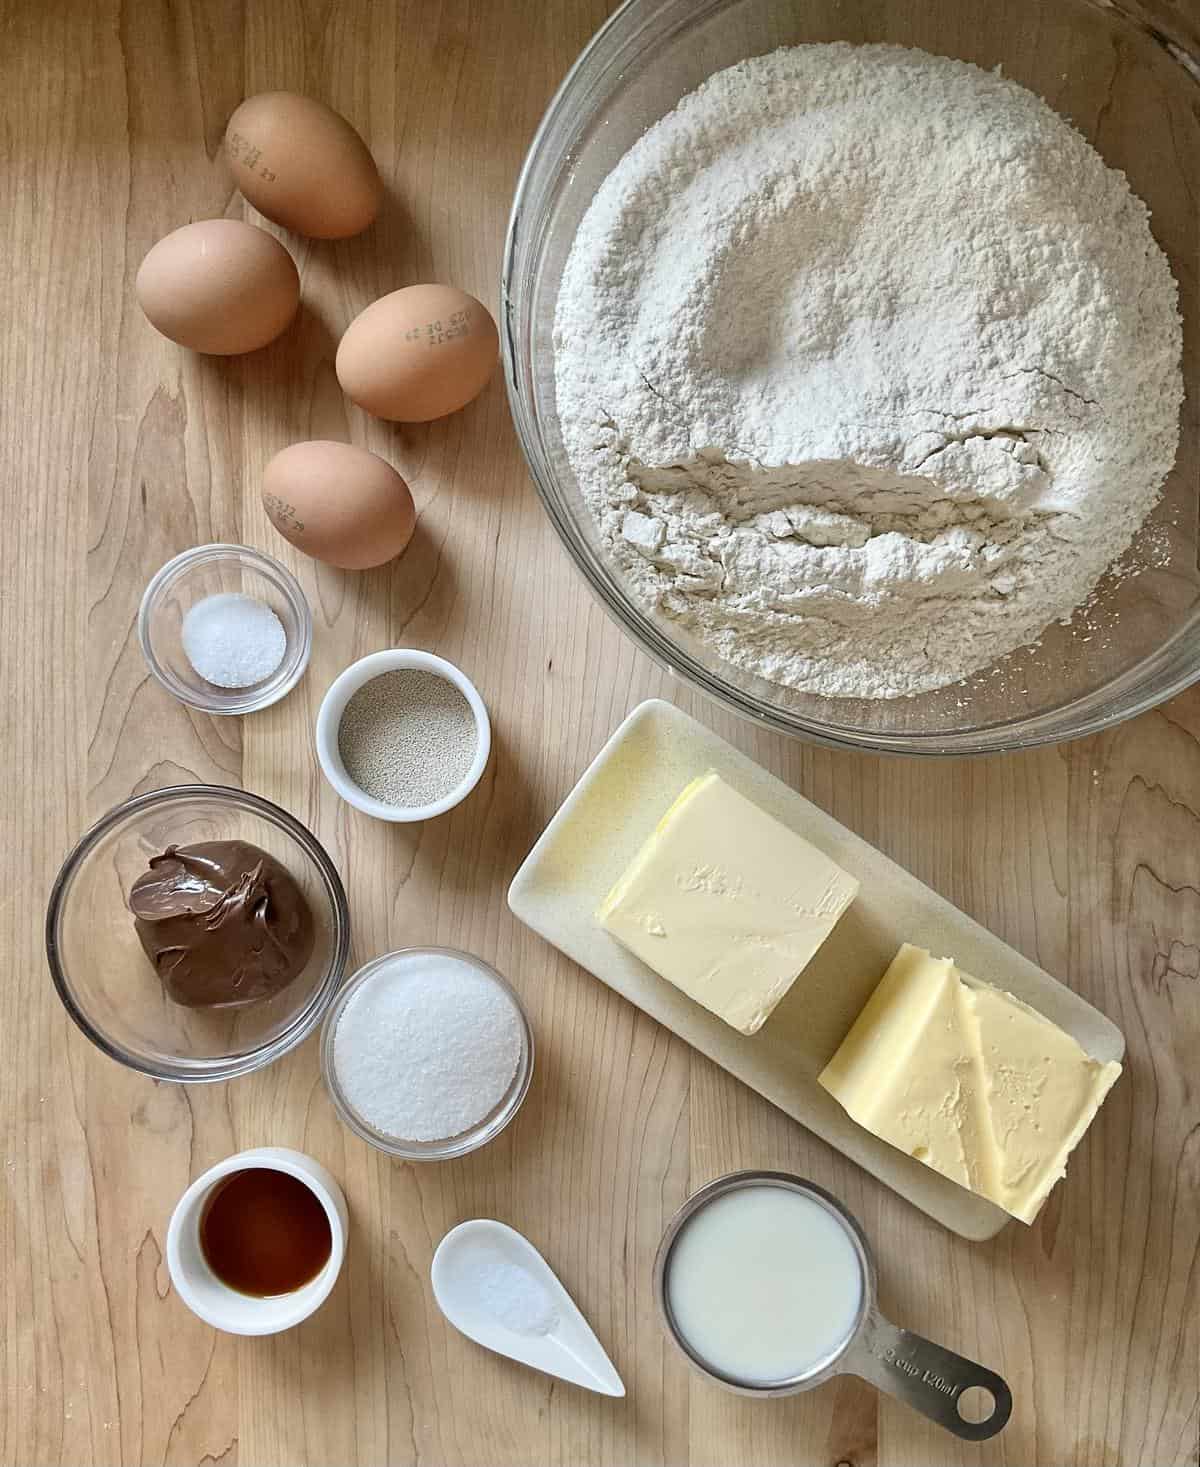
Whisk together 2¼ teaspoons of active dry yeast (8 grams), 1 teaspoon of granulated sugar, and ½ cup of lukewarm milk in a small bowl. Set aside for 5 minutes.
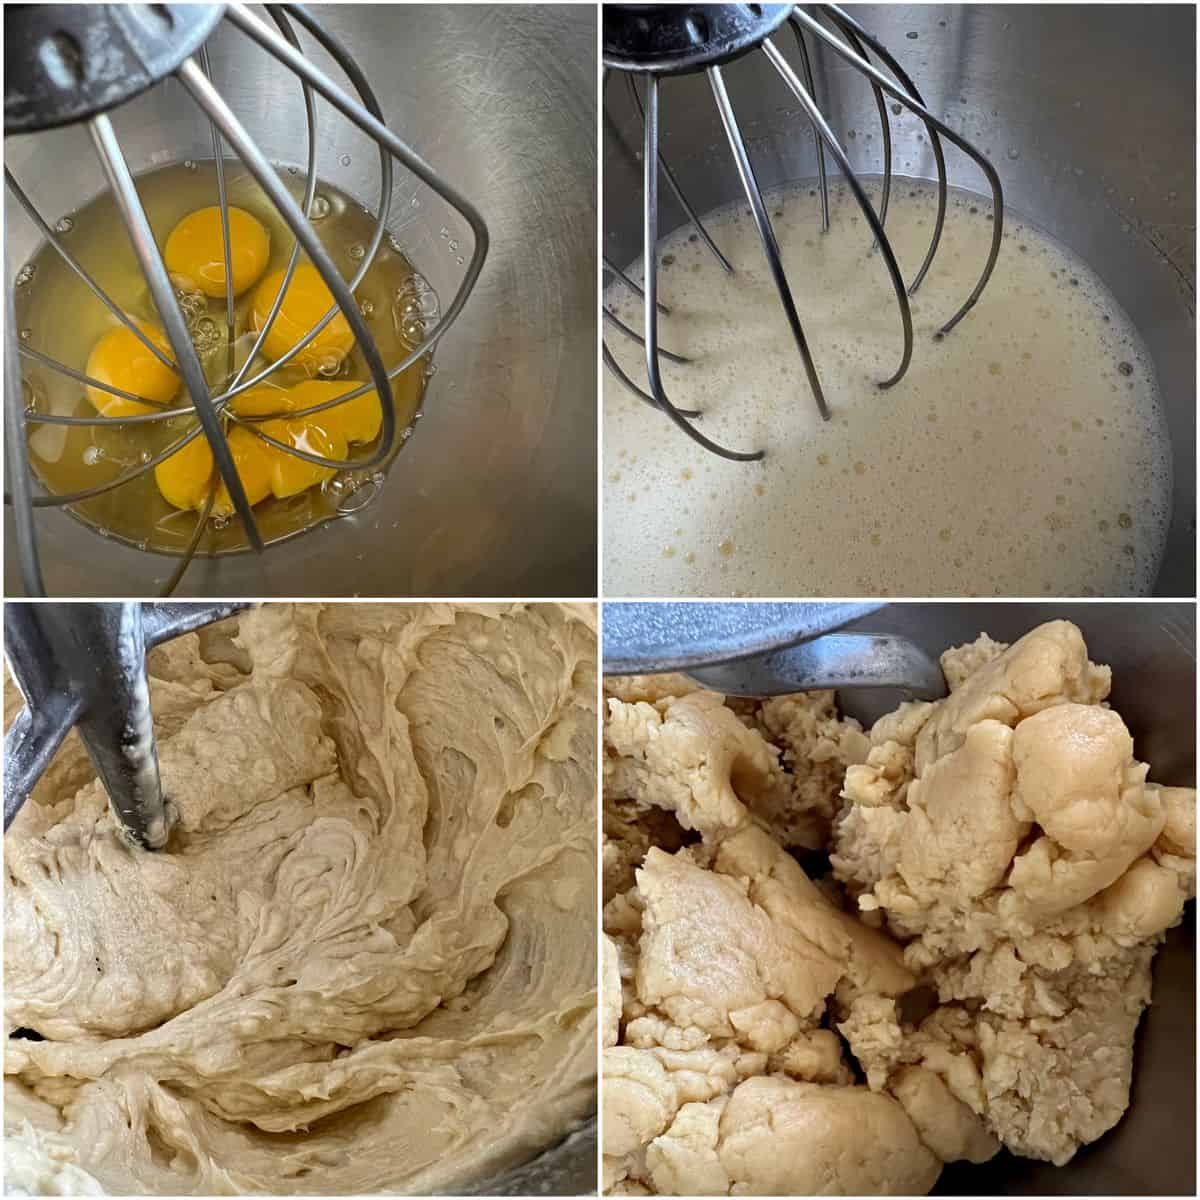
Meanwhile, in a large mixing bowl of an electric stand mixer, whisk 4 room-temperature eggs at medium speed for about 2 minutes.
Add 4 tablespoons of granulated sugar and continue to whisk for another 2 minutes.
Switch to the paddle attachment; add 1 cup (226 grams) of room-temperature butter, 1 cup (190 grams) of room-temperature vegetable shortening, ¼ teaspoon of salt, and 1 teaspoon of pure vanilla extract. Mix on medium speed until well combined. Scrape down the sides of the bowl as needed.
Add the yeast mixture and mix until well combined.
Add 5½ to 6 cups (780-850 grams) of sifted all-purpose flour to this mixture. Using the hook attachment, knead for approximately 5 to 8 minutes or until the dough pulls away from the sides of the bowl.
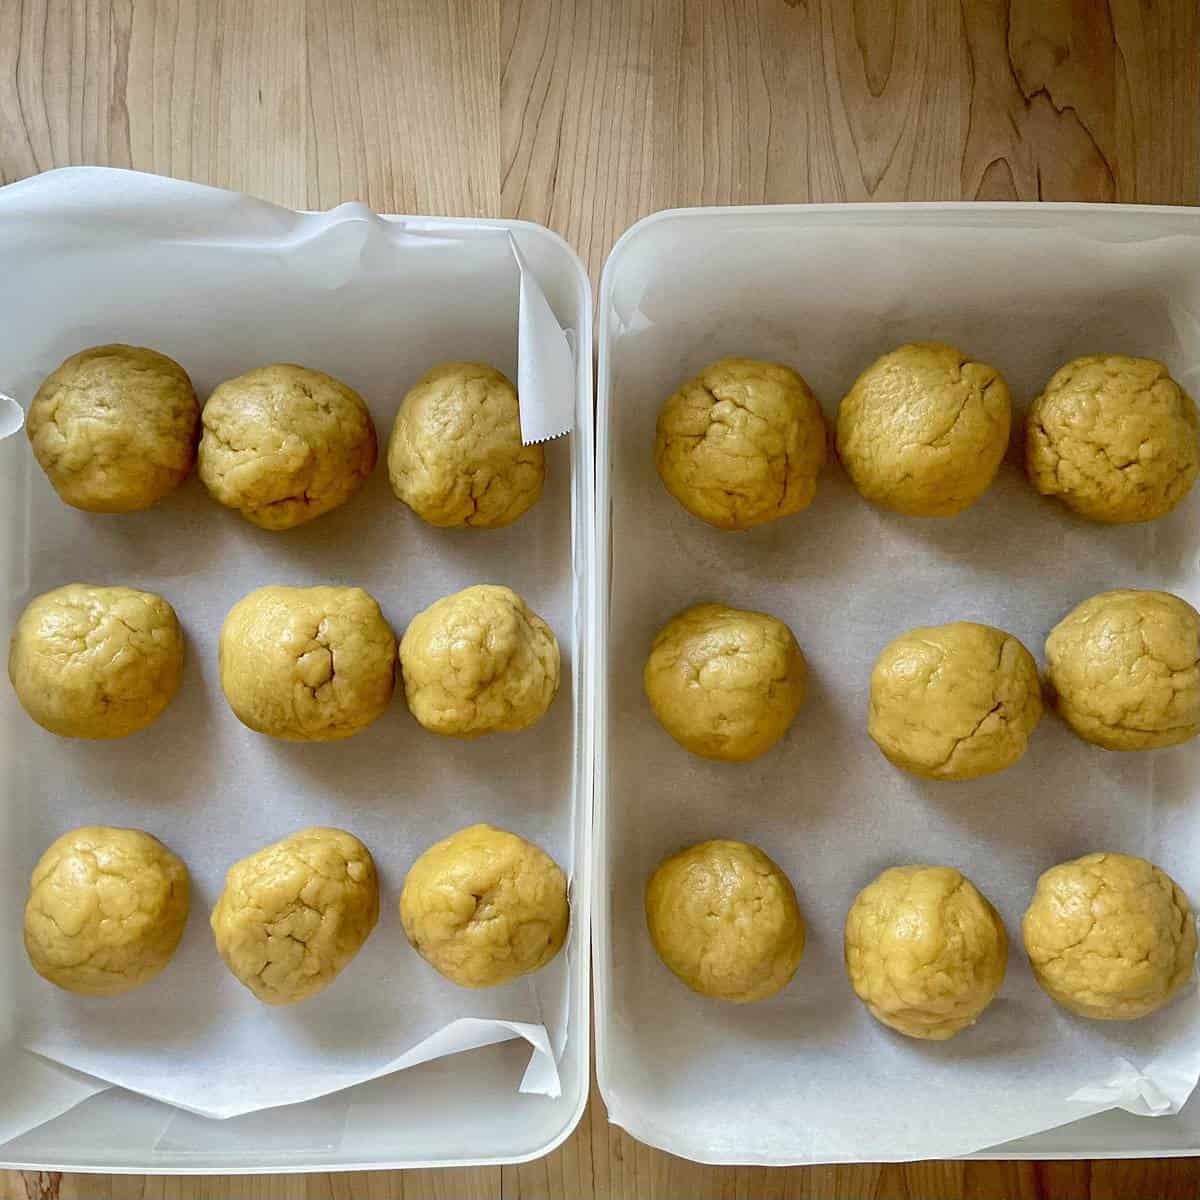
Then, divide the dough into 18 balls. Each ball should weigh approximately 90 grams. Place in an airtight container and refrigerate for at least 12 hours or up to 24.
I will usually make my dough in the evening. It takes about 30 minutes, from start to finish, to make the dough, including clean-up time.
Day 2: Shaping and rolling the cookies
Preheat the oven to 350℉ (175℃). Line a large baking sheet with parchment paper.
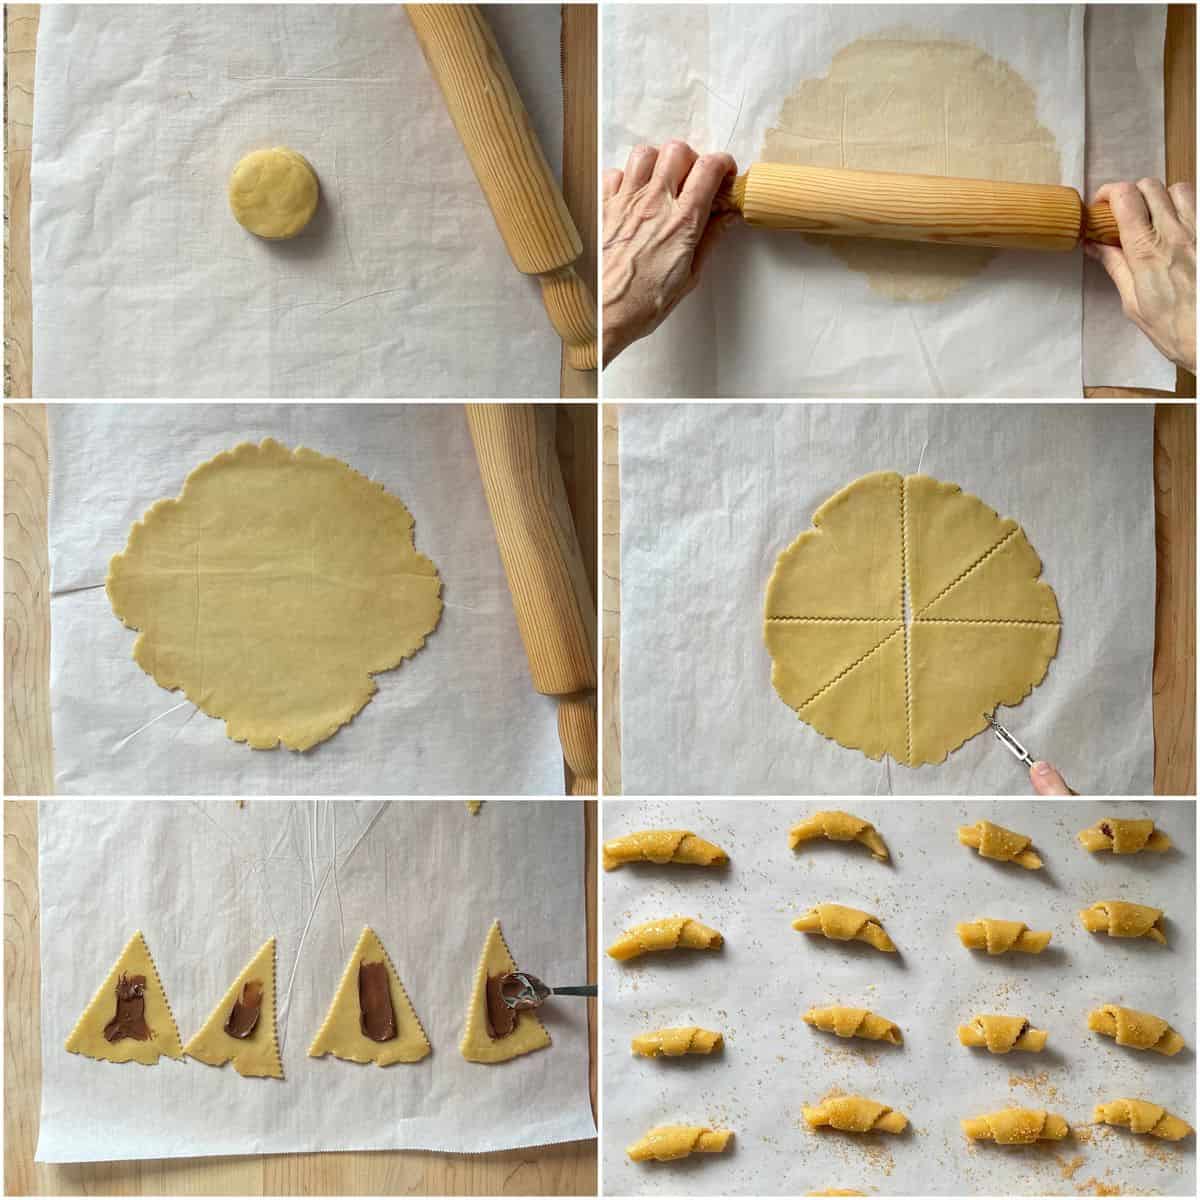
Working with one ball of dough at a time, place it between two sheets of parchment paper and roll out the dough to an 8-inch round, about ⅛-inch thick.
With a pastry cutter, cut the dough into eights (first cut the dough in half, then in quarters, and then in eighths).
To begin, place ½ teaspoon of Nutella® on the wide ends of each alternating wedge and spread it thinly toward the tip. Roll each of the 4 triangles up from the wide end to the pointed end, forming a crescent shape.
Transfer to the parchment-lined baking sheet. Repeat with the other 4 sections.
Repeat this process with another ball of dough.
Brush the tops of the cookies with an egg wash and sprinkle with turbinado (coarse) sugar.
Bake, in batches, for 10-12 minutes or until bottoms are lightly browned. Rotate the pans as necessary to bake evenly.
Remove the cookies from the oven and let them cool on the baking sheet for 2-3 minutes before transferring them to a wire rack to cool completely.
This recipe yields a total of 144 cookies, which is equivalent to 12 dozen cookies. While it may seem like a large quantity, watch them disappear before your eyes!

Tips
- Chill the dough: After preparing it, it’s important to let it chill in the refrigerator overnight before rolling it out. This will help the dough firm up and make it easier to work with.
- Don’t overfill the cookies: While filling them with as much Nutella as possible may be tempting, be careful not to overfill them. Too much filling can cause the filling to ooze out, making a mess.
- Place the seam side down: When placing the rolled-up croissant cookies on the baking sheet, place the seam side down. This will help the cookies maintain their shape and prevent them from unrolling during baking. It will also help the Nutella filling stay inside the cookie and not leak onto the baking sheet.
FAQ
If you’re unfamiliar with this commercial product, Nutella® is a popular chocolate hazelnut spread from Italy. It is made from a blend of roasted hazelnuts, cocoa powder, and sugar, ground together to create a smooth, creamy texture.
Once the baked cookies are at room temperature, arrange them in a single layer in the tin container, placing a sheet of wax paper or parchment paper between the layers to prevent them from sticking together. Store in a cool, dry place at room temperature for up to 3 days.
Yes. Transfer the room-temperature cookies to an airtight container for longer storage, separating each layer with parchment or wax paper, and freeze for up to 3 months. To thaw the croissant cookies, remove them from the freezer and let them sit at room temperature for about 30 minutes to an hour.
Absolutely! You can substitute Nutella with other fillings like fruit preserves or cream cheese for a different flavor. You can also create a healthier version of everyone’s beloved decadent spread with this easy-to-follow chocolate hazelnut butter recipe.
Big batch Italian cookie recipes

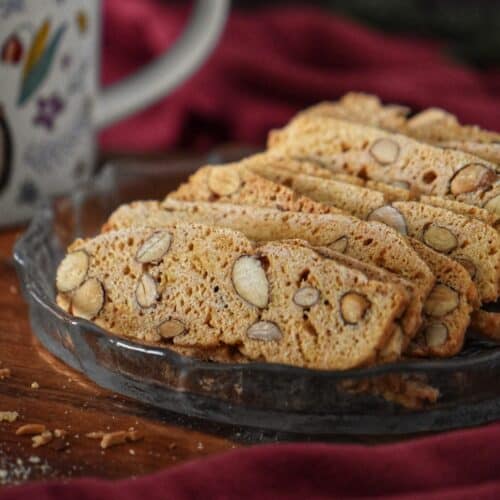
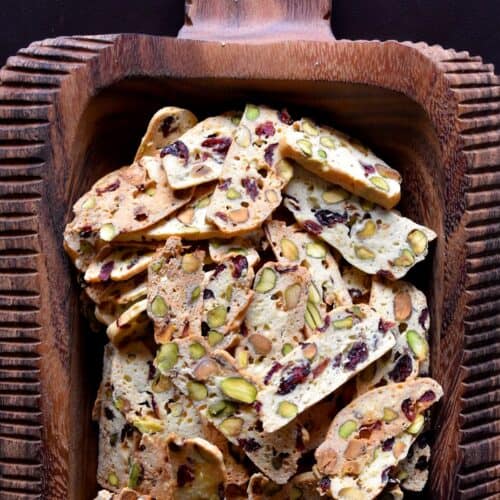

If you’re interested in exploring more big-batch recipes for Italian cookies, you might also want to try making these bakery-style Italian almond cookies that can be piped into various shapes. If you enjoy cookies with a crunchy texture, be sure to try these thin almond biscotti bread or cranberry pistachio biscotti. And, if you’re a fan of traditional Italian Christmas cookies, you can’t go wrong with this family recipe for mostaccioli, which is a must-have for any platter of Italian Christmas cookies.
Easy Nutella® desserts
As a special treat, Nutella® is a versatile ingredient that can easily be used in various recipes. For example, you might try adding a drizzle to a fresh fruit salad or making a chocolate pizza topped with fruit for a fun and indulgent treat.

Braided Sweet Bread
If you want to switch things up, swap out the hazelnut spread for Nutella in this amazing braided sweet bread recipe for a delightful twist.
Recipe origins
Almost two decades ago, I had the privilege of crossing paths with an exceptional individual named Vittoria.
Not only was she a kind-hearted person, but she also possessed incredible skills in the kitchen as both a cook and baker.
During our friendship, Vittoria generously shared numerous recipes with me, including her beloved Crema di Limoncello recipe.
Although Vittoria has passed, I would like to pay tribute to my dear friend’s memory with this recipe.
I modified the original recipe, which used margarine as the fat source. Instead, I used equal amounts of butter and vegetable shortening. The result is a delicately tender cookie with a rich, buttery flavor.
These mini croissant-shaped cookies are sure to please any crowd.
THANKS SO MUCH for following and being part of the She Loves Biscotti community, where you will find Simple & Tasty Family-Friendly Recipes with an Italian Twist.
Ciao for now,
Maria
★★★★★ If you have made these butterhorn cookies, I would love to hear about it in the comments below and be sure to rate the recipe!
Recipe

Butterhorn Cookies with Nutella Filling Recipe
WANT TO SAVE THIS RECIPE?
Ingredients
- 2¼ teaspoon active dry yeast 8 grams
- 1 teaspoon granulated sugar
- ½ cup milk lukewarm
- 4 eggs room temperature
- 4 tablespoons granulated sugar
- 1 cup butter room temperature, 226 grams, 2 sticks
- 1 cup vegetable shortening room temperature, 190 grams
- ¼ teaspoon salt
- 1 teaspoon vanilla extract pure
- 5½-6 cups all-purpose flour 780- 850 grams, sifted
- Hazelnut nut spread example: Nutella®
Egg Wash Glaze:
- 1 egg lightly beaten
- 1 teaspoon milk
- 3-4 tablespoons turbinado sugar for sprinkling
Instructions
- In a small dish, combine the yeast with 1 teaspoon of sugar.
- Add the warm milk and stir.
- Set aside for about 5 minutes.
- Meanwhile, in a large mixing bowl (of electric stand mixer) whisk the eggs, at medium speed for about 2 minutes.
- Add the sugar and continue to whisk for another 2 minutes or so.
- Switch to paddle attachment; add the butter, shortening, salt and vanilla extract.
- Mix on medium speed until well combined.
- Add the yeast mixture and mix until well combined.
- Add 5½ to 6 cups (780-850 grams) of all-purpose flour to this mixture. Using the hook attachment, knead for approximately 5 to 8 minutes or until the dough pulls away from the sides of the bowl.
- Divide the dough into 18 balls (each weighing about 90 grams).
- Place the dough balls in an airtight container, and refrigerate overnight (or up to 24 hours).
- Preheat the oven to 350℉ (175℃).
- Line baking sheet with parchment paper.
- Working with one ball of dough at a time, place it between two sheets of parchment paper and roll out the dough to an 8-inch round, about ⅛ of an inch thick.
- With a pastry cutter, cut the dough into eights (first cut it in half, then in quarters and then in eighths).
- To begin, place ½ teaspoon of Nutella® on the wide ends of each alternating wedge and spread it thinly toward the tip. Roll each of the 4 triangles up from the wide end to the pointed end, forming a crescent shape.
- Repeat this process with another ball of dough.
- Brush the tops of the cookies with the egg wash and sprinkle with turbinado (coarse) sugar.
- Bake, in batches, for 10-12 minutes or until bottoms are lightly browned. Rotate the pans as necessary to bake evenly.
- Remove the cookies from the oven and let them cool on the baking sheet for 2-3 minutes before transferring them to a wire rack to cool completely.
- WATCH THE VIDEO ON THE RECIPE CARD TO SEE HOW EASY IT IS TO MAKE THIS COOKIE!
Video
Notes
- Chill the dough: After preparing it, it’s important to let it chill in the refrigerator overnight before rolling it out. This will help the dough firm up and make it easier to work with.
- Don’t overfill the cookies: While filling them with as much Nutella as possible may be tempting, be careful not to overfill them. Too much filling can cause the filling to ooze out, making a mess.
- Place the seam side down: When placing the rolled-up croissant cookies on the baking sheet, place the seam side down. This will help the cookies maintain their shape and prevent them from unrolling during baking. It will also help the Nutella filling stay inside the cookie and not leak onto the baking sheet.
Nutrition
This post was originally published on Feb 4, 2017, and republished on March 31, 2023 and November 18, 2024 with updated content, and a video. Thanks for sharing!
Judy M
Made these cookies today excellent recipe and dough is so easy to work with. One problem…I forgot to halve the recipe. Seriously !!144 cookies to add to my tray that’s enough for our English Christmas and Ukrainian Christmas dinners. But so delicious I’m sure they’ll get eaten.