

This vegan recipe for homemade Chocolate Hazelnut Butter is guaranteed to elevate your opinion of the humble nut butter. How could you possibly go wrong with cocoa and hazelnuts right?

I know what you’re thinking… Nutella®!
Well, sorry to disappoint you, but this is not a copycat recipe for Nutella®.
Although this hazelnut spread is also made with hazelnuts, the rest of the ingredients are slightly healthier. Let me explain.
When you look at the list of ingredients on any label, they are written in order of weight. So, the first ingredient is usually the one that is present in the largest amount.
Let’s take a look at the ingredient list of Nutella® -the first ingredient is sugar, followed by palm oil, hazelnuts, cocoa, skim milk, etc… So there is more sugar and oil than any other ingredient.
Don’t get me wrong; I love Nutella® just as much as the next person. It makes a great treat when smothered on bread, filling for croissant cookies or making a chocolate pizza.
In fact, I don’t trust anyone who tells me they don’t like the stuff, but we need to keep those New Year’s resolutions going — you know, the ones we all made about eating healthier.
If you have a food processor, this recipe for cocoa hazelnut butter is an easy, tasty, healthy and economical spread to make at home.
Mise en place
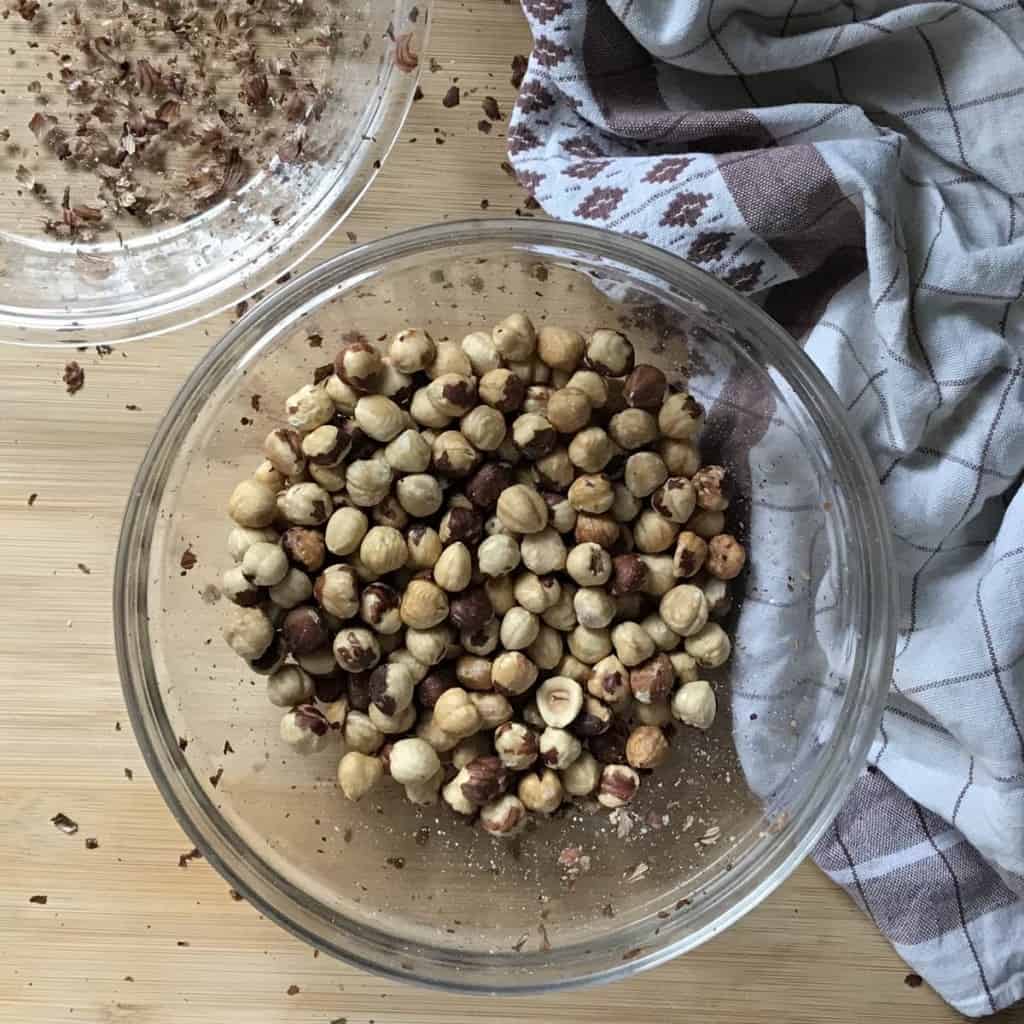
The only prep for this recipe is preparing the hazelnuts. Please refer to the step-by-step tutorial on how to roast hazelnuts. We also need to remove the skins as they are known to provide a bitter aftertaste.
Instructions
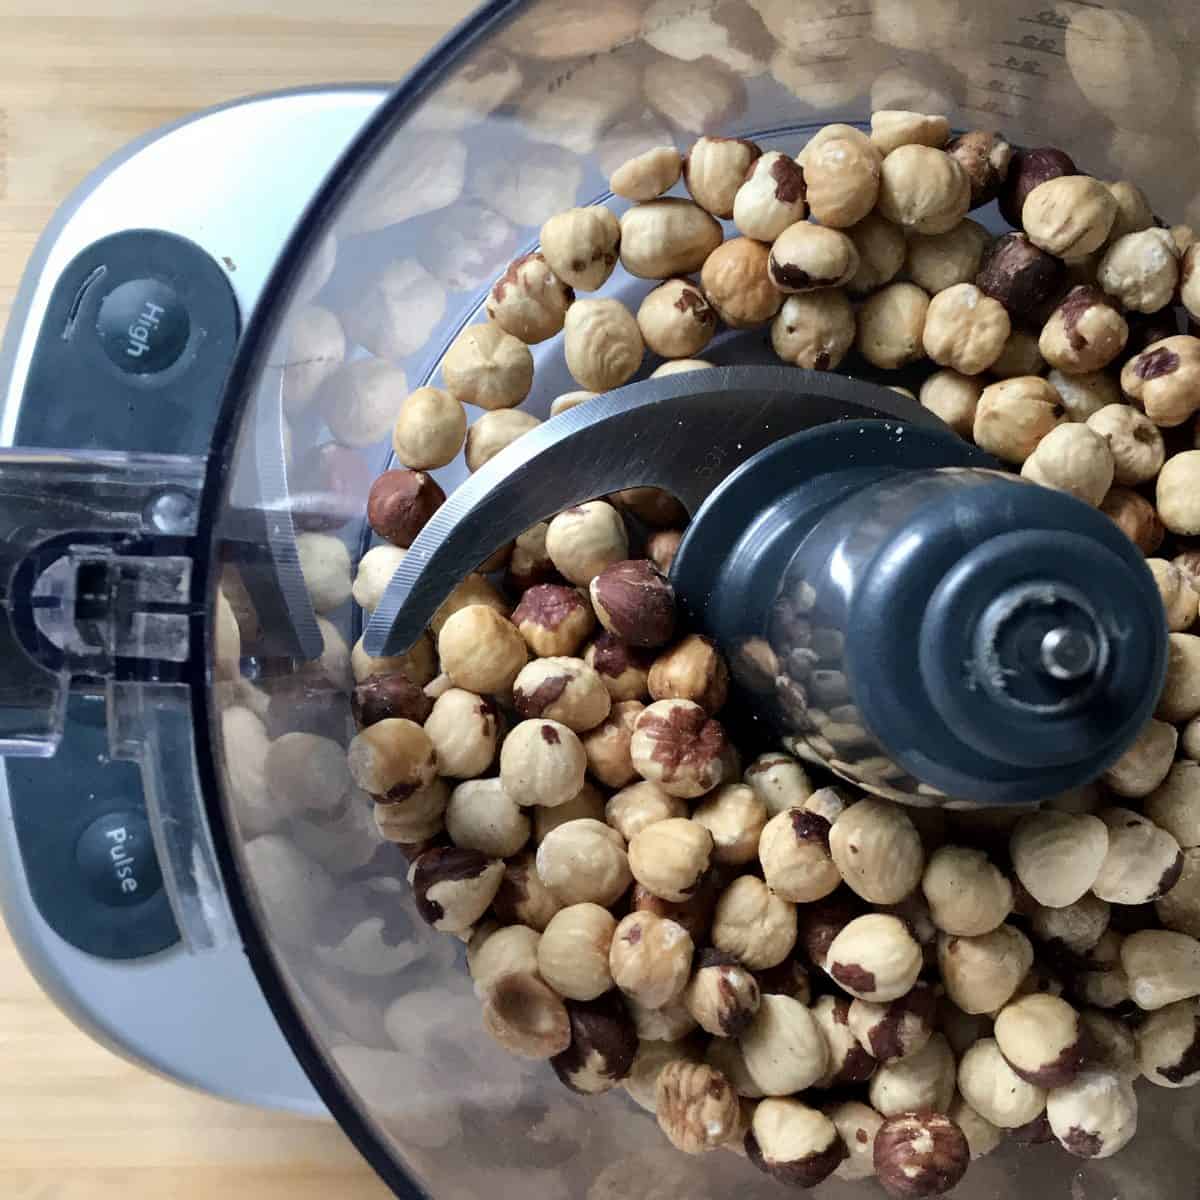
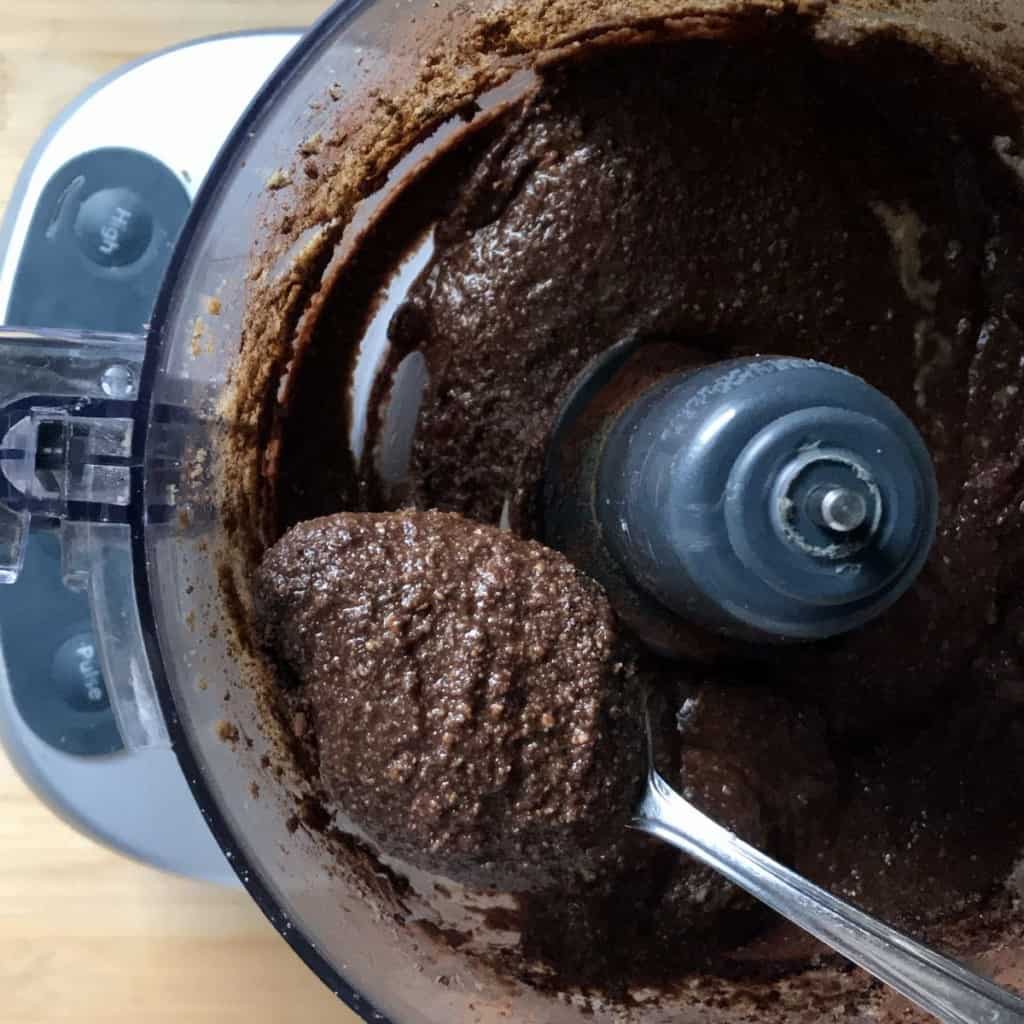
Place the 2 cups of warm skinless nuts in a food processor and pulse for 30 seconds.
Process the nuts first on low speed, then on high. Remember, you need to scrape down the sides of the bowl every few minutes or so, just like we did when we made almond butter.
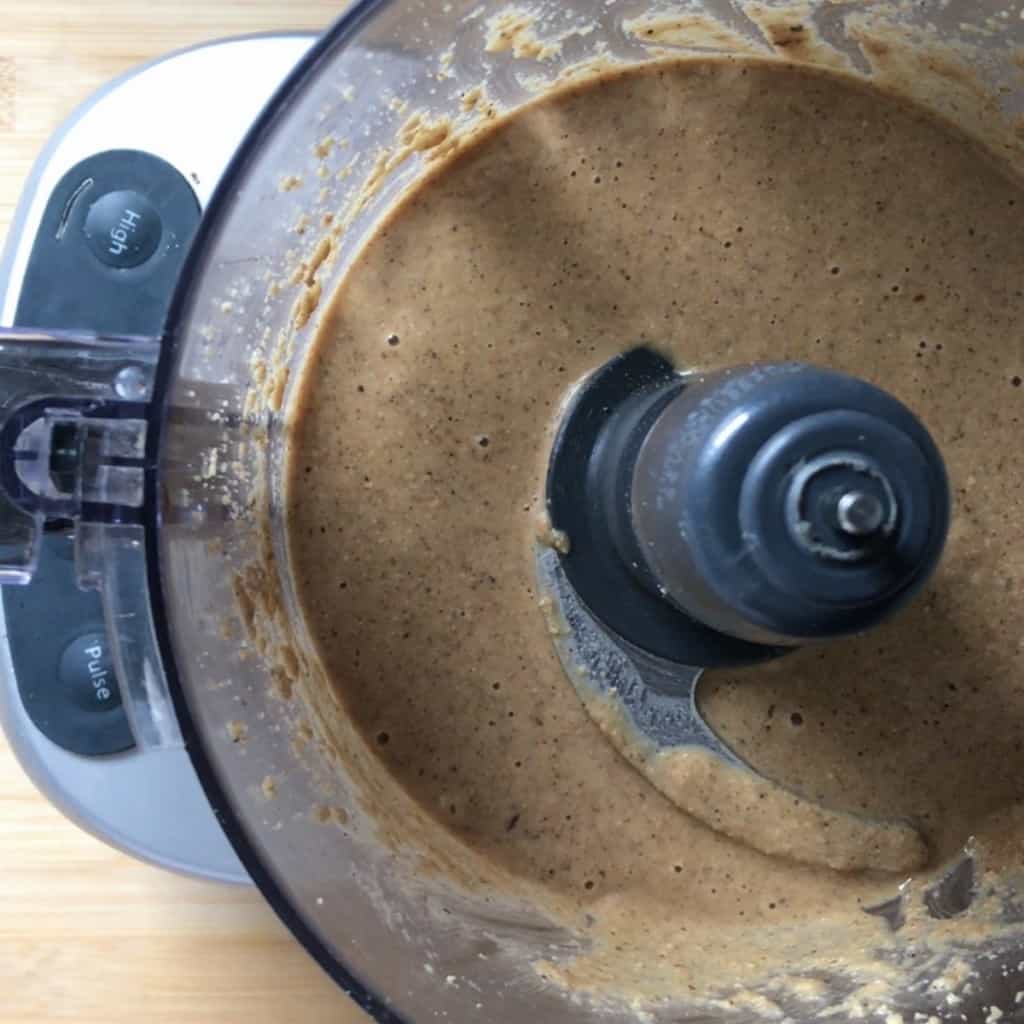
Before you know it, the nuts will release their natural oils, and the hazelnuts are transformed into nut butter. This can take anywhere from 5-10 minutes, depending on the strength of your food processor.
Let’s make this nut butter a little more decadent. Let’s add the rest of the ingredients!
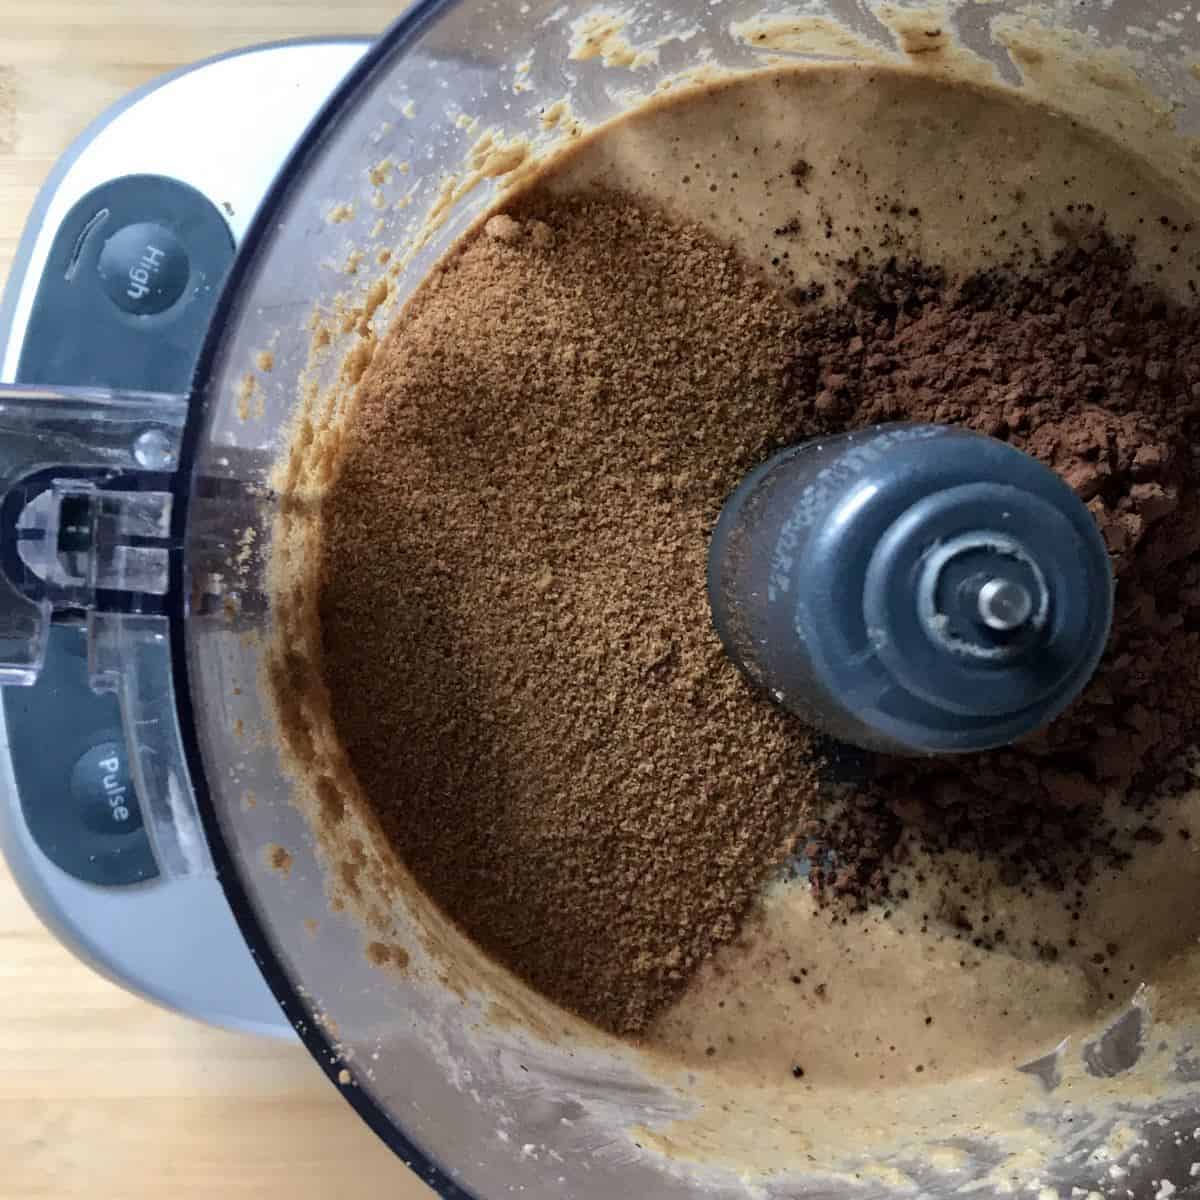
More specifically, 2 tablespoons cocoa powder, ⅓ cup of coconut sugar, ½ teaspoon vanilla extract and ⅛ teaspoon of salt. As an optional ingredient, add ¼ teaspoon of espresso powder.
Pulse for 30 seconds for the mixture to come together. Do not over mix as the mixture can seize and separate.
Taste and adjust for sweetness.
So now, instead of reaching for that jar of you-know-what, reach for this chocolate hazelnut spread.
But remember everything in moderation!
Tips
- While processing the hazelnuts, allow your food processor to rest every few minutes to prevent the motor from overheating.
- Roasting the hazelnuts might seem like an extra step, but you will be compensated with a flavorful spread.
- When processing warm roasted hazelnuts, the breakdown of the oils occurs more quickly. It is therefore not necessary to add any oil since the hazelnuts release their own oils.
- Be patient. Depending on the type of food processor you have, it can sometimes take up to 10 minutes for the hazelnuts to transform into nut butter.
- Your food processor’s strength will determine the final texture of the nut butter anywhere from smooth to slightly granular and nutty.
- Scraping down the sides throughout the process ensures an even transformation.
- For a sweeter nut butter, increase the amount of sugar.
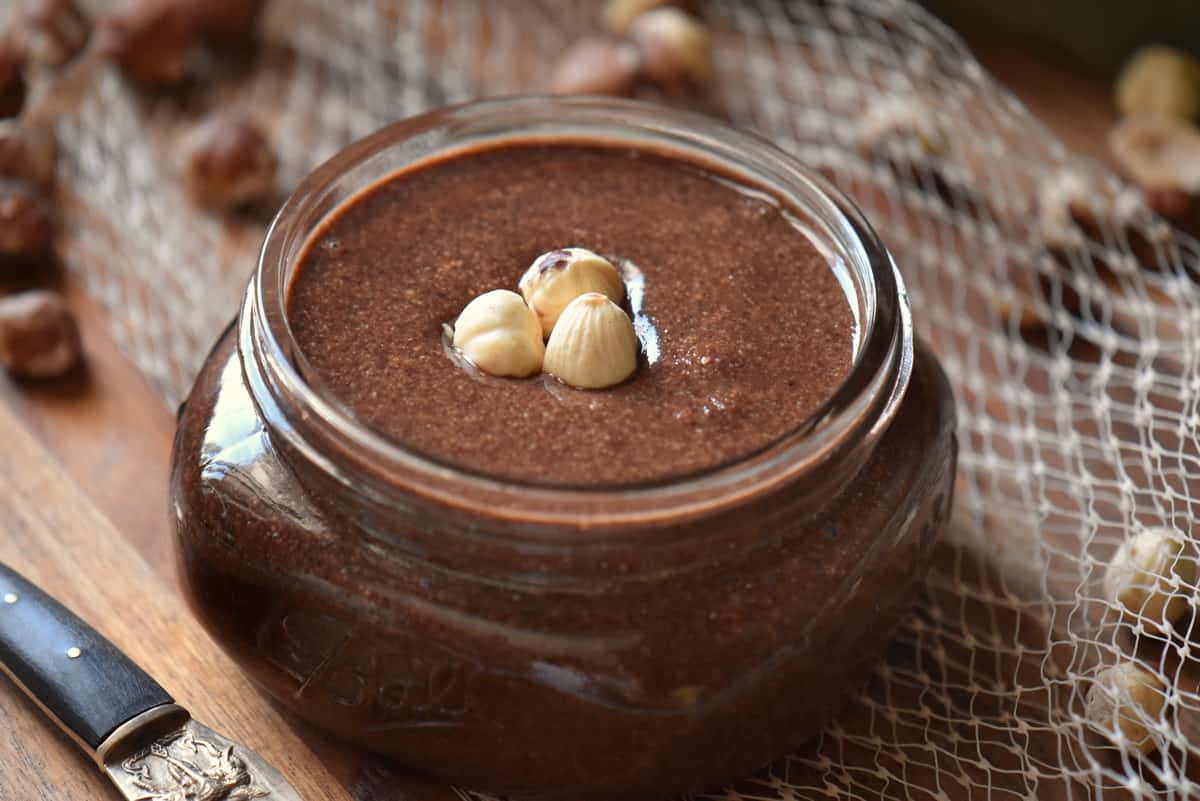
- Use a sterile jar and lid to maximize the storage period.
How do I store this spread?
Once you have attained the right consistency, transfer to sterile jars and allow to come to room temperature before refrigerating. Then you can refrigerate this chocolate spread for up to one month. Please note that the spread will harden slightly once refrigerated.
How to enjoy
Nut butter is great to spread on toast, swirl into your breakfast bowl, blend into your smoothie, or use as a filling in this braided sweet bread recipe. You can also enjoy a spoonful straight from the jar!
Hazelnut recipes
If you love the combination of chocolate with the earthy nutty flavor of hazelnuts, this chocolate biscotti recipe is for you. Hazelnuts also provide the perfect crunch in these Italian brutti ma buoni cookies. You might also want to try this decadent recipe for homemade baci chocolates. You can also make your own delicious homemade Baci chocolate. It’s a must-try!

Recipe inspiration
When I realized that Nutella is essentially a mixture of sugar and palm oil with little hazelnuts and cocoa, I decided to make my own.
A few years ago, I bookmarked this video from America’s Test Kitchen. I loved the fact that the focus is on the hazelnuts.
Over the years, I have made a couple of changes to the recipe, so I am republishing this recipe.
If you are looking for a chocolate spread recipe, it’s coming!
If on the other hand, you are looking for a simple nut spread, this hazelnut butter recipe is for you.
Please note that if you prefer a sweeter spread, increase the amount of coconut sugar.
THANKS SO MUCH for following and being part of the She Loves Biscotti community where you will find Simple & Tasty Family-Friendly Recipes with an Italian Twist.
And if you are new here, welcome! You may want to sign up for my weekly e-mail newsletter. You can unsubscribe any time you want.
Ciao for now,
Maria
★★★★★ If you have made this healthy chocolate nut butter spread, I would love to hear about it in the comments below and be sure to rate the recipe!
Recipe

Chocolate Hazelnut Butter Recipe
WANT TO SAVE THIS RECIPE?
Ingredients
- 2 cups roasted hazelnuts skins removed
- 2 tablespoons cocoa powder
- ⅓ cup coconut sugar
- ¼ teaspoon espresso powder optional
- ½ teaspoon pure vanilla extract
- ⅛ teaspoon salt
Instructions
- Add warm skinless hazelnuts to a food processor and process on low speed until creamy and smooth (about 5-10 minutes). You will need to scrape down the sides of your bowl every few minutes or so.
- Add the rest of the ingredients.
- Pulse and process for 30 seconds for the mixture to come together. Do not over-mix as the mixture can separate.
- Taste and adjust for sweetness.
- Pour mixture into sterile jars.
- Keep at room temperature or refrigerated for one month. Please note that the spread will harden once refrigerated.
Notes
- While processing the hazelnuts, allow your food processor to rest every few minutes to prevent the motor from overheating.
- Roasting the hazelnuts might seem like an extra step, but you will be compensated with a flavorful spread.
- When processing warm roasted hazelnuts, the breakdown of the oils occurs more quickly. It is therefore not necessary to add any oil since the hazelnuts release their own oils.
- Be patient. Depending on the type of food processor you have, it can sometimes take up to 10 minutes for the hazelnuts to transform into nut butter.
- Your food processor's strength will determine the final texture of the nut butter anywhere from smooth to slightly granular and nutty.
- Scraping down the sides throughout the process ensures an even transformation.
- For a sweeter nut butter, simply increase the amount of sugar.
- Use a sterile jar and lid to maximize the storage period.
Nutrition
This post was originally published on January 22, 2017, and republished on February 6, 2021 with updated content and photos.
Anna Fiala
I have the same story … grew up on Nutella but cut it out a few decades ago due to nutritional reasons.
I had leftover skinned toasted hazelnuts after Christmas so I tried your recipe the day you sent the link in your newsletter!!! My Breville Sous Chef food processor was up for the job and my spread came together in 5 minutes. So delicious and can enjoy a piece of toast with it without feeling sick and knowing it is mostly hazelnuts!!!
I do plan to make again but will boost the amount of cocoa and coconut sugar a bit and perhaps up the salt to bring out the amazing flavour even more.
Maria
Thanks for sharing Anna!
Peggy
Finally got around to making this and it is amazing! This will be a permanent staple in my house going forward.
Maria
How wonderful Peggy! Thanks for sharing!
Ur pal val
Just tried this… turned out great! Thanks for sharing
Maria
My pleasure! So glad you enjoyed it! Appreciate your comment 🙂
deb@glutenfreefarina
Pinned for later. Definitely trying this. Thanks.
Maria
Hope you like it Deb! Appreciate you dropping by ♥
Barbarito-Levitt Paula
I can tell from just reading your recipe that it captures the hazelnut – chocolate flavor combination perfectly. Although I was raised on Nutella, I stay away from it for exactly the reasons you mentioned. Grazie Maria, I still have some hazelnuts from Piemonte in the freezer and now know exactly what I shall do with the, Terrific Valentine’s Day gift!
Maria
Thank you Paula. Yes, these little jars of yumminess make fantastic gifts. Hazelnuts from Piemonte ♥♥♥ … that sounds amazing! Enjoy 🙂
Jess Wright @ The Cookbook Obsession
This sounds better than Nutella! and I’m a wee bit obsessed with it 🙂 I’m going to the store to buy hazelnuts just so I can make this today. O, Yum I can’t wait
Maria
Hope you like it Jess! We will save the Nutella for ultra special occasions 🙂 Thanks for taking the time to comment.
Diane
Miam!! Quelle belle recette, je l’essaie sans faute d’ici quelques jours 🙂
Maria
Merci Diane 🙂 C’est une recette vraiment facile… une autre alternative pour les petits déjeuners ♥
Nadia
This recipe is so easy! I’ve been wanting to make my own for a while. Can’t wait to try!
Maria
Thanks Nadia! I like to make my own so that I can control how much sugar and salt I add. Hope you like it! Thanks for taking the time to comment 🙂
Nicoletta @sugarlovespices
Yes! That’s a priority on our list! Your cocoa hazelnut butter looks amazing!
Maria
Thanks Nicoletta! Hope you like it! The food processor does all the work with this recipe! Appreciate you dropping by… hope you are having a great week-end 🙂