

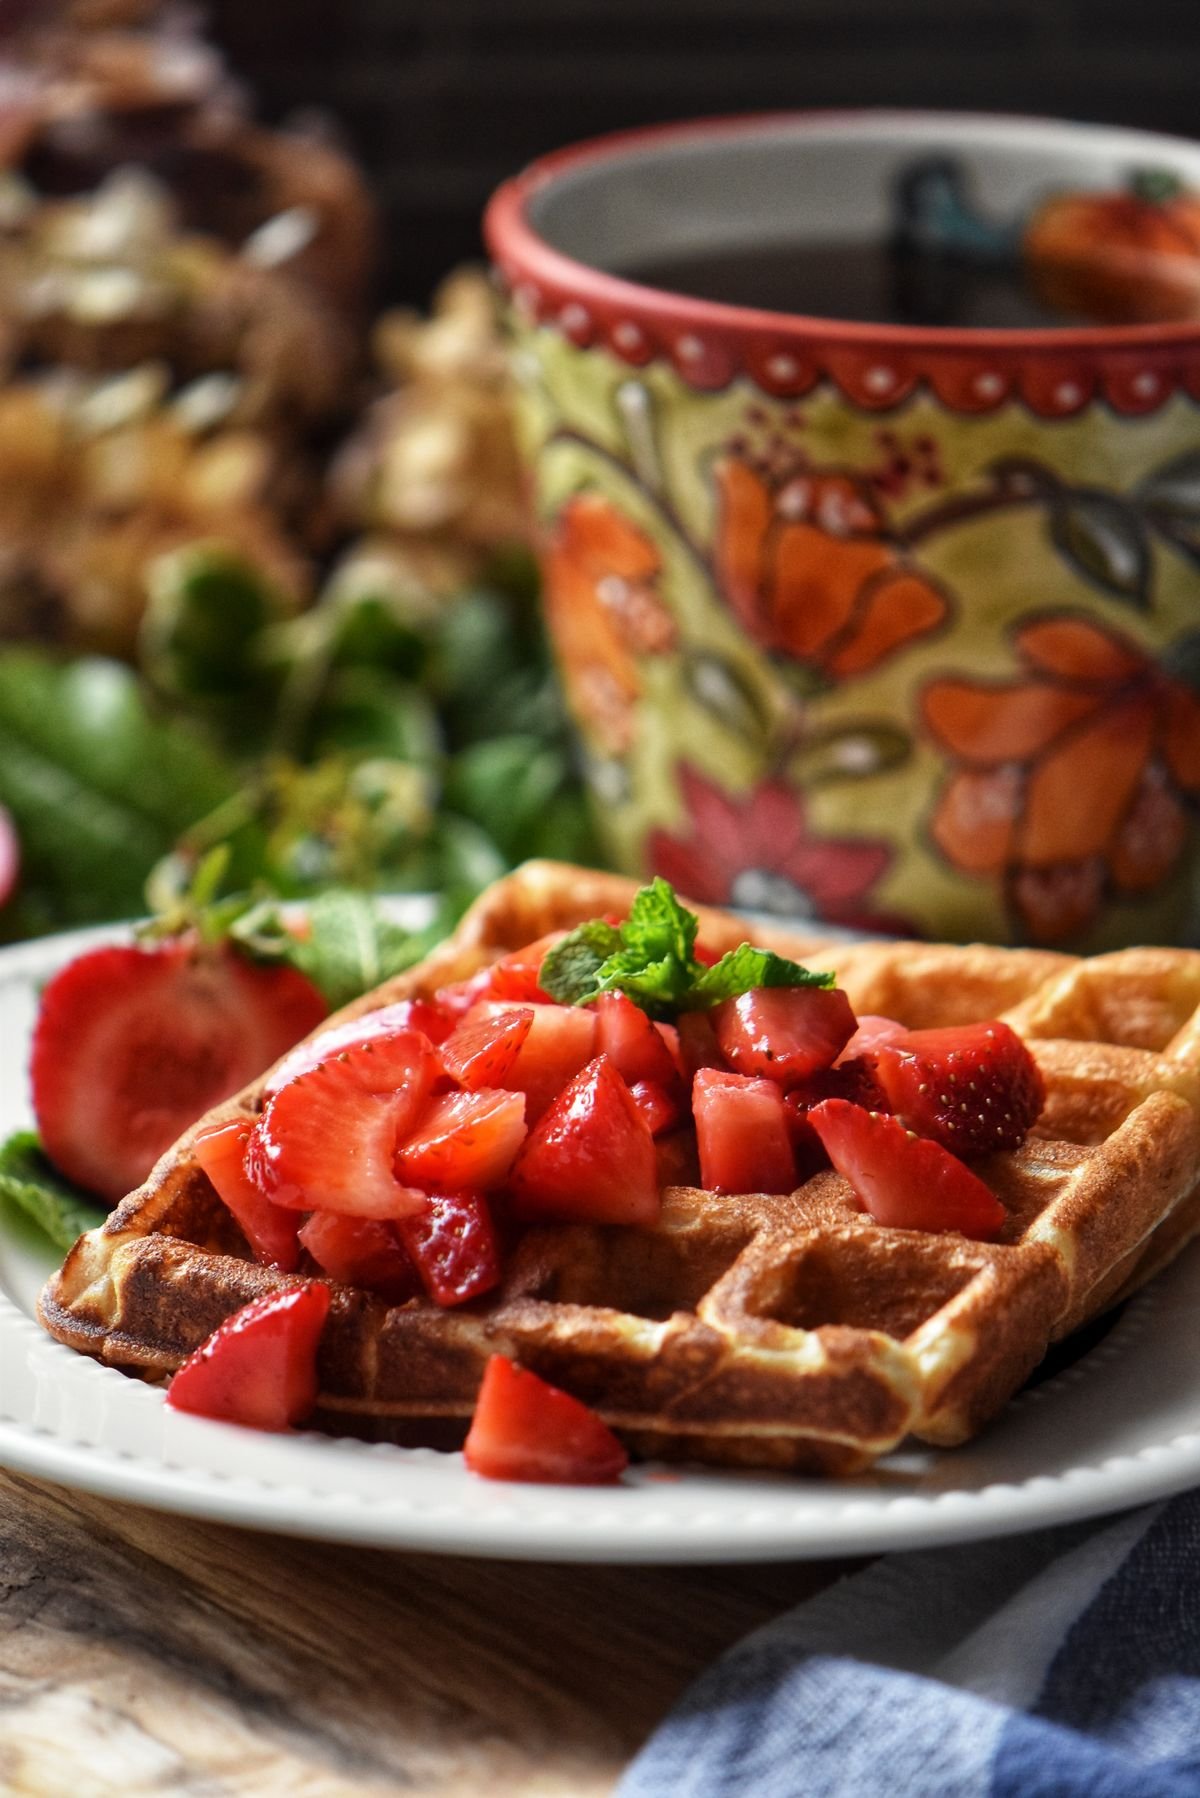
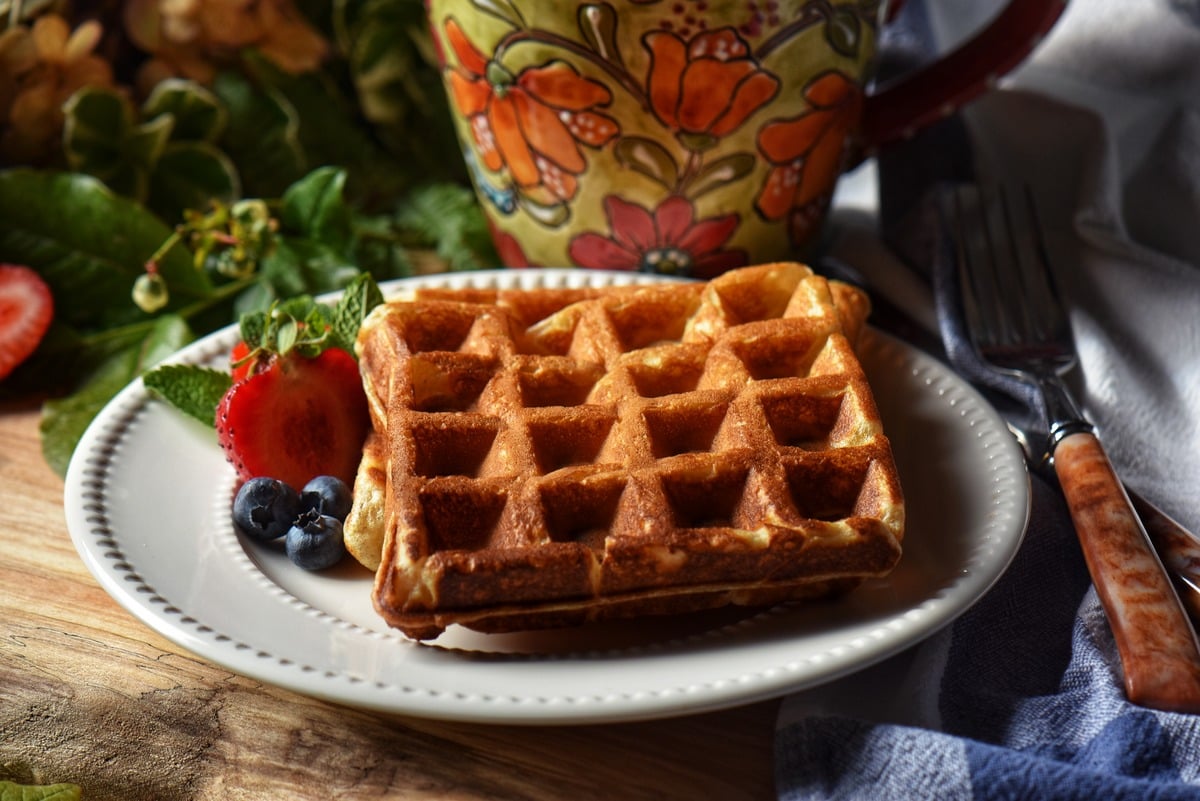
These Buttermilk Waffles are especially light and crispy because of the whisked egg whites. Perfect for breakfast, brunch, lunch or dessert. Garnish with your favorite waffle toppings and enjoy!
There are so many recipes, both sweet and savory, that feature buttermilk as the main ingredient.
Whether you are making homemade muffins, pancakes, soda bread, biscuits, scones, cake or even sweet bread, to name but a few baked goods, there is no denying that pleasant tangy flavor.
I probably know what you’re thinking, another buttermilk recipe, really?
Well, I apologize in advance. In my defense… look at them. Who can resist a classic waffle recipe with a light and fluffy texture? What’s there not to love?
Even more spectacular is the taste. I’ve tried buttermilk-less recipes, and I think they all have a noticeable aftertaste. So, you can be sure that if there’s a recipe that calls for buttermilk, it’s immediately placed in my “to do” folder.
These homemade waffles will quickly become a favorite Sunday brunch recipe.
The combination of baking powder, baking soda, beaten eggs and egg whites, along with a hot waffle iron, creates the steam, air and carbon dioxide gases to make crispy and fluffy buttermilk waffles every single time.

Instructions
Before we begin making this quick bread, preheat the oven to 200°F/95° C and set a wire rack on a baking sheet. This will keep the waffles warm while we finish cooking all the batter. It would be best if you also preheated your waffle iron.
- Combine the dry ingredients. Whisk together 2 cups of all-purpose flour, 1½ teaspoons of baking powder, 1 teaspoon of baking soda, ½ teaspoon of ground cinnamon and ½ teaspoon salt for at least 1 minute. Add ¼ cup of brown sugar and whisk. Make a well and set it aside.
- Whisk the liquid ingredients. More specifically, 3 egg yolks (room temperature), ½ cup of vegetable oil, 2 cups of buttermilk (room temperature), and 1 teaspoon of pure vanilla extract.
- Combine the wet and dry ingredients. Gently pour the wet ingredients into the well of dry ingredients. Use a wooden spoon or rubber spatula to combine. Stir gently until the dry ingredients are moistened. Do not overmix. Set aside.
- Whisk the egg whites. In the bowl of a stand mixture, whisk 3 egg whites (room temperature) until stiff.
- Gently fold in the egg whites with the batter.
- Pour about ¼ – ⅓ cup for each waffle. Follow the manufacturer’s instructions for exact amounts.
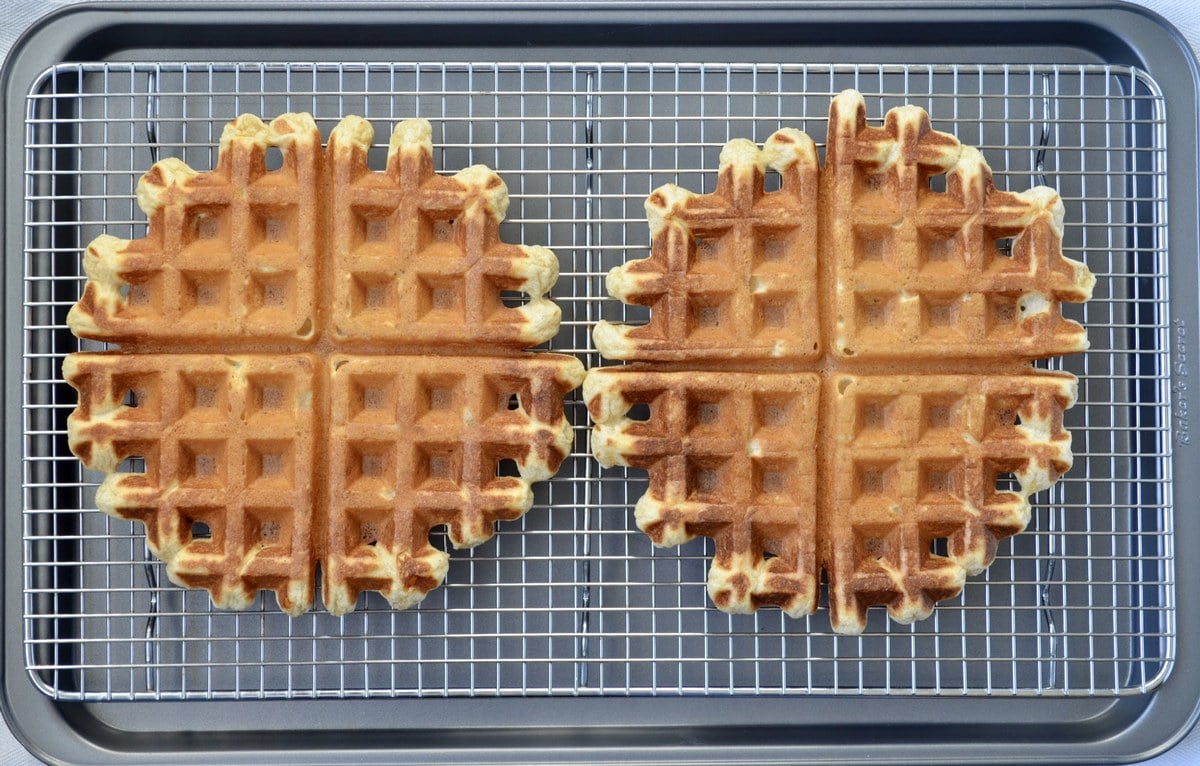
- Close the lid and cook. Cook the waffles for 2-3 minutes or until they become golden brown with crispy edges.
- Transfer to warm oven. If not serving right away, keep them warm until the rest of the batter is cooked.
- Serve with your favorite toppings.
Some buttermilk waffle toppings
- summer fruit salad
- winter fruit salad
- macerated strawberries
- frozen strawberry sauce
- blueberry sauce
- whipped homemade ricotta
- sweet ricotta
- yogurt
- maple syrup
- applesauce
- pear butter
- plum butter
- apple butter
Tips
- Whisk the dry ingredients properly. Whisking ensures even distribution of the baking powder and soda, which creates a perfectly leavened waffle.
- Do not overmix. When combining the liquid and dry ingredients, mix until just combined.
- Keep the waffles crispy. To keep the cooked waffles crispy, place each cooked waffle immediately on a cooling rack, in a single layer, set over a baking sheet pan, in a preheated oven (200°F/95° C). This allows the hot air of the oven to surround each waffle.
- Follow the manufacturer’s instructions for the best results. Since every waffle maker is slightly different, use their recommendations regarding the amount of batter to use and the cooking time.
- Watch for the steam. As the steam dissipates, it usually means the waffles are done.
- Use cultured buttermilk for the best results. Unfortunately, homemade buttermilk does not provide you with the same results.
- Make them healthier. Replace up to 1 cup of the all-purpose flour with whole wheat flour.
Can these buttermilk waffles be frozen?
Waffles freeze really well. Once they are at room temperature, please place them in a single layer on a parchment-lined sheet pan that fits in your freezer. Freeze for at least 4 hours or until completely frozen. Transfer to a freezable bag, label and freeze. Best if used within 3 months.
Can the batter be made ahead of time and refrigerated?
It is not recommended to refrigerate a waffle batter, especially one with egg whites. Once the baking powder and soda become wet, they are activated and should be cooked right away; otherwise, they are neutralized.

Recipe inspiration
My upbringing as an Italian-Canadian (sometimes it felt more like a Canadian-Italian) did not include this quick bread.
As a kid, my siblings and I would occasionally have the commercial brand whenever my mom would “give in” to our tantrums (probably watched too many commercials as a kid, I guess).
It was only when I became a mother that I was totally grateful to all the times my mom said no to the frozen “Eggo.” Have you ever taken a minute to read the nutritional label of this frozen food?
Well, I did and once I began to understand the effects of processed foods on our bodies, I decided on the spot to make an effort to eat healthier. Highly processed usually means a lot of salt, sugar and harmful fats. [source]
I’ve adapted this recipe from Martha Stewart Living, with one modification. I’ve substituted the butter with vegetable oil. On occasion, I’ve also replaced up to half the amount of all-purpose flour with whole wheat flour- depending on who I’m making it for.
I love to serve these light and crispy waffles with lots of seasonal fruits.
You might be looking at this and thinking, “I just don’t have the time.”
Well, that was also my thought process. But you know what, they’re ready in less than 30 minutes. I usually measure the dry ingredients the night before, making the whole process quicker in the morning.
They also freeze very well, so you can also enjoy them during the week, as a snack or light supper.
I hope you get the chance to try them!
THANKS SO MUCH for following and being part of the She Loves Biscotti community where you will find Simple & Tasty Family-Friendly Recipes with an Italian Twist.
And if you are new here, welcome! You may want to sign up for my weekly e-mail newsletter. This way, you won’t miss any of my new recipes.
Ciao for now,
Maria
★★★★★ If you have made this crispy waffles recipe, I would love to hear about it in the comments below and be sure to rate the recipe!
Recipe

Crispy Buttermilk Waffles
Equipment
- waffle iron
WANT TO SAVE THIS RECIPE?
Ingredients
- 2 cups flour 284 grams, all-purpose
- 1½ teaspoon baking powder
- 1 teaspoon baking soda
- ½ teaspoon ground cinnamon
- ½ teaspoon salt
- ¼ cup brown sugar
- 3 large eggs separated (room temperature)
- ½ cup vegetable oil
- 2 cups buttermilk room temperature
- 1 teaspoon vanilla extract
Instructions
- In a large mixing bowl, sift together dry ingredients. Whisk in the brown sugar. Set aside.
- In another bowl, whisk together egg yolks, oil, buttermilk, and vanilla. Gently combine with the dry mixture.
- In a medium mixing bowl, beat egg whites until stiff.
- Gently fold the egg whites with the batter.
- Heat the waffle iron. Spray with non-stick spray.
- Pour about ¼ - ⅓ cup for each waffle. Follow the manufacturer's instructions for exact amounts.
- Close the lid and cook the waffles for 2-3 minutes or until they become golden brown with crispy edges.
- Place on a cookie sheet on a rimmed baking pan and transfer to the oven to keep warm (set oven to 200℉/93℃).
- Repeat with the remaining batter.
- Serve with your favorite toppings.
Notes
- Whisk the dry ingredients properly. Whisking ensures even distribution of the baking powder and soda, which in turn creates a perfectly leavened waffle.
- Do not overmix. When combining the liquid and dry ingredients, mix until just combined.
- Keep the waffles crispy. In order to keep the cooked waffles crispy, place each cooked waffle immediately on a cooling rack, in a single layer, set over a baking sheet pan, in a preheated oven (200°F/95° C). This allows the hot air of the oven to completely surround each individual waffle.
- Follow the manufacturer's instructions for the best results. Since every waffle maker is a little different, use their recommendations when it comes to the amount of batter to use and the cooking time.
- Watch for the steam. As the steam dissipates, it usually means the waffles are done.
- Use cultured buttermilk for the best results. Unfortunately, homemade buttermilk does not provide you with the same results.
- Make them healthier. Replace up to 1 cup of the all-purpose flour with whole wheat flour.
Nutrition
This post was originally published on March 1, 2015, and republished on June 14, 2020, with updated content and photos. Thanks for sharing.
Cile
I’ve been making these for years and they are the best waffles ever. I highly recommend them. My husband likes his waffles very crispy so I keep them in the waffle iron a little longer after the timer goes off. Yum!!
Maria
How wonderful Cile! Thanks so much for taking the time to comment!
Chloe Anderson
Best waffle recipe I’ve used!
Maria
I am so thrilled to read this! Thanks for sharing Chloe!
Nathan Clark
My grandpa says that these are his favorite waffles now. Best in his life. I also agree! The waffles are crispy and light. Very tasty! 10/10 will make again.
Maria
How wonderful Nathan! Thanks so much for your kind words and for taking the time to share your experience with these Buttermilk Waffles, truly appreciate it 🙂
Kate
Great recipe! I substituted a gluten free cup for cup flour and they came out tender on the inside, crunchy on the out.
If you are gluten free and can somehow get an ironclad waffle maker, you will have great waffle success. I found mine on Craigslist!
Maria
So happy to hear this recipe worked out with gluten free flour. I am sure this information will be appreciated by anyone who is looking for a gluten free waffle recipe. Thanks so much for taking the time to share your experience with this recipe Kate, truly appreciate it 🙂
Karen
I made them today and my family loved it! This recipe is what I’ve been looking for! Thanks!
Maria
Lazy Sunday mornings are great for waffles! So glad you enjoyed the recipe! Thanks so much for taking the time to comment Karen 🙂 Have a great day!
PAT
I MADE THESE FOR BREAKFAST THIS MORNING & WE LOVED THEM. PUT THEM IN THE OVEN AS RECOMENDED & THEY WERE PERFECTLY CRISP WHEN I FINISHED COOKING & WE SAT DOWN TO EAT. I FROZE TWO THAT WERE LEFT & WE’RE PLANNING A WAFFLE ICECREAM SANDWICH LATER TONIGHT FOR DESSERT. YUM!
THANK YOU MARIA, ANOTHER GREAT RECIPE !!!
Maria
My pleasure Pat ♥ Saturday mornings are just perfect for waffles 🙂 Thanks so much for taking the time to comment, really appreciate it! Have a great week-end!