
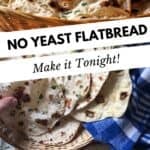
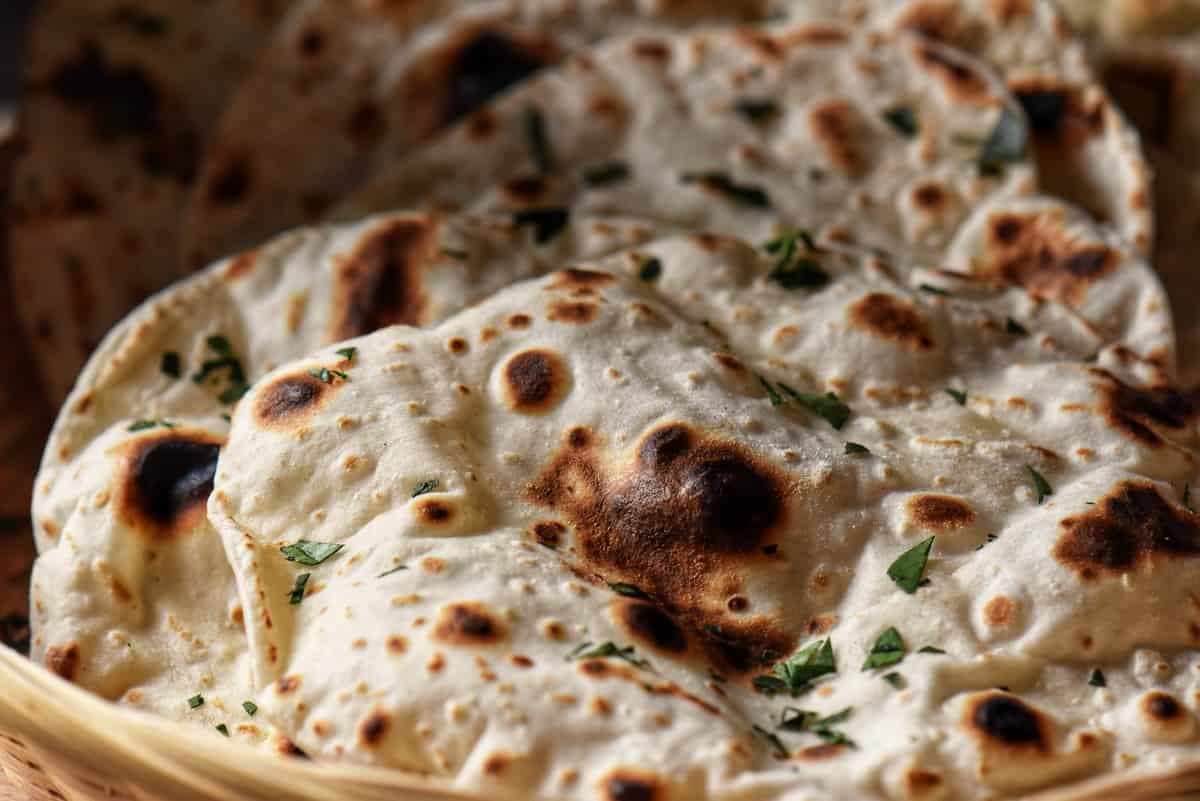
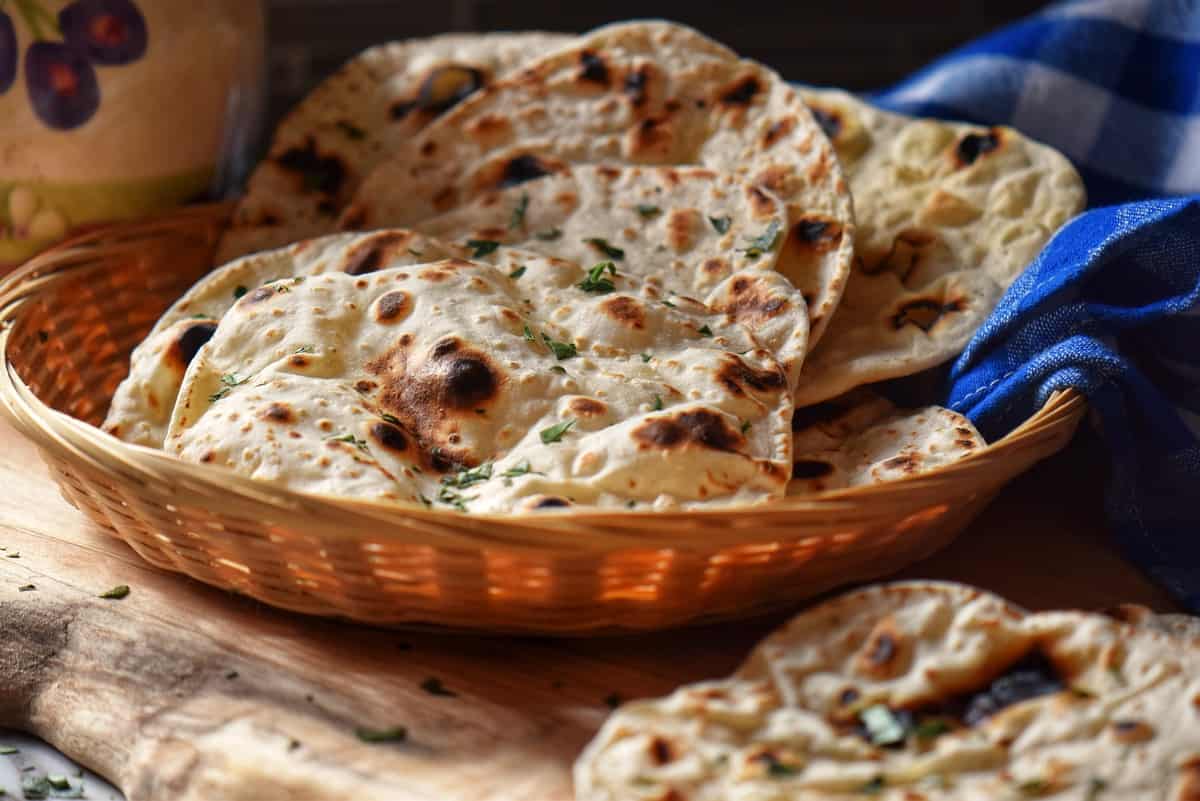
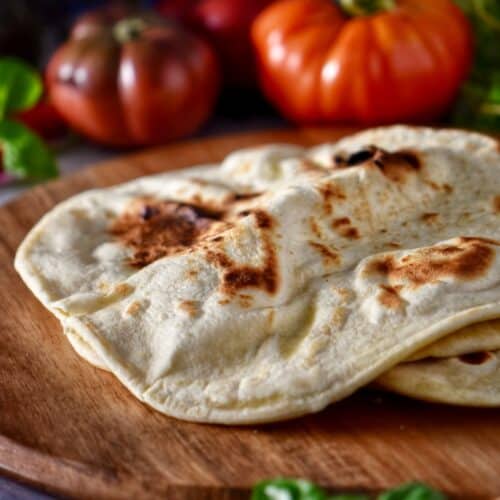
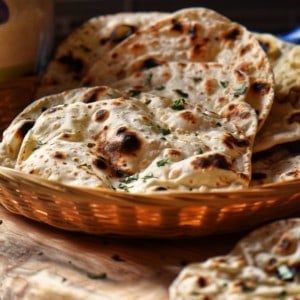
Create delicious flatbreads easily with my 4-ingredient Quick Flatbread recipe. No yeast is needed! Just flour, water, oil, and salt. Perfect for a speedy stovetop bread.
Flatbreads are considered one of man’s oldest foods.
Across cultures, flatbreads take on diverse forms and flavors, from the soft naan of India to the crispy lavash of Armenia and from the versatile pita to the unleavened matzo.
Even Italy boasts its variation - the beloved piadina.
Growing up in an Italian household, fresh homemade bread with yeast was a daily occurrence.
That is why I’m fascinated by the simplicity of making bread without leavening agents. With just flour, water, oil, and salt, you can create a delightful, no-yeast flatbread that’s quick to prepare.
While many may associate flour and water solely with making pasta like cavatelli, these simple ingredients are also perfect for homemade flatbreads.
Today, I’m sharing a quick, easy flatbread recipe that will become a household favorite.
Jump to:
How to Make Flour and Water Flatbread
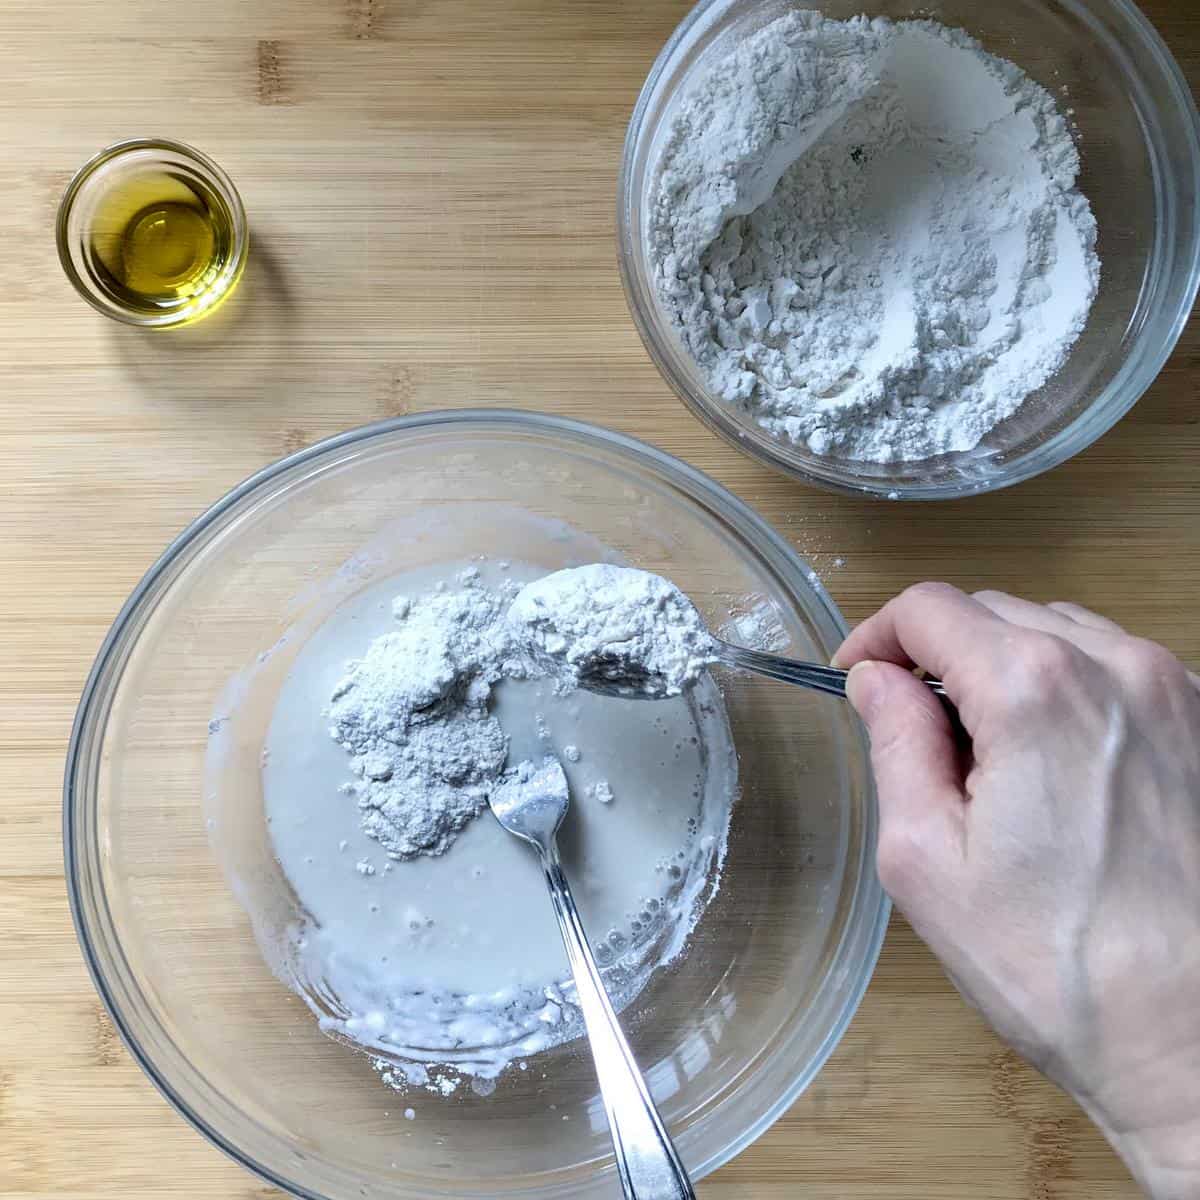
- In a small bowl, whisk 200 grams of flour with ⅛ teaspoon salt. Set aside.
- In a larger mixing bowl, place 100 mL of room-temperature water along with a couple of tablespoons of the dry ingredients.
- Start whisking together with a fork.
- Slowly incorporate a few more tablespoons of flour and keep whisking together.
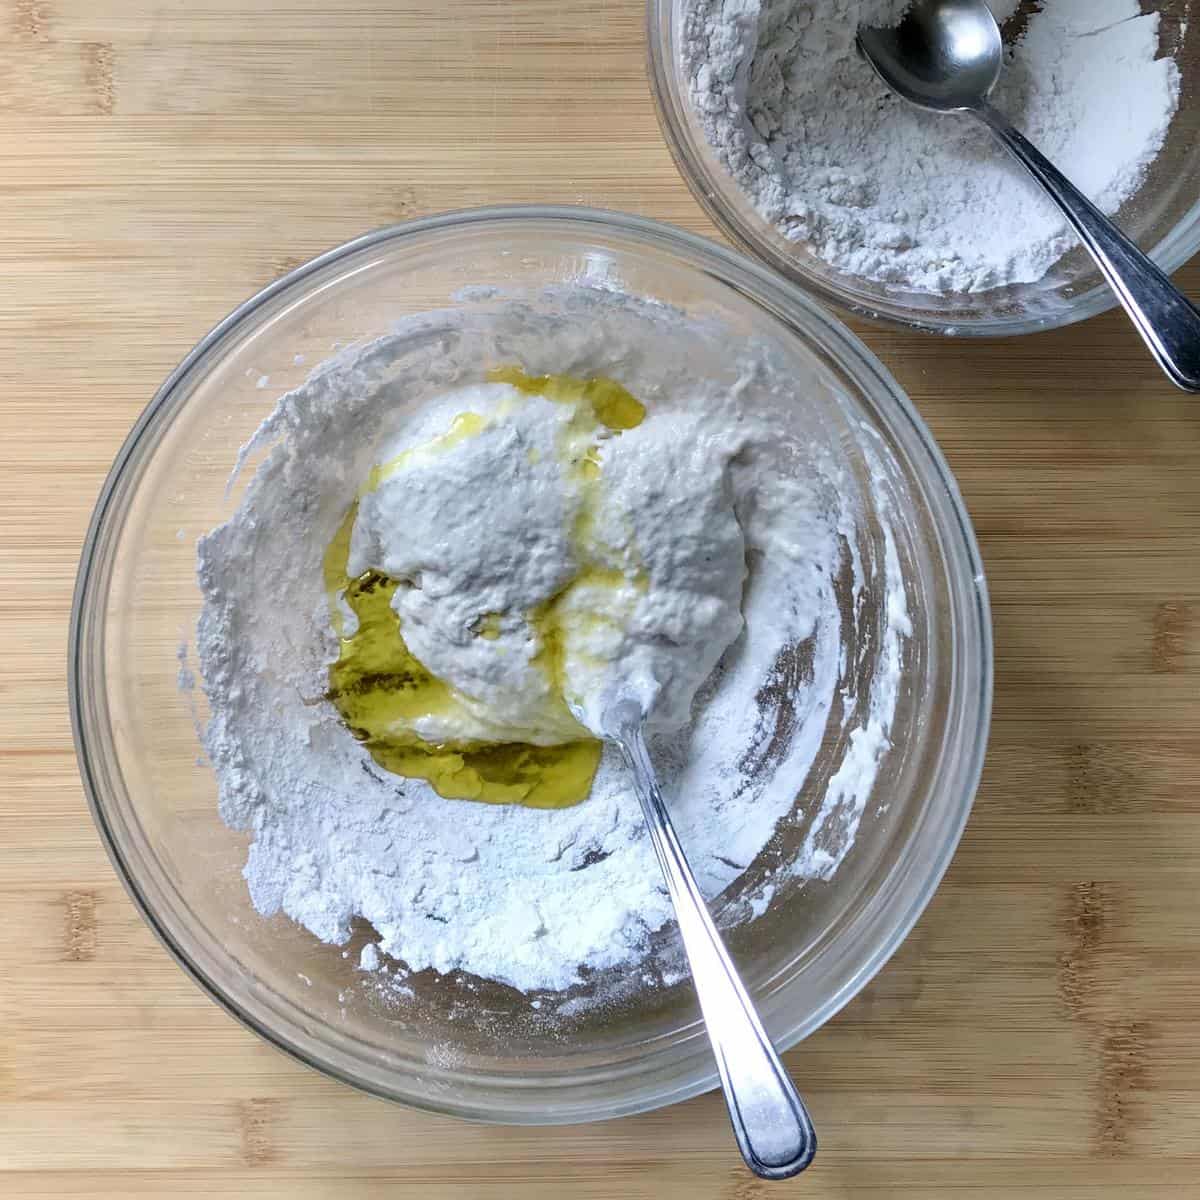
- Add 1 tablespoon of olive oil once half of the dry ingredients are incorporated.
- Use your hands to knead in the rest of the flour and add a few tablespoons at a time.
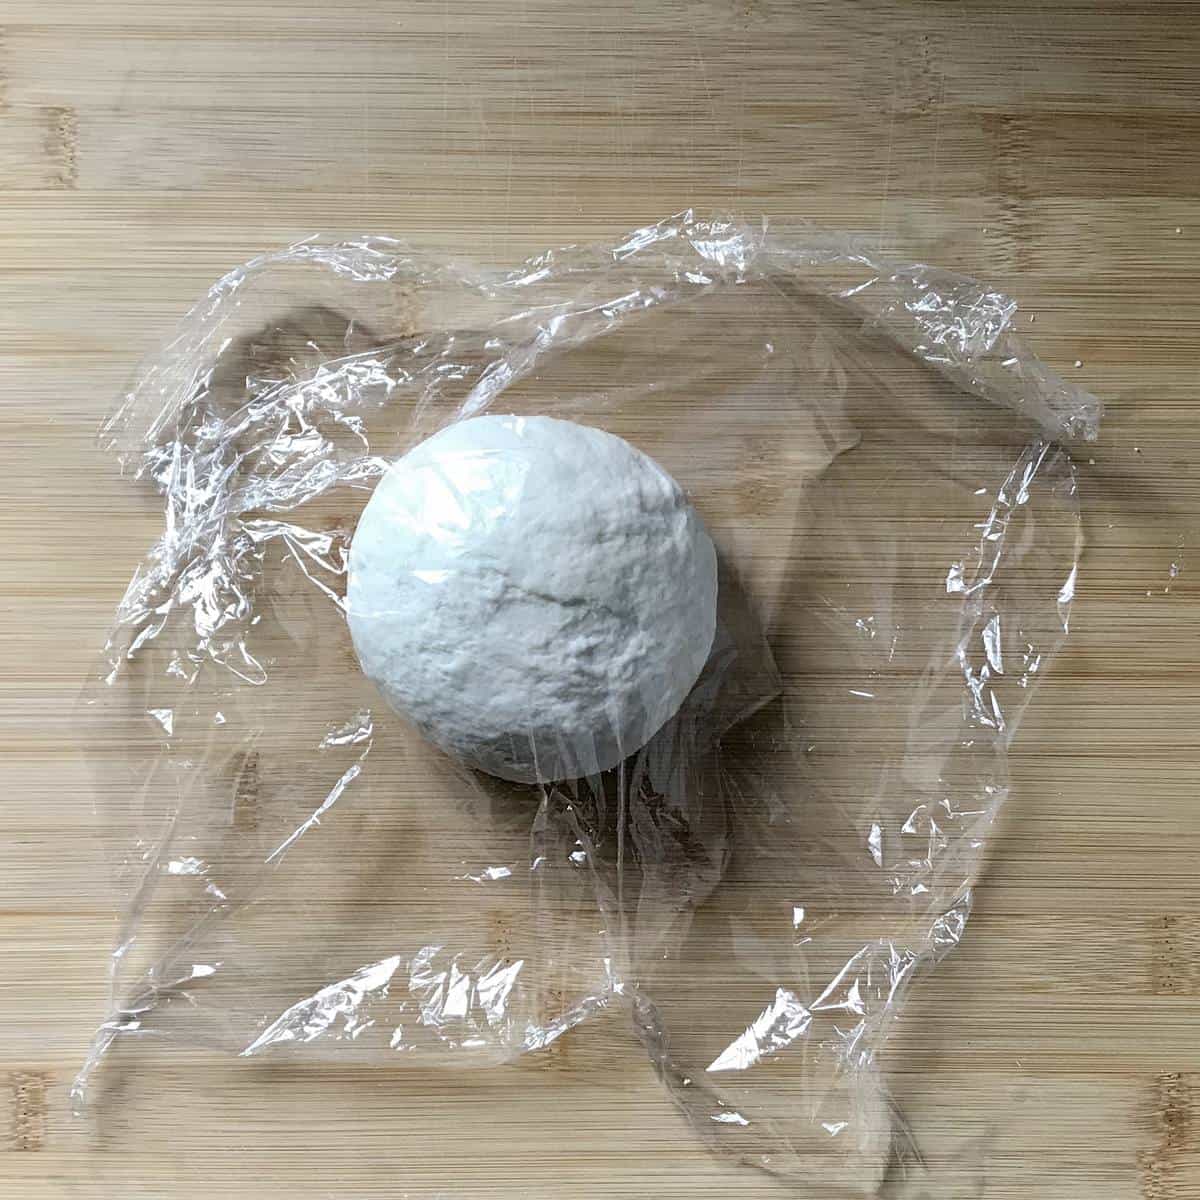
- Once you have a ball of dough, knead on a lightly floured wooden board for approximately 2-3 minutes.
- Cover with plastic film and allow to rest for about 30 minutes at room temperature.
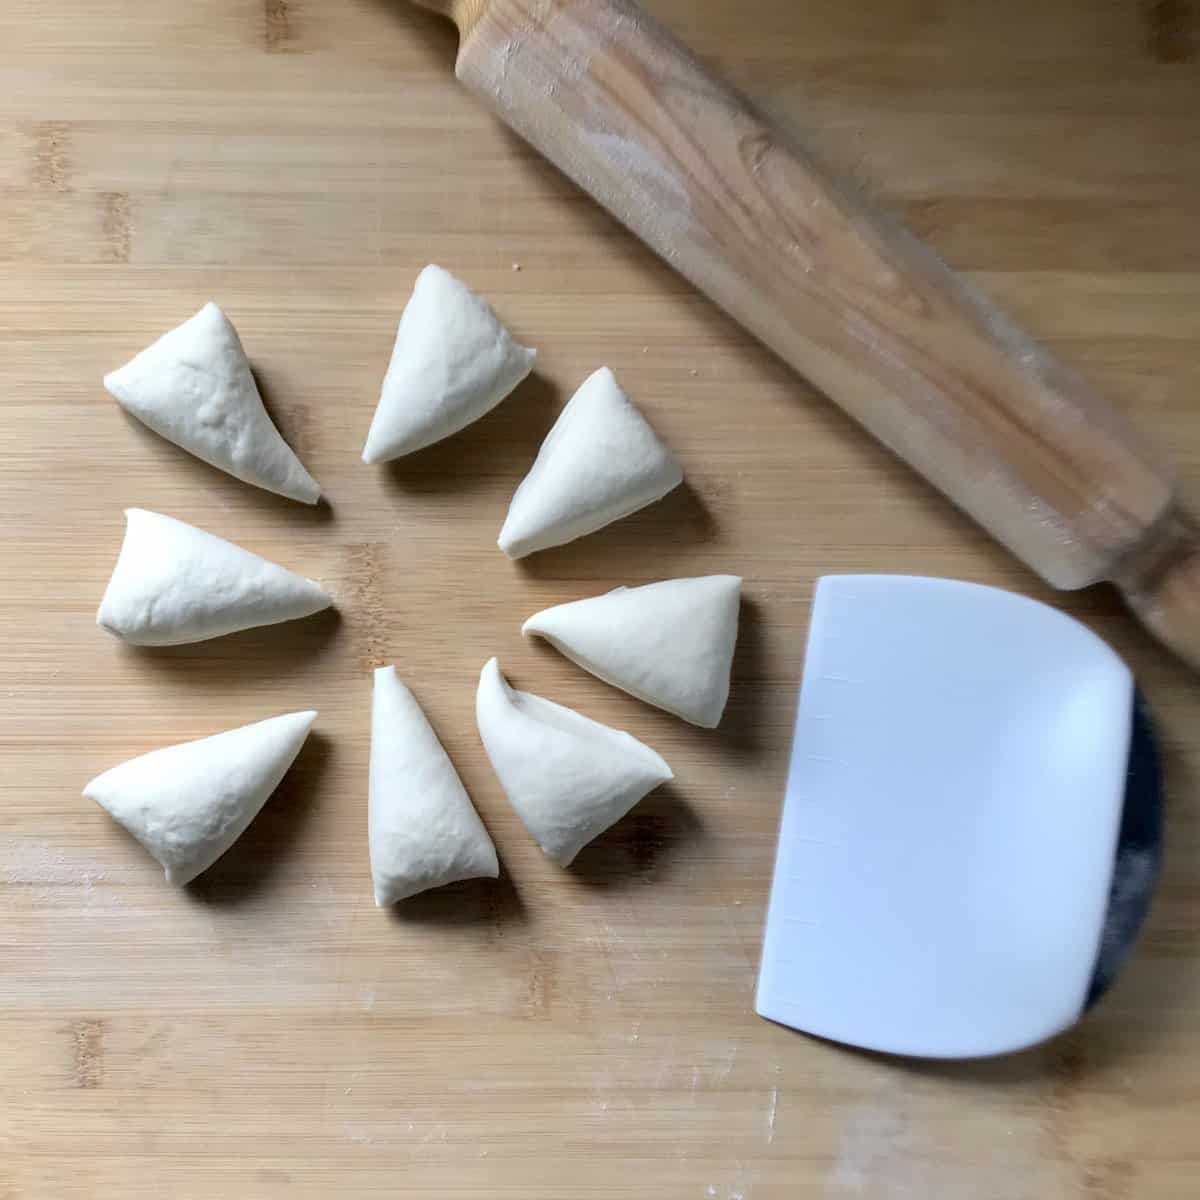
- Divide the dough into 8 sections. Roll out each section in a ball.
- Dust your wooden board and rolling pin lightly with flour.
- Roll out each ball of dough into a 6-inch round disc, about one-eighth inch thick.
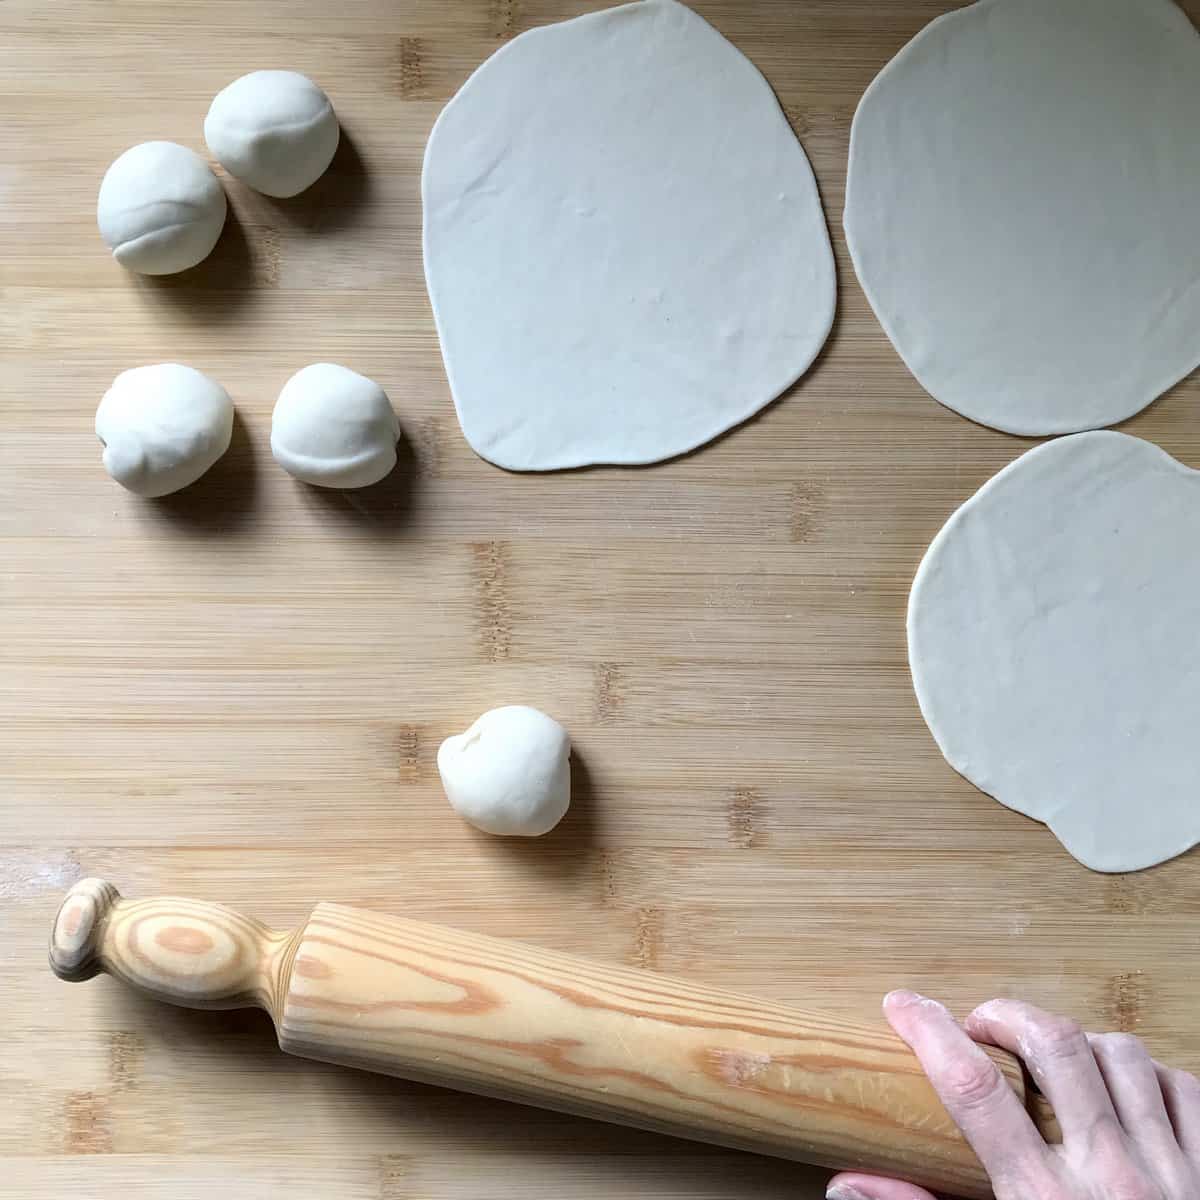
- Continue to roll out the other dough balls (discs can be stacked and separated with a piece of parchment paper).
- Heat a large grill pan, cast-iron skillet, or non-stick pan over medium-high heat.
- Add the rolled-out dough.
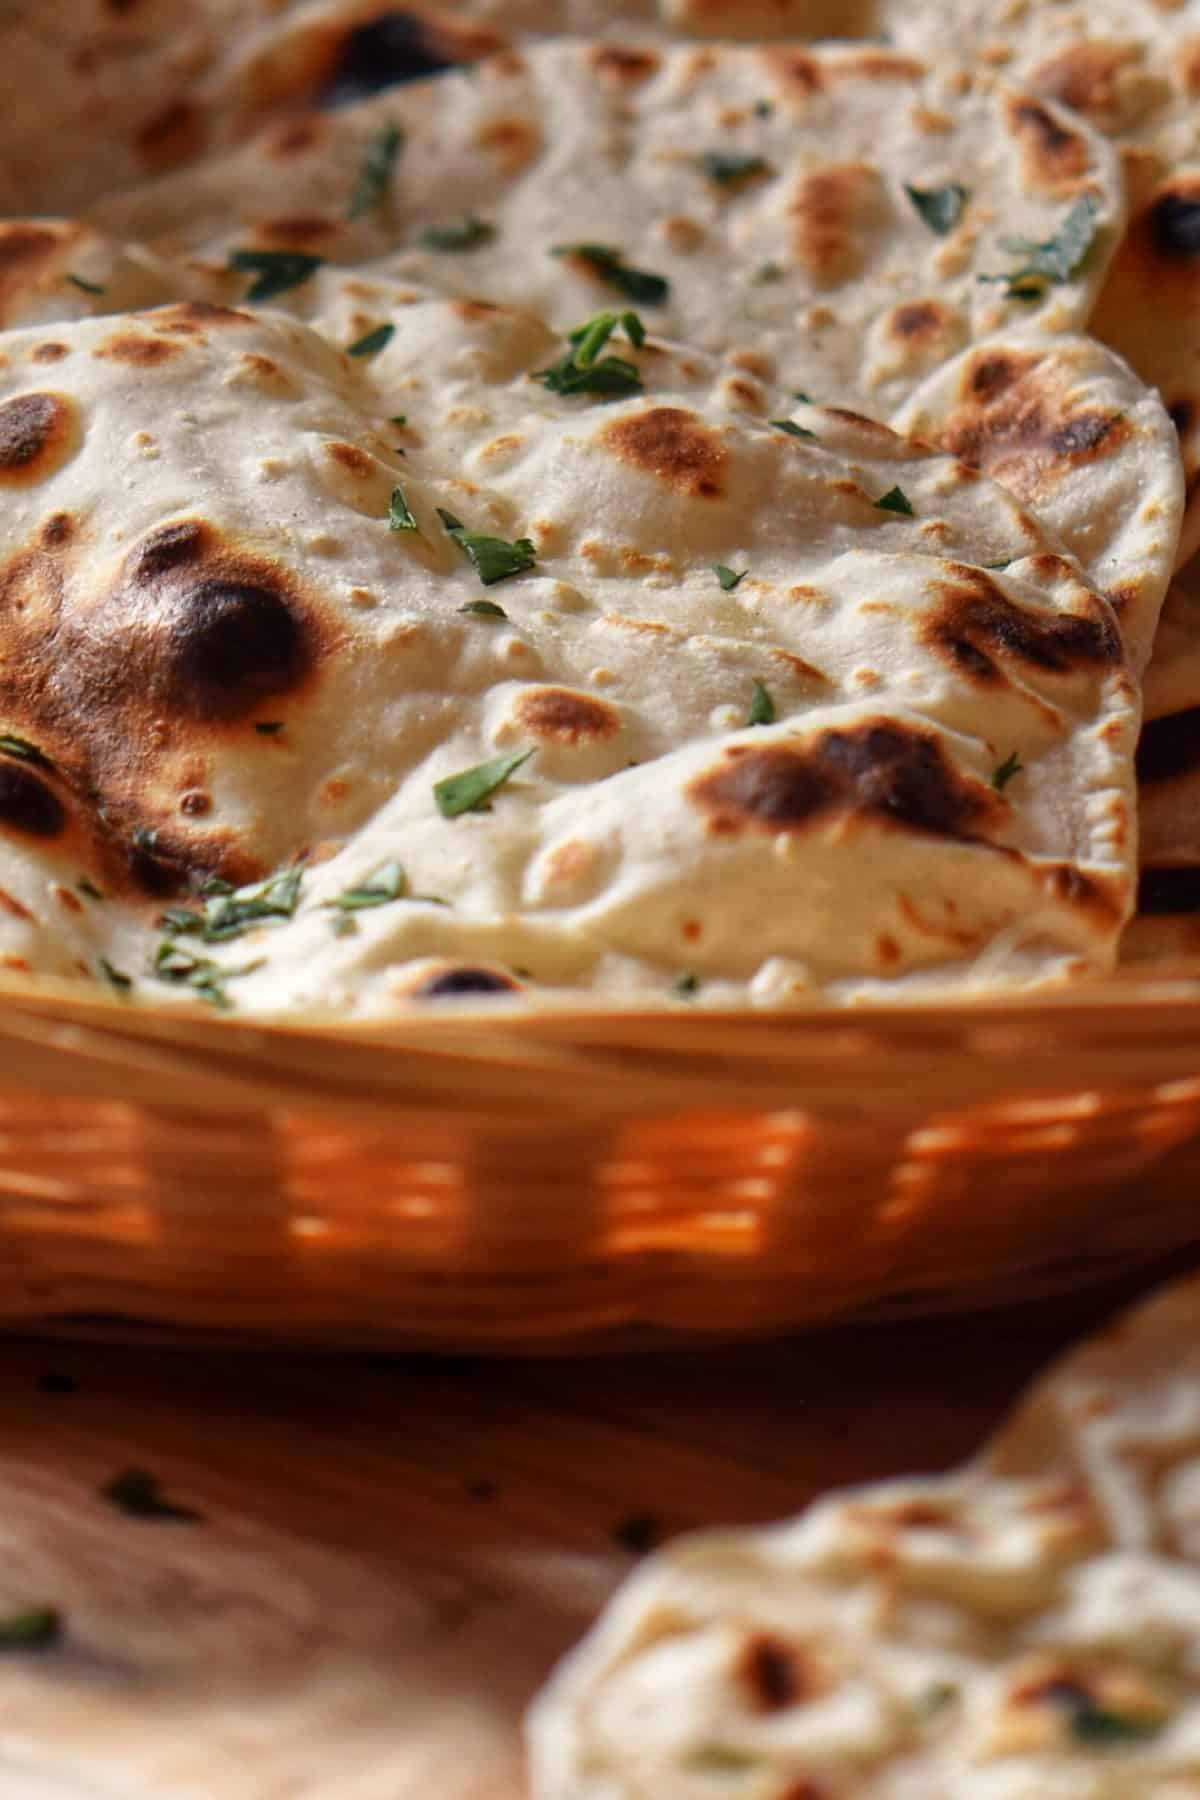
- Cook until light charring occurs, about 1- 2 minutes. Adjust heat accordingly.
- Turn over and continue to cook for an additional 1 minute.
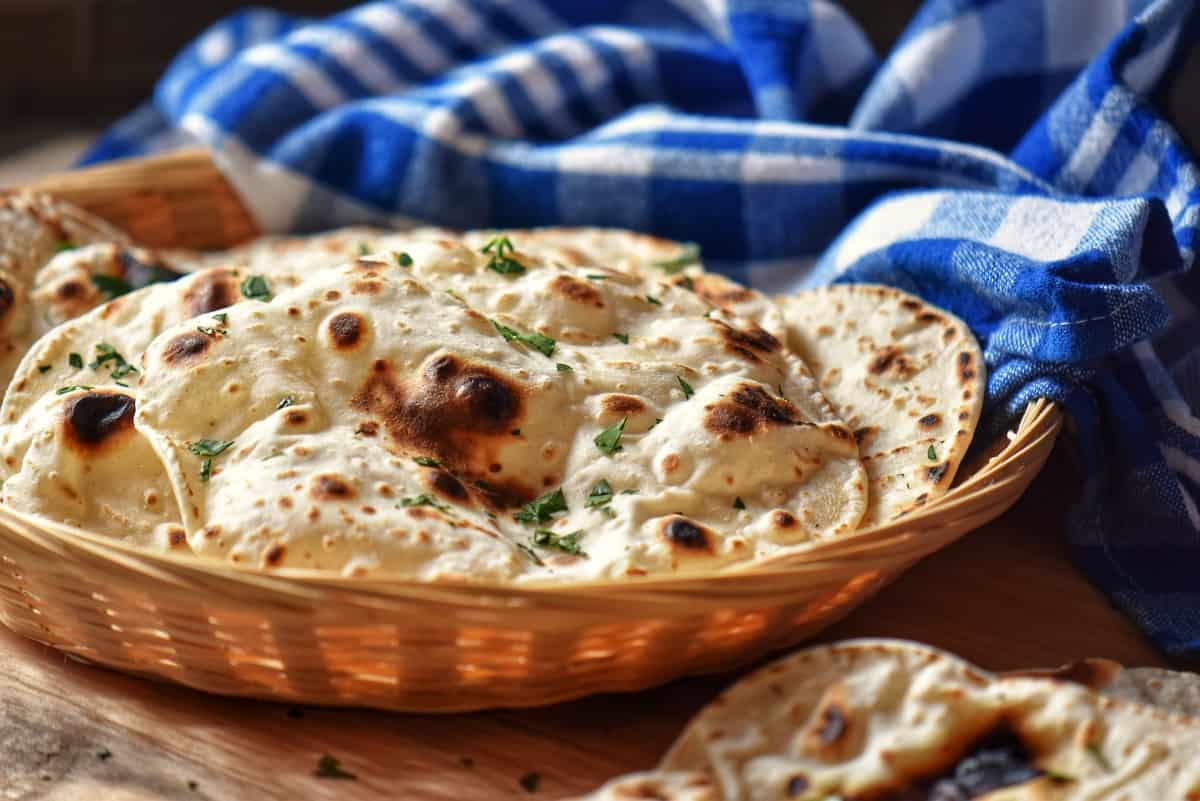
- Transfer stove-top flatbread to a baking sheet. Cover with a clean tea towel to keep warm. Repeat the same procedure for the rest of the dough.
- If desired, garnish with chopped Italian flat-leaf parsley.
Tips
- The idle time of 30 minutes makes the dough easier to roll out.
- Using a nonstick skillet means no need to use butter or oil.
- Adjust the heat to get nicely charred bread.
- Garnish with your favorite herbs and spices.
- This flatbread is best the day you make it.
- Store leftover bread in an airtight container or plastic bag.
Serving Suggestions
Wrap It Up: Use your flatbread as a versatile wrap or sandwich base. Fill it with grilled vegetables, falafel, chicken spiedini, or your choice of protein and veggies for a satisfying meal on the go.
Dunk and Dip: Cut your flatbread into strips or wedges and bake until crispy for homemade flatbread chips. Perfect for dipping into salsa, or your favorite creamy yogurt sauce.
Soup and Stew Sidekick: They also make a great accompaniment to soups, veal stew or Italian ciambotta.
Open-Faced Sandwich Base: Try using your flatbread as a base for open-faced sandwiches, like this irresistible tuna melt.
FAQ
Quick flatbread is an easy, no-yeast bread made from just flour, water, oil, and salt - perfect for when you want fresh bread without rising time or special equipment.
A cast-iron skillet, grill pan, or non-stick skillet all work great - just make sure it's hot so you get nice light charring on each side.
Quick flatbread can turn out dry or tough if the dough is too dry or overworked. The dough should feel soft and slightly tacky, not stiff. Avoid adding too much flour while kneading, and let the dough rest briefly before rolling to help relax the gluten and improve texture.
Once cooled, store your flatbreads in an airtight container or plastic bag at room temperature for a few days, or freeze with parchment between each piece.
Yeast-free Bread Recipes
Here are some easy-to-make yeast-free bread options.
Recipe Origins
I love collecting recipes, and one of my favorite sources has always been the local newspaper’s food section. It’s been a few years since I last added clippings to my collection, with so many recipes now easily accessible online.
This flatbread recipe dates back at least thirty years to my early days of learning how to make bread without yeast.
Recently, I stumbled upon it, and I just had to share it with all of you!
Enjoy!
THANKS SO MUCH for following and being part of the She Loves Biscotti community, where you will find Simple & Tasty Family-Friendly Recipes with an Italian Twist.
Ciao for now,
Maria
★★★★★ If you have made this no-yeast quick flatbread, I would love to hear about it in the comments below and be sure to rate the recipe!
Recipe
Quick Flatbread Recipe: Flour and Water
WANT TO SAVE THIS RECIPE?
Ingredients
- 200 grams all-purpose flour 1½ cups minus 1 tablespoon
- ⅛ teaspoon salt
- 100 mL water ⅓ cup + 2 tablespoons, room temperature
- 1 tablespoon olive oil extra virgin
- additional flour for dusting wooden board
Instructions
- In a small bowl, whisk the flour with ⅛ teaspoon of salt. Set aside.
- In a larger mixing bowl, place 100 mL of room temperature water along with a couple of tablespoons of the dry ingredients.
- Start whisking together with a fork.
- Slowly incorporate a few more tablespoons of flour and keep whisking together.
- When approximately half of the flour mixture is incorporated, add 1 tablespoon of oil.
- Use your hands to knead in the rest of the flour, a few tablespoons at a time.
- Once you have a ball of dough, knead for approximately 2-3 minutes.
- Cover with plastic film and allow to rest for about 30 minutes at room temperature. It can also be refrigerated overnight.
- Cover ball of dough with plastic film. Allow to rest for about 30 minutes at room temperature.
- Divide the dough into 8 sections. Roll out each section in a ball.
- Dust wooden board and rolling pin lightly with flour.
- Roll out each ball of dough into a 6 inch round disc -about ⅛ inch thick.
- Continue to roll out the other balls of dough (discs can be stacked, separated with a piece of parchment paper).
- Heat a large grill pan, cast-iron skillet or non-stick pan over medium-high heat.
- Add the rolled out dough.
- Cook until charring occurs, about 1- 2 minutes. Adjust heat accordingly.
- Turn over and continue to cook for an additional 1 minute.
- Transfer stovetop flatbread to a baking sheet. Repeat the same procedure for the rest of the dough.
- Serve immediately (while still warm) with your favorite fillings.
Video
Notes
- The idle time of 30 minutes makes the dough easier to roll out.
- By using a nonstick skillet, there is no need to use butter or oil.
- Adjust heat to get a nicely charred bread.
- Garnish with your favorite herbs and spices.
- This flatbread is best the day you make it.
- Store leftover bread in an airtight container or plastic bag.
- 1 serving = one 6 inch flatbread
Nutrition
I originally published this post on March 29, 2020, and republished it on February 15, 2024, with updated content. Thanks for sharing.
Josie Perri
Amazing! I halved the recipe and they came perfect! I made my own garlic butter and parsley sauce. Delish! Thank you!
Maria
Thanks so much for sharing Josie!
Christine Virelli- Kuhens
I’ve made these twice so far and will continue to make these..My first batch made the recipe a lil thick because I didn’t follow the directions as Maria suggested…will I ever learn?!
This batch today was excellent tho and I more than likely will never buy from the store this Quick Flatbread ever again..Today I made tortillas and they were excellent…
Thank you so much
Maria
Maria
My pleasure Christine. Thanks so much for sharing ♥
Bianca
What a great little recipe! These turned out so well. We loved them so much we just ate them as they were, no filling required! Yum. Will definitely be making these again.
Maria
Thanks for taking the time to share Bianca! Aren’t they just the best?!?
Grace
I accidentally omitted the oil, and divided into 6 instead of 8 pieces. (whoops). Still turned out great! I added more water to use up the flour and probably tripled the salt, but still wanted a little more. They opened up kind of like a pita, ready to be filled with the lentil filling I made. 😊 Super easy and delicious.
Maria
Thanks for sharing Grace!
Grace
Forgot one more note, I did half whole wheat and half bread flour 😊