
How to caramelize onions without any added sugar, just onions, olive oil, and patience. A retired dietitian’s go-to method for a low-glycemic condiment that’s perfect on focaccia, hash browns, or pizza.
The magic of caramelized onions lies in their ability to enhance a wide range of dishes by adding a touch of sweetness and savory goodness.
This sweet, savory taste pairs well with various ingredients, making them a versatile addition to your culinary repertoire.
Whether you’re stirring them into a comforting potato leek soup or folding them into a hearty casserole, these caramelized gems will take your creations to the next level.
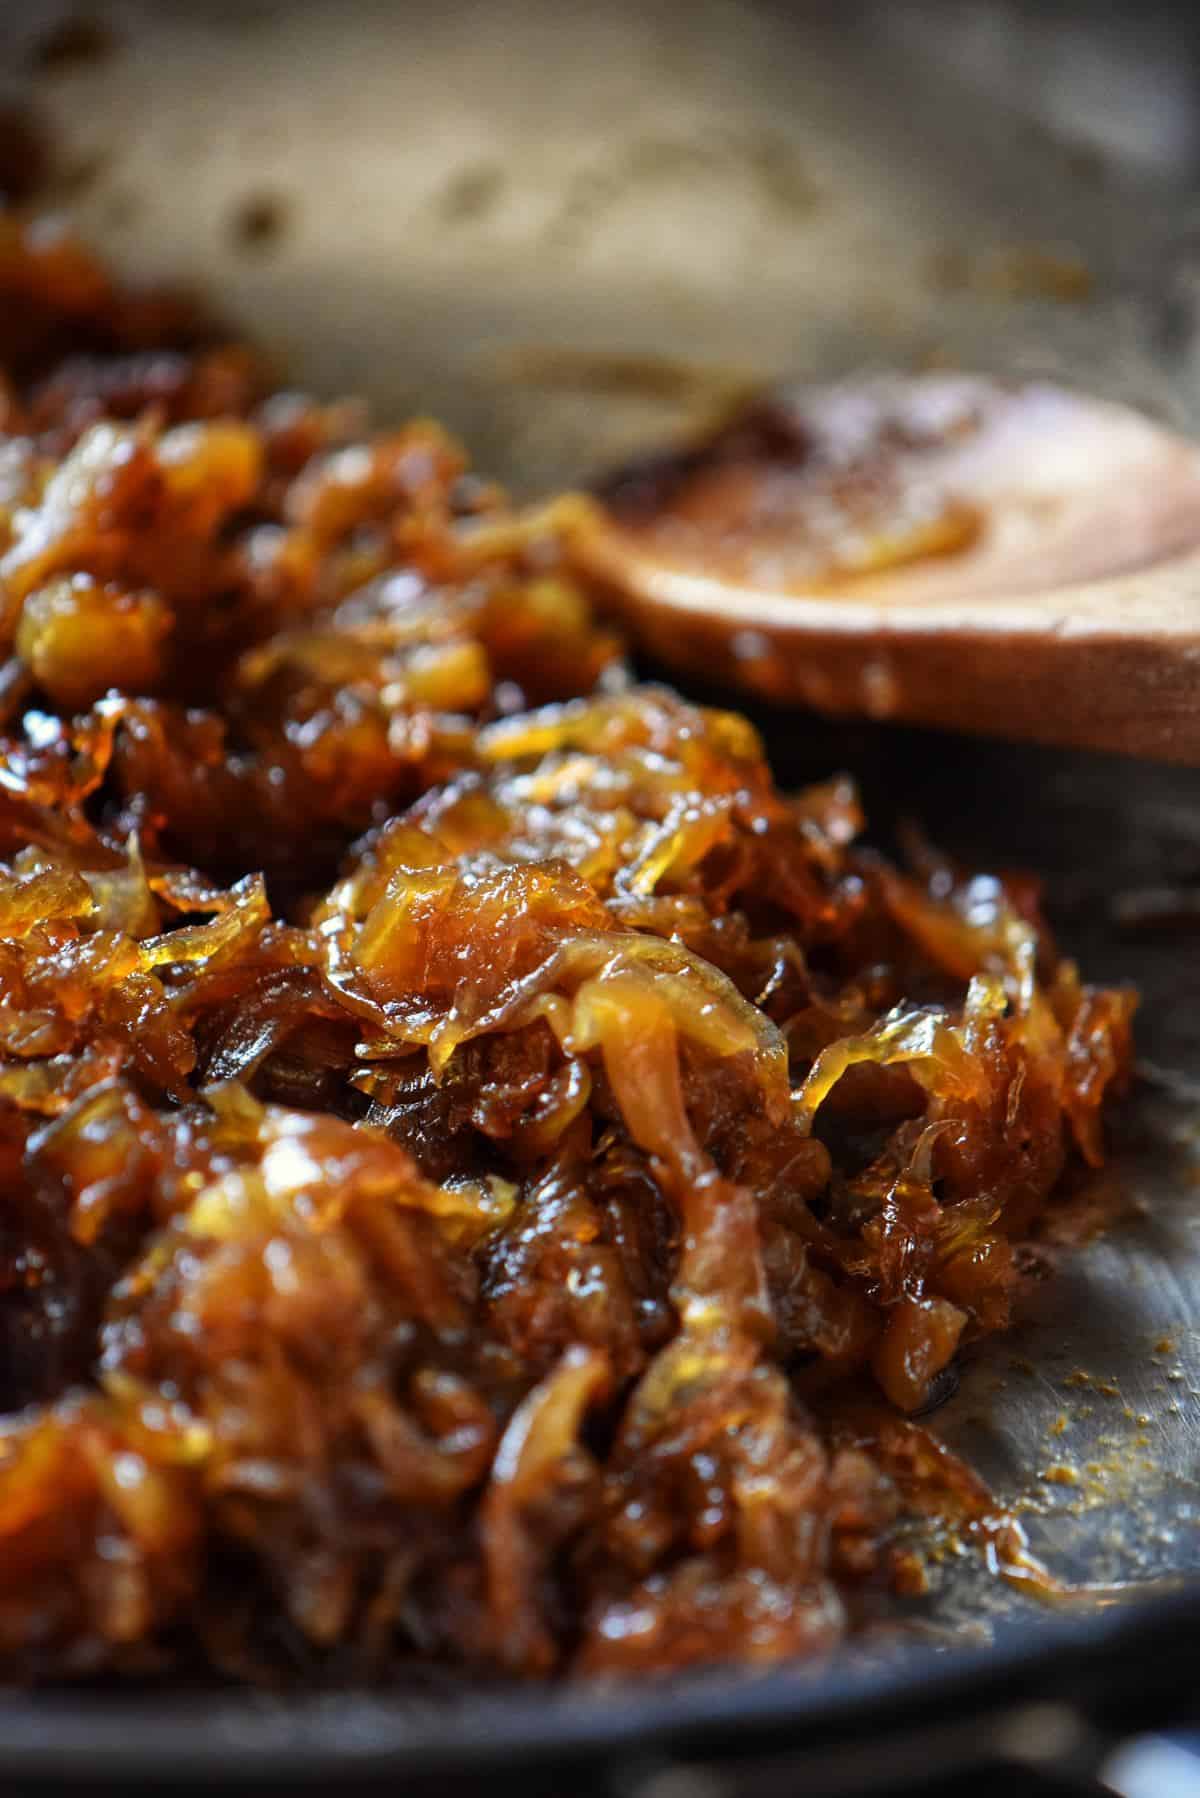
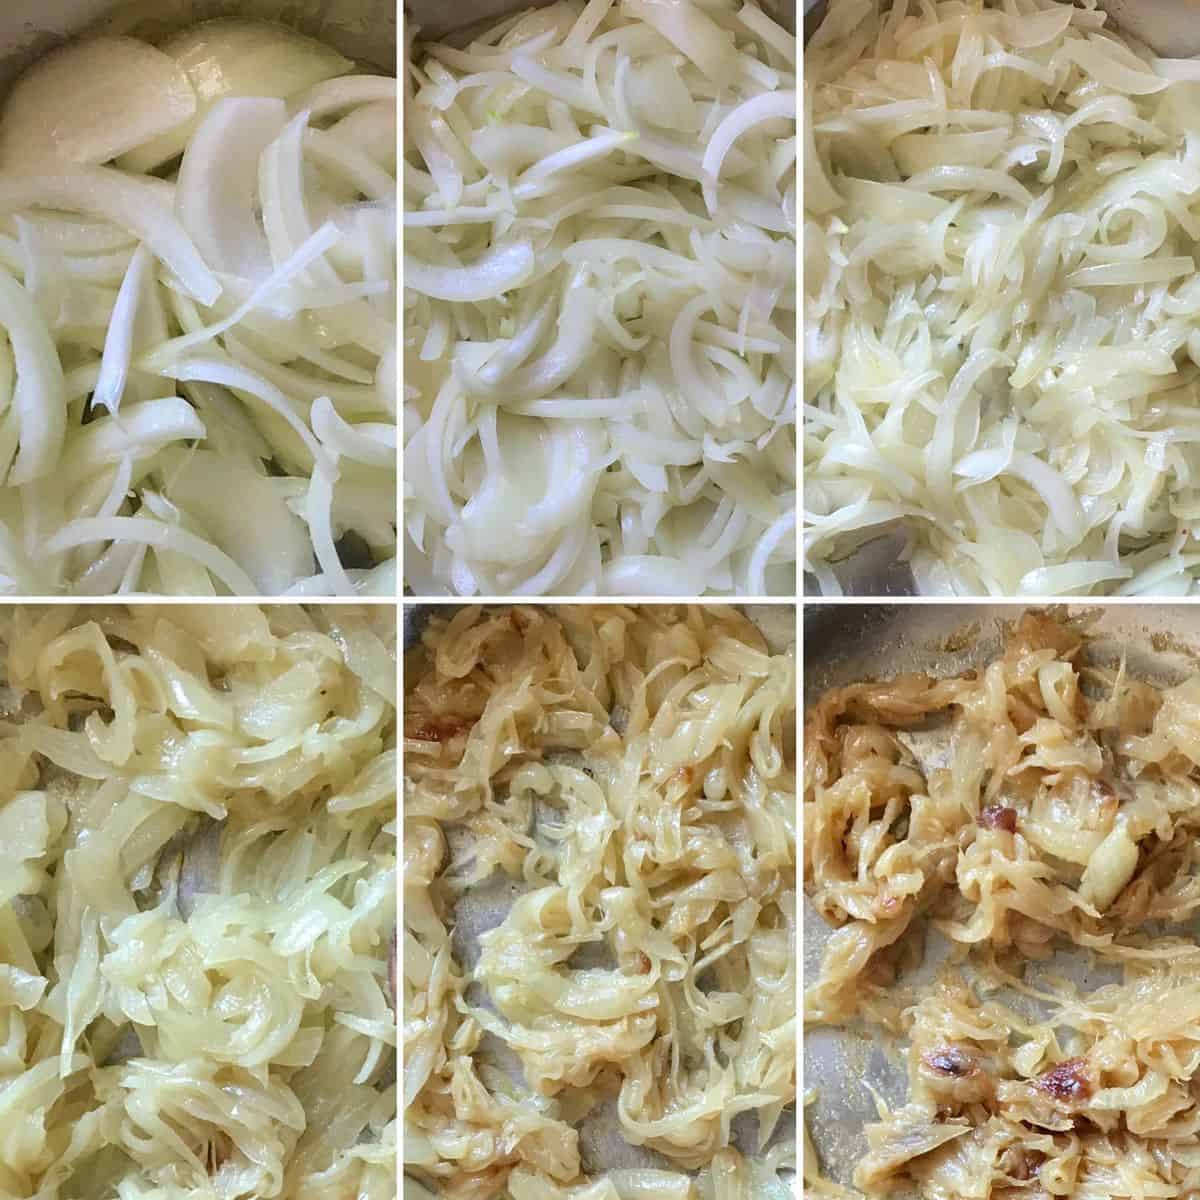
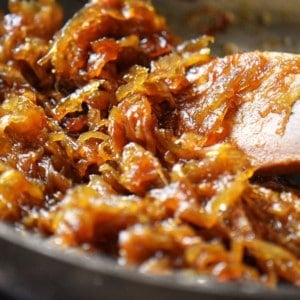
As you will see, caramelized onions undergo a stunning transformation in color.
As a retired dietitian, I love how this simple process of caramelizing onions can be a healthier alternative to adding excessive amounts of salt, sugar, or unhealthy fats to dishes.
The humble white onions turn a glorious golden brown, adding visual appeal to any dish.
Seeing those beautifully caramelized strands is a feast for the eyes and can instantly elevate the presentation of your meals.
Slow cooking is the key to this process for the natural sugars to brown and contribute to a major taste transformation. Let’s make them together!
Jump to:
Quick Overview
- Prep Time: 10 minutes
- Cook Time: 45 to 60 minutes
- Total Time: 1 hour to 1 hour 10 minutes
- Yield: About ¾ cup
- Special Touch: No sugar needed at all. Low heat and patience coax out the onions’ own natural sugars, while deglazing with stock or wine (instead of plain water) picks up extra flavor from the browned bits in the pan.
- Dietary Note: Naturally low glycemic index. Onions are a non-starchy vegetable, making this a diabetic-friendly way to add sweetness to a dish without added sugar.
- Serving Suggestions: Pile onto focaccia, tuck into a piadina sandwich, fold into a potato frittata, or spoon over crispy hash browns.
Prep the Onions
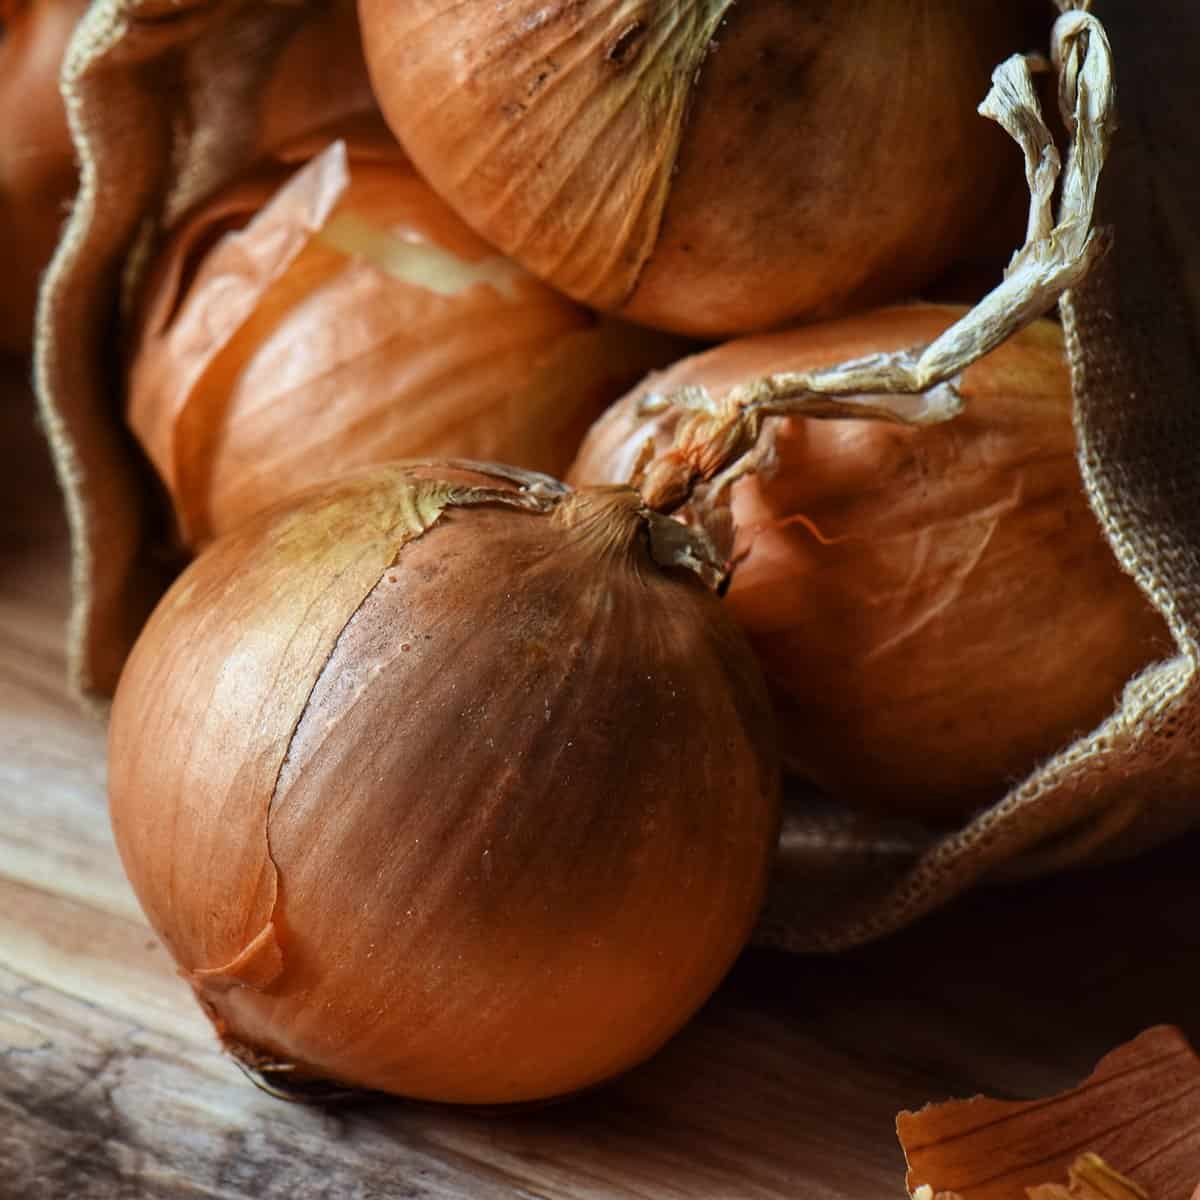
There is only one food item to prep for this recipe: one pound of yellow onions. If you don’t have a scale, that’s about three medium onions.
That’s it!
Although slicing one pound of raw onions might sound like a lot, you will see that by the end of the caramelization process, on average, this recipe yields approximately ¾ of a cup.
So please pick up your sharpest knife, perhaps a set of goggles, and let’s start chopping.
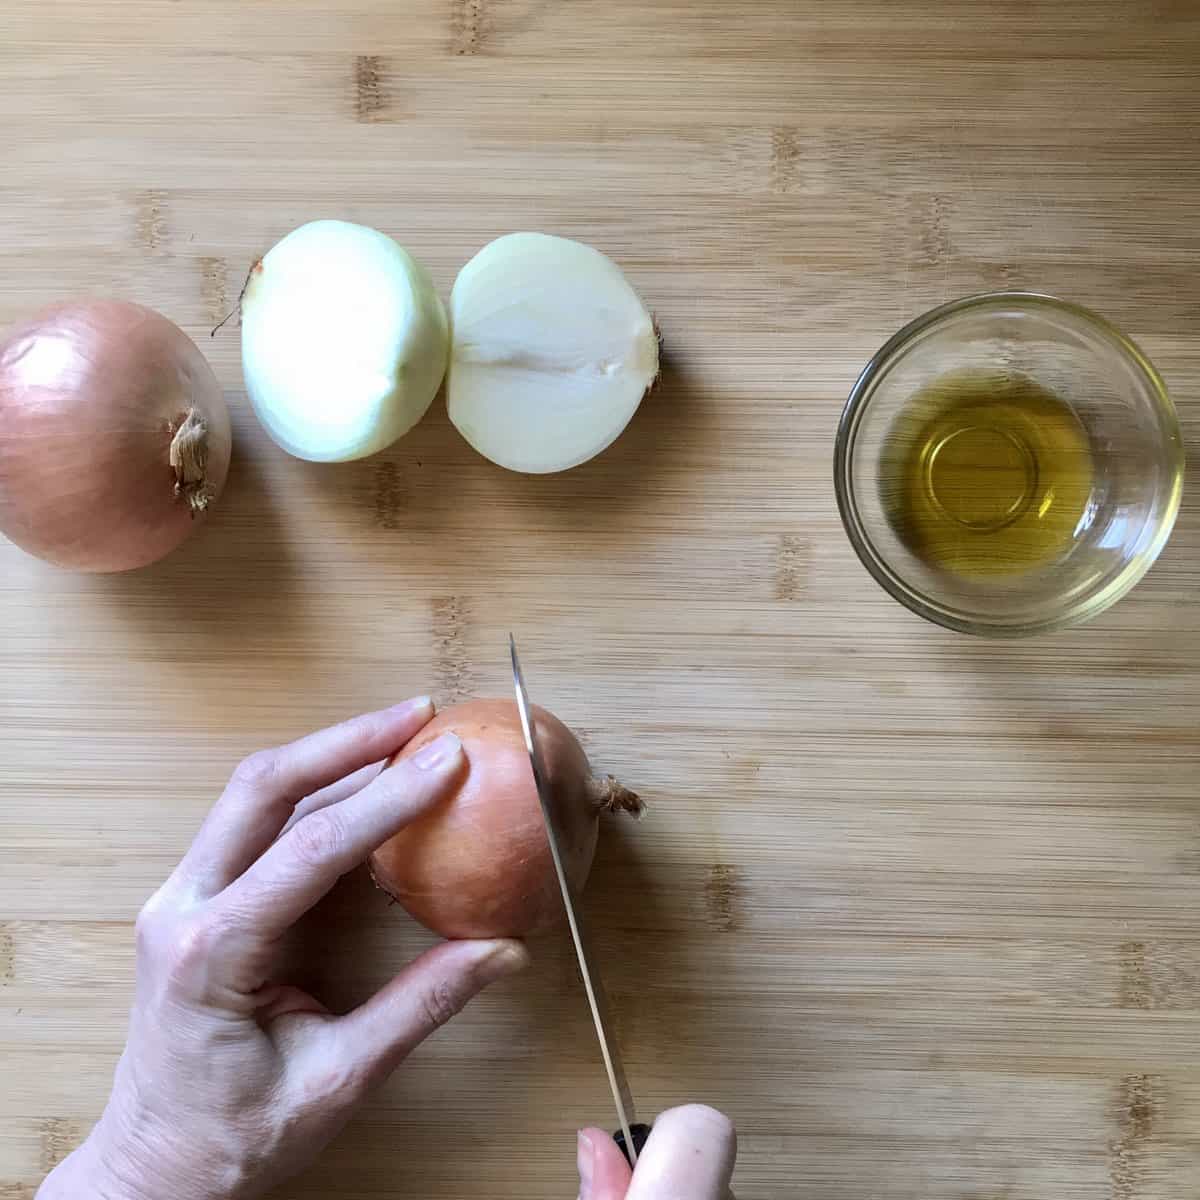
Place the onion sideways and cut off the stem.
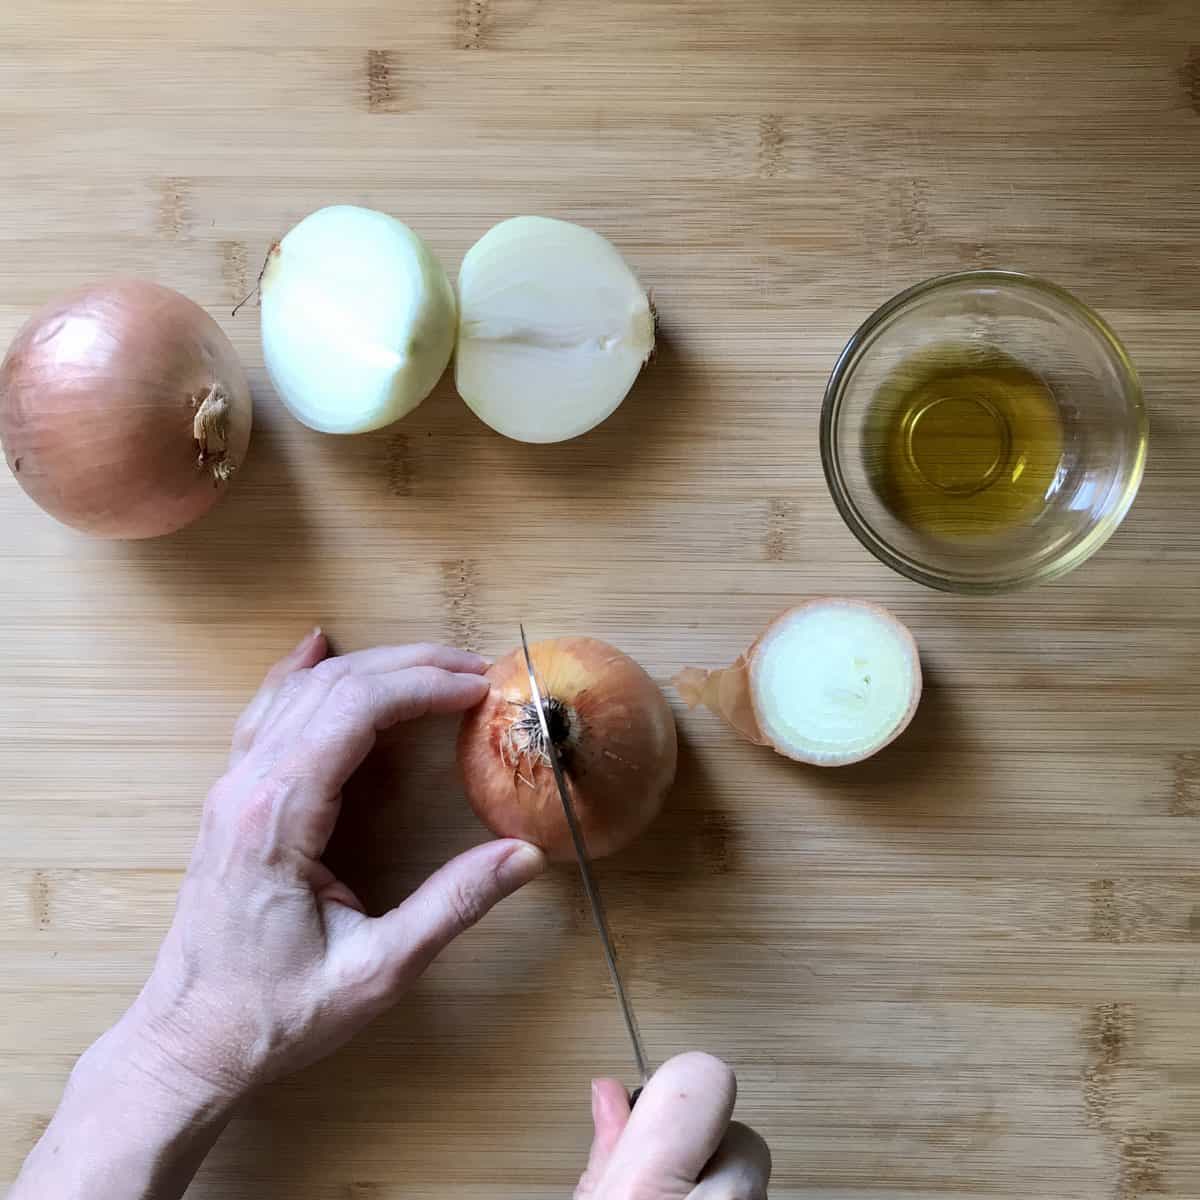
Then, place it flat on the cutting board and cut it in half, from the root to the bottom, where the stem used to be.
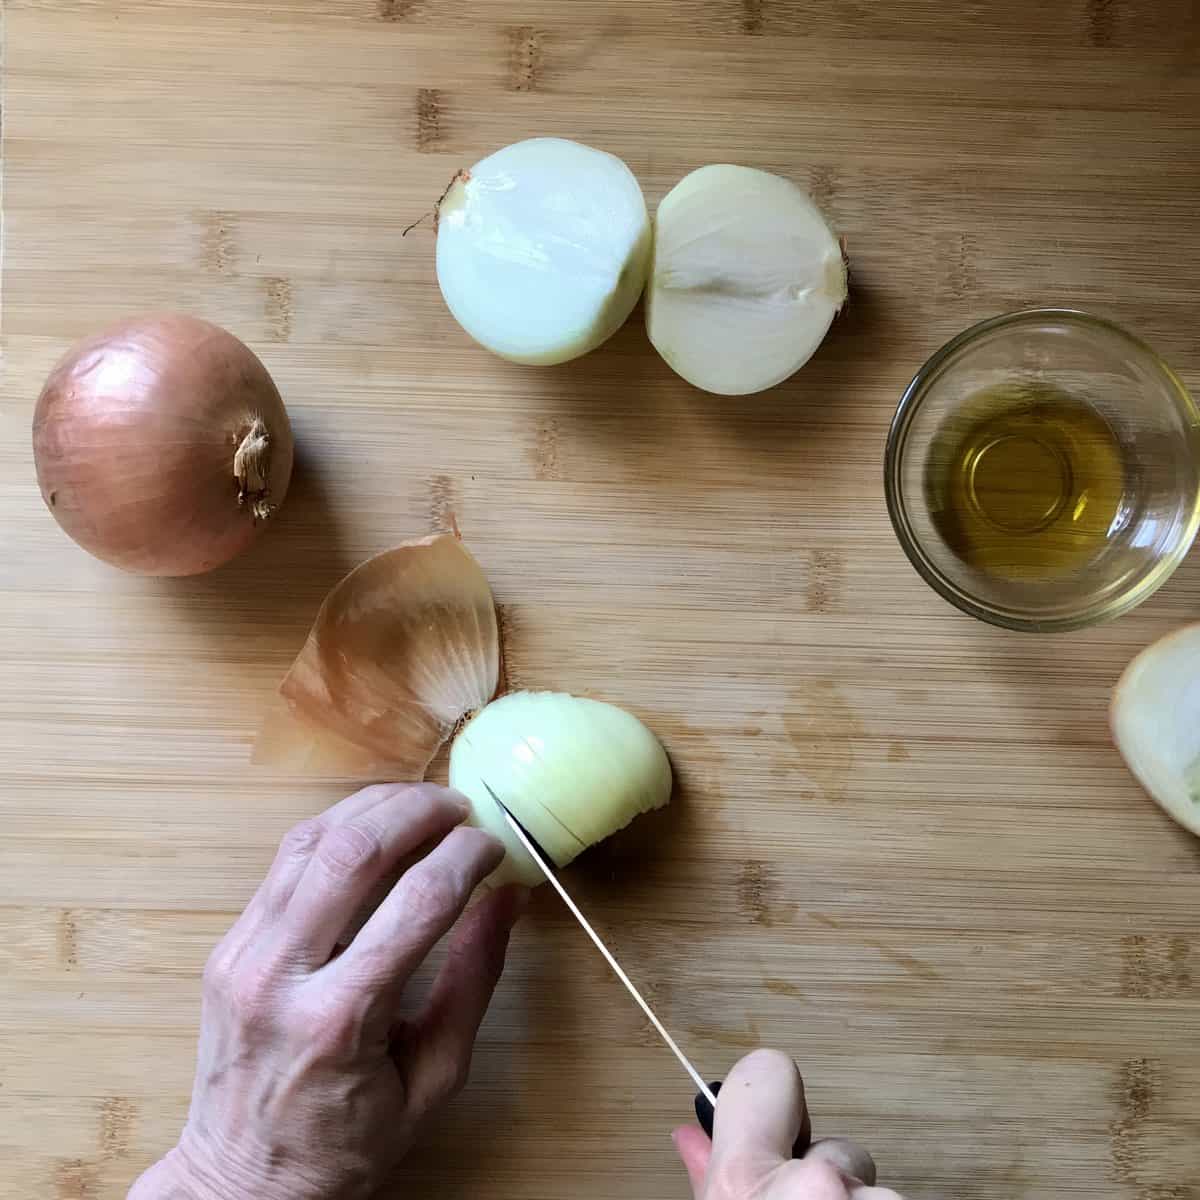
Keeping the root intake, remove the outer skin. Place flat on the cutting board and make ¼ inch incisions as close as possible to the root.
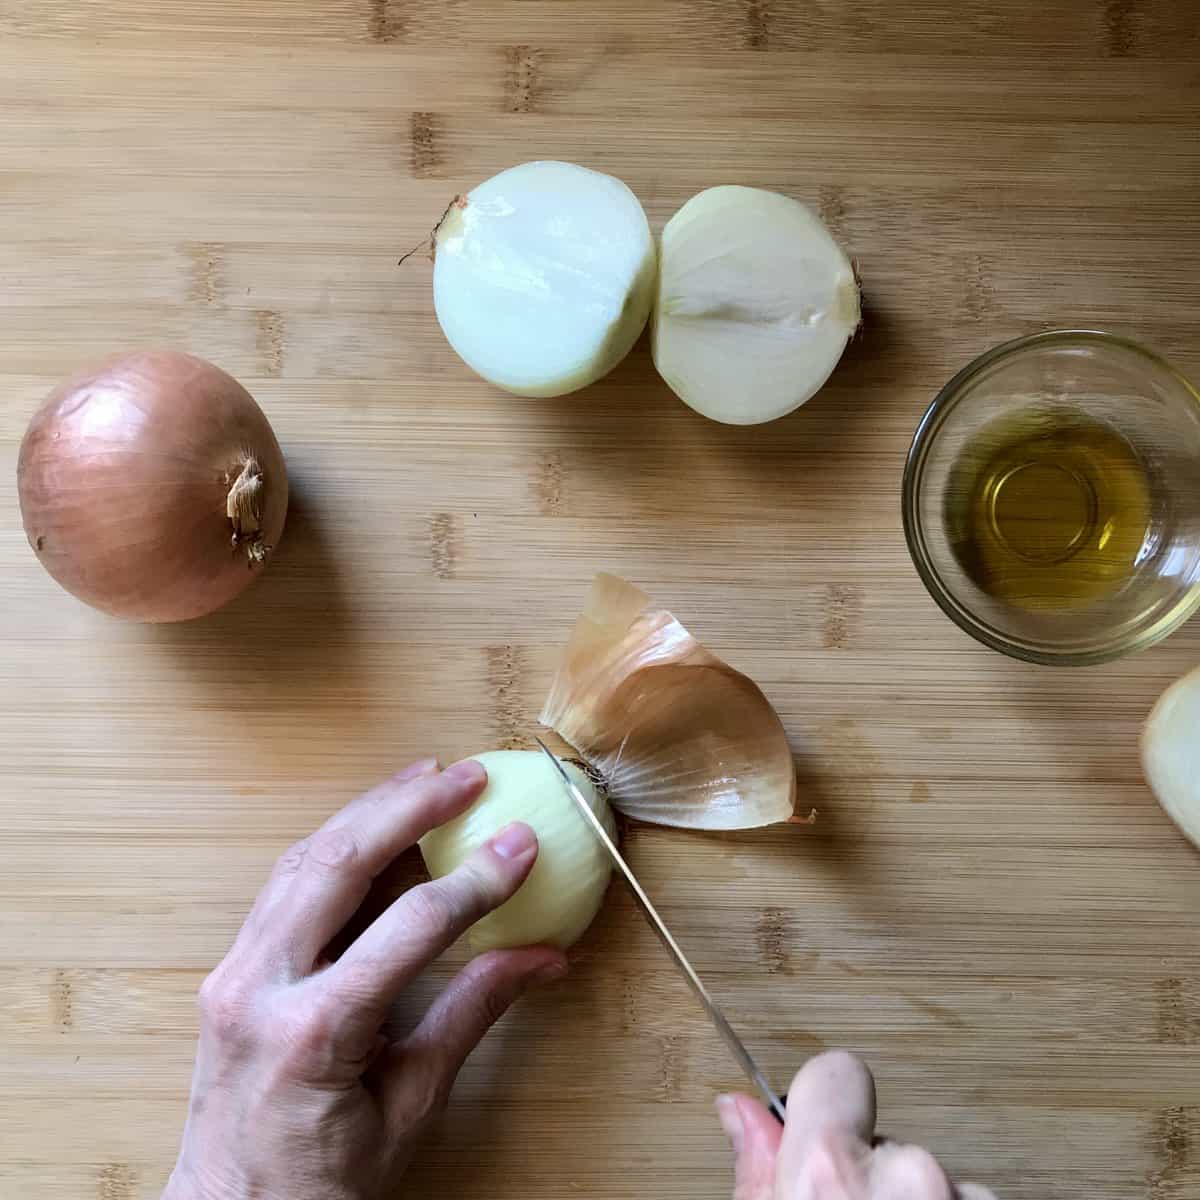
Then chop off the root.
Repeat this procedure until all the onions are sliced.
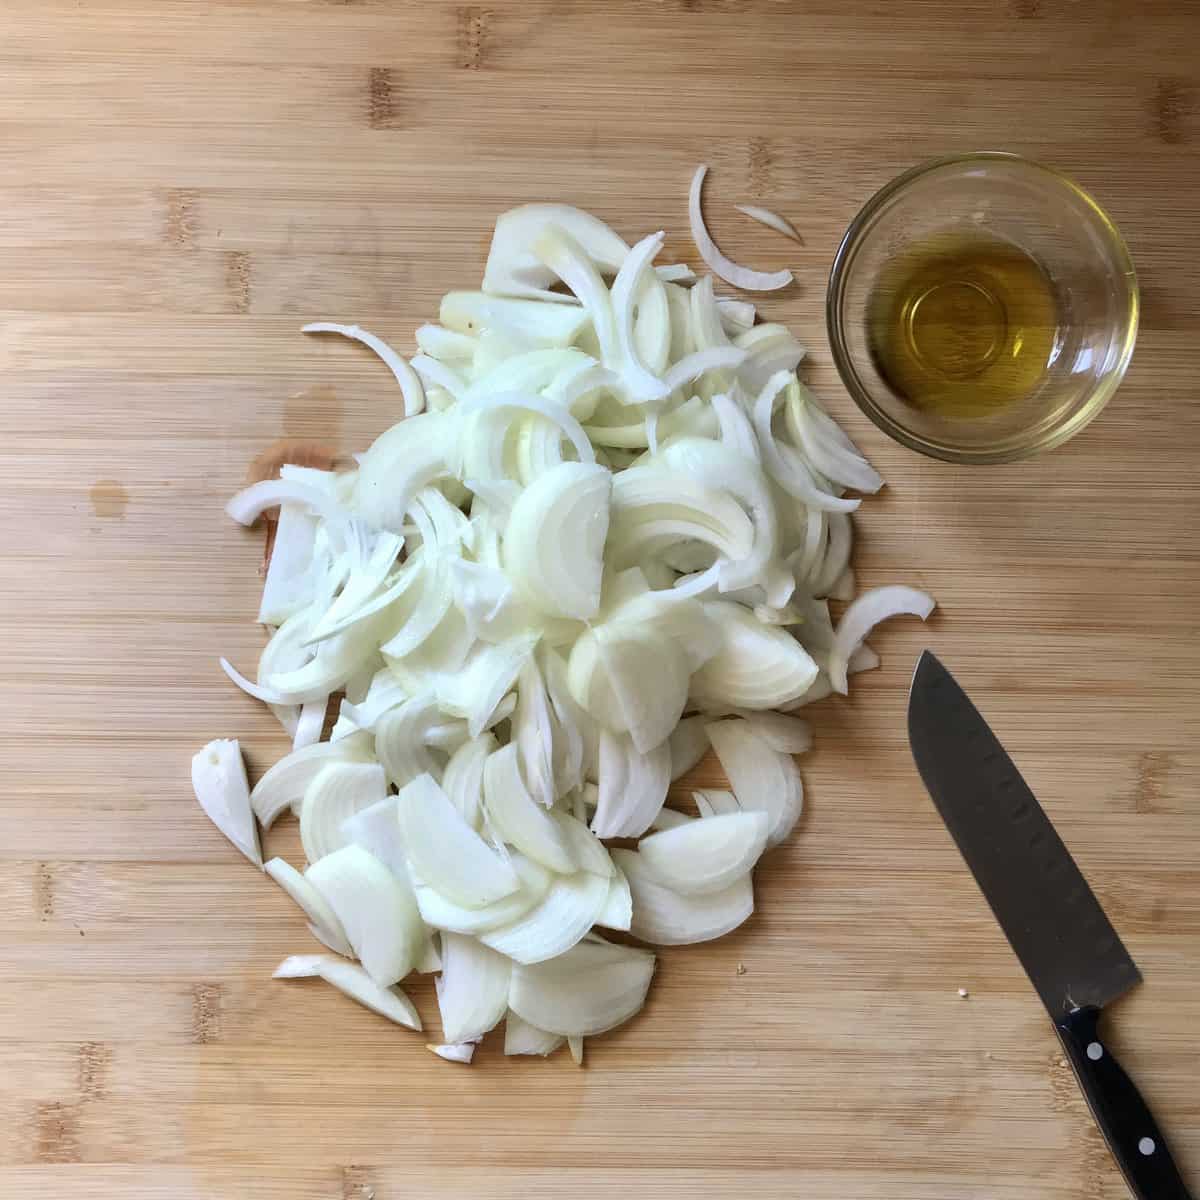
It’s now time to caramelize onions!
How to Caramelize Onions Without Sugar
Over medium-high heat, add 2 tablespoons of olive oil to a large, wide cast-iron skillet or large, heavy pan at least 12 inches in diameter. Swirl to coat the pan.
Add the sliced onions, one-third at a time, and toss in the oil until properly coated.
Sprinkle with ¼ teaspoon of kosher salt and stir constantly for about 2-3 minutes, or until they start to soften.
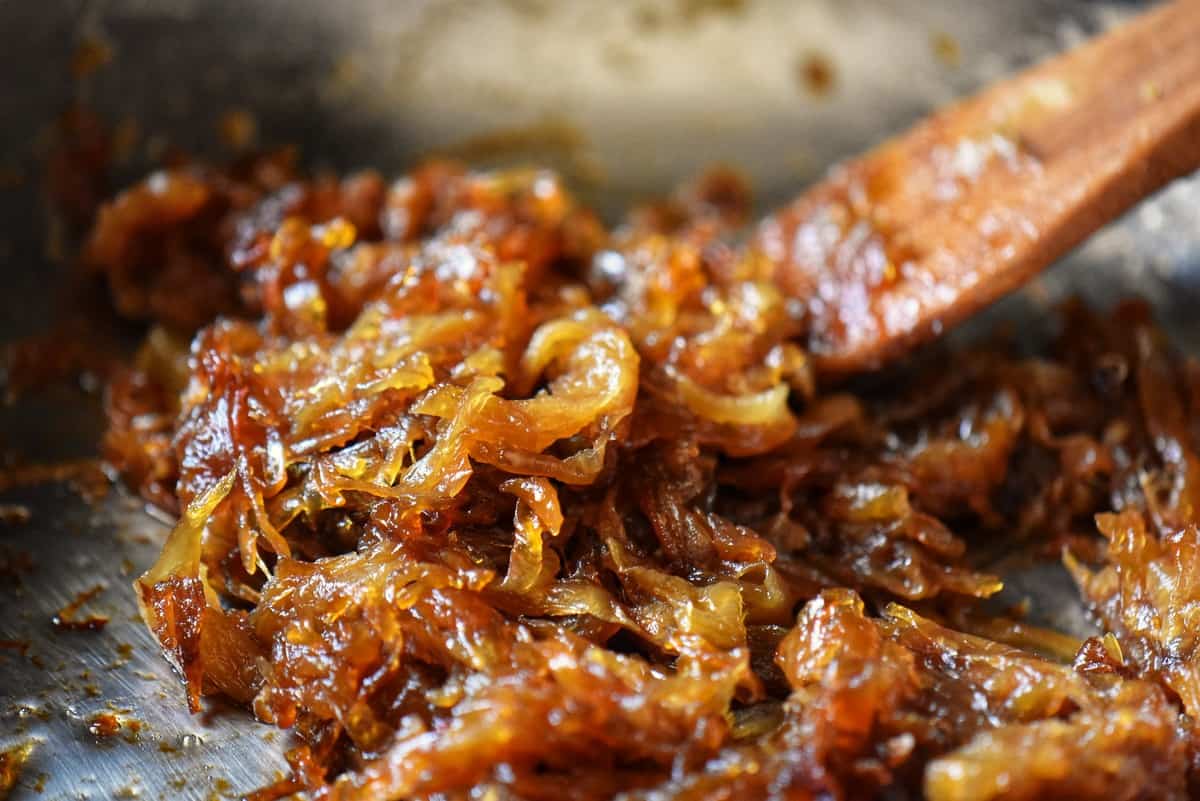
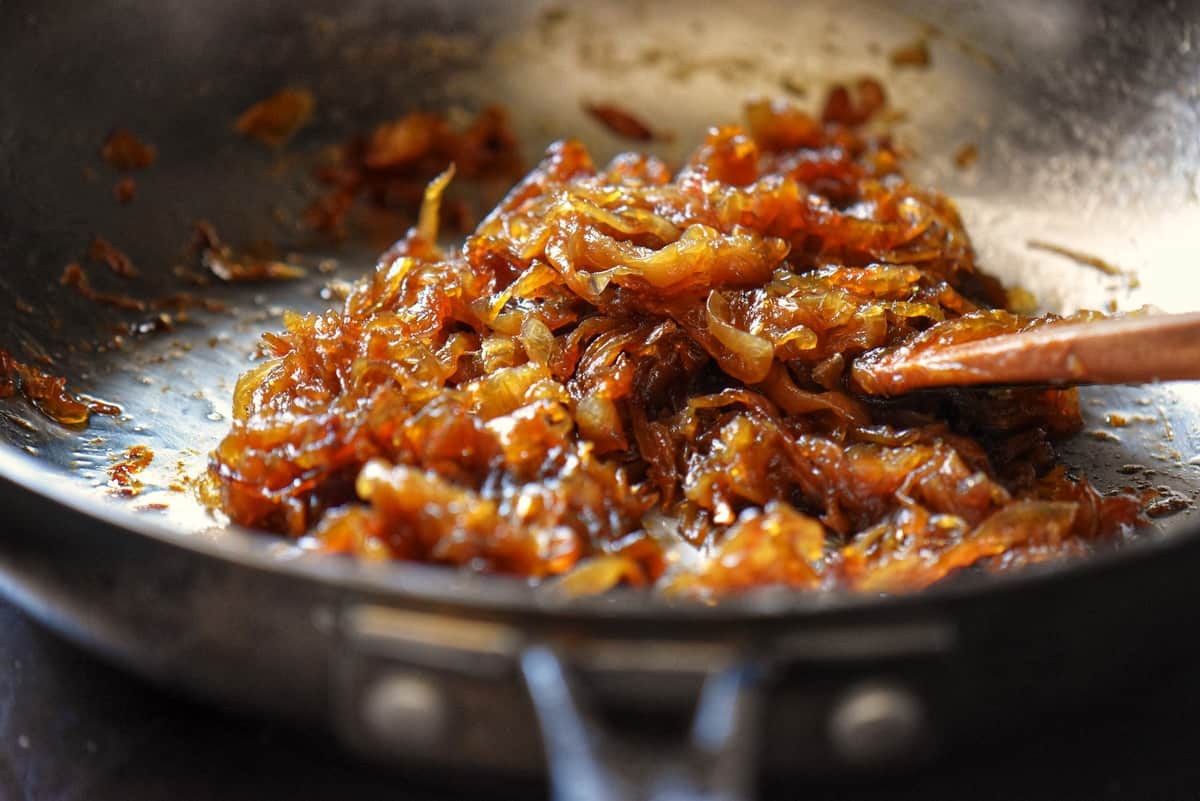
Lower the heat to low and cook, uncovered, for about 45 minutes or until the onions become very soft, slightly sticky, and a deep golden brown. Stir the onions and /or shake the pan every 3-4 minutes.
If they begin to stick to the bottom of the pan, add a little water, about a tablespoon or so, and scrape the bits off. Consider lowering the heat if they start to burn.
Towards the end of the process, a few minutes before the onions are done to your liking, add 1-2 tablespoons of water, stock or wine to de-glaze the pan. When the liquid evaporates, they are done.
Use immediately or cool to room temperature, refrigerate for up to three days, place in an airtight container, and cover and freeze for up to one month.
Tips
- One pound of yellow onions = 3 medium.
- Make soup stock with the unused outer skins. Freeze until you have enough vegetable scraps to make a flavorful broth.
- Keep the root intact to hold the layers of the onion in place. This makes it easier to slice evenly.
- Use a large sauté pan or cast-iron skillet, at least 12 inches in diameter. This encourages the water accumulation released by the onions to evaporate quickly. This, in turn, provides the perfect environment for the onions to caramelize properly.
- Add salt at the beginning. This helps draw moisture out of the onions.
- Use low heat and stir. Do not be tempted to increase the temperature to speed up the cooking time.
- Use stock or wine to deglaze the pan instead of a splash of water to release the browned bits stuck on the pan.
FAQ
Caramelization is the process by which sugar browns. [source]. These sugars, in the form of carbohydrates, are naturally found in fruits and vegetables. When their sugars heat up and caramelize, fruits like apples, bananas, and peaches make spectacular desserts. The same applies to vegetables like carrots, cabbage, and potatoes.
When given the choice of which variety of onion to caramelize, keep in mind that each type of onion contributes a slightly different taste. Whether it is the yellow, red, or sweet variety like the Vidalia, experiment to see which you prefer. You might also try mixing different varieties.
A cast iron or heavy pan creates those little brown bits throughout the onion caramelization process. Deglazing these flavorful morsels stuck at the bottom of the pan contributes a lot of flavor to the final product. In comparison, you can use a non-stick skillet, but the overall flavor is inferior.
Yes, this is a well-documented kitchen trick, popularized by Serious Eats food scientist J. Kenji López-Alt. A small pinch of baking soda, about ⅛ to ¼ teaspoon per pound of onions, raises the pH of the onions, which speeds up the Maillard reaction responsible for browning. This can cut your cooking time significantly, sometimes by half. I personally prefer the slow, patient method without any additives, since I find it gives the onions a more even texture and prevents the slightly softer, almost mushy result that baking soda can produce. But if you are short on time, it is a legitimate technique worth trying.
Reader Ricardo asked about this, and it is a great question. Onions are a non-starchy vegetable with a naturally low glycemic index (source), and because this recipe adds no sugar at all, what you are tasting is purely the onion’s own natural sweetness drawn out through slow cooking. As with any food, portion and the rest of your meal matter, so if you are managing blood sugar closely, it is always worth checking with your healthcare provider about how onions fit into your individual plan. But as a base ingredient, caramelized onions made this way are a genuinely smart way to add sweetness and flavor without reaching for sugar.
How to Use Caramelized Onions
Beyond what’s in the Quick Overview above, caramelized onions are also fantastic on pizza, stirred into your favorite pasta dish, or piled onto a sandwich.
Condiment Recipes
If you love this caramelized onion method, here are a few more condiment recipes worth keeping in your back pocket:


Recipe Inspiration
As you can imagine, caramelized onions were not the food of my childhood.
It wasn’t even a part of my teenage years or my young adult life.
Yes, I am embarrassed to say that I was late to appreciate the miraculous transformation of onions.
Thank goodness for the Food Network!
Do you remember the first time you were introduced to the magic of caramelized onions? Let me kno
THANKS SO MUCH for following and being part of the She Loves Biscotti community where you will find Simple & Tasty Family-Friendly Recipes with an Italian Twist.
Ciao for now,
Maria
★★★★★ If you use this procedure to make the best-caramelized onions, I would love to hear about it in the comments below and be sure to rate the recipe!
Recipe
How to Caramelize Onions
WANT TO SAVE THIS RECIPE?
Ingredients
- 1 pound onions 3 medium yellow, sliced ¼ inch thick
- 2 tablespoons extra virgin olive oil
- ¼ teaspoon salt
Instructions
- Over medium-high heat, add the olive oil in a cast-iron pan or large, heavy skillet at least 12 inches in diameter. Swirl to coat the pan.
- Add the sliced onions, one-third at a time, and toss in the oil until properly coated.
- Sprinkle with ¼ teaspoon of salt and stir constantly for about 2-3 minutes or until they start to soften.
- Lower the heat to low and cook, uncovered for about 45 minutes or until the onions become very soft, slightly sticky and a deep golden brown. Stir the onions every 3-4 minutes.
- If they begin to stick to the bottom of the pan, add a tablespoon or so of water and simply scrape the bits off. Consider lowering the heat if they start to burn.
- Towards the end of the process, a few minutes before the onions are done to your liking, add 1-2 tablespoons of water, stock or wine to de-glaze the pan. When the liquid evaporates, they are done.
- Use immediately or cool to room temperature and refrigerate for up to three days or place in an airtight container, cover and freeze for up to one month.
Video
Notes
- One pound of yellow onions = 3 medium
- Make soup stock with the unused outer skins. Simply freeze until you have enough vegetable scraps to make a flavorful broth.
- Keep the root intact in order to hold the layers of the onion in place. This makes it easier to slice evenly.
- Use a large cast-iron or heavy skillet, at least 12 inches in diameter. This encourages the water accumulation, released by the onions, to evaporate quickly. This, in turn, provides the perfect environment for the onions to caramelize properly.
- Add salt at the beginning. This helps draw out the moisture from the onions.
- Use low heat and stir. Do not be tempted to increase the temperature to speed up the process.
- Use stock or wine to de-glaze the pan instead of water to release the onion bits stuck on the pan.
- Nutritional information is for the entire recipe.
Nutrition
This post was originally published on July 10, 2020, and republished on June 2, 2023, and again on June 22, 2026, with updated content. Thanks for sharing!
Elizabeth
Maria,
I love your recipes. They are so easy to follow and delicious.
Thank you for taking the time to share them with us.
The caramelized onions came out great and delicious 🫶🏻
Liz
Maria
Hi Liz! Thank you so much for your kind words. I am thrilled to hear that the caramelized onions turned out great! Knowing that you find the recipes easy to follow is the best reward for me. It’s my pleasure to share them with you. Happy cooking!
Mary
Thanks for this hint! I have always cooked my onions like this and never put sugar in them. I don’t think I liked the idea of sweet onions 😊 So I’m glad that everyone can realise they don’t need the sugar!
Maria
I couldn’t agree more Mary! Onions have so much natural sweetness on their own; they just need a little time and patience to release it. Adding sugar is often used as a shortcut, but it just doesn’t compare to that deep, complex flavor of true caramelization. I’m so glad we are on the same page—low and slow is definitely the way to go!
Michael Lagana
really good
Maria
Thank you Michael!
angela
I love this recipe . I made a focaccia with caramelized onions , it was delicious, we all enjoyed it . thank you so much for the wonderful recipes
Maria
SO thrilled to read this Angela! Thanks for sharing!
Ricardo Valenzuela
Maria, thank you for posting. I love caramelized onions. This is a great recipe for those that are diabetic…no sugar added.
Ciao,
Ricardo
Maria
Thanks so much Ricardo! My pleasure!
Val
I’ve made these a few times already and they are fantastic! Thanks Mary!
Maria
My pleasure Val! Thanks for stopping by.